|
|
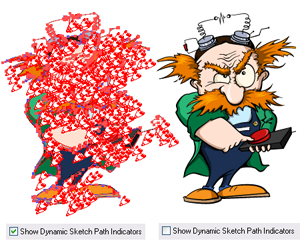
In this article I’ll tell you how to reconfigure the Dynamic Sketch Tool for easier work. We will learn about all the options for this tool and talk about all the effects they have. |
|
|
For a long time it’s been discussed on the forums devoted to the work of Adobe Illustrator how to close paths quickly. The designers often face with the problem that the clients do not except the vector works because of the open paths. Search and closing of paths manually is a tiresome work. Today I will tell you how to close paths with standard Adobe Illustrator’s means and about other ways of solving this problem with scripts and plug-ins. |
|
|
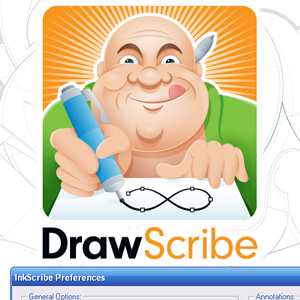
In this article I will show you how to customize the InkScribe Tool for easy work. InkScribe is designed to allow all users to get comfortable with the vector design process, from novices to professionals. The Preferences offered is key to ensuring this. We will learn about all the options of this tool and will talk about the advantages of choosing one or another option. |
|
|
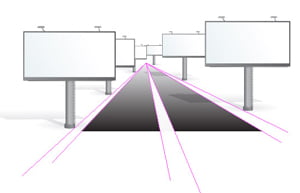
Today we will talk about work with guides. After finishing today’s
lesson we will know how to create guides, how to hide and snap an
object to them and how to apply to create the prospective and so on.
Learn at the jump!
|
|
|
In this article I’ll tell you how to customize the Dynamic Sketch Tool for an improved workflow, and how to edit the created outline with the help of the Width Tool found in Illustrator CS5. Paths created with the help of the Dynamic Sketch Tool have not only dynamic properties, but can also be edited with the standard tools of Adobe Illustrator that shows the flexibility of this tool. Learn more at the jump! |
|
|
If you already have some experience working in Adobe Illustrator, then you probably already have some settings that are often used in daily work. It may be colors, symbols, sets of brushes, graphic styles and path settings. There is no need to add all these resources to each document; you can simply create a template with all the necessary settings and graphics. In this article we will discuss how to do this and look at some of the interesting properties of the Appearance panel. Let’s reduce your design preparatory process down to the minimum… |
|
|
Natalie Ulrich shares some very interesting tricks
with us. In today’s article we will talk
about the Layers panel. I always knew that this is a powerful tool of
Adobe Illustrator, but I had no idea about some of the functions and
how to work with them. Do you know how to speed up your work with
Adobe Illustrator for displaying objects with effects and blend
objects while they move or zoom? Learn at the jump
|
|
|
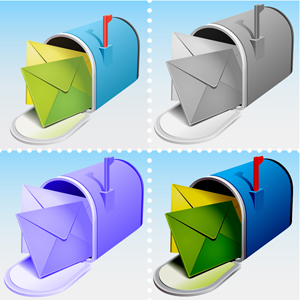
Vector designers often faced with a problem when they need to change the colors in their work. The usage of the Recolor Artwork function is not very effective sometimes, and some of the changes can’t be done that way. Today I will tell you how to quickly recolor a difficult vector object using the Appearance panel. You will also be able to change the lighting and texture. Let’s begin! |
|
|
Today we’ll talk about how using InkScribe allows you to work faster, smarter, more accurately — in other words, more efficiently. As it was already discussed in Part 1 of this series, we can easily choose the type of segment to be created; curved (Bezier) or straight. But now I should say that working with straight segments in InkScribe has one unique feature — Ghost Handles. |
|
|
Today Natalie Ulrich will share some very interesting tricks with us. In this article we will talk about the work with color, gradient fills and about peculiarities of work with the Eyedropper Tool. Also we will learn a bit more about the alignment of the objects with the stroke. Personally I found a lot of new and useful information in this article. Learn more at the jump!
|
|
|
|
Recent Consultations |
 |
|
|
|
|