|
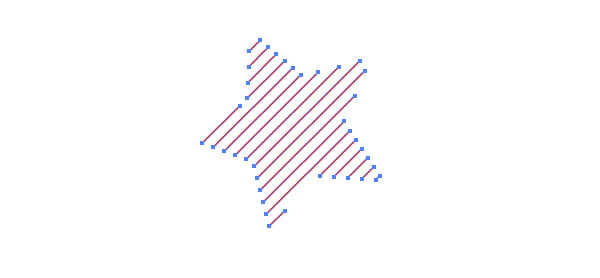
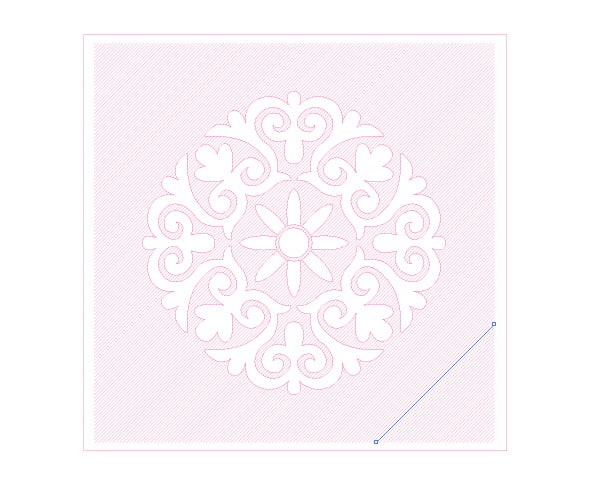
Final Image Preview In this tutorial we will consider couple of ways of creating some hatching in Illustrator which include hatch cutting along the given path. Then we will apply this knowledge to create embossed pattern which consists only of paths.
Illustrator Tutorial Details - Program: Adobe Illustrator CS - CS6;
- Difficulty: Beginner;
- Estimated Completion Time: 30 minutes;
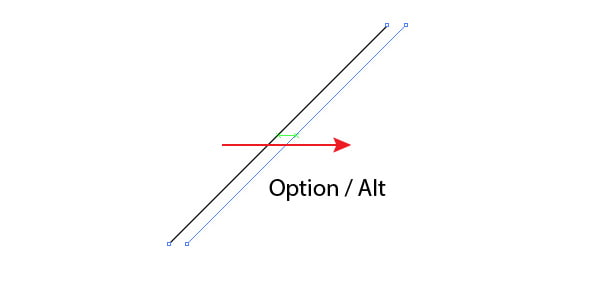
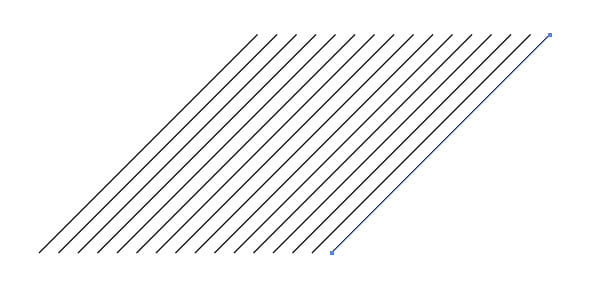
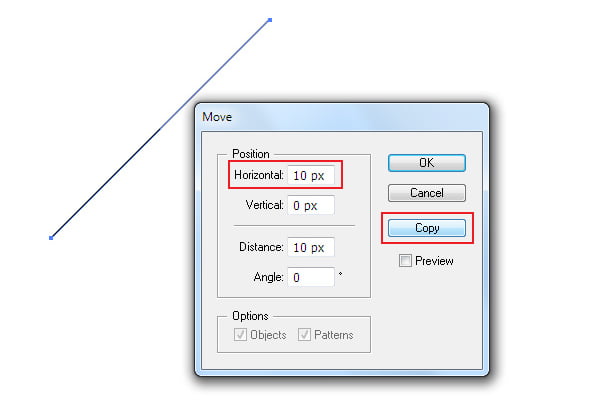
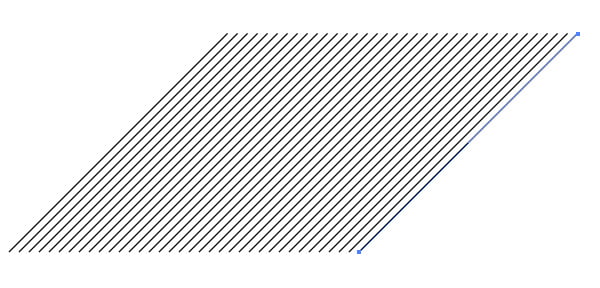
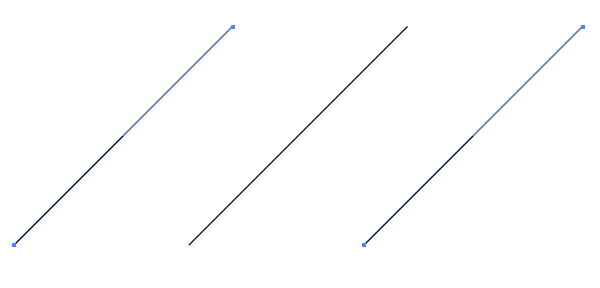
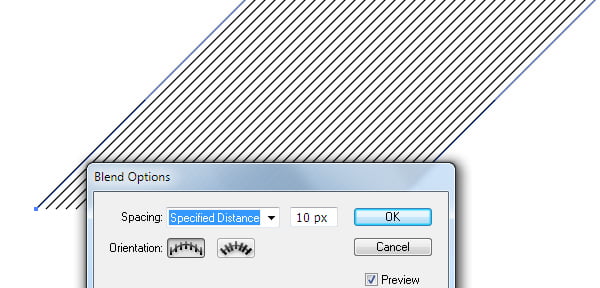
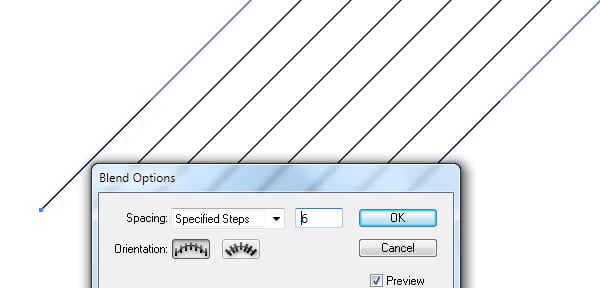
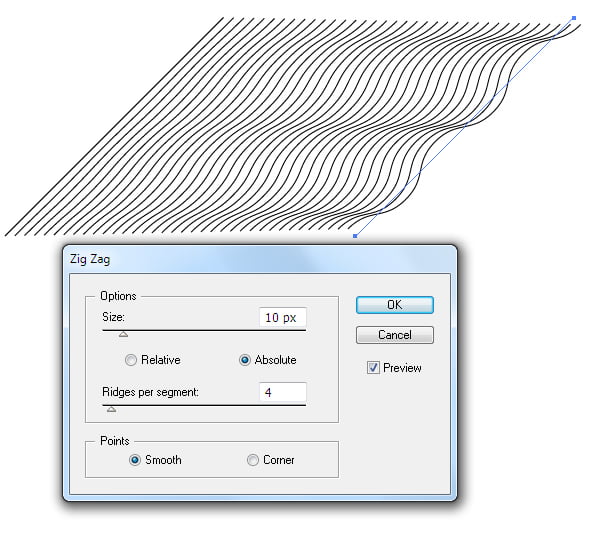
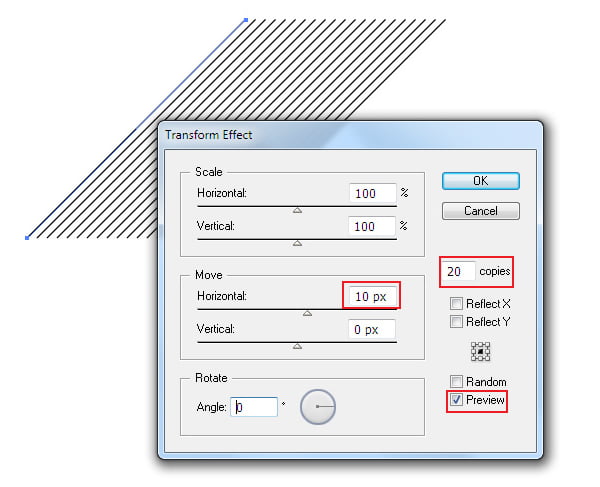
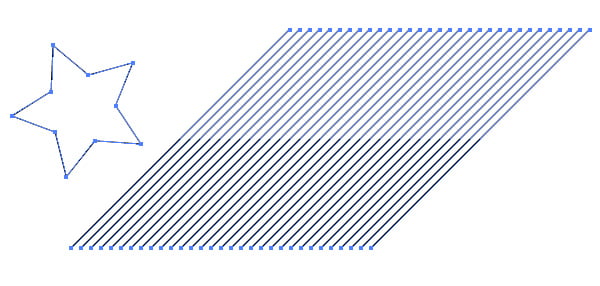
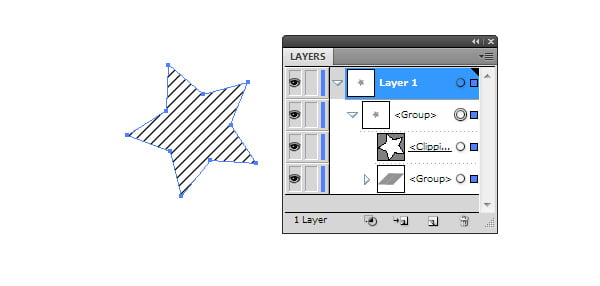
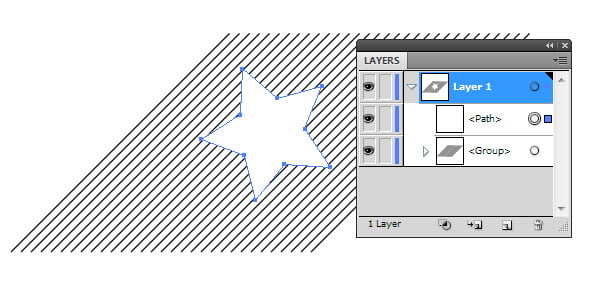
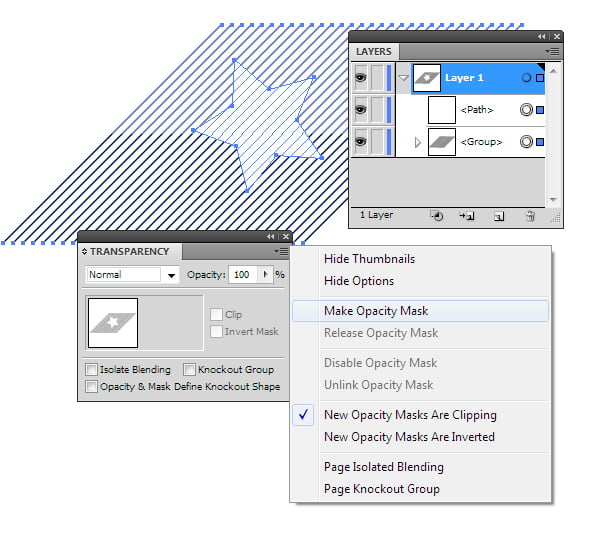
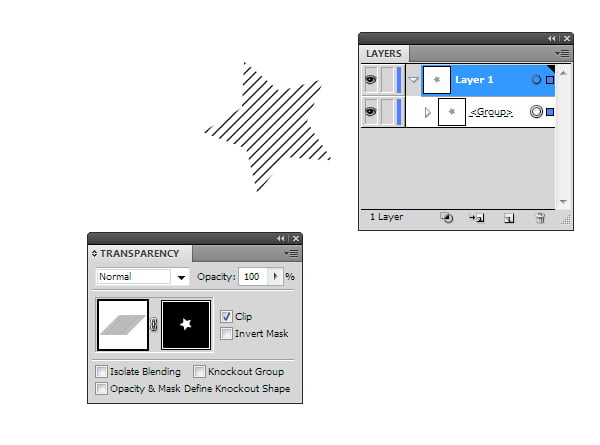
Hatching CreationTo create hatching (i.e. parallel lines which are located at equal distances from each other) you can use several methods. Let's look at some of them. Line DuplicationMove the line to some distance holding down Opt/Alt keys. This action leads to its doubling. Now let's use the Cmd / Ctrl + D shortcuts couple of times to repeat the last action. You can set a certain distance between hatching lines. To do so, select the line and go to the Object > Transform > Move… and set the value of horizontal or vertical shift and click on Copy. Now use the Cmd / Ctrl + D shortcuts again to repeat the shift. Blend Tool Usage for Hatching CreationLet's create two lines; you can use the doubling technique for it (as it was indicated above). Select both lines and then use the Cmd / Ctrl + Opt / Alt + B shortcuts to apply blend effect to them. To control parameters of the effect, click twice on the Blend Tool (W) icon which is located on the toolbar. Set the necessary parameters in the opened dialog box. This way gives us more flexibility in obtaining hatching comparing to doubling. You can set the distance between the lines or the number of steps of the effect. In addition, you can change the form of one or both lines and get some interesting results. On the figure above the Zig Zag effect (Effect > Distort & Transform > Zig Zag…) is applied to the right line. If hatching lines require further work, go to the Object > Blend > Expand, and then Object > Expand Appearance. Transform Effect Usage for Hatching CreationAnd finally, you can get hatching by using the Transform Effect. Select the line, and then go to the Effect > Distort & Transform > Transform… and set the required parameters such as shift and number of copies, watching the changes taking place. Object HatchingClipping and Opacity Mask UsageSo we have our hatching and object. Place the object above all the hatching lines, it also should be placed above hatching lines in the Layers panel. Select the object and hatching lines, and then use the Cmd / Ctrl + 7 shortcuts for the Clipping Mask creation. To limit hatching lines you can also create the Opacity Mask. Fill the upper object with white. Select the object and the hatching lines, and then select the Make Opacity Mask in the fly-out menu of the Transparency panel. Hatching Crop along Object OutlineIf hatching lines are the variable width paths, then they should most likely be cropped along object outline. And here the users of Adobe Illustrator face the difficulties. I hope you won't have any difficulties solving this problem after reading my tutorial. Shape Builder Tool Usage
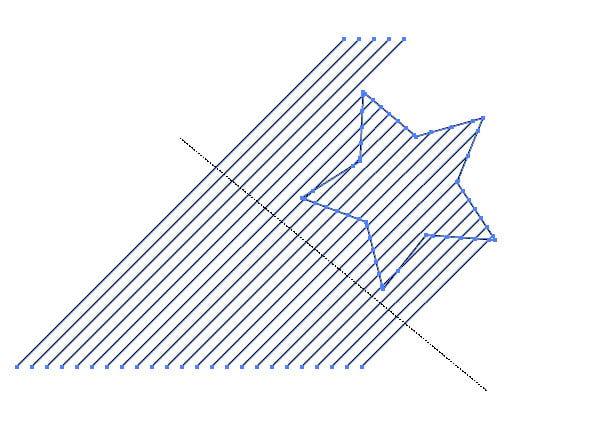
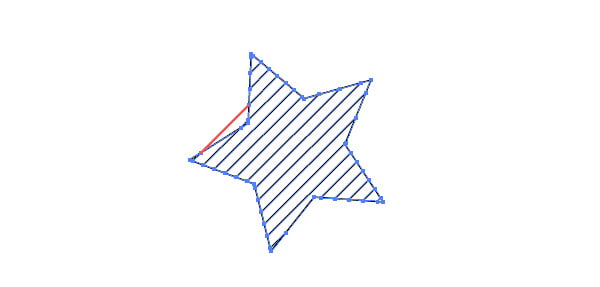
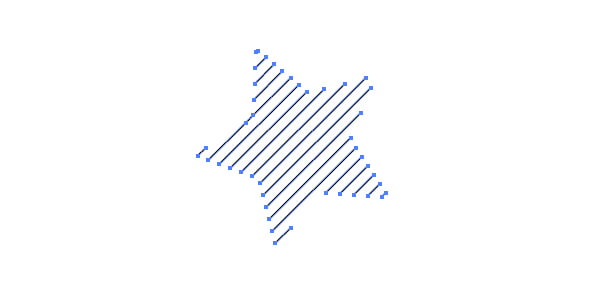
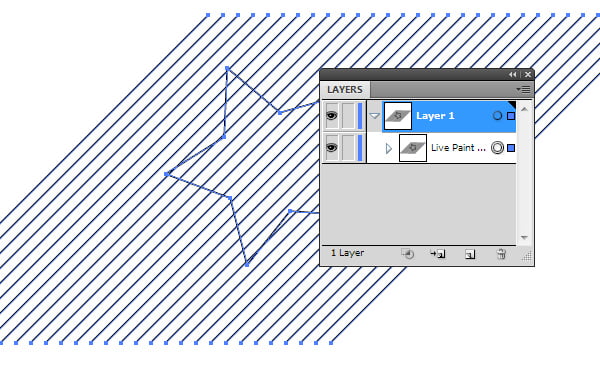
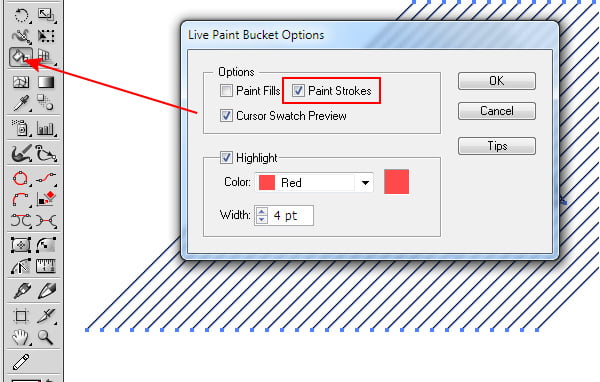
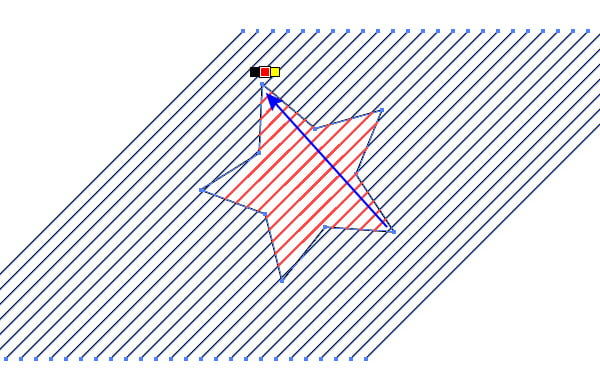
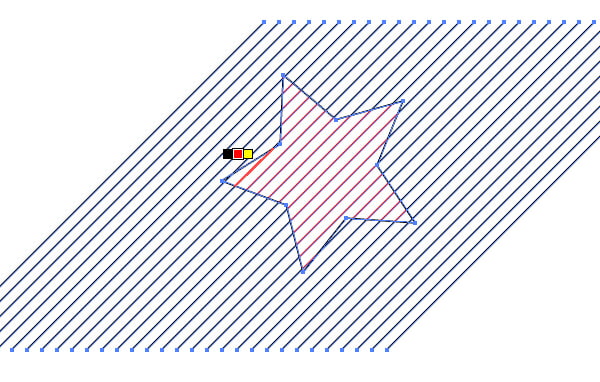
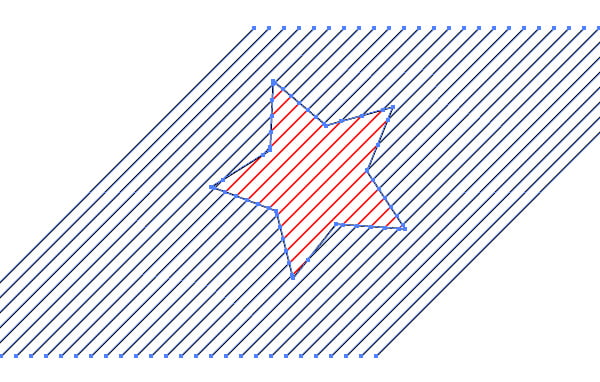
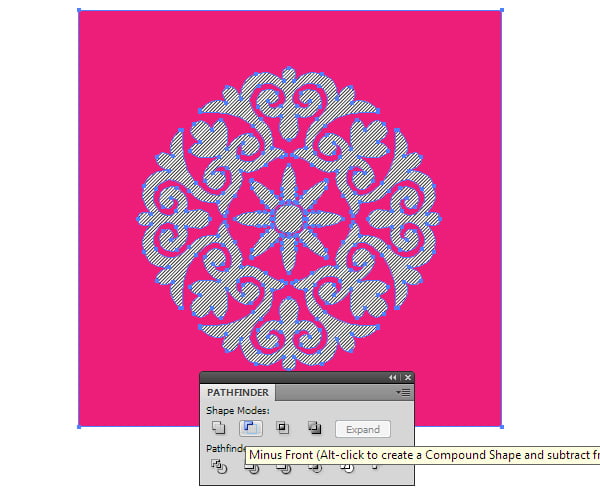
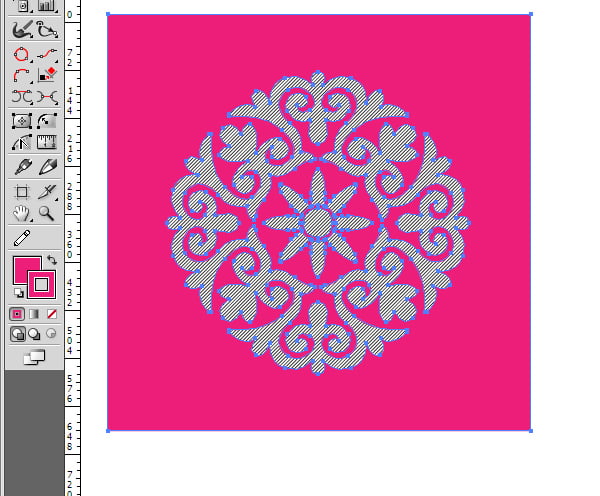
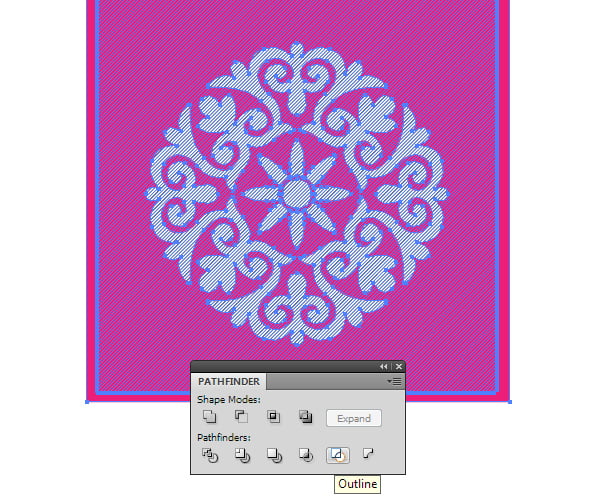
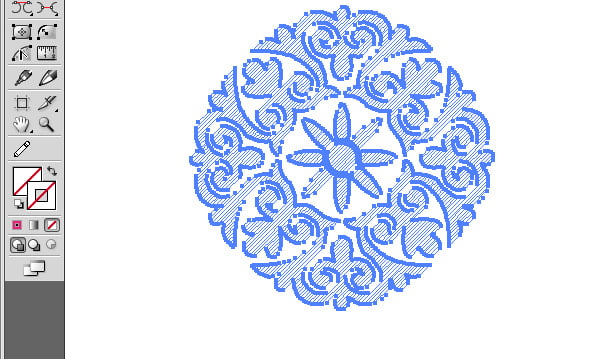
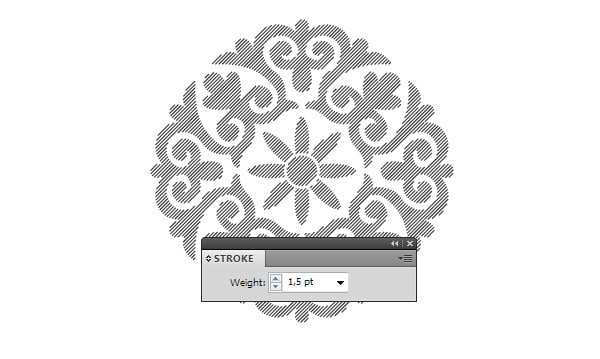
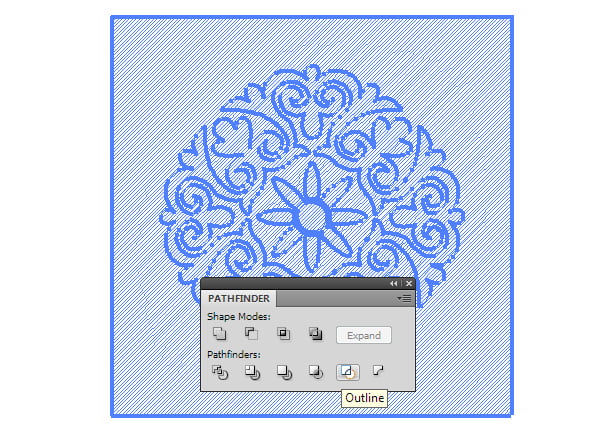
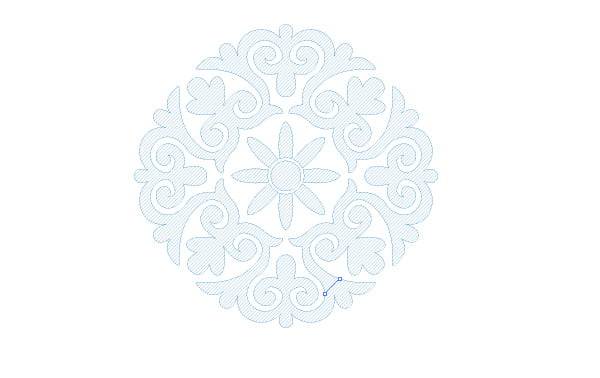
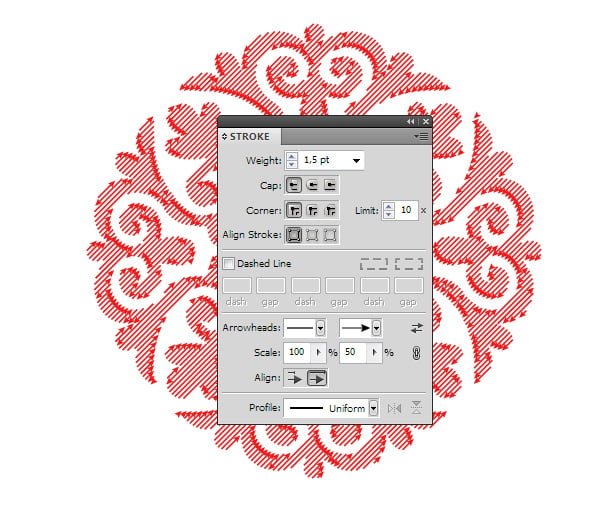
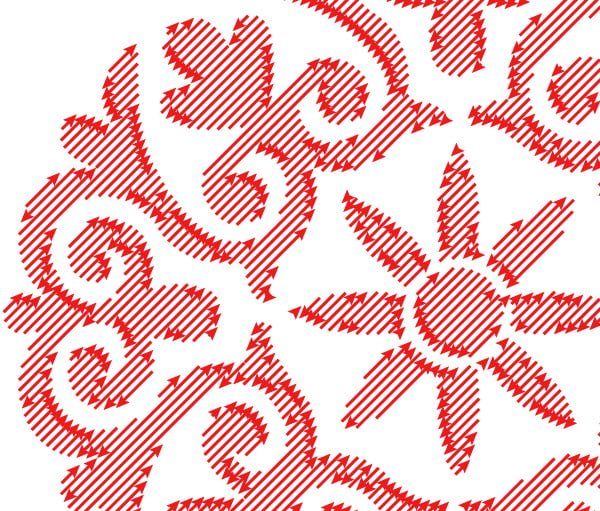
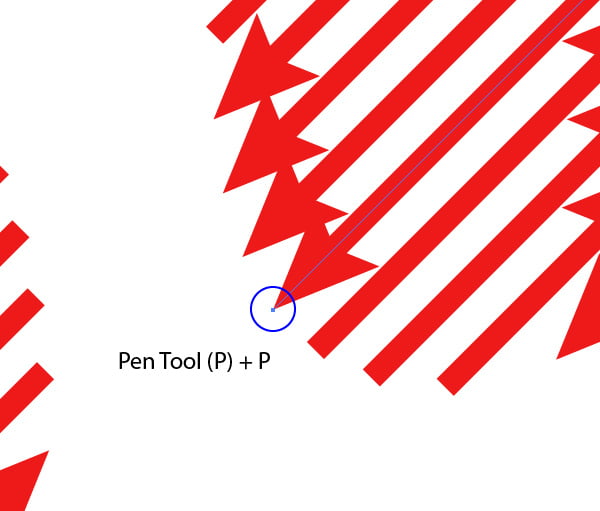
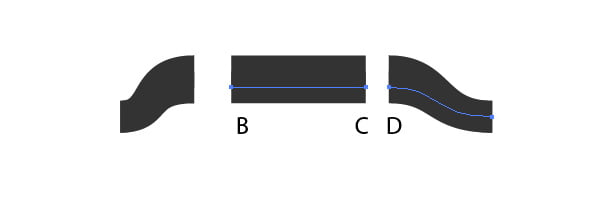
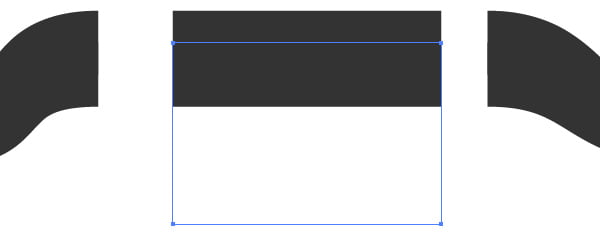
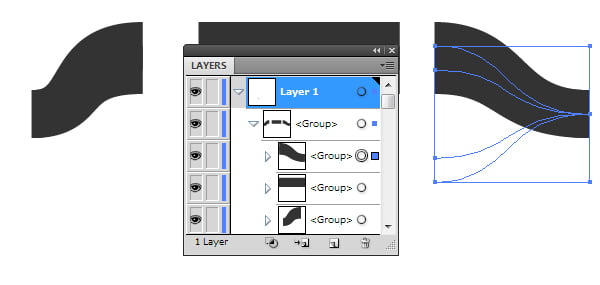
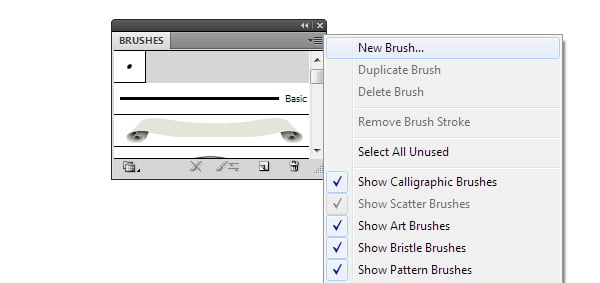
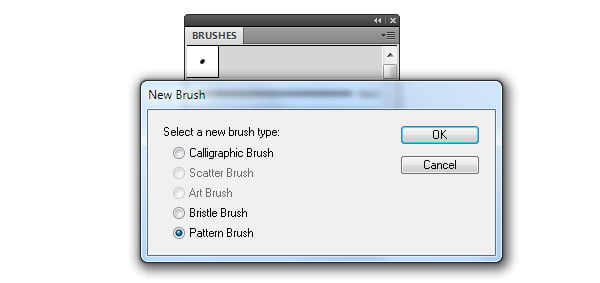
Note: the Shape Builder Tool is available only for the users of Adobe Illustrator CS5-CS6. Select the object and the hatching lines. Take the Shape Builder Tool and while holding down Opt/Alt keys move your cursor along the outside hatching lines by pressing your mouse button . Most likely that we will need to repeat this action couple of times; we might even need to delete some individual strokes. Everything depends on the complexity of the object to which this hatching should be applied. And now the object outline can be deleted. Live Paint Bucket Usage (the method was developed by Seryozha)Select the hatching and the object, and then go to the Object > Live Paint > Make. Click twice on the Live Paint Bucket (K) icon on the toolbar which will open the dialog box with the tool's settings. Tick Paint Strokes. Choose the other color for stroke and then move the cursor along the lines inside the object. Some strokes will need to be recolored separately. As in the previous method, it depends on the complexity of an object. Now go to the Object > Expand. Select one of the black lines, and then go to the Select > Same > Stroke Color. Press on Delete. Pathfinder Panel Usage and Embossed Pattern Creation (the method was developed by Anna Staroverova)The methods described above are not well suited for hatching crop along the object outline with a complex shape. Let's have a look at more convenient method with the Pathfinder panel usage and, in continuation of this method, let's create a volume pattern which consists only of paths. Step 1So, we have a complex shape object which is the Compound path and hatching. Duplicate the Compound path and hatching (Cmd / Ctrl + C; Cmd / Ctrl + F), we will need it a bit later. And for now turn off visibility of new objects in the Layers panel. With the Rectangle Tool (M) create a rectangle which covers all the hatching and lies below the pattern. Step 2Select the pattern and the rectangle, and then click on the Minus Front in the Pathfinder panel. Most likely, as the result of these actions we get a group of some objects. We should have the Compound Path, that's why go to the Object > Compound Path > Make or use Cmd / Ctrl + 8 shortcuts. Apply the stroke to the resulting Compound Path. Step 3Select the Compound Path and hatching lines, and then click Outline in the Pathfinder panel. Select one of the color lines and go to the Select > Same > Stroke Color and press on Delete. We only have remaining path that have no stroke. We just need to give them the stroke of desired color and width. As you can see, this method works excellent; I believe it is the best. Now let's continue working on the volume pattern. Step 4Turn off the visibility of the hatched pattern and turn on the visibility of the copy of pattern and the hatching in the Layers panel. Apply the stroke to the pattern, and then select the pattern and the hatching and click on the Outline in the Pathfinder panel. Select one of the colored path and then go to the Select > Same > Stroke Color and press Delete. Apply the stroke to the rest of the paths. And now we have outside and inside hatching of the pattern. I applied different colors for better clarity. Step 5In future, we will need to work with the hatching inside the pattern, so let's discover its paths. Apply the Arrowheads in the stroke panel for it. As you can see, we have a group of multidirectional paths. Take the Pen Tool (P) and click on the starting point of one of the "wrong"-directed paths. Update on 02/24/13: now it is possible to do this automatically using a script Paths One Direction, which you can download here.
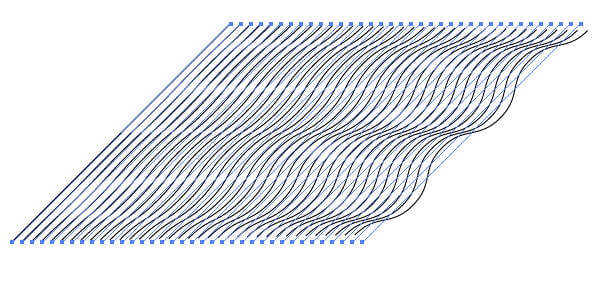
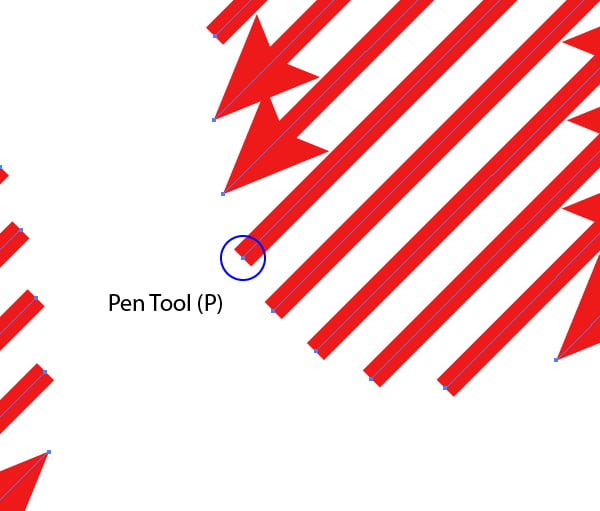
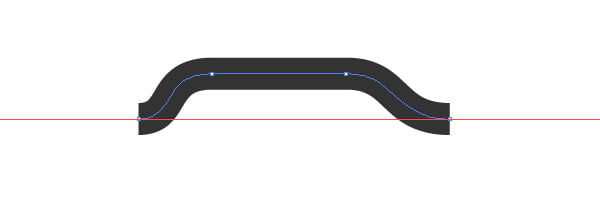
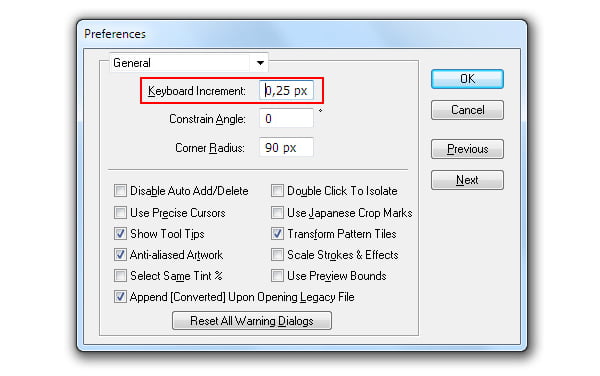
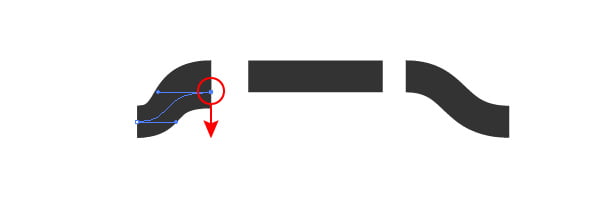
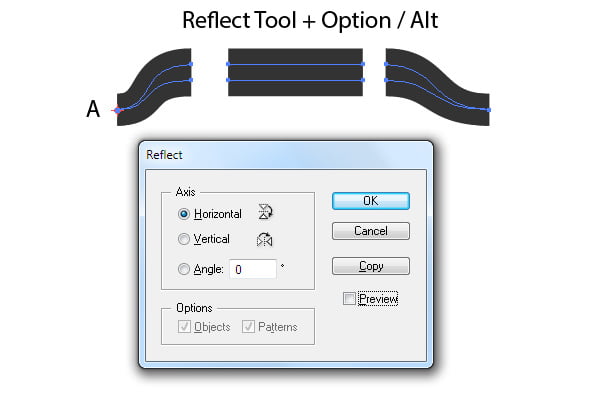
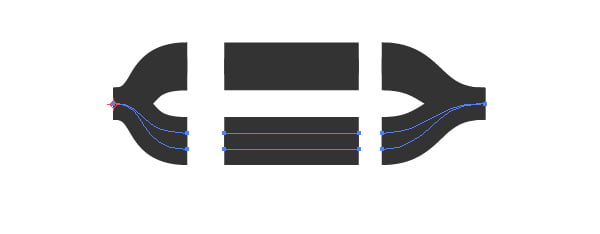
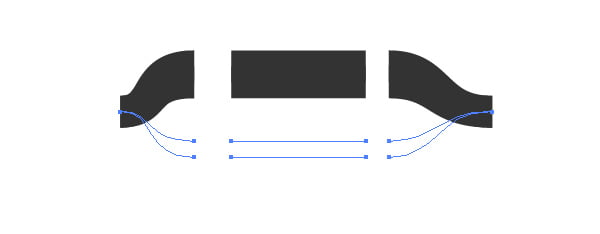
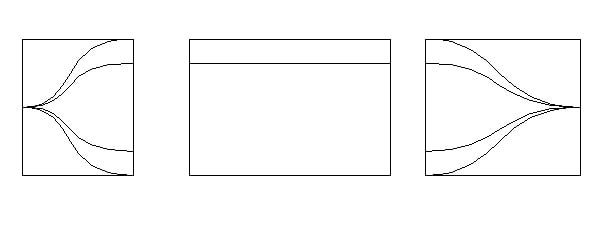
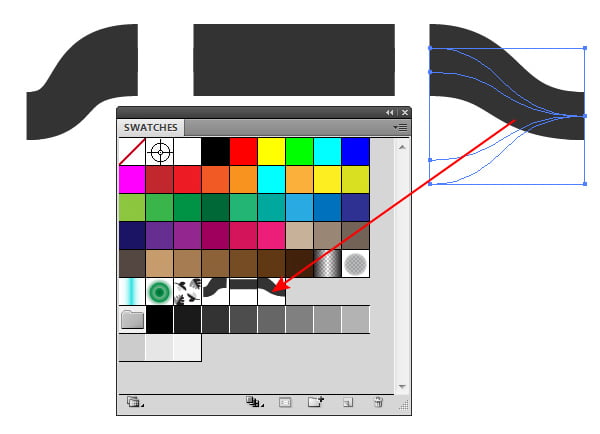
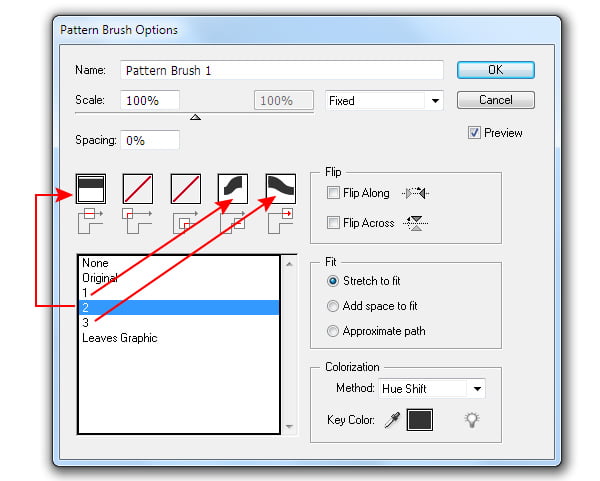
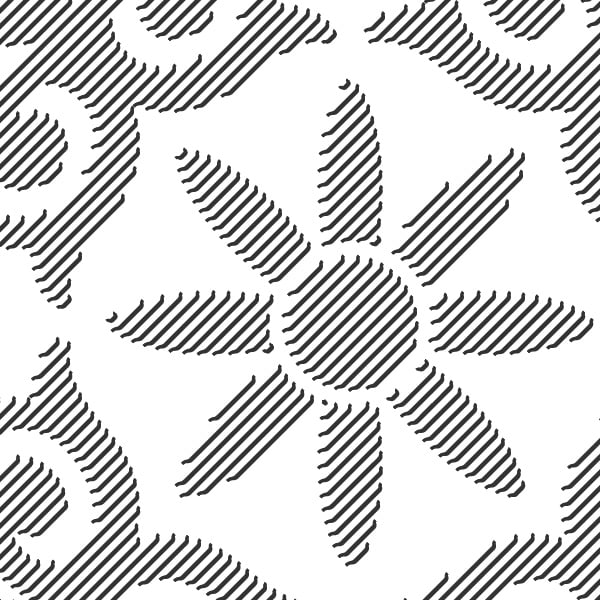
Click on the P button in order not to extend the edited path, and then edit the direction of the next "wrong"-directed path. It is very monotonous work: click + P + click + P +…. But we must do it anyways. When the work is done, the Arrowheads in the Stroke panel should be turned off. Step 6And now let's create the Pattern brush which we will apply to the hatching pattern to make some volume. With the Pen Tool (P) create a path as it is indicated on the figure below. The width of the path should be equal to the width of the hatching and the starting and ending points should lie on one horizontal line. Step 7Cut the path at points A and B (I parted the paths for your clarity and convenience of our further work). Copy all the paths and paste them to the front. And now let's reduce the Keyboard Increment value (Cmd / Ctrl + K). Select point A of the left upper path with the Direct Selection Tool (A) and then shift in below by clicking a couple of times on the Down Arrow key. Shift the points B, C and D of upper paths to exactly the same value. Step 8Select all 6 paths, take the Reflect Tool (O) and click in the point A while holding down Opt / Alt keys. Choose Horizontal and click on Copy in the dialog box. Turn off the bottom paths' stroke. Step 9Take the Rectangle Tool (M) and create a rectangle with no fill and no stroke and which goes exactly through the points A, B and C paths located to the left. Place the rectangle below all the paths. Create similar rectangles for the paths located in the center and to the right. Work very carefully; as you know the sloppy work is unacceptable for the Pattern Brush. On the figure below you can see the elements of the brush in the Outline mode. Step 10Select and group (Cmd / Ctrl + G) separately: the right, middle and left part of the brush. And now drag these elements sequentially to the Swatches panel. Step 11Open the Brushes panel (F5) and select the New Brush… in the fly-out menu. And now choose the Pattern Brush in the opened dialog box. Choose for the Side, the Start and the End Tiles earlier saved swatches and choose the Colorization Method- Hue Shift in order to be able to recolor the stroke. Step 12Apply the brush to the inner hatching pattern. Change the stroke color of the inside and outside hatching. Your accuracy while creating the Pattern Brush allows you to get a perfect joining of the contact points of inside and outside hatching. And here is how this pattern looks with wavy hatching. The style described in this tutorial is used in safely patterns creation on banknotes and other securities. Now you just need to promise me that you won't become a counterfeiter!
P.S. You can also use the Shape Contours script for the hatching creation; this script works with the help of the Scriptographer plug-in. However, the method described in this tutorial is more flexible.
|