|
|
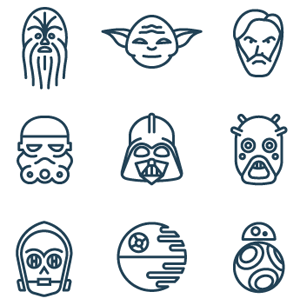
In this tutorial I will describe the process of creating a Star Wars icons in a Line Art style in Adobe Illustrator. Our vector assistants are MirrorMe, VectorScribe and ColliderScribe; they will make the work more convenient and quick. |
|
|
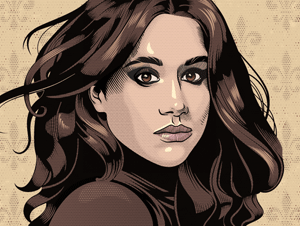
Today you will find out how to create this portrait of Meghan Markle whilst learning all about the tools that helped to speed up the work. These are WidthScribe for intelligent work with variable width paths and Phantasm for creating halftone textures. In addition, I used DynamicSketch, VectorScribe and Texturino, which have long been part of my workflow in Adobe Illustrator. |
|
|
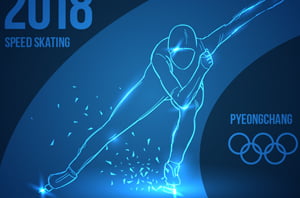
Today we will draw a sports poster dedicated to the Winter Olympic Games in Pyeongchang. To make some stages of the work more effective, DynamicSketch will help us to create an athlete's body, Stipplism will help with quick creation of ice fragments and Phantasm will help with color correction. |
|
|
Today you will learn how to create a vector cacti in a flat style with the help of the Dynamic Shapes tool which is part of VectorScribe. This tool allows you to quickly create shadows on objects and modify ready-made elements. The combination of Dynamic Shapes and native Illustrator effects makes it possible to transform one kind of cactus into another, by managing only the parameters in the dialog windows and the Dynamic Shapes panel. |
|
|
Today you will learn how to create a Mandala pattern with MirrorMe and DynamicSketch. The combination of these tools allows you to make drawing more comfortable, as you can see the reflection of the stroke preview. Here you will also find some practical recommendations that will help you to facilitate your creative process when creating similar patterns. |
|
|
In this article we will introduce you to the Dynamic Gear options presented in the VectorScribe plug-in. You will also learn how to create the perfect gearing which can be animated using Adobe After Effects. Accurate meshing of teeth will be provided by the ColliderScribe plug-in and thanks to the tools and options in both this and VectorScribe, we will create this animated Gear Infographic… |
|
|
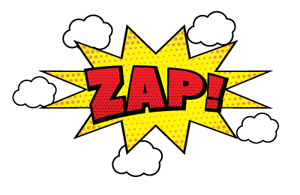
In this tutorial we will learn how to create a comic text effect using the Halftone effect of the Phantasm plug-in, some native effects and the Actions feature. This is a very useful feature that helps to speed up the processes immensely. For example, a sequence of 37 actions and the use of multiple effects with lots of parameters, takes less than 5 seconds. Let’s get started! |
|
|
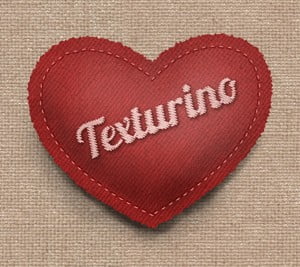
Today using the example of creating a handmade sackcloth heart, we will explore the Shadows and Highlights functionality of Texturino v1.2 to add realism to your vector workflow. The new Convert Raster Art to Texture feature makes it even easier to work with bitmap textures. So, let’s get down to learning and applying new technologies that extend the capabilities within Adobe Illustrator! |
|
|
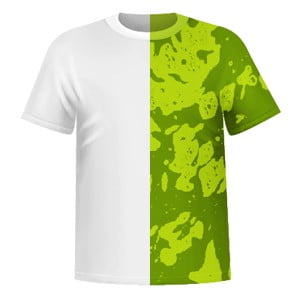
In this tutorial we will learn how to create a T-shirt mockup with the Texture Brush Tool and Texture panel in Texturino. These methods will not only allow you to use textures in a more convenient way, but also to draw shadows and highlights to create volume on absolutely flat vector objects directly in Adobe Illustrator. |
|
|
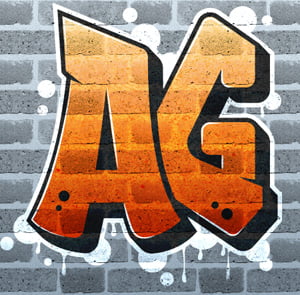
Today we will create a vector graffiti logo and apply the bitmap texture from free for customers Pro Texture Packs with the help of the Texturino. Other Astute Graphics' tools will help us to make the process of creating an artwork fast, convenient, and efficient. |
|
|
|
Recent Consultations |
 |
|
|
|
|