|
In this article I will show you how to customize the InkScribe Tool for easy work. InkScribe is designed to allow all users to get comfortable with the vector design process, from novices to professionals. The Preferences offered is key to ensuring this.
We will learn about all the options of this tool and will talk about the advantages of choosing one or another option.
To open the InkScribe Preferences windowm, double-click on its icon in the toolbar, or press the Enter key when already in the tool. Alternatively, select the appropriate item in the fly-out menu of the InkScribe panel (Window > DrawScribe > InkScribe panel).
InkScribe Preferences window is divided into two parts. The left side is used to configure the tool and the right one is used to configure the Annotation and save your settings.
All the settings shown in the pictures above are default settings. I’ll introduce you to each option and will try to illustrate all those mentioned. Let’s start with the settings of the InkScribe Tool.
General Options
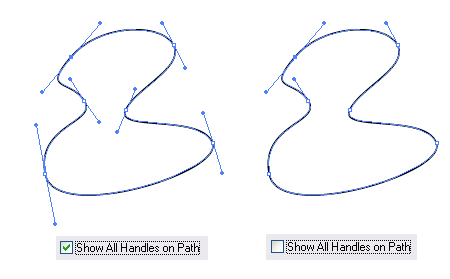
Show All Handles on Path keeps the handles of unselected points visible.
Choosing this option allows you to edit all the handles of the path, not just the handles associated with the selected point(s).
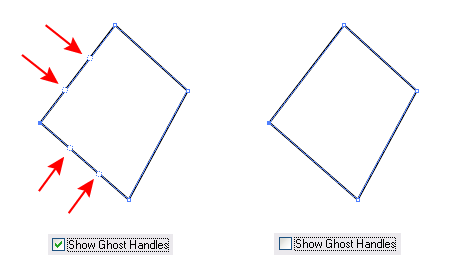
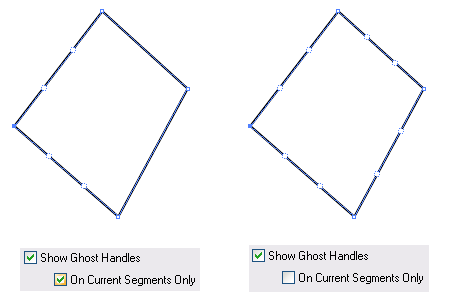
Show Ghost Handles. Ghost Handles allow retracted handles to be easy extended and positioned.
Ghost Handles allow you to create a complex path first with the straight-line segments, and then get the desired shape by positioning Ghost Handles.
Show Ghost Handles on Current Segment Only only displays ghost handles associated with selected point(s).
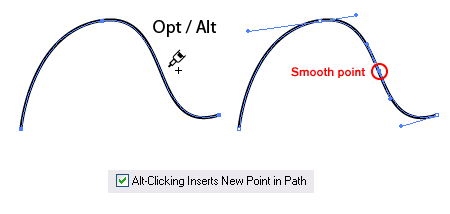
Opt / Alt — Clicking Insert New Point in Path adds points along existing path segments.
You can read full version this article on Astute Graphics
Follow us if you want to be the first to know about the latest Adobe Illustrator tutorials and articles. Vectorboom team works for you!
|