|
|
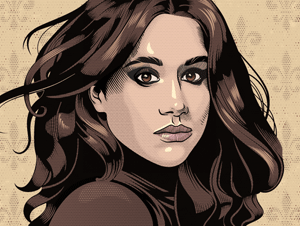
Today you will find out how to create this portrait of Meghan Markle whilst learning all about the tools that helped to speed up the work. These are WidthScribe for intelligent work with variable width paths and Phantasm for creating halftone textures. In addition, I used DynamicSketch, VectorScribe and Texturino, which have long been part of my workflow in Adobe Illustrator. |
|
|
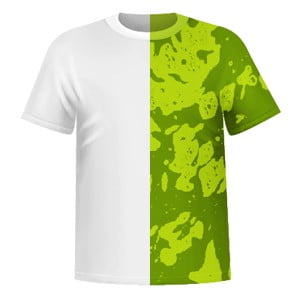
In this tutorial we will learn how to create a T-shirt mockup with the Texture Brush Tool and Texture panel in Texturino. These methods will not only allow you to use textures in a more convenient way, but also to draw shadows and highlights to create volume on absolutely flat vector objects directly in Adobe Illustrator.
|
|
|
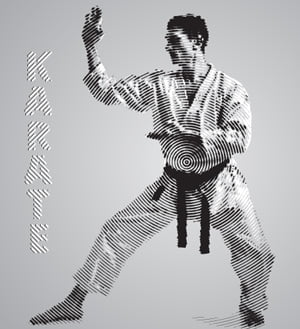
Today we take a look at the technique of creating ink drawing style using WidthScribe. Thanks to this plug-in you can achieve a similar effect by setting the parameters in the Width Stamp panel. Phantasm effects will allow you to conduct all the necessary… |
|
|
In today’s tutorial you will learn how to create pictures in pointillism style, and for that you don’t need to know how to draw. Paints and brushes are not required. All you need is Stipplism and a few bitmap images that you can work with using the help of Rasterino and, without leaving Illustrator. So let’s start painting together! |
|
|
Today you will learn how to create a simple Stipple effect, which is applicable to editable text. To create this effect, it only takes a few seconds, thanks to a new Stipplism plug-in. Difficult manual work that takes hours of effort and years of practice has been replaced by the selection of parameters and clicking OK button. So let’s stipple fast! |
|
|
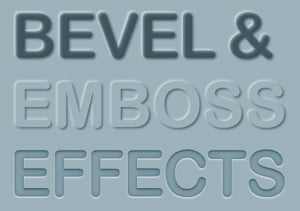
Today we will talk about how to get the Bevel & Emboss and Letterpress effects for editable text using native Illustrator’s features. Let’s get started! |
|
|
In this tutorial we will look at a combination of Space Fill, Dynamic Shapes, and Symbols features. This technology will allow us to get at least three levels of dynamics in the artwork. This means that for the transformations and searching for the best solutions you will need to spend ten times less time. For example, a uniform filling of the shape with hundreds of Fill Art objects, you just need to press the button repeatedly. |
|
|
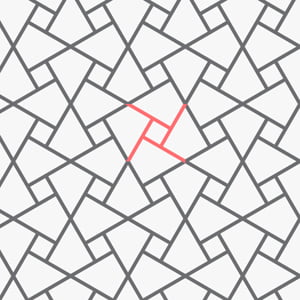
Generally, there are 17 kinds of symmetry for seamless patterns, however Adobe Illustrator can offer us only one of them, it is called the Simple Shift. Thanks to MirrorMe plug-in we can significantly extend the functionality of the Pattern Maker feature, adding at least another 7 kinds of mirror symmetry. Let’s take a look at how to create additional types of symmetry, working directly in the Pattern Maker mode. |
|
|
Function Split Long Contour is designed for high precision applications of the Width Stamp Tool to very long paths, such as circular and square spirals. You will learn about the peculiarities of this feature from this article. |
|
|
In this tutorial we will learn how to quickly distribute a bunch of objects along a path of arbitrary shape. Combining Gradient on Stroke feature and allows us to influence the size of distributed objects, subjecting them to the law of linear perspective. To create the effect of aerial perspective, we use the Opacity Mask. Let’s get started! |
|
|
|
Recent Consultations |
 |
|
|
|
| Deal of the Week: 2000+ Royalty Free Cartoon Vectors — only $27! | |
|