|
To make the hard work of every designer a bit easier, we present you links to a variety of very useful resources for designers. Free templates and fonts, color matching, icons creation and much more. It’s great to have such tools at your fingertips! |
|
|
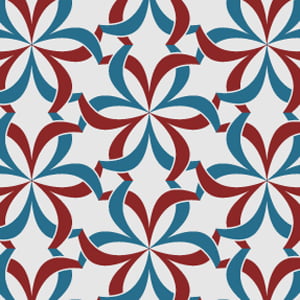
Today we will talk about shapes of pattern tiles and how to combine the dynamic features of MirrorMe and Pattern Maker to produce complex-looking but easy to make seamless patterns. Let’s create something interesting! |
|
|
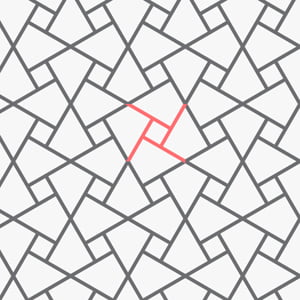
Today we’ll talk a little bit about the two most common types of symmetry and using tools so you can quickly and easily create symmetrical objects in Adobe Illustrator. And this is important, because symmetry is used in all kinds of design, architecture, painting and other visual arts. |
|
|
Generally, there are 17 kinds of symmetry for seamless patterns, however Adobe Illustrator can offer us only one of them, it is called the Simple Shift. Thanks to MirrorMe plug-in we can significantly extend the functionality of the Pattern Maker feature, adding at least another 7 kinds of mirror symmetry. Let’s take a look at how to create additional types of symmetry, working directly in the Pattern Maker mode. |
|
|
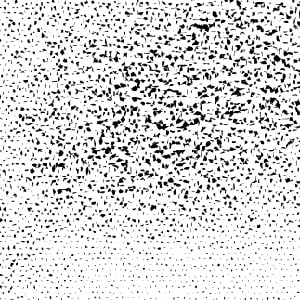
In this tutorial we will learn how to create organic texture using Phantasm Halftone effect, some native effects and Actions feature. The resulting action can be used to generate a wide variety of vector textures in your future projects. Why spend time searching for the right texture, when it can be easily created! |
|
|
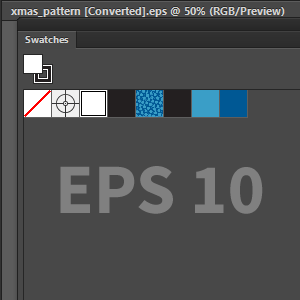
Most of you probably noticed that the sample of the seamless pattern in the majority of cases disappears from the Swatches panel after you save your file in eps10 format. This is a minor problem but if you take care of your client and count on long term cooperation then you’ll need to think more about it. Moreover, some microstock websites demand saving the seamless patterns in the Swatches panel (I think Graphicriver for example). Let’s study this problem and try to solve it. |
|
|
The script allows changing scale, coordinates, transparency and rotation angle of the object in specified range in random order. This is a wonderful tool for abstract background and texture creation! |
|
|
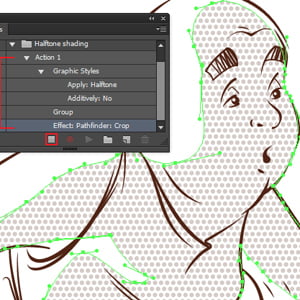
In this tutorial you will learn how to create a Halftone shading effect in a matter of seconds using Phantasm. Using the Actions feature and native Pathfinder effect will allow us to limit the dots using object’s outline. |
|
|
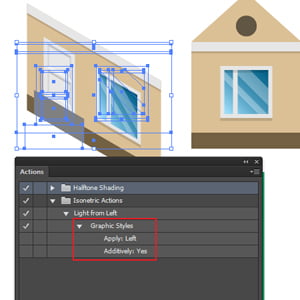
In the previous tutorial we looked at the process of creating isometric icons of the building with the help of transformation effects and Phantasm for quick coloring of different projections. Today, using action feature we will make the process automatic. After this, creating isometric icons in Adobe Illustrator will only take a few seconds. Accelerate to speeds of space! |
|
|
It is well known that the creation of isometric images in Adobe Illustrator is a quite time-consuming task that requires some knowledge. Using the techniques of today’s tutorial we are simplifying the process of transforming, coloring (Phantasm) and positioning (ColliderScribe) objects. This knowledge has very much accelerated my workflow and now I am sharing this with you. |
|
|
|
Recent Consultations |
 |
|
|
|
|