|
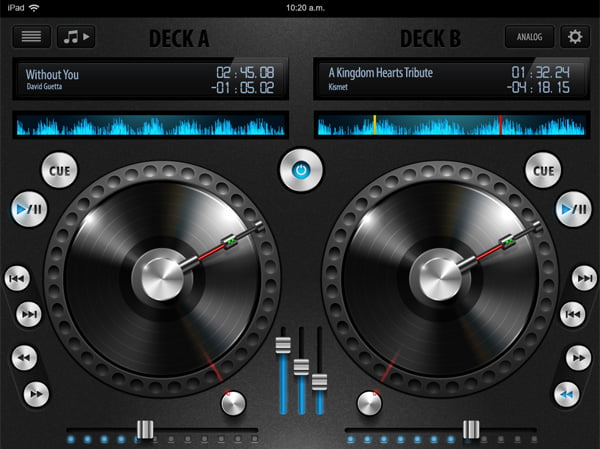
Final Image Preview The following Adobe Illustrator tutorial will assist in understanding of the interface creation steps, from design to detailed description of each element. I am sure that all techniques described herein will be not difficult for understanding, however will provide the professional appearance for any of your projects.
Tutorial Details
- Program: Adobe Illustrator
- Difficulty: Intermediate
- Estimated Completion Time: 3 hours
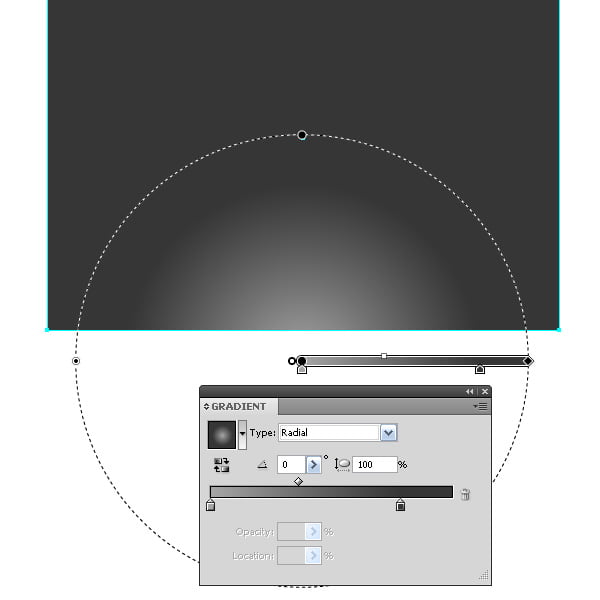
Interface DesignStep 1Using the Rectangle Tool (M), make the rectangle with size 1024 x 768 px. The above size will suit to the same of the iPad screen. In case of working with the interfaces, all created elements are recommended to be of the natural scale. The above shall enable us to create extremely sharp graphics avoiding the need for creations of additional elements. Create the background of your interface. The background created at the initial step of our project shall enable the correct selection of the other elements colors. Fill the background with grey to dark grey gradient having located the gradient center below the background.
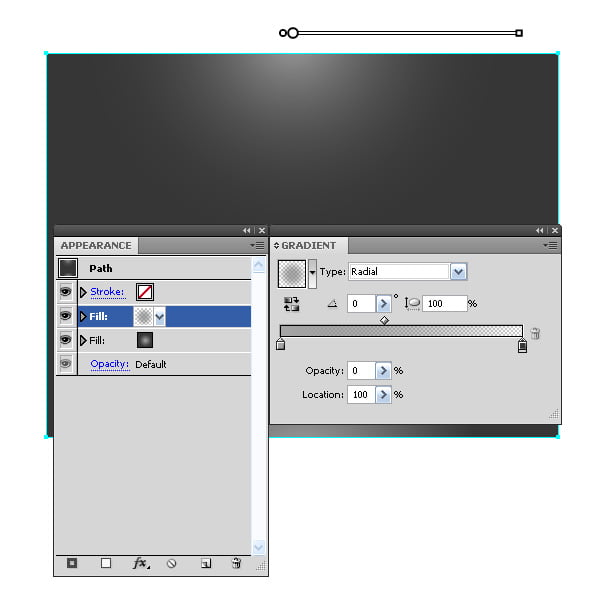
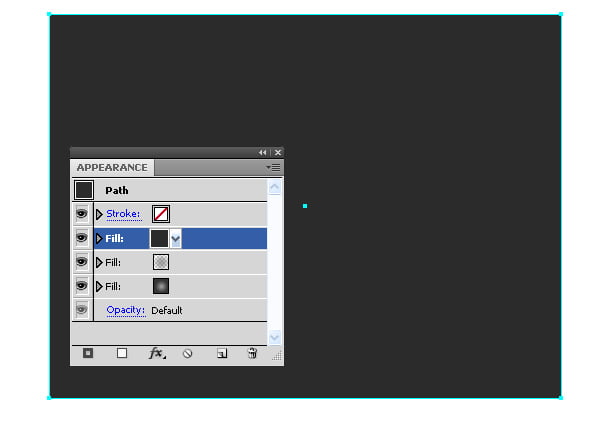
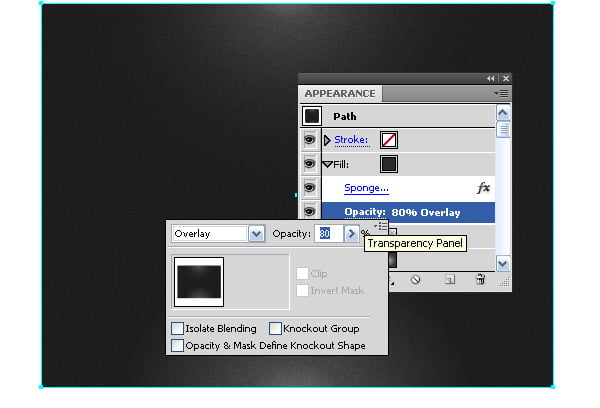
Step 2Open the Appearance panel and add a new fill applying then grey to dark grey gradient to it. The dark grey slider of such gradient shall have the opacity of 0%. Locate its center above the background. Add the new fill of the dark grey color in the Appearance panel Select it and go to Effect > Artistic > Sponge…. Set the parameters of te effect shown in figure below. Set the Overlay Blending mode and 80% opacity for such fill.
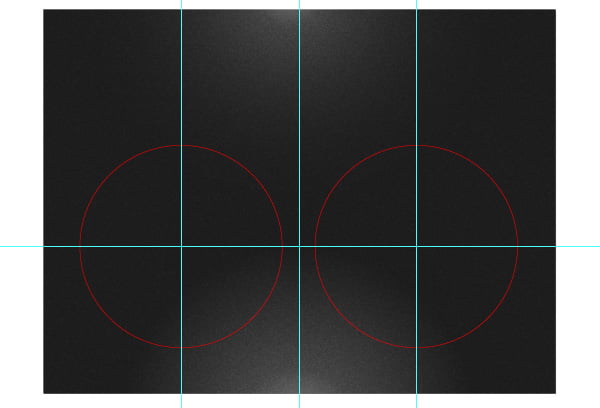
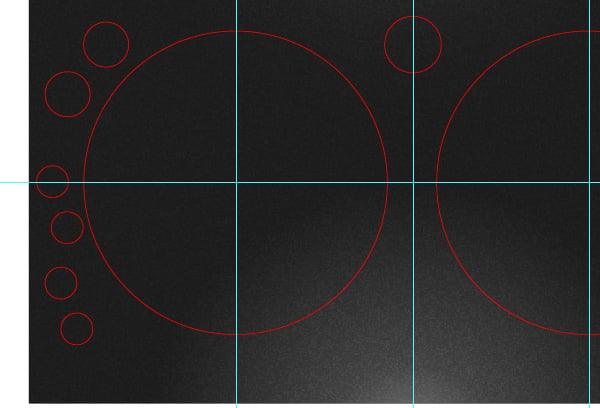
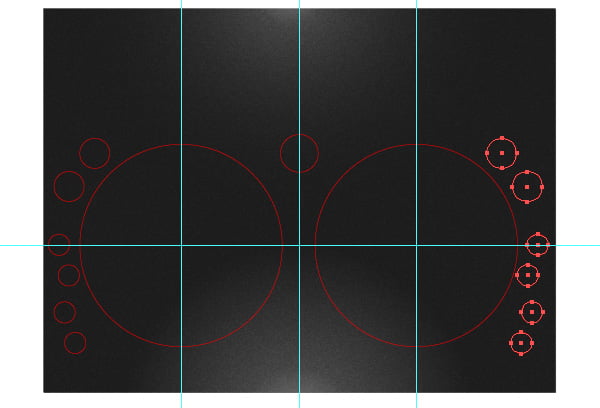
Step 3Now, let us think about the interface elements arrangement. Prior to do this, you shall examine the similar existing interfaces and understand its functional features. Moreover, the said elements shall be located in way convenient for the users. The main elements of DJ app are the Vinyl Records. Using the Ellipse Tool (L) create two circumferences having the same size. In order to locate the interface elements in symmetrical way, it shall be necessary to create several guide lines. Some variants of key arrangement were applied by me before I have made my choice as shown in figure below.
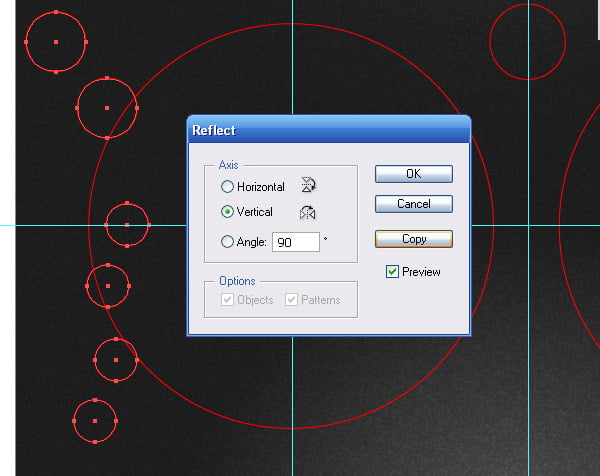
Step 4As we try to create the interface being of the natural scale you’ll be provided with an option to put your hand on the monitor screen in order to check if the elements being created are conveniently located. Apart from the convenient location, your interface shall have nice appearance. The symmetry is considered to be your reliable partner in order to achieve the set objectives. Select the keys in the left part of the interface and go to Object > Transform > Reflect…, with following choosing of the Vertical option and pressing the Copy key in the dialogue box.
Move such created circumferences to the right part of the interface
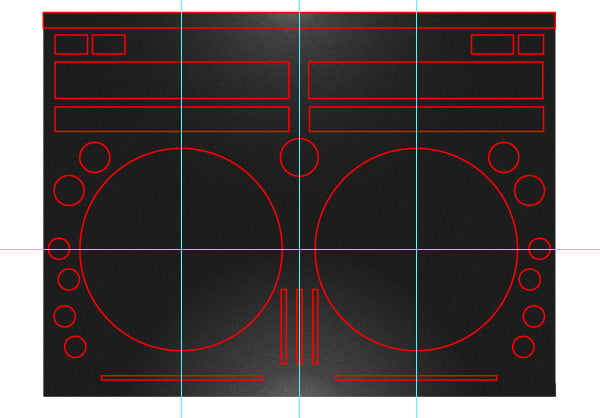
Step 5Using the Rectangle Tool (M), mark the indicators’ sliders and other keys’ positions. Now, you can proceed with the interface elements creation.
You can read full version this vector tutorial on VectorTuts+
Follow us if you want to be the first to know about the latest Adobe Illustrator tutorials and articles. Vectorboom team works for you!
|