|
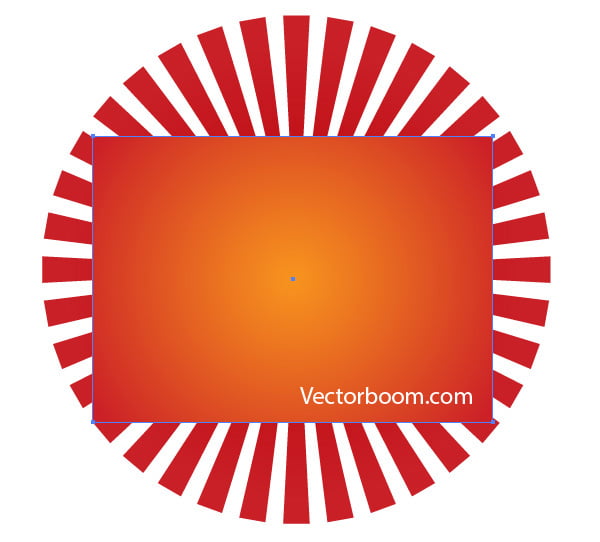
Final Image Preview
In this tutorial we won't only find out how to create very interesting text effect, but also we'll learn how to convert raster shadows into 100% vector. That's why this tutorial is especially valuable for me, and I'm happy to recommend it to all vector graphics fans.
Step 1
Create a rectangle with any fill, which will serve us as a temporary background (the illustration's background will be changed later).
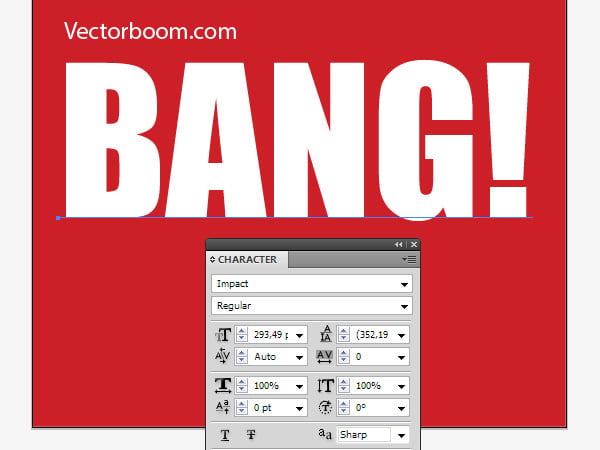
Take the Type Tool (T) and type the world "BANG!” in white.
Step 2
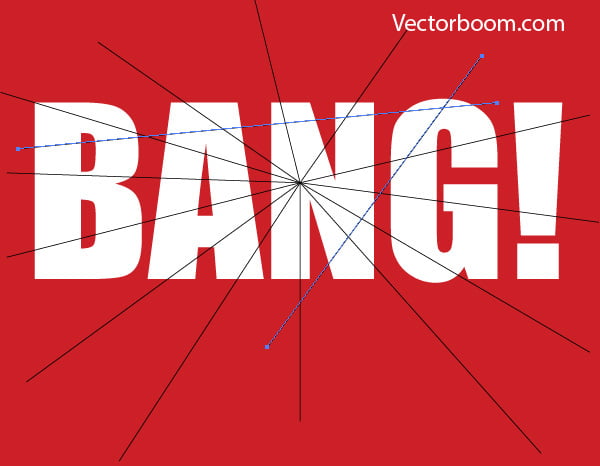
Keep your text selected, go to the Type > Create Outline, which converts your text object into a group of normal vector objects.
With the help of the Line Tool (L) create a couple of linear segments diverging from one point.
It can be simply done, if your Smart Guides mode (View > Smart Guides or Cmd/Ctrl + U) is on. You can also create multiple arbitrary directed lines as it is indicated on the figure below.
It would be better, if your lines don't cut letters into many little bits. The more bits there are, the more work must still be done ahead.
Step 3
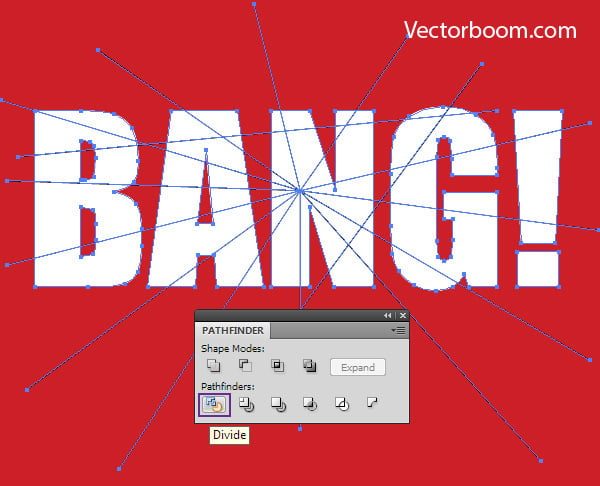
Select the lines and letters, then click on the Divide in the Pathfinder panel.
As the result of the action, we cut our letters into bits and get a few paths with no fill or stroke, which should be deleted.
To do so, go to the Object > Path > Clean Up…, then click OK in opened dialog box.
Step 4
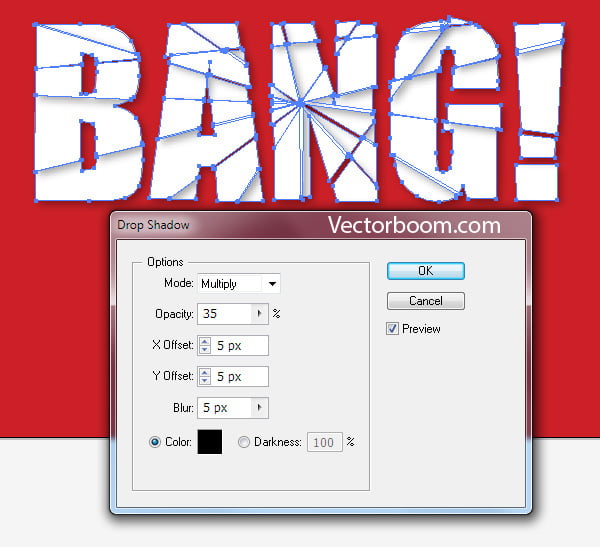
Be sure to ungroup the received group (Object > Ungroup or Cmd/Ctrl + Shift + G)
Keep the objects selected, go to the Object > Transform > Transform Each…. Select Random and Preview options, then set the value of vertical and horizontal displacement and rotation angle (optional). Your parameters may differ from mine, the most important is to reach the effect of starting chaos.
Step 5
Go to the Effect > Stylize > Drop Shadow… and set appropriate effects of the parameter.
If you're contributor of microstock websites, you certainly won't be satisfied with your raster shadow. That's why I will introduce you technique, which will help you to convert raster shadow into vector one.
Step 6
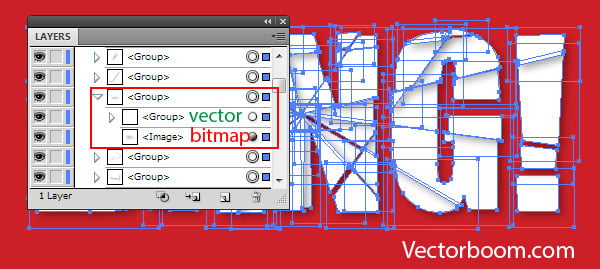
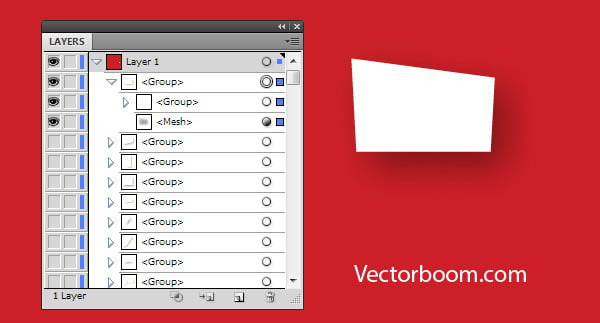
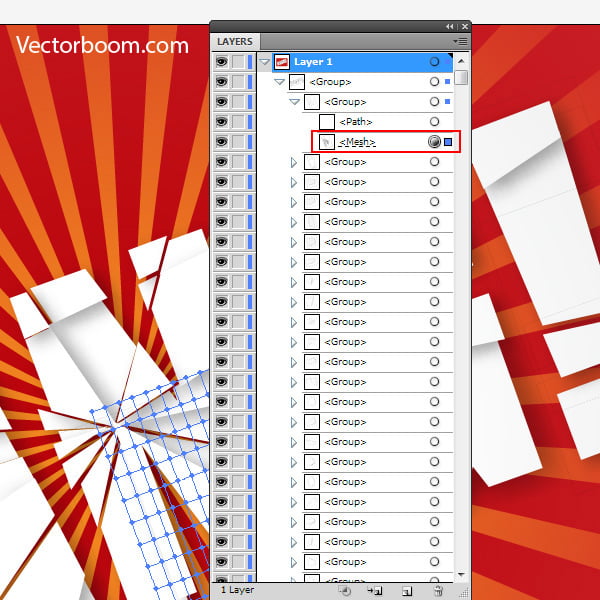
Go to the Object > Expand Appearance. Each object turned into a group, which contains a group with a vector object and a bitmap image in the form of shadow.
In order not to miss a single group, I disabled the visibility of all groups, except the top one.
Step 7
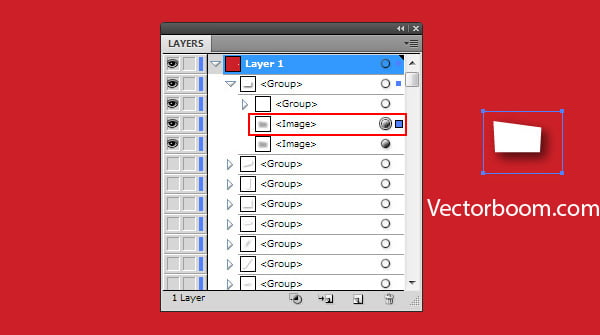
Select the bitmap image in the Layers panel, copy it, and then paste in to the front (Cmd/Ctrl + C; Cmd/Ctrl + F)
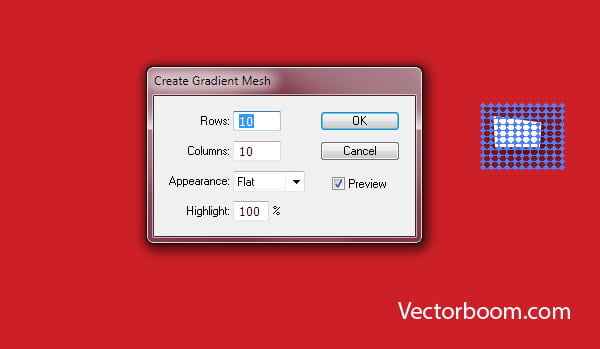
And now go to the Object > Create Gradient Mesh and set the number of columns in the opened dialog box.
By experimenting, I found out that it is enough to receive a gradient mesh, which consists of 10 rows and 10 columns, to maintain the quality of the shadow. I want to draw your attention, the number of cells in your gradient mesh influences the size of your vector file, that's why it is not worth setting too big values.
Step 8
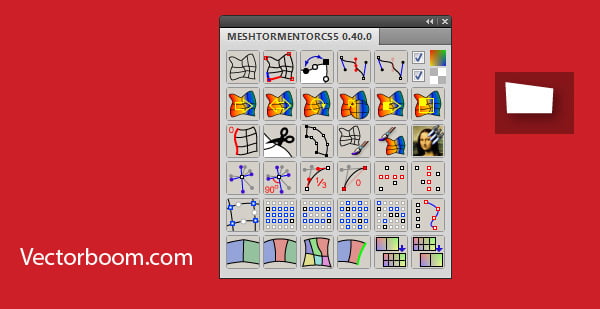
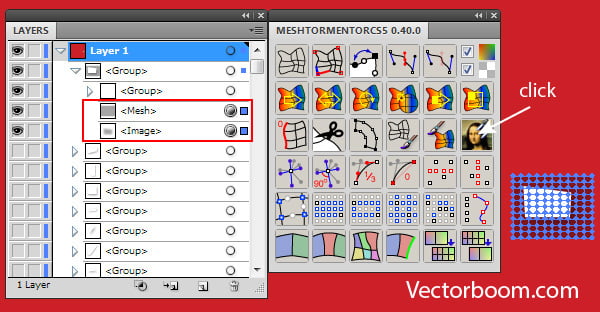
Now we will need a free plug-in to work with gradient mesh - Mesh Tormentor, which you can download by clicking on the following link. Open the plug-in panel (Window > Mesh Tormentor)
Select the gradient mesh and the bitmap image in the Layers panel, then click on Capture Colors from Raster Object in the Mesh Tormentor panel.
Now the bitmap image should be deleted.
As you can see, what we've got, is a vector shadow. Enable visibility of the next group..
Step 9
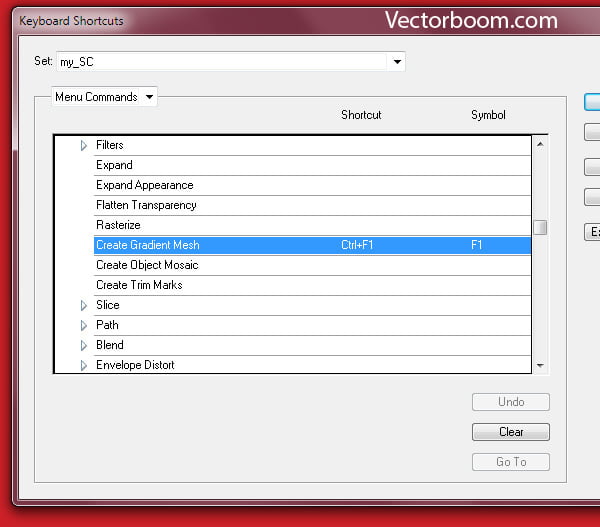
The actions, described above, should be performed with all bitmap shadows. I understand, this work is quite tedious and monotonous. I tried to create Action to automate this process, but my idea was not successful. Unfortunately, I cannot select two nearby objects using only the commands from the program's menu. Moreover, I'm not sure how to write plug-in's performance into action. If among you, my dear readers, there is someone who can solve this issue, I'll be very grateful for your help. In order to at least somehow speed up the process, I assigned a keyboard shortcut for command Object > Create Gradient Mesh. You also can do this by going to Edit > Keyboard Shortcuts… I also think the article How to Speed Up the Workflow with the Help of Shortcuts in Adobe Illustrator will be useful to you.
So, in 10-15 minutes of work we get this result with 100% vector shadow.
Step 10
Group all the objects, except for our background, then rotate the group at a certain angle.
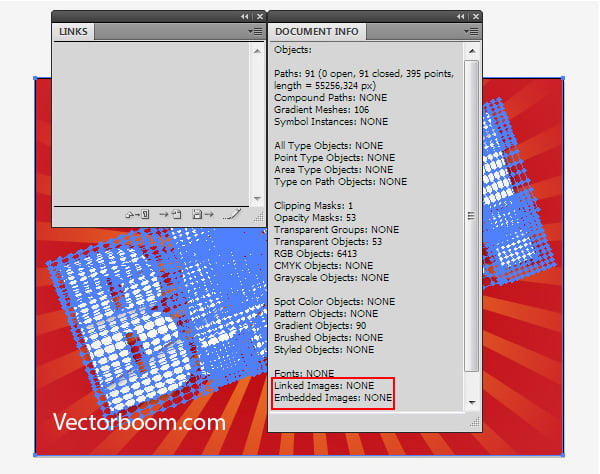
Let's see whether our object contains any raster objects. Open the Links panel (Window > Link). If it is empty, it means we don't have any raster objects, and, therefore, we can move on.
Step 11
Let's proceed to background's creation. Fill the lower rectangle with radial gradient from orange to red.
With the help of the Pen Tool (P), or with any other method known to you, create a triangle with red fill, as it is indicated on the figure below. Then place it underneath the group with letters.
Step 12
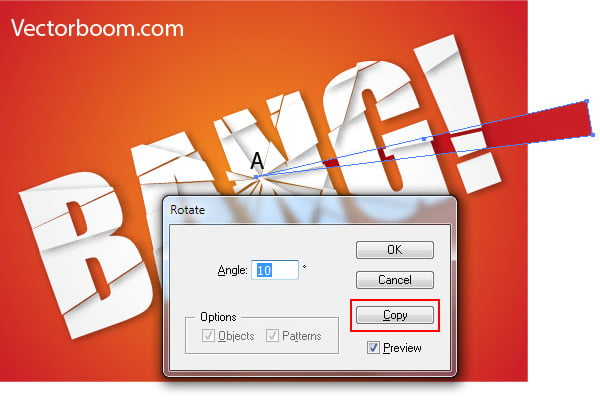
Take the Rotate Tool (R) and click on point A while keeping the keys Opt/Alt selected. In the opened dialog box, set an angle of 10 degrees, then click on Copy.
Use the Cmd/Ctrl + D shortcuts 35 times.
Step 13
Double the lower rectangle, then place it above all created objects.
Select all the objects (Cmd/Ctrl + A), then go to the Object > Clipping Mask > Make or use Cmd/Ctrl + 7 keyboard shortcuts to hide parts of beams that extend beyond the background.
Step 14
Now the file can be saved in EPS10 format. As you can see, it has suitable size for uploading to microstock.
Don't forget after saving to close and re-open the eps file for verification. Do we happen to have some invalid raster objects? Nope, it all looks good.
If you look closely at our illustration, you'll barely notice some subtle black stripes, which were formed on the edges of our gradient meshes. I'm not sure whether the micro stock’s inspector will let a file with such defect through, so let's get rid of it.
Step 15
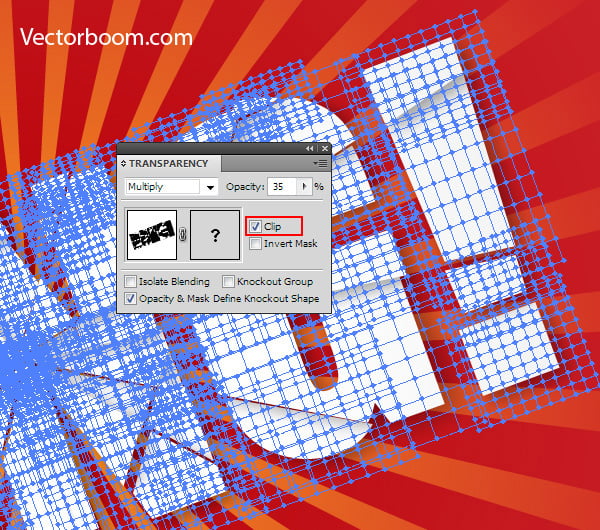
Artifacts were formed due to the fact, that gradient meshes were converted into Opacity Masks.
Select any Opacity Mask in the Layers panel.
Now go to Select > Same > Appearance. This action selects all Opacity Masks. Open the Transparency panel (Window > Transparency), then tick Clip option.
As you can see, our artifacts disappeared.
Save the opened document in EPS10 format again. At this stage, my Adobe Illustrator tutorial is over. I wish you all to have successful sales!
|