|
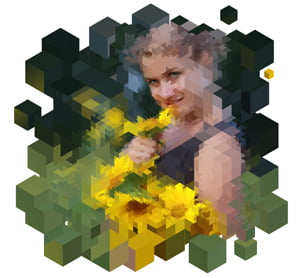
Final Image Preview
In this Text Effect Tutorial we will learn how to create Impossible Text while using simple and understandable techniques. Although, it was not as obvious to me as it is now. I even tried to remember my classes of trigonometry in high school. In the final part of this tutorial we will issue some impossible text in the Blueprint style. This style is a popular trend in design now. Have fun and enjoy this Adobe Illustrator tutorial!
Illustrator Tutorial Details
- Program: Adobe Illustrator CS3 - CS6;
- Difficulty: Beginner;
- Estimated Completion Time: 1 hour;
Creation of Impossible Text
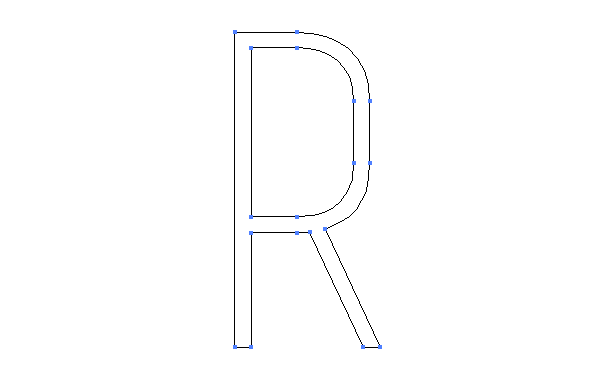
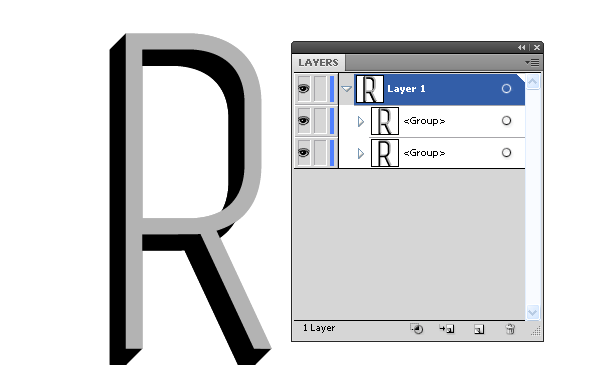
Step 1
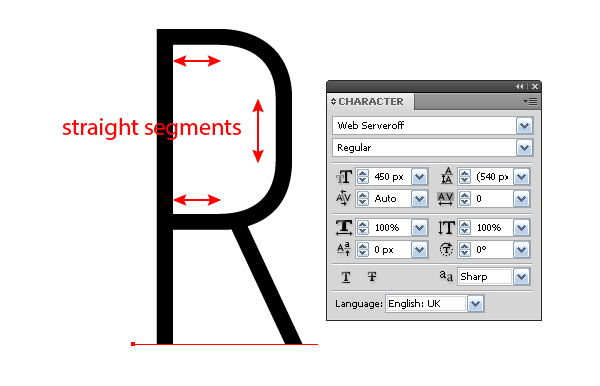
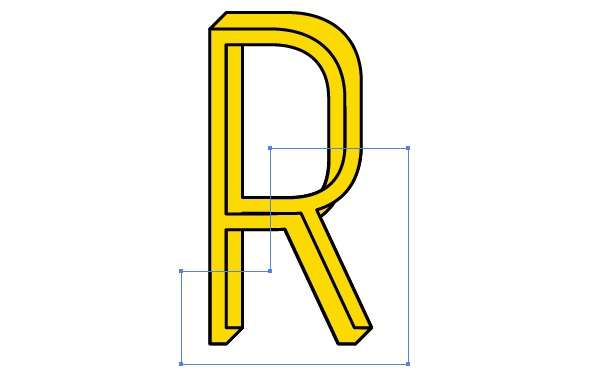
Let's take a closer look at the technique of creation of "impossible” text on the example of one complex-shape letter. Supposedly, it is the "R” letter. Please note that not every font is suitable for our purposes. You should choose the font where the rounding parts, which are typical for most of the fonts, should be represented by straight segments.. Exactly that's why I've chosen the Web Serveroff font. Take the Type Tool (T) and create a letter.
Now go to the Type > Create Outlines.
Ungroup the resulting Compound path (Cmd / Ctrl + G).
Step 2
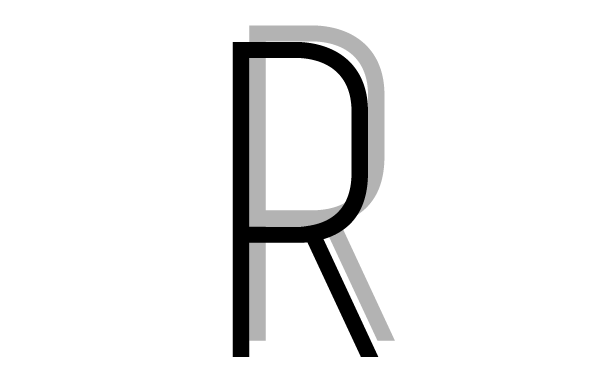
What will be so impossible about our letter? It should illustrate some impossible shape; it is a well-known form of an optical illusion. Copy our letter and paste it to the front (Cmd / Ctrl + C; Cmd / Ctrl + B). Fill the bottom object with gray, and then lock the upper object in the Layers panel in order not to move it in the process of our further manipulations.
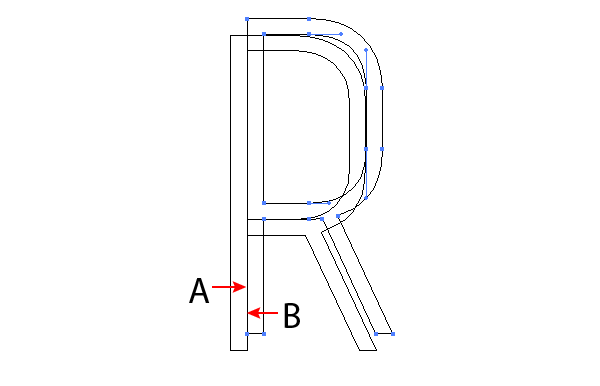
For precise positioning of objects go to the Outline preview mode (View > Outline).
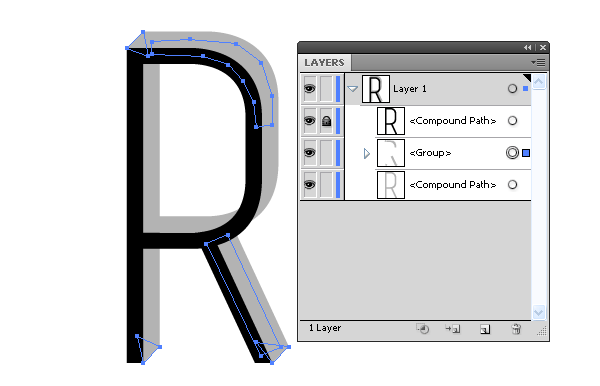
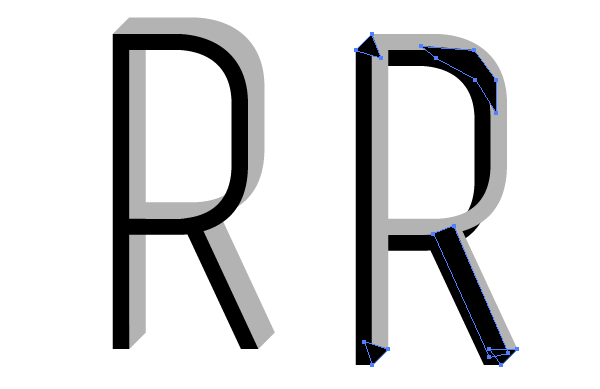
Step 3
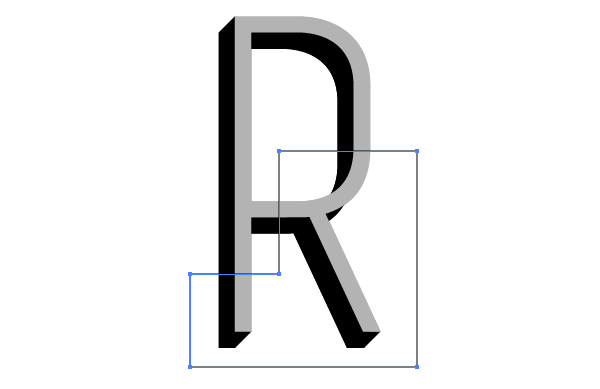
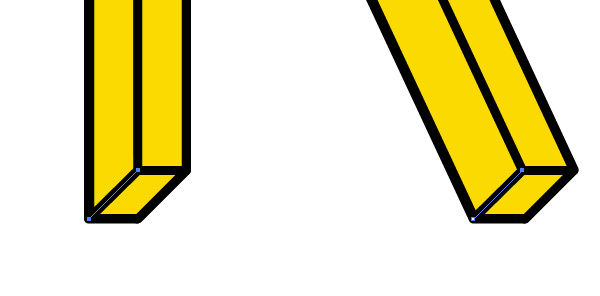
Select the whole lower letter, take the Direct Selection Tool (A) and taking one of the sides of the letter move it up and to the right as long as the sides indicated on the figure as sides A and B will match. Hold down the Shift button while moving. Only in this case it will be at the angle of 45 degrees.
Now we can get back to the Preview mode (View > Preview).
Step 4
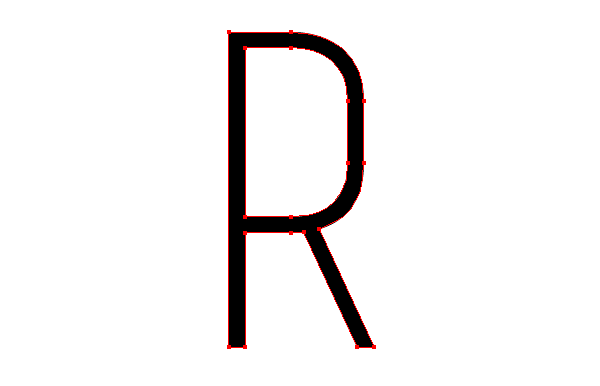
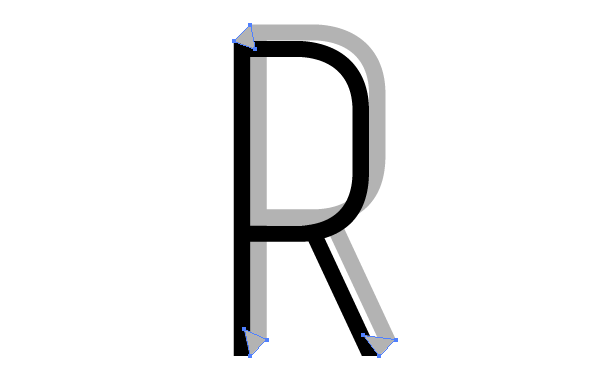
Take the Pen Tool (P) and connect the corners of two letters as it is indicated on the figure below.
Now create some objects which will cover the spaces between the letters.
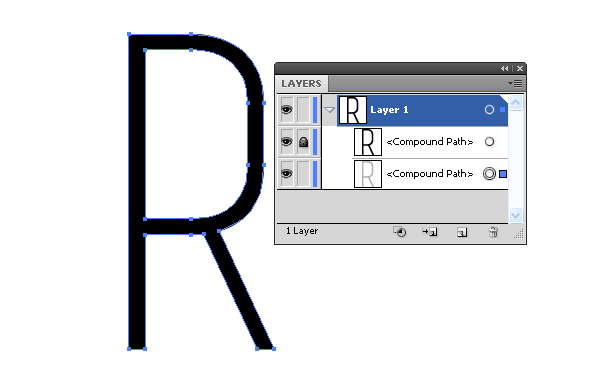
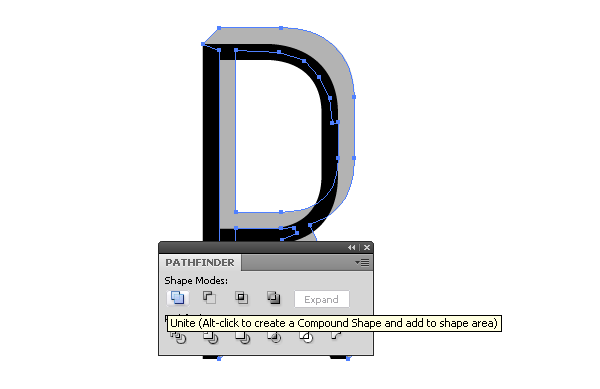
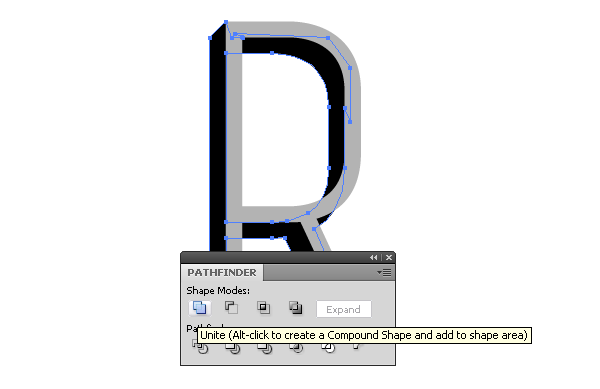
Select and group (Cmd / Ctrl + G) the objects, created in this step, then move the group below the black letter.
Select these objects and the lower letter, and then click on the Unite in the Pathfinder panel.
Step 5
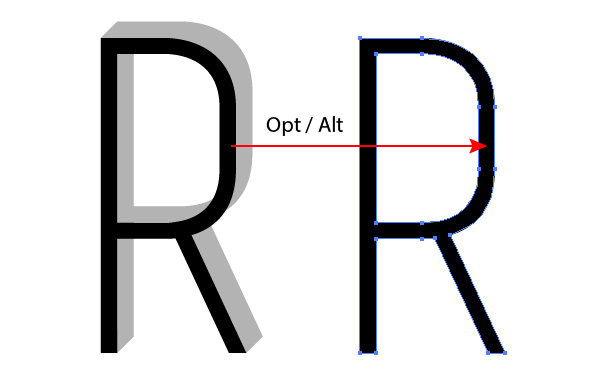
Unlock the black letter in the Layers panel, and then move it aside holding the Opt / Alt, which leads to its duplication.
Fill this object with grey.
Step 6
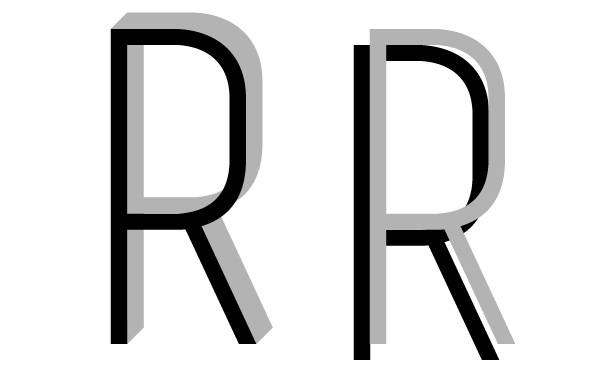
Copy the grey letter and paste it back. Fill the lower letter with black. Now, using the technique described above, move the black letter down and to the left.
Connect the corners of letters and cover some space between them with the Pen Tool (P).
Group the created forms and place them underneath the grey letter.
Unite these forms with the lower letter.
Step 7
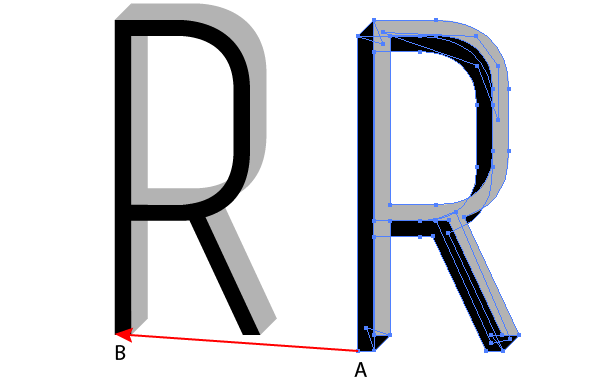
Select the right letter, take the Direct Selection Tool (A), then take the point A and move it with the point B of the left letter. Make sure that the Smart Guides (View > Smart Guides) mode is on; this will make any other manipulations with the vector objects easier.
The right and the left letter are combined, and their outlines are exactly the same.
Step 8
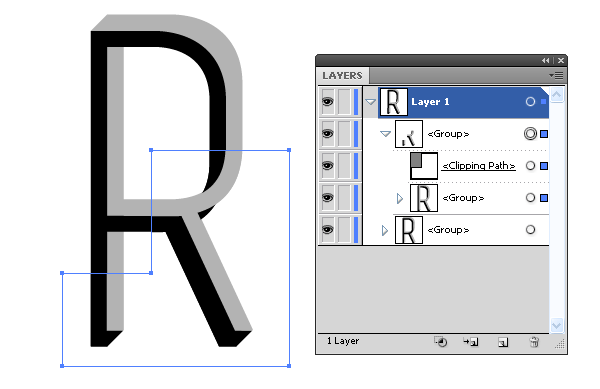
Take the Pen Tool (P) and create a path as it is indicated on the figure below.
This path should cross the letter only on its rectilinear segments. You can have a different form of the path while working with other letters depending on the effect that you're trying to achieve. Select the group with the upper letter and the path, and then go to the Object > Clipping Mask > Make or use the Cmd / Ctrl + 7 shortcuts.
The letter, which illustrates the impossible shape, is ready.
Step 9
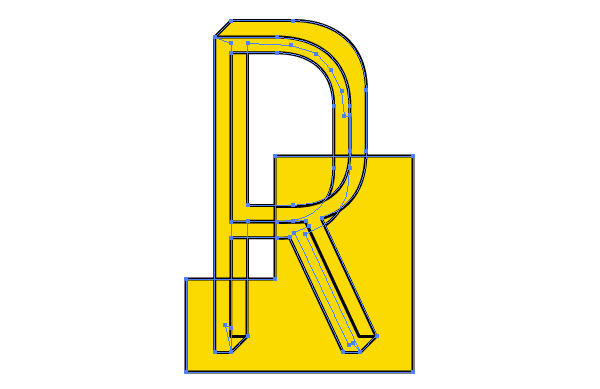
You can apply a stroke to this letter and one-color fill.
In this case you will need to cancel the fill and the stroke in the Clipping path.
You also need to create a couple of missing edges of the letter with Pen Tool (P).
Step 10
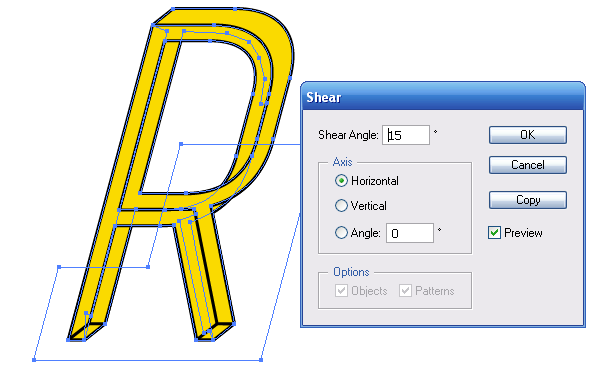
Now we can tilt the letter. Select all its elements and go to the Object > Transform > Shear… and set an angle in the dialog box.
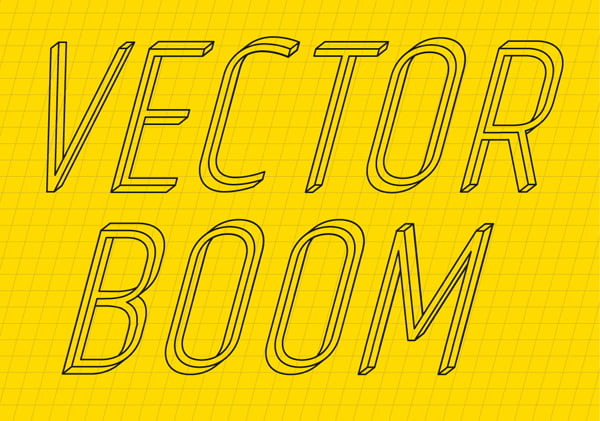
With the help of this technique I’ve created impossible text with the name of my website. The combination of yellow and black looks good, that’s why this color combination is often used in advertising.
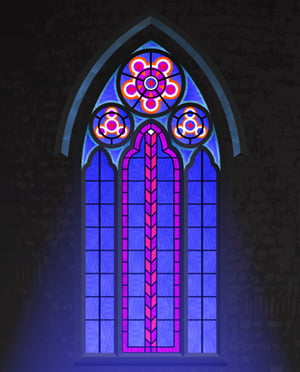
Creation of Impossible Text in Blueprint Style
Step 11
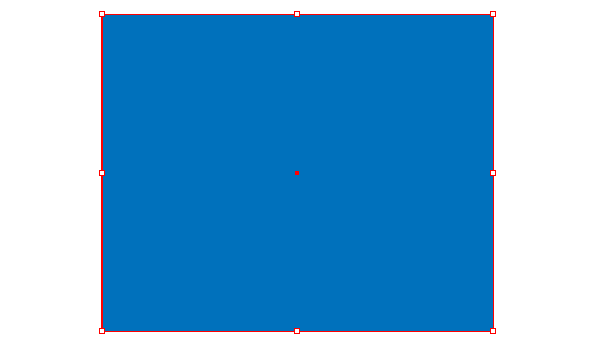
Now let's create an inscription in Blueprint style. Create a rectangle with the Rectangle Tool (M) and fill it with blue.
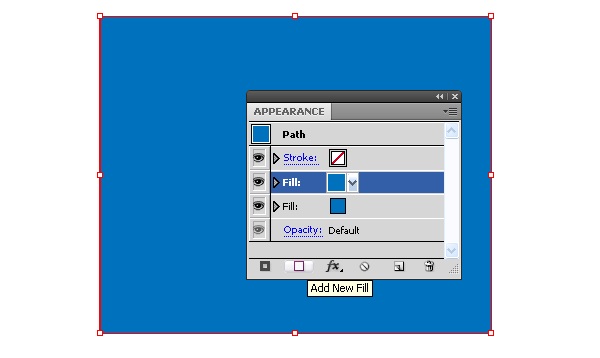
Add a new fill to this object in the Appearance panel.
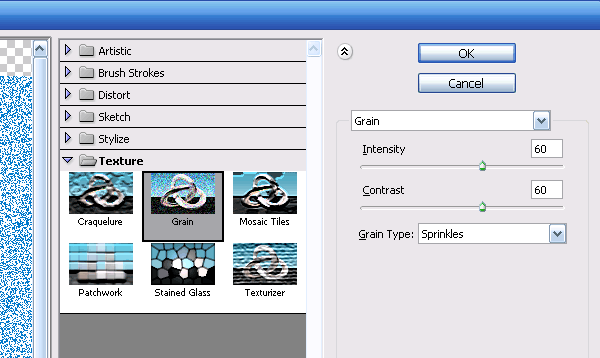
Select the new fill and go to the Effect > Textures > Grain…. Set the parameters indicated in the figure below.
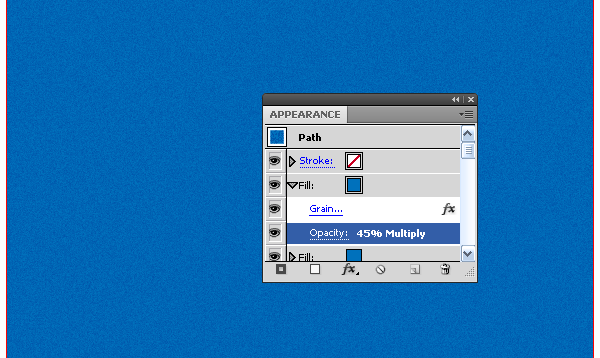
Apply the Multiply blending mode to the fill and reduce the opacity to 45%.
Step 12
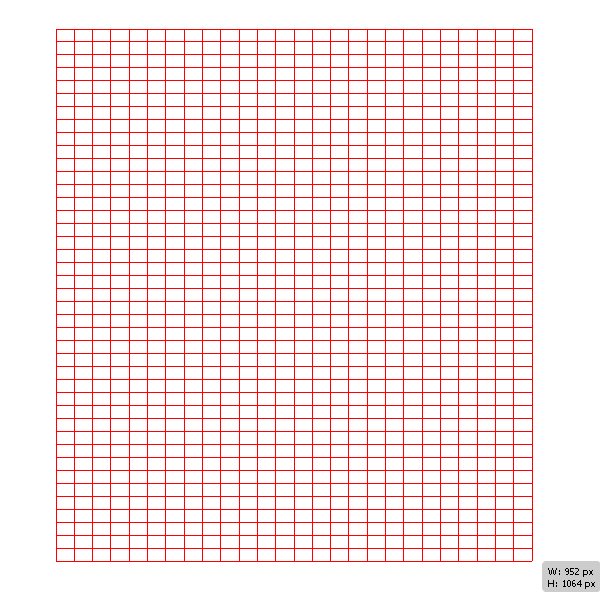
Take the Rectangular Grid Tool and create any mesh. To increase/reduce the number of columns and rows of the mesh use the arrows buttons in the process of its creation.
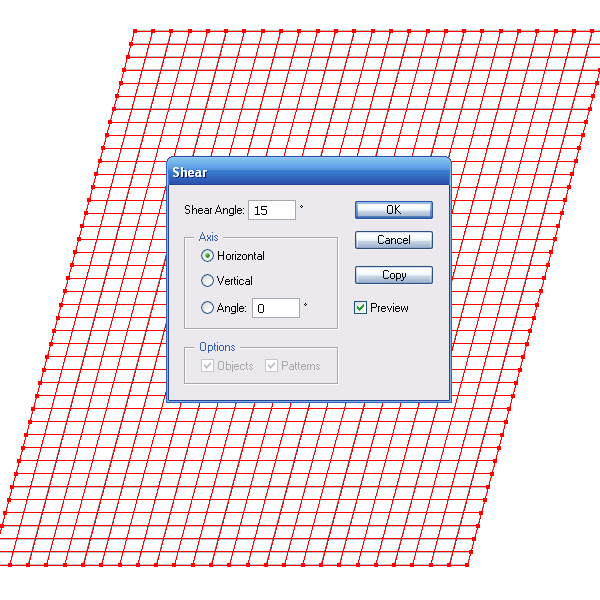
Go to the Object > Transform > Shear…, and then set an angle in the dialog box.
Step 13
Choose white as the color of the stroke, and then reduce the opacity of our mesh to 30%.
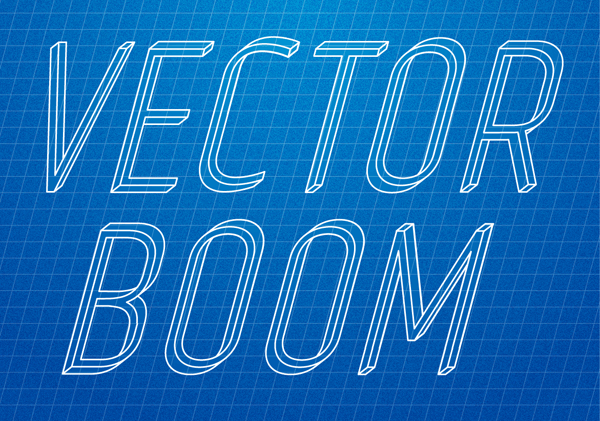
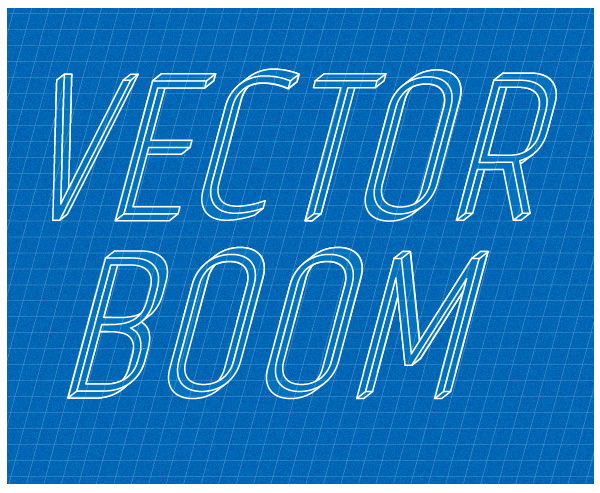
Place our impossible text, which was created in previous steps of this illustrator tutorial, between the mesh and the background. The text has white stroke and blue color, the same as the background.
Step 14
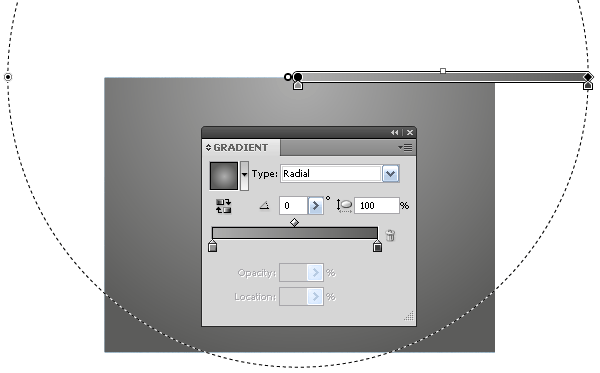
Create a new rectangle and place it above all created objects. Fill the rectangle with radial gradient which consists of two shades of gray.
Apply the Overlay blending mode to this object. And here we go, our impossible text in Blueprint style is ready
Follow us if you want to be the first to know about the latest Adobe Illustrator tutorials and articles. Vectorboom team works for you!
|