|
|
Adobe Illustrator CS6 has a new feature which is called Gradient on Strokes. It is the first time since Adobe Illustrator’s creation we have an opportunity to apply the gradient fills to the strokes. There are two more types of the gradient fills beside the linear and radial gradient fills. I think this feature has lots of creative potential. Let’s examine the gradient on strokes in more detail and figure out how to use it. |
|
|
I think that SubScribe Designer is an irreplaceable tool for anyone who creates detailed graphics. And it is even free to all DrawScribe, VectorScribe and Phantasm CS v2 customers! With its help, you can create tangents and perpendiculars to the paths, create a circle according to given points, quickly align objects relatively to horizontals or verticals, create circumscribed and inscribed circles, and much, much more. |
|
|
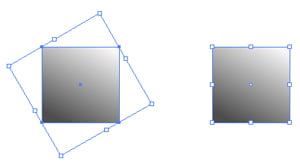
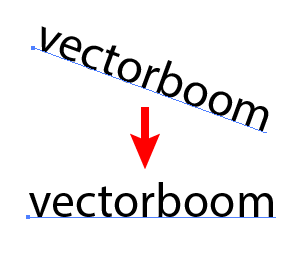
More than once you’ve probably experienced a situation when the Bounding Box was located at "inconvenient” angles and you needed to change it to make a correct transformation of one or multiple objects. It is quite natural if you come up with a question: how to rotate the Bounding Box in Adobe Illustrator? If you were looking for an answer, you probably won’t have found it. Until now… where I recently discovered a new trick which I want to share it with you. |
|
|
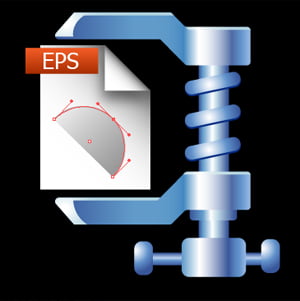
Probably
you have
been searching
for the
answer to
this question
many times.
Standard
proposals as
to this
problem solving
can provide
your source
file size
reduction only
by a
few hundred
kilobytes, and
it is
doubtful whether
this would
satisfy you.
Today let
me tell
you how
to make
the source
EPS file
much smaller.
The solution
is very
simple and
original. Hope
you find
it interesting!
|
|
|
For a long time it’s been discussed on the forums devoted to the work of Adobe Illustrator how to close paths quickly. The designers often face with the problem that the clients do not except the vector works because of the open paths. Search and closing of paths manually is a tiresome work. Today I will tell you how to close paths with standard Adobe Illustrator’s means and about other ways of solving this problem with scripts and plug-ins. |
|
|
In this article I’ll tell you how to customize the Dynamic Sketch Tool for an improved workflow, and how to edit the created outline with the help of the Width Tool found in Illustrator CS5. Paths created with the help of the Dynamic Sketch Tool have not only dynamic properties, but can also be edited with the standard tools of Adobe Illustrator that shows the flexibility of this tool. Learn more at the jump! |
|
|
If you already have some experience working in Adobe Illustrator, then you probably already have some settings that are often used in daily work. It may be colors, symbols, sets of brushes, graphic styles and path settings. There is no need to add all these resources to each document; you can simply create a template with all the necessary settings and graphics. In this article we will discuss how to do this and look at some of the interesting properties of the Appearance panel. Let’s reduce your design preparatory process down to the minimum… |
|
|
Natalie Ulrich shares some very interesting tricks
with us. In today’s article we will talk
about the Layers panel. I always knew that this is a powerful tool of
Adobe Illustrator, but I had no idea about some of the functions and
how to work with them. Do you know how to speed up your work with
Adobe Illustrator for displaying objects with effects and blend
objects while they move or zoom? Learn at the jump
|
|
|
Vector designers often faced with a problem when they need to change the colors in their work. The usage of the Recolor Artwork function is not very effective sometimes, and some of the changes can’t be done that way. Today I will tell you how to quickly recolor a difficult vector object using the Appearance panel. You will also be able to change the lighting and texture. Let’s begin! |
|
|
Today we’ll talk about how using InkScribe allows you to work faster, smarter, more accurately — in other words, more efficiently. As it was already discussed in Part 1 of this series, we can easily choose the type of segment to be created; curved (Bezier) or straight. But now I should say that working with straight segments in InkScribe has one unique feature — Ghost Handles. |
|
|
|
Recent Consultations |
 |
|
|
|
|