|
More than once you’ve probably experienced a situation when the Bounding Box was located at "inconvenient” angles and you needed to change it to make a correct transformation of one or multiple objects. It is quite natural if you come up with a question: how to rotate the Bounding Box in Adobe Illustrator? If you were looking for an answer, you probably won’t have found it. Until now… where I recently discovered a new trick which I want to share it with you.
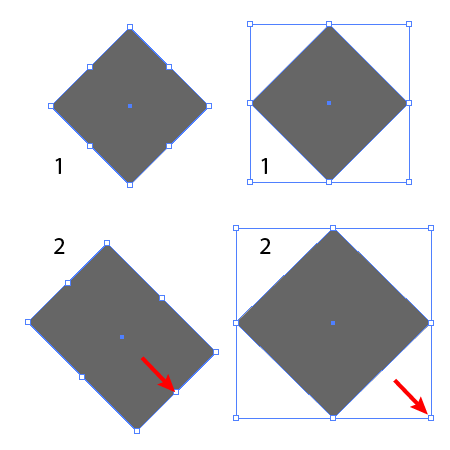
The Bounding Box in Illustrator is used for the transformation of objects using such tools as the Selection Tool (V), Scale Tool (S), Shear Tool and Free Transform Tool (E). The position of the Bounding Box influences how the transformation will occur. The picture below shows the same object, but with different positioning of the Bounding Box, and the results of its transformation with the Selection Tool (V).
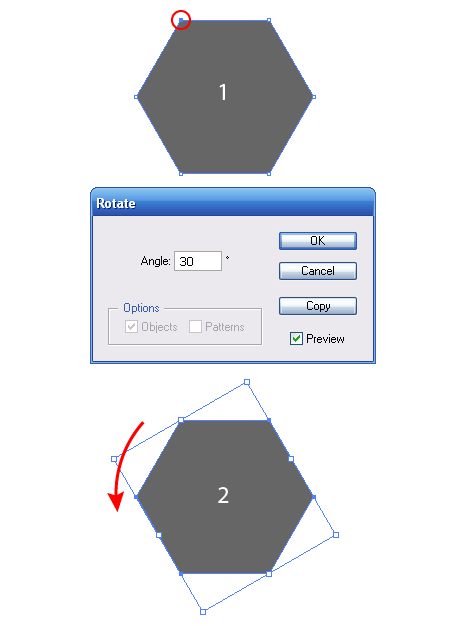
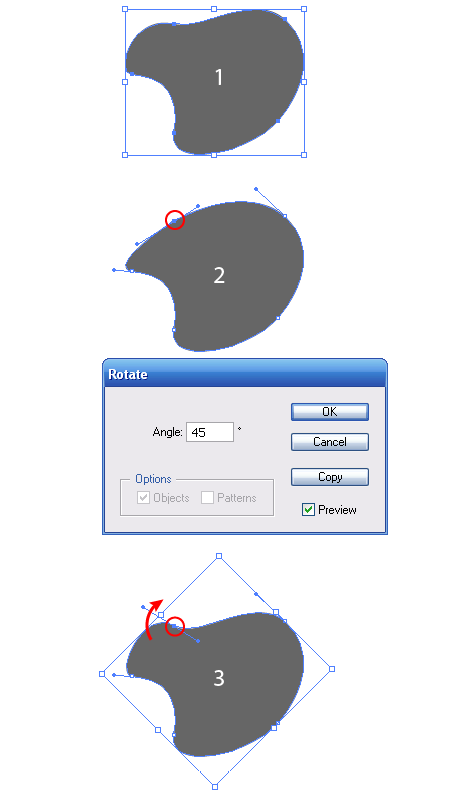
I think you can see how important it is to control the location of the Bounding Box. To rotate the Bounding Box, select one anchor points using the Direct Selection Tool (A) and go to Object > Transform > Rotate… and enter the rotation angle in the dialog window. As a result the Bounding Box will take the necessary position.
This trick works with any kind of points, but if you apply it to a smooth point, after the turn the location of its handles will change and they should be returned to their original position using the Direct Selection Tool (A). The new position of the Bounding Box after editing point’s handles will not change.
You can read full version this vector tutorial on AstuteGraphics.com
Follow us if you want to be the first to know about the latest Adobe Illustrator tutorials and articles. Vectorboom team works for you!
|