|
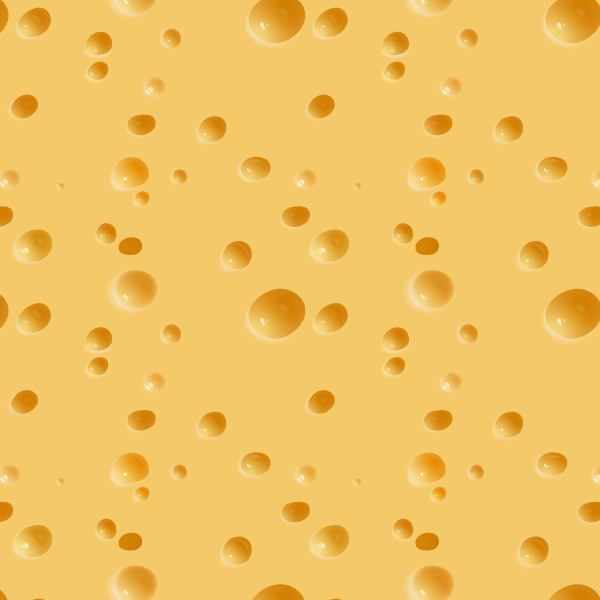
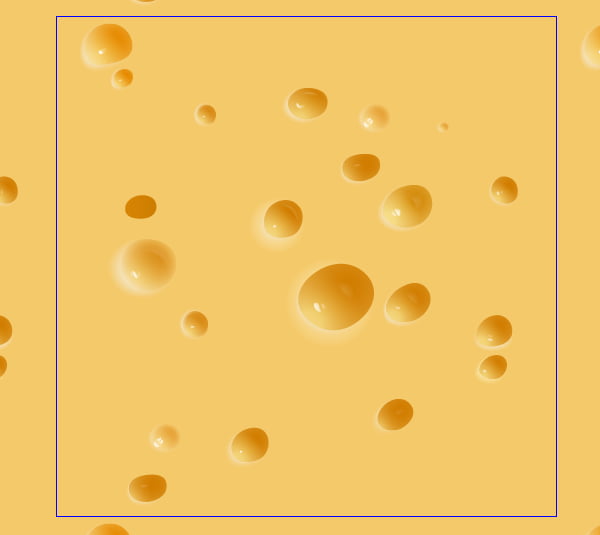
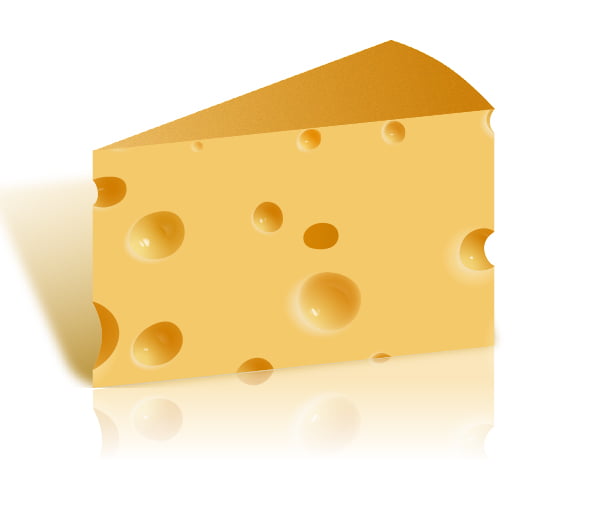
Final Image Preview
In this tutorial we will learn how to create a realistic cheese pattern using reference image. Having studied the picture, determine vector techniques with the help of which we can reproduce an image in Illustrator. To create a seamless pattern, we will be using the Pattern Creation Feature in Adobe Illustrator CS6. So let's get started!
Study the reference image
Step 1
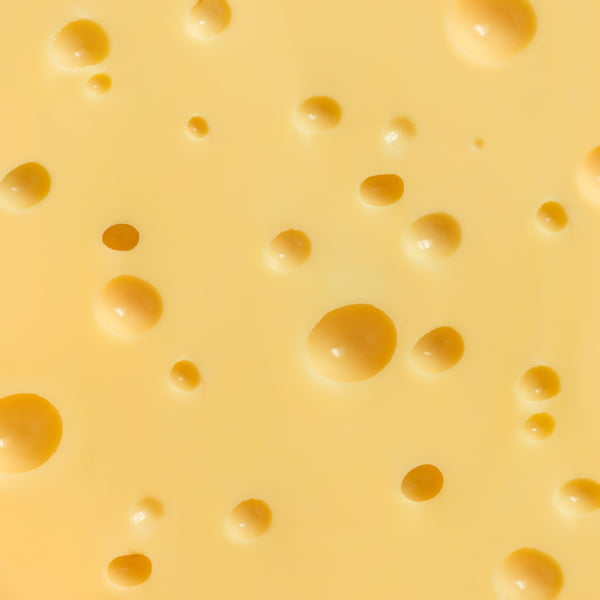
As a reference image, we will be using the Cheese texture background from Shutterstock.
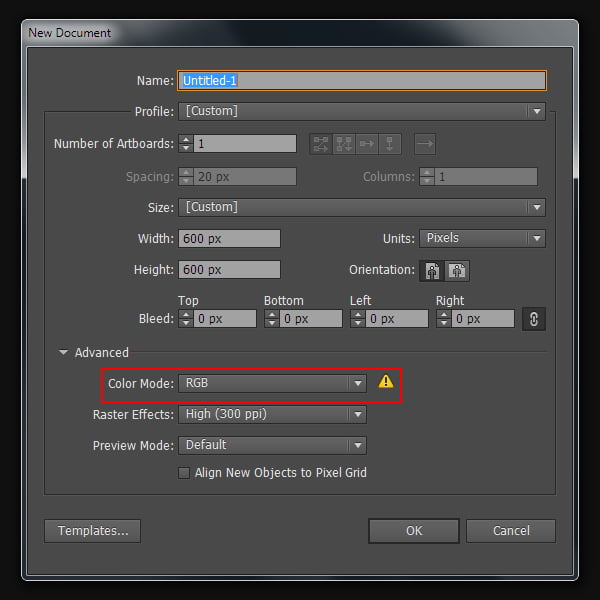
Run Adobe Illustrator and create a new file (File > New).
Please note that we will be working in RGB color mode. Paste cheese picture into the current document (File > Place …).
Step 2
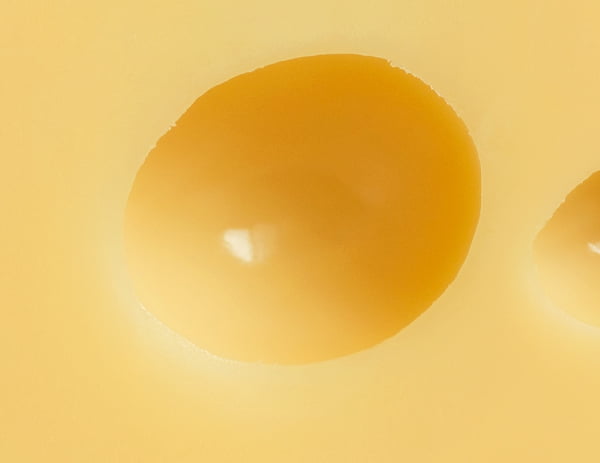
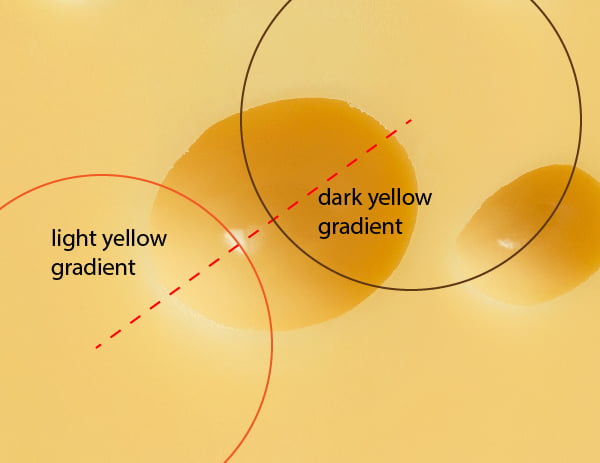
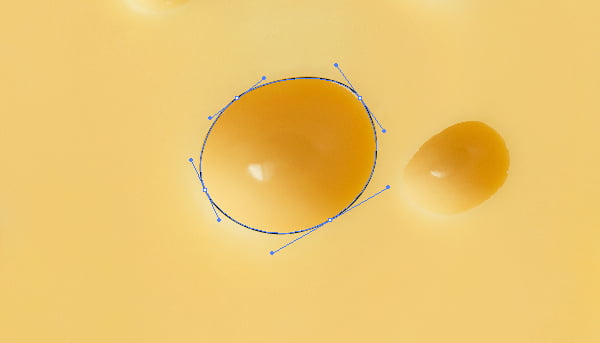
Start studying the reference image. The texture of the cheese is almost smooth yellow background with holes that are similar in structure and shape. We need to develop vector techniques to create one of the deepenings in the cheese, and will create the rest similarly, making tiny changes in their color fills and shapes. Study the play of light on one of the cheese holes.
I can clearly see two radial gradients (dark yellow and light yellow), the centers of which are located on the major axis of the ellipse.
Step 3
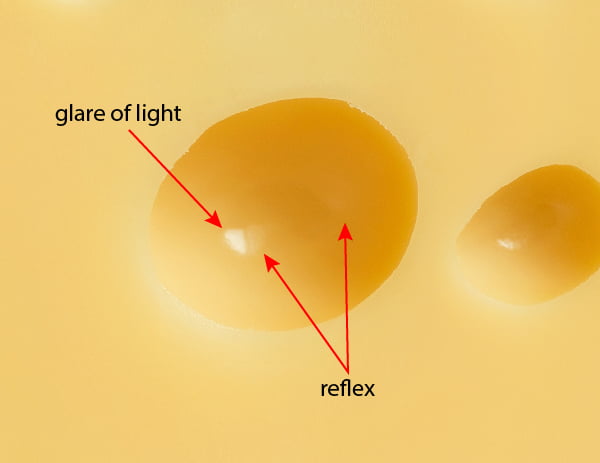
We can also see a glare of light and two reflexes.
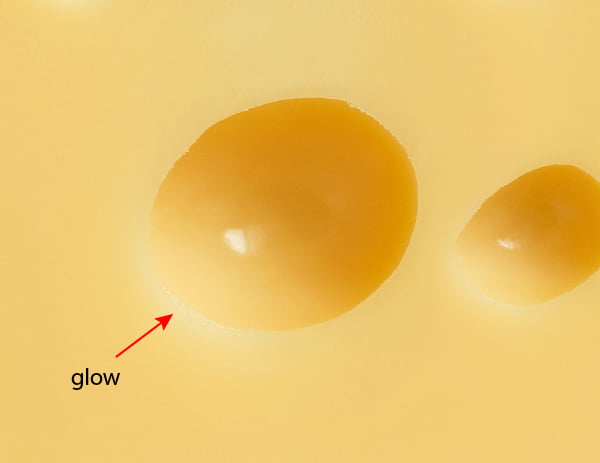
Finally, we can see the glow from the left edge of the cheese hole.
Now, when all the objects are identified, proceed to their creation.
Creating the basic elements of deepenings in the cheese.
Step 4
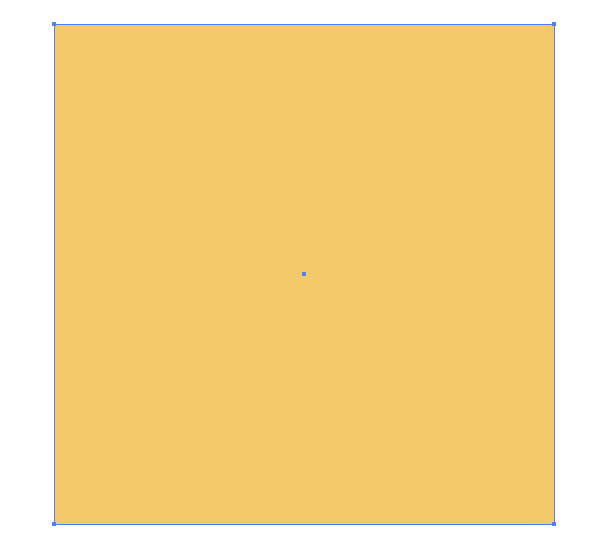
First, create a background. Take the Rectangle Tool (M) and create a square with a yellow fill. In this case, we do not need to mix colors, just pick the color with the help of the Eyedropper Tool (I) from the cheese picture.
We should not use a gradient fill for the background, otherwise we will get visible seams on the edges of the joint tiles of the seamless pattern.
Step 5
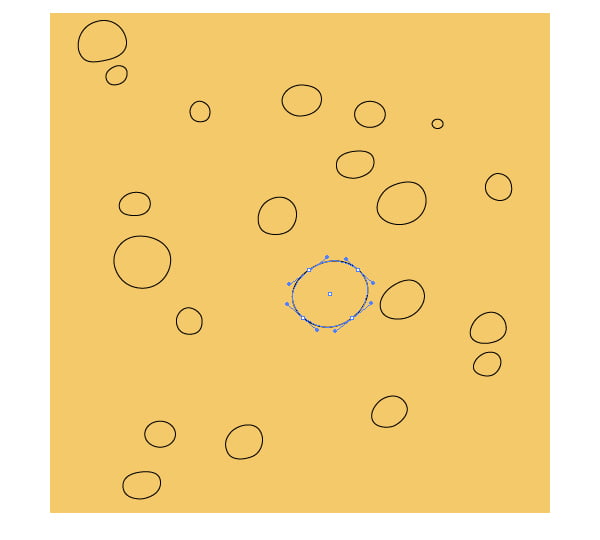
Create the shape of one of the holes in the cheese. For these purposes, you can use the Ellipse Tool (L), and then change its shape with Direct Selection Tool (A). This shape can also be created using the Pen Tool (P).
Create shapes of all the cheese holes, except for those that are on the edges of the image and are not completely visible to us, then move them to the background.
Step 6
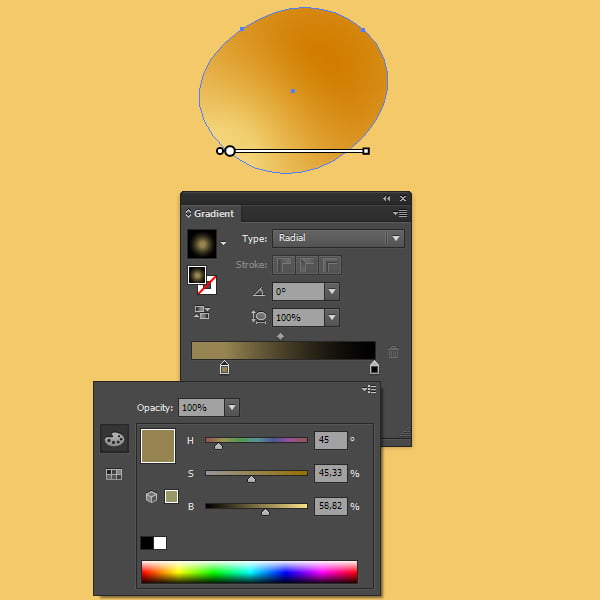
Proceed to coloring of the first hole in the cheese. Turn off its stroke, then fill the shape with a radial gradient that includes two shades of dark yellow color.
You can pick colors using the Eyedropper Tool (I), but it will be better if you believe in what you see and mix colors in the Color panel while watching the reference image. To mix the colors, I usually use HSB color mode. This intuitive mode allows you to get the desired color in much easier way.
Step 7
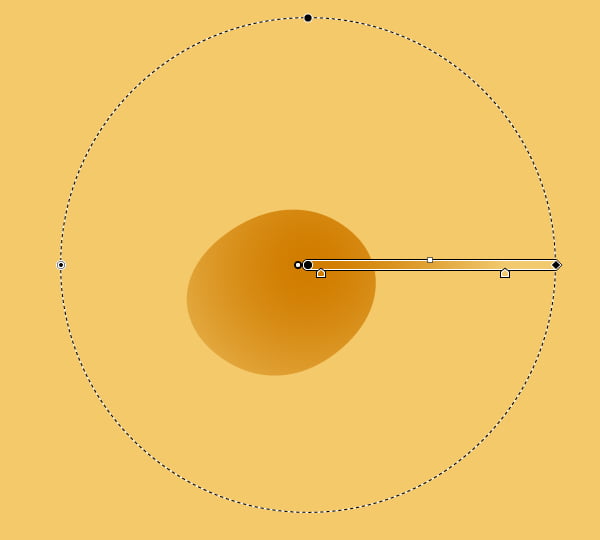
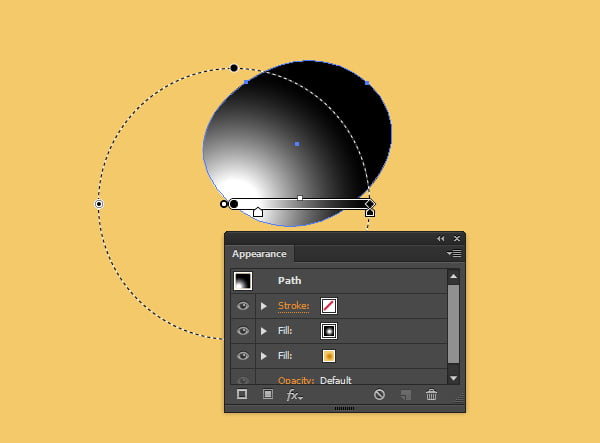
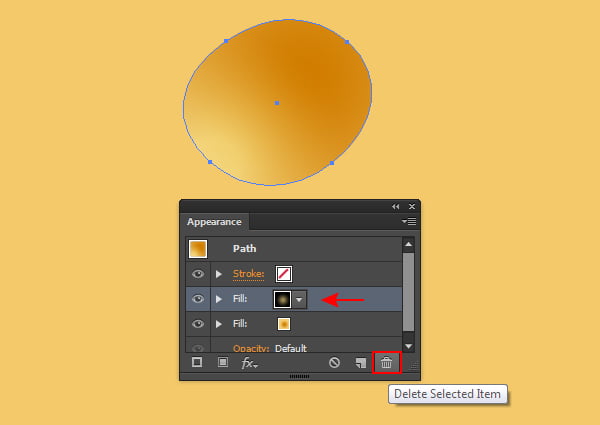
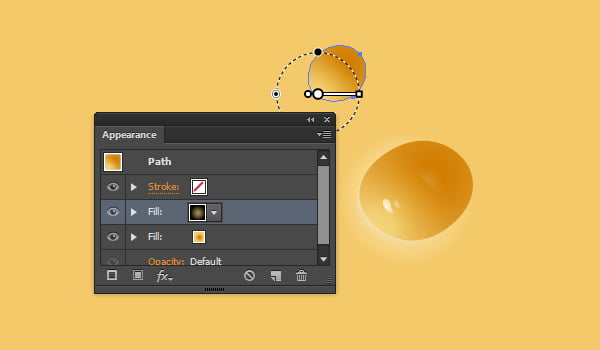
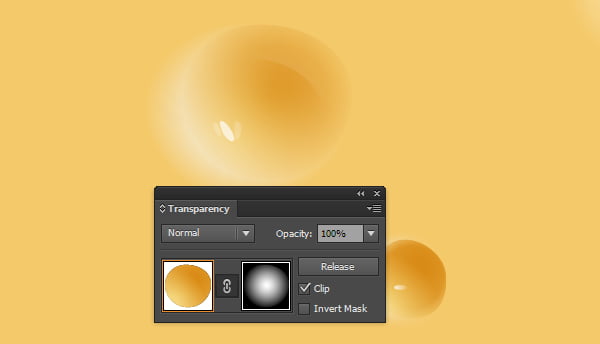
Open the Appearance panel (Window > Appearance panel), then add a new fill to our object by clicking on the appropriate button.
Object must be selected at this moment. Apply black and white radial gradient to the new fill, then place its center as shown in the following picture.
I hope you have not forgotten about our research in the beginning of the tutorial.
Step 8
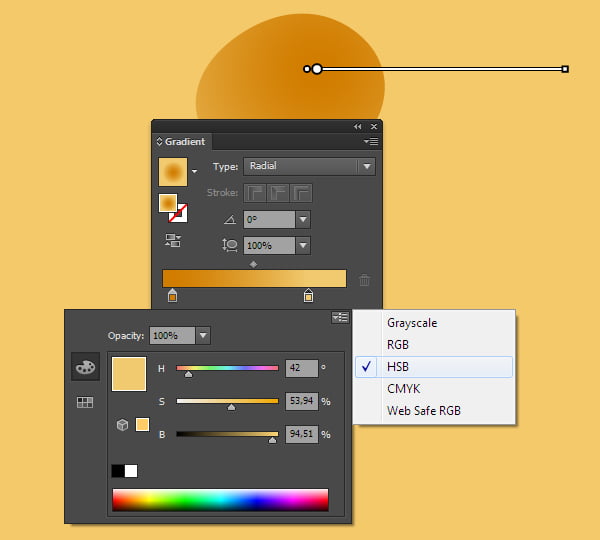
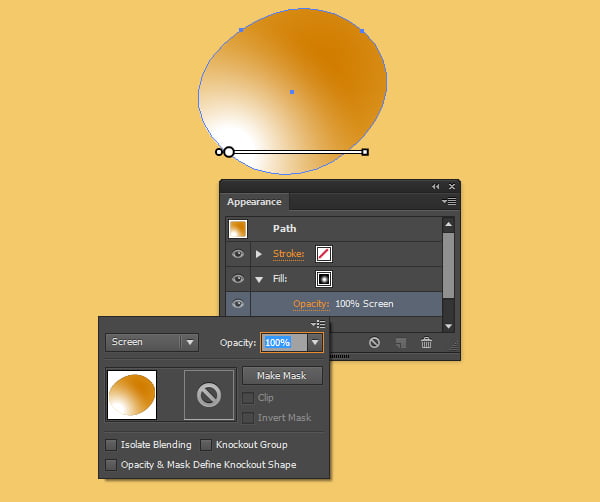
Apply the Screen blending mode to this fill. You can do that in the Transparency panel or directly in the Appearance panel.
Only now are we starting to pick up the color of the central slider of the radial gradient.
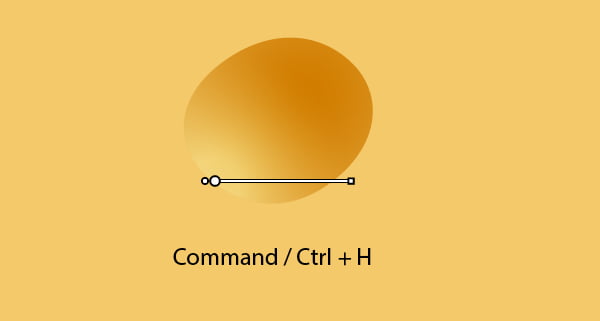
Note that the black color (R = 0, G = 0, B = 0) after applying the Screen blending mode becomes transparent.
To make sure there is nothing to prevent us from focusing on the colors selection, hide the edges (Command / Ctrl + H).
Step 9
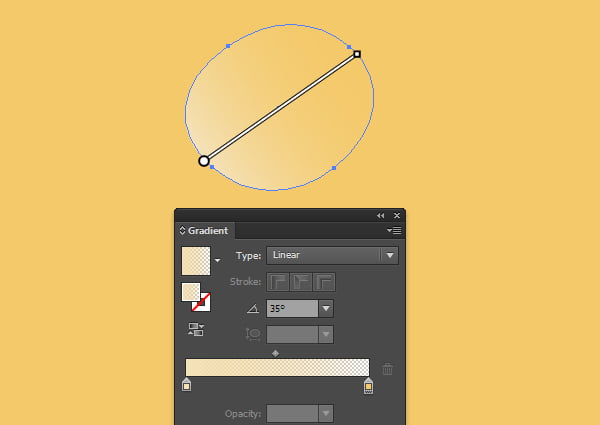
Copy the shape and paste it back (Command / Ctrl + C, Command / Ctrl + B). Remove the upper fill in the Appearance panel of the new object.
Fill this object with a linear gradient which sliders are light yellow. Set 0% opacity for the right slider (visibility of the upper object is off for clarity purposes).
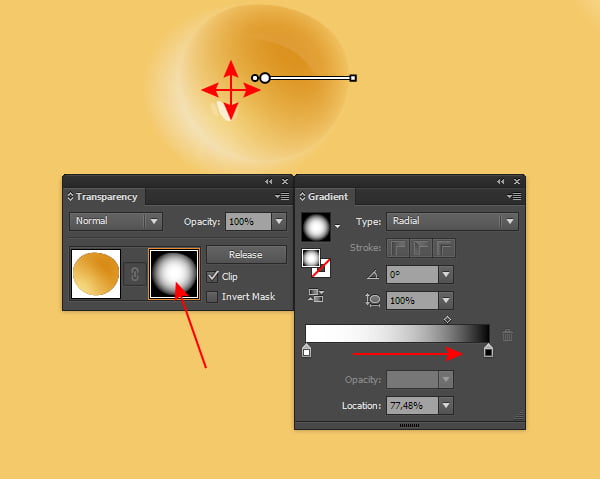
Step 10
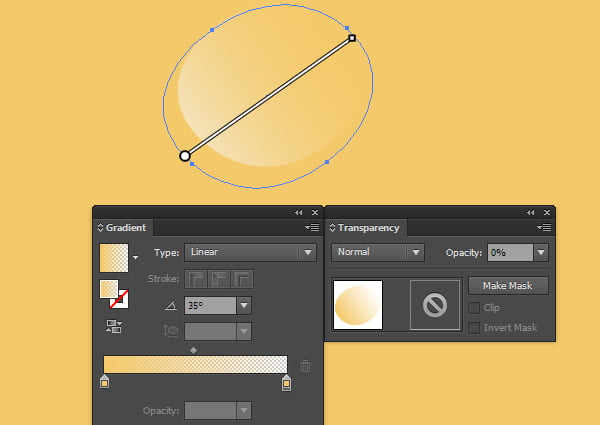
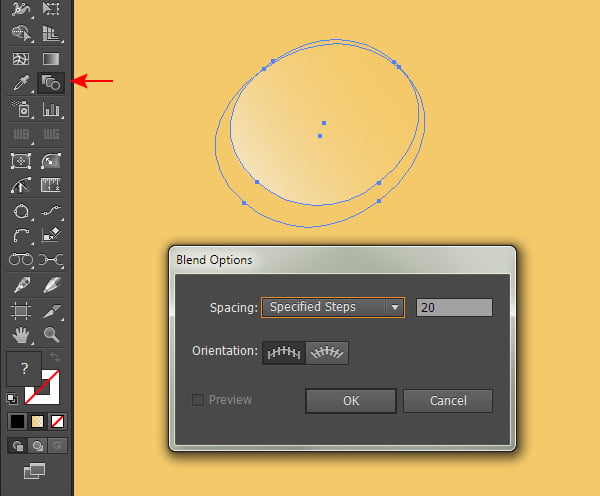
Copy the object and paste it back. Now increase tits size with the Selection Tool (V), pulling the lower left corner of bounding box. Set 0% opacity for this object in the Transparency panel.
Double click on the Blend Tool icon on the Tool bar and set the number of the specified steps in the dialog box, click OK.
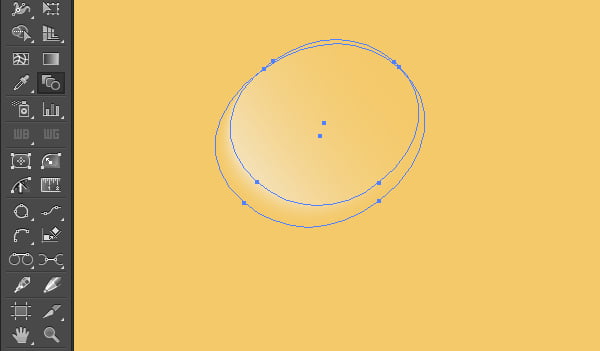
Select both of the translucent shapes, take the Blend Tool (W) and click on the lower, then on upper shape.
Glow on the edge of the deepening is ready (now the visibility of the upper object can be turned on).
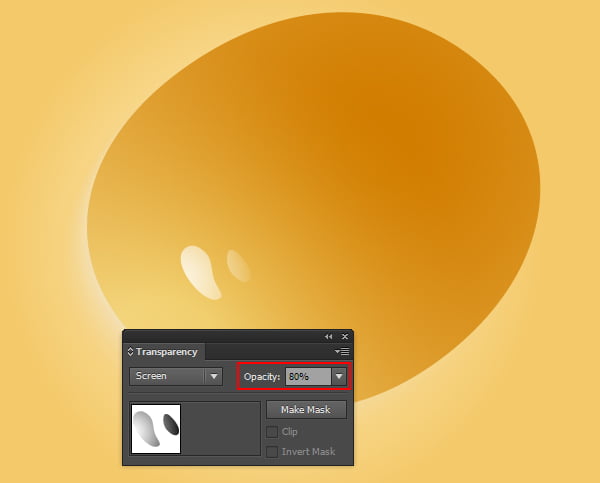
Step 11
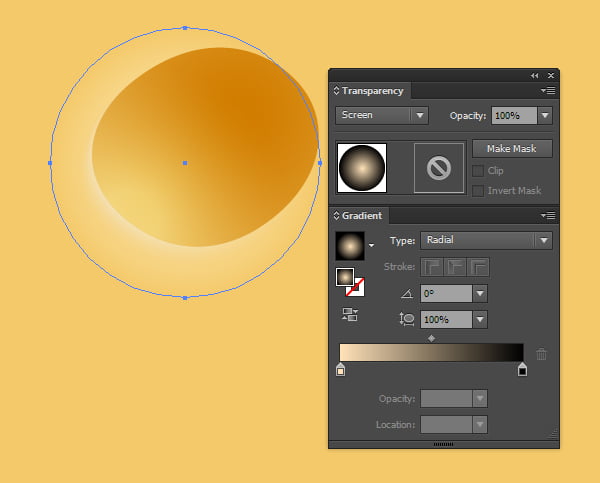
Now create a softer glow next to the edges. Draw the circle and place it below all the objects of the hole. Fill the circle with black and white radial gradient, then apply the Screen blending mode in the Transparency panel. Now change the color of the central slider of the gradient in order to achieve the desired effect (light pink color worked in my case).
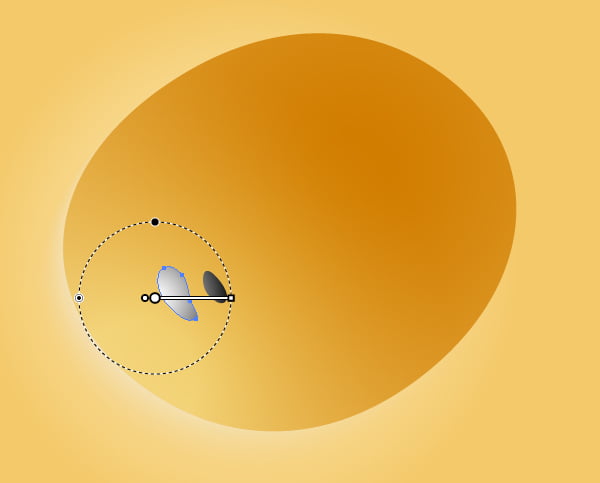
Step 12
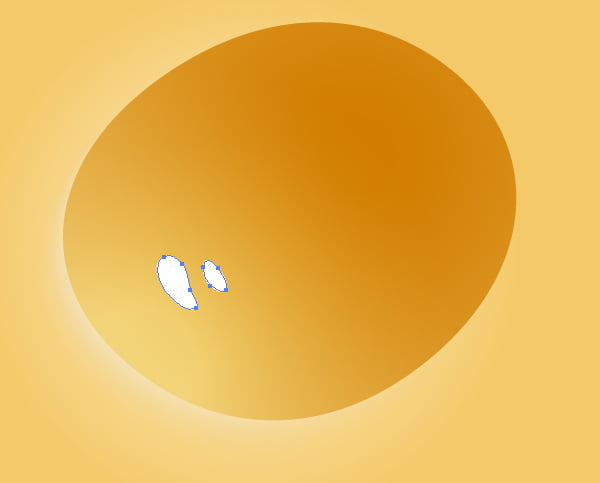
With the help of the Pen Tool (P) create a shape of the glare and its reflection.
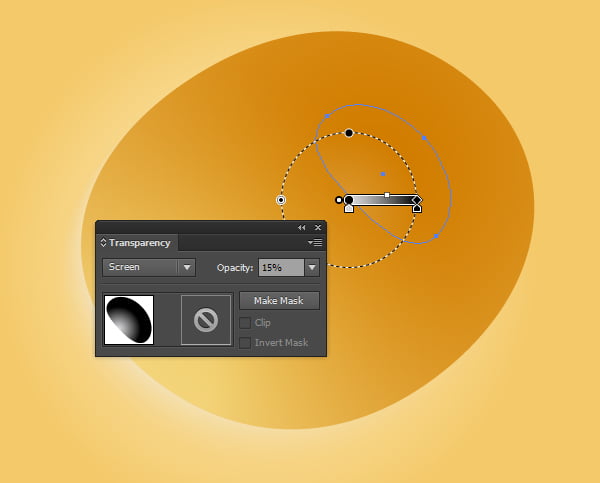
Group up two objects (Command / Ctrl + G), then fill the group with black-and-white radial gradient.
Apply the Screen blending mode to this group. To control the intensity of the glare, you can change the opacity value in the Transparency panel.
Using this technique, create another reflection of the glare.
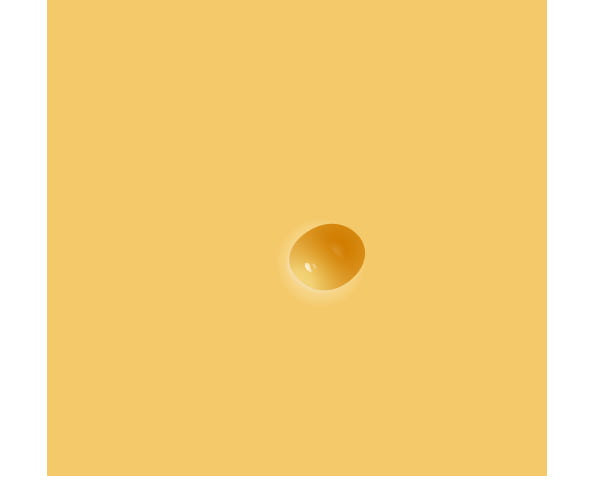
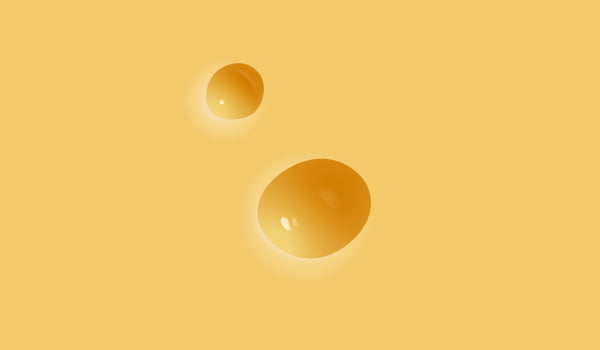
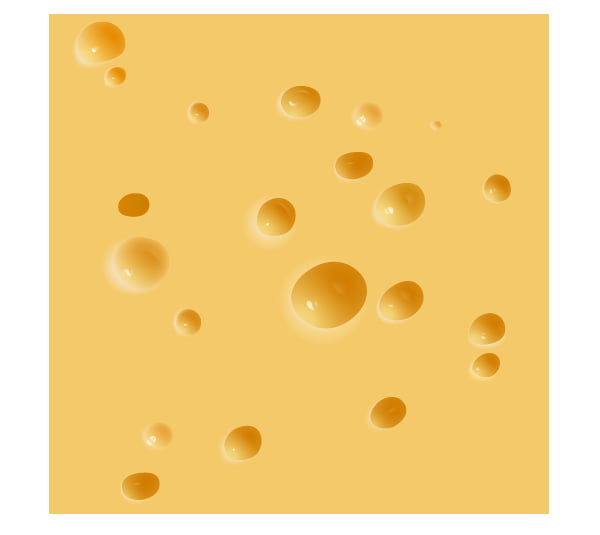
One hole in the cheese is ready, and, in my opinion, it looks quite realistic.
Create all the holes in the cheese and another technique.
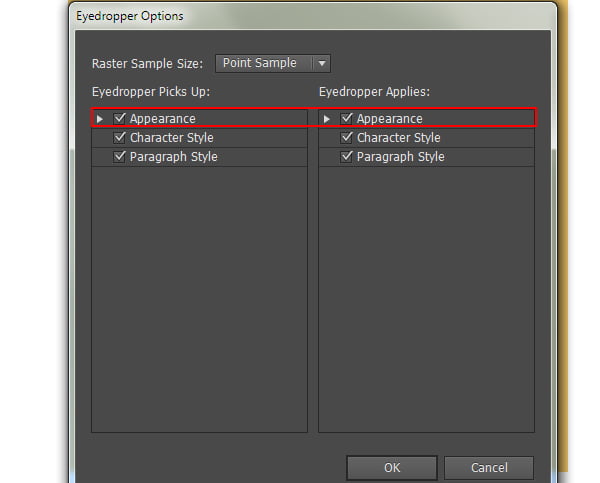
Step 13
When filling the rest of the holes, you can copy the fill of the first hole with the Eyedropper Tool (I). But to do this, the tool has to be adjusted appropriately. Double click on the icon of the Eyedropper Tool (I) on the Tool bar, then tick Appearance in both columns of the dialog box.
Now the complex fill consisting of two radial gradients will be copied on any object.
Lighting of the holes is a little bit different. You can see that by looking at the reference image. You can always adjust the color and position of the gradient, open the Appearance panel and select the desired fill.
The rest of the elements will have to be created from the beginning. In order to accelerate this process, save all the colors and gradients in the Swatches panel.
Step 14
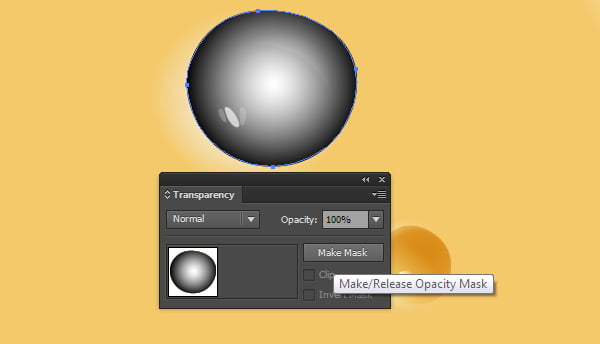
The edges of some of the holes in the cheese look blurred. Let's reproduce this effect. Copy the shape of the deepening and paste it in front (Command / Ctrl + C, Command / Ctrl + F). Remove one of the fills in the Appearance panel the same as we did in step 9. Apply the black and white radial gradient fill to the object. Select both of the deepening shapes (color and black and white), then click on the Make Mask button in the Transparency panel.
If you are using earlier Adobe Illustrator versions, choose Make Opacity Mask in the fly-out menu of the Transparency panel. In the areas where the mask is black, the lower object became transparent.
To control mask gradient, click on the Opacity Mask box in the Transparency panel. Now you can achieve the desired effect by controlling the position of the sliders and the center of the radial gradient .
Using the above mentioned, create the rest of the holes in the cheese.
Creating a seamless pattern
Step 15
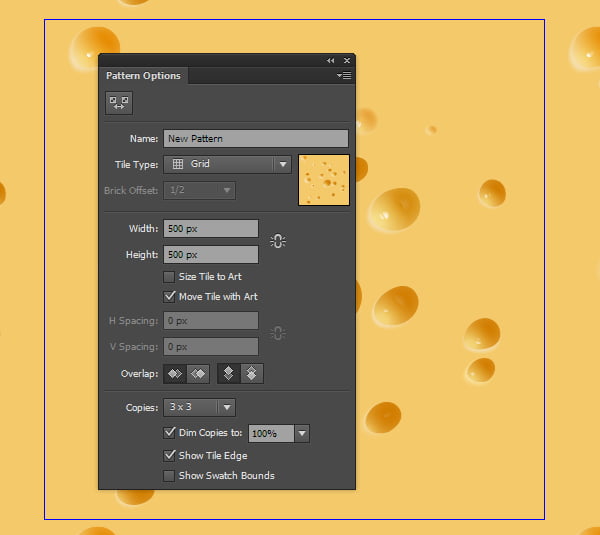
In the process of work, you can lock some of the objects. Locking the objects is a normal part of my workflow. Before the following actions it is necessary to unlock all of the objects (Object > Unlock All). Select all the created objects, then go to Object > Pattern > Make. We proceeded to mode of the creation and editing of patterns.
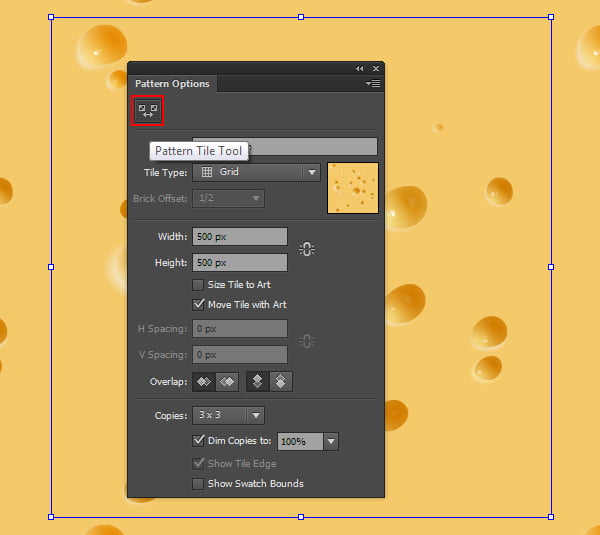
Step 16
Pattern tile has empty spaces, which is not good.
We are able to change the size of the tiles. To do this, take the Pattern Tile Tool in the Pattern Options panel.
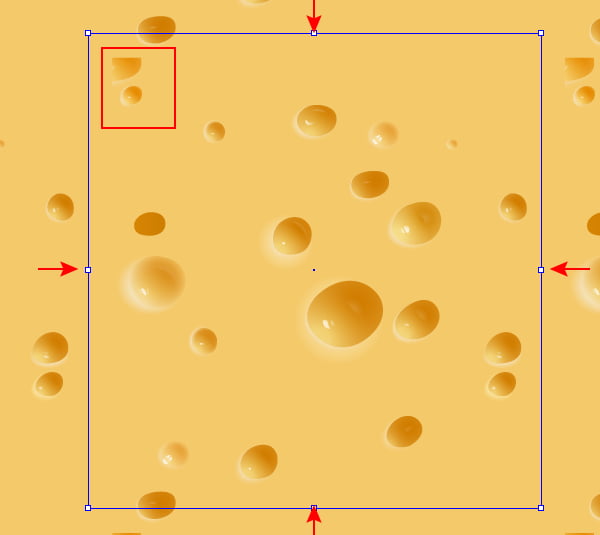
Now reduce the size of the tiles, by moving the markers of the bounding box.
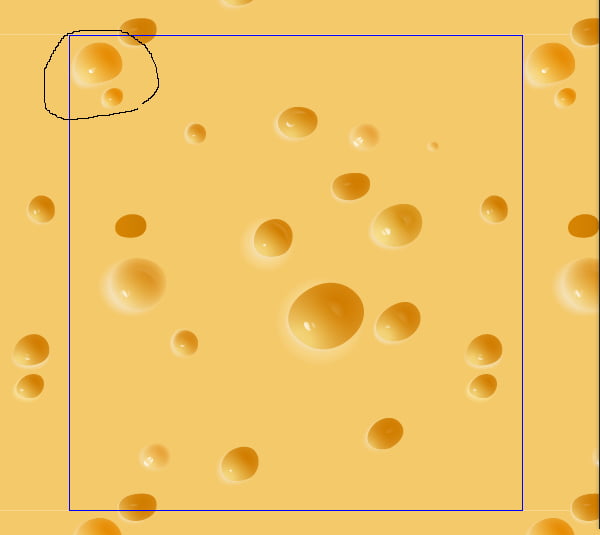
As you can see, the elements of the pattern in the upper left corner are partially hidden. Let's eliminate this defect.
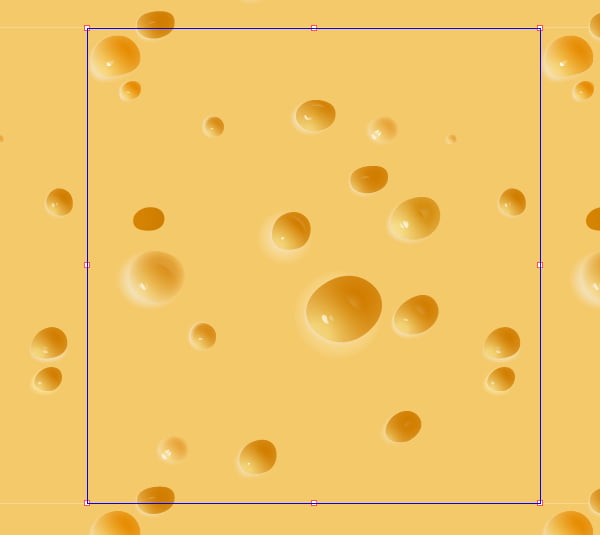
Step 17
This happened due to the fact that the lower rectangle, which plays the role of the background has a size larger than the pattern tile. Let's reduce it with the help of the Selection Tool (V) so that it exactly matches the shape of the tile.
As you can see, the defect disappeared.
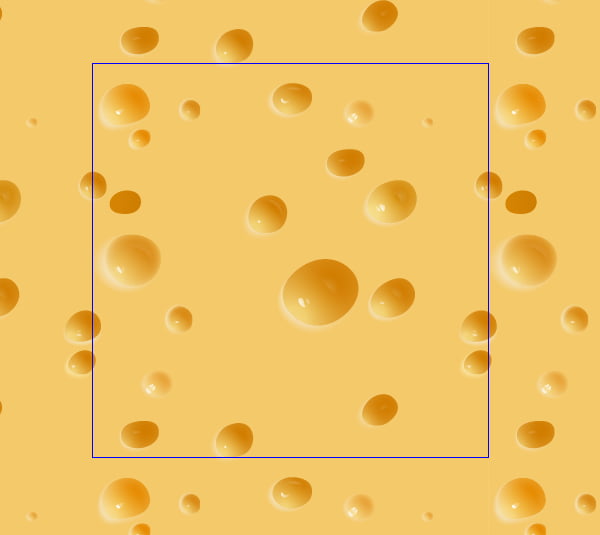
Step 18
For best results, you can mix the objects of the pattern. To select them, you can also use the Lasso Tool (Q). In this case, the lower rectangle should be locked in the Layers panel, in order not to select it along with the necessary elements.
To move the selected objects use the Selection Tool (V).
After these manipulations my pattern looks like this.
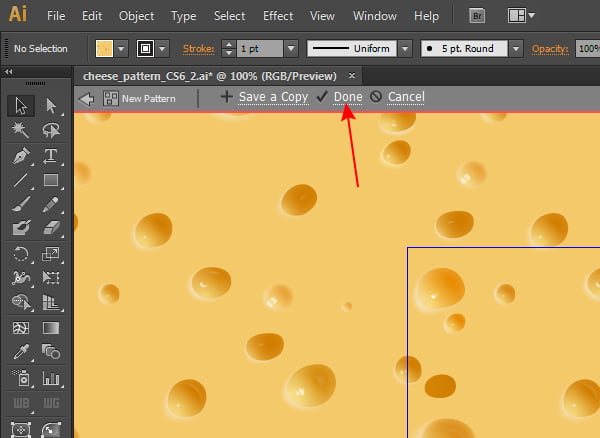
Click Done on the Top bar.
Seamless pattern is now created; we can now apply it to objects of different shapes and use it as a design element.
Conclusion
Although in this tutorial we have used Adobe Illustrator CS6 to create a seamless pattern, but you can also achieve this result working in earlier releases. Read about the different ways to create patterns in my article How to Create a Seamless Pattern in Illustrator.
|