|
Dear friends, I present you the last article in the series of the "Effective Methods of Working in Adobe Illustrator” articles. You will learn some tips and hints while working with the paths, with the transformation of objects; you will learn how to find the true center of the figures and learn some other tricks which allow you to do more work in less time.
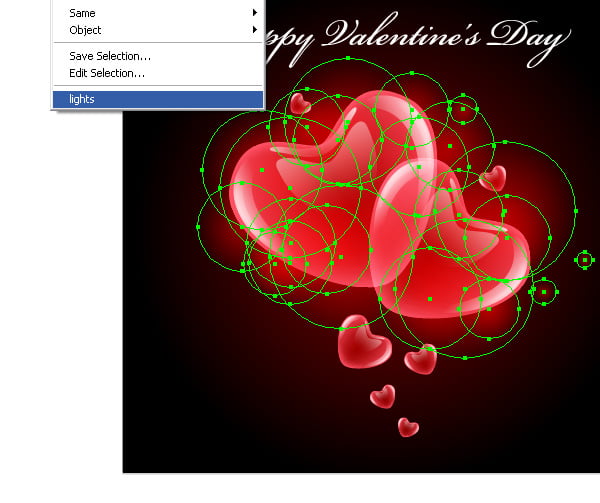
Saving of the selectionWhen you created the multiple selections of objects, you probably wouldn’t want to repeat it all over again. In the Illustrator you can save the selection and get back to it any time you want. You can do it with the Select > Save Selection function. Type in the suitable name for your selection and click on the OK button in the dialog box. And when you need your selection later, you can find it in the bottom part of the Select menu. Even if you deleted some of the objects, the rest of the objects will still be in the selection.
The Change of the Shape of the Path ContourThe shape of the existing path can be changed with the Pencil Tool (N). Just simply select the object and draw the necessary place with the pencil again. You should start drawing as close to the existing path as possible, so the program took it as the editing of the old path but not as the creation of completely new path. This distance depends on the Pencil Tool settings. The double click on the icon of the tool in the toolbar opens the dialog box with its settings; tick the Edit Select and set the Within parameter- it is the distance in which you will edit the contour.
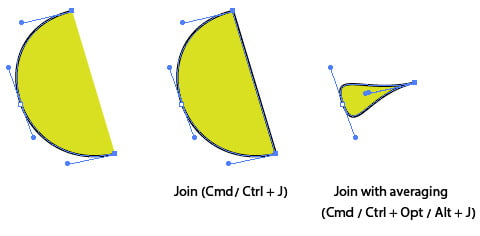
The Join or the Join with AveragingThere is a difference between the Join (Cmd/ Ctrl + J) and the Join with averaging (Cmd / Ctrl + Opt / Alt + J). If you select the end points of the opened path/paths with the Direct Selection Tool (A) and go to the Object > Path > Join or use the shortcuts Cmd / Ctrl + J, they will be connected with the direct segment. And if you want path/paths to be connected in the common point go to the Object > Path > Average first, and then to the Object > Path > Join to close the path.
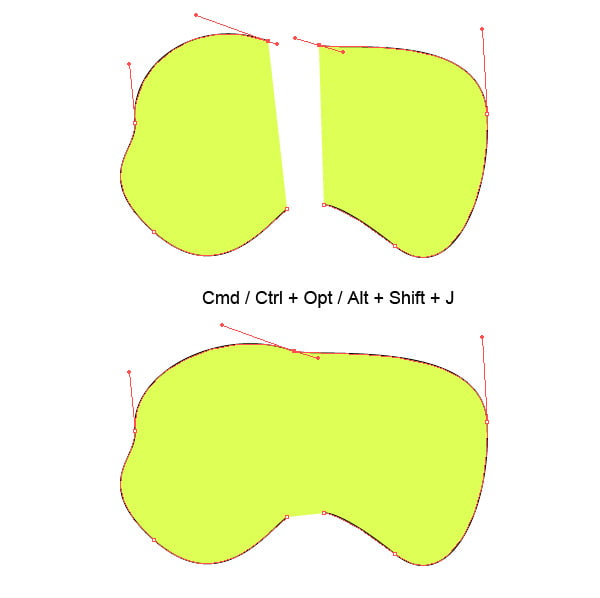
The Simultaneous Averaging and JoiningTo average and join simultaneously, select both ends of the paths and press the Cmd / Ctrl + Opt / Alt + Shift + J shortcuts.
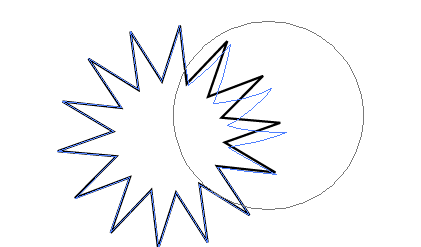
The True CenterIf you use the Attributes panel to show the center of the star, you might notice that the indicated point is located not directly in the center of the figure. You can find the true center of the star or any other object in the other way. Select the object, copy and paste it in front (Cmd / Ctrl + C; Cmd / Ctrl + F). Now go to the Object > Path > Average (Cmd / Ctrl + Opt / Alt + J) and tick the Both in the dialog box. The point that you receive will be the true center of the object.
The Size of the Distortion ToolsTo change the size of the distortion tools, as the Warp, the Twirl and so on, drag the cursor while holding the Opt / Alt key. The dragging outside will increases the size of the brush; dragging inside will decrease it. When you use the Opt / Alt key the size of the brush will change disproportionally. To change the size of the brush proportionally, use the Opt / Alt + Shift shortcuts.
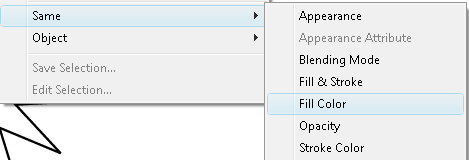
The Selection of the Objects by ColorTo find out if the particular color is been used in the document and if yes, then in what place, reset the selection from all the objects, select the color in the Swatch Palette and go to the Select > Same > Fill Color. Every object that has the same fill color will be selected.
Selection of the GroupUsing the Direct Selection Tool (A) the paths and the points can be selected, even when they are the elements of the group. To select the whole path, click on it while holding the Opt / Alt key. Every other click with Opt/Alt key pressed selects the group, which has the path, then the group, that has the group and so on. Try this tip to make sure how useful it is.
The Selection of the Gradient Mesh NodesWhen you work with the Gradient Mesh, you often need to select the nodes to change their color or place. While using the Mesh Tool (U), you can add new nodes accidently. Instead of doing so, press and hold the Cmd/Ctrl to activate temporarily the Direct Selection Tool (A). To select some nodes hold down the Cmd / Ctrl + Shift shortcuts.
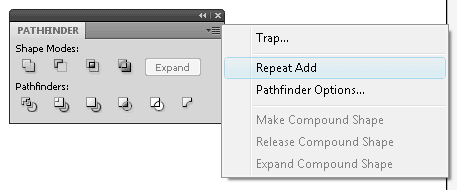
The Repetition of the Last Pathfinder Panel ActionTo repeat the last action of the Pathfinder panel, open the panel menu and select the Repeat command there or press the Cmd / Ctrl + 4 shortcuts.
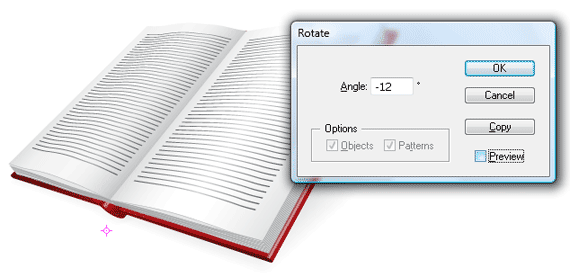
The Transformation of the Specified ValueThe transformation with the Scale Tool, the Rotate Tool and the Shear Tool can be performed either manually, while you drag the cursor, or on the basis of the given values. To install the transformation parameters, make a double click on the icon of the tool in the toolbar and put the necessary values in the dialog box.
The rotate point will be placed in the center of the object by default. To point out the location of the rotate point and open the dialog box of the tool, click on the necessary place while holding the Opt/Alt key.
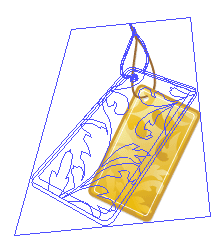
The Free TransformationThe transformation with the Free Transform has a couple of types, which can be turned on when you use the modifier key after clicking on the hollow squares. First, click on the hollow square, then click on the Cmd / Ctrl key and while holding both buttons make a movement. To make a perspective distortion use the Cmd / Ctrl + Opt / Alt + Shift shortcuts; to shear- use the Cmd / Ctrl + Opt / Alt shortcuts; for scaling use the Shift button.
Two Ways of TransformationThere are two ways to transform a couple of objects. First is to select the objects and transform them with such commands, as the Scale, the Rotate or the Shear. Those actions transform them as one object. The second way is to go to the Object > Transform > Transform each…. In this way the objects can be transformed separately and you can use the advantage of the preview.
Effective Methods of Working in Adobe Illustrator (Part 1)
Effective Methods of Working in Adobe Illustrator (Part 2)
Effective Methods of Working in Adobe Illustrator (Part 3)
Effective Methods of Working in Adobe Illustrator (Part 4)
Effective Methods of Working in Adobe Illustrator (Part 5)
Effective Methods of Working in Adobe Illustrator (Part 6)
Effective Methods of Working in Adobe Illustrator (Part 7)
Natalia is a successful illustrator and photographer who works with micro stock sites. If you want to become financially independent and get a good source of passive income, register on micro stocks at the following links and start making money right now.
Shutterstock.com
Dreamstime.com
Fotolia.com
123RF.com
DepositPhotos.com
Lori.ru
Istockphoto.com
Follow us if you want to be the first to know about the latest Adobe Illustrator tutorials and articles. Vectorboom team works for you!
|