|
Final Image Preview
In this illustrator tutorial we will learn how to create calendar icon by using simple geometric forms, gradient fills, Opacity mask, and blending modes. So let’s get started!
Step 1
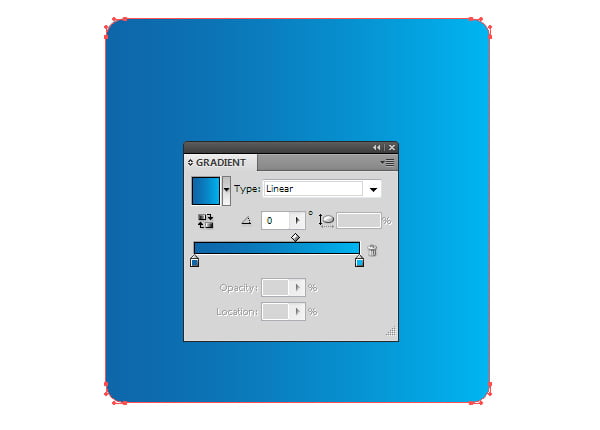
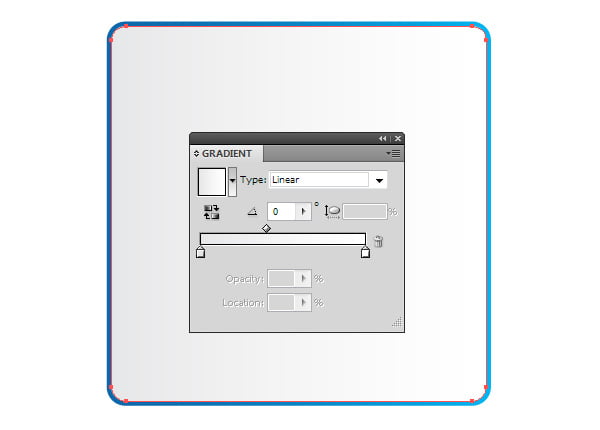
Take the Rounded Rectangle Tool and create a rectangle. Fill it with linear gradient from light-blue to blue.
The direction of gradient shows us the location of the light source. It is located to the right from the icon. Don’t forget about it when coloring the elements of our icons. As obvious as it may seem, some beginners ignore the light source location, that’s why the icon usually looks unnatural and unprofessional.
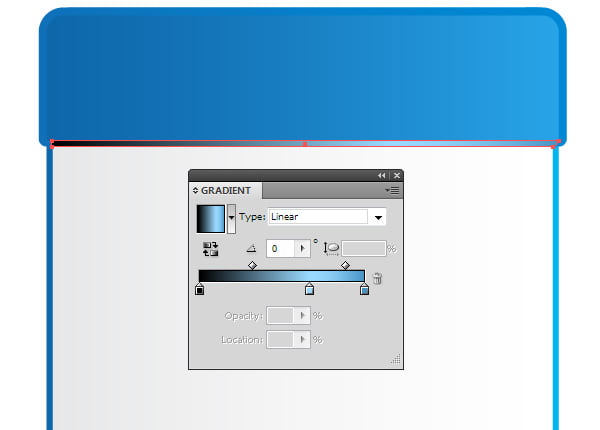
Step 2
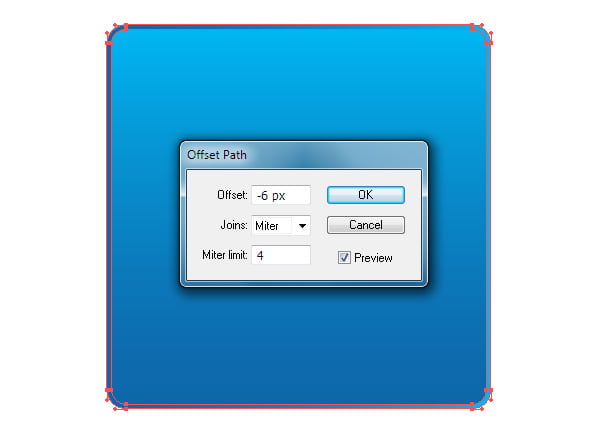
Select the rectangle, and then go to the Object > Path > Offset Path… and set the offset value.
Fill the new object with linear gradient from white to light-grey.
Step 3
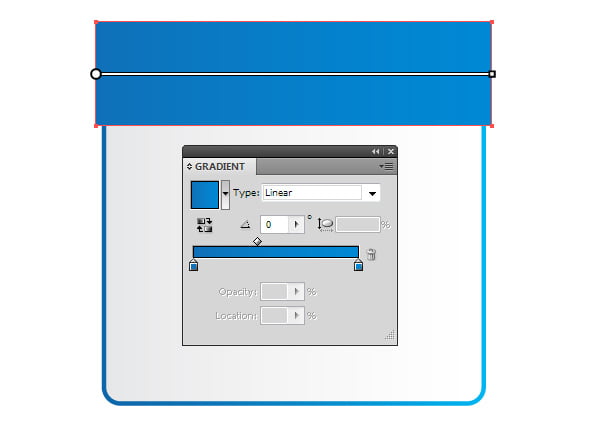
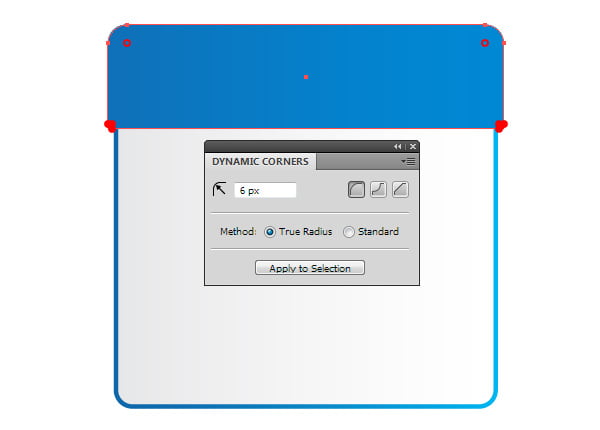
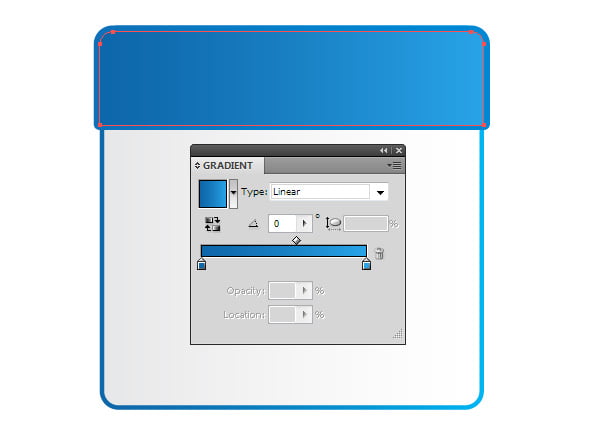
Create a rectangle with the help of the Rectangle Tool (M); fill the rectangle with the linear gradient, which consists of two shades of blue (don’t forget of our light source!)
This rectangle should have different radii of rounding corners. I use the Dynamic Corners Tool (VectorScribe plug-in) for these purposes.
You can apply different radii of rounding corners by using the standard Adobe Illustrator features. You can find out the way it is done by clicking on the following link.
Step 4
Create a rectangle, the size of which is a couple of pixels smaller than our previous rectangle. Round only upper corners of this rectangle.
Create a rectangle which is 2px high, then round its right bottom corner, and fill it with linear gradient consisting of two shades of blue and black (R=0; G=0; B=0).
Please note, we create the icon in RGB color mode (File > Document Color Mode > RGB color). Apply to this rectangle the Screen blending mode in the Transparency panel.
I always use this blending mode to create highlights. As you’ve already noticed, black became transparent.
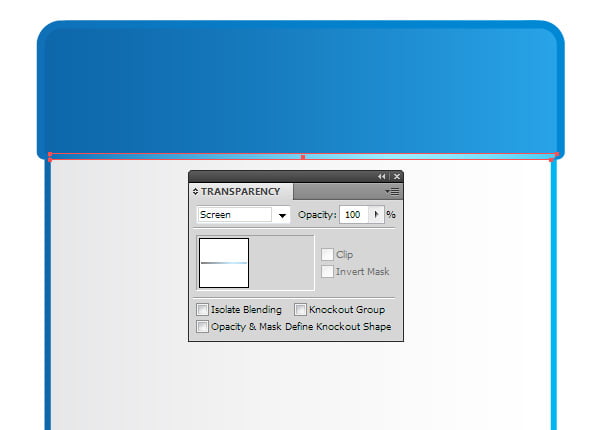
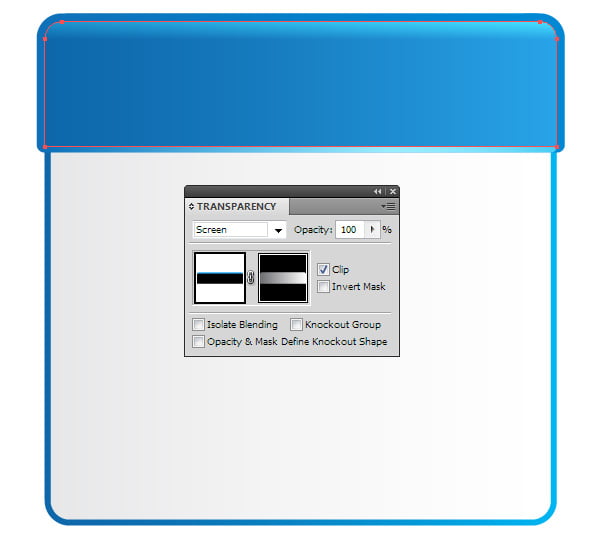
Step 5
Copy the rectangle with rounded upper corners, than paste it to the front (Cmd /Ctrl + C; Cmd / Ctrl + F). Fill it with vertical linear gradient from bright-blue to black. Apply Screen blending mode to this object. So, we created a highlight on the top part of the calendar.
However, the intensity of the highlight should decrease from right to left, in accordance with the light source location. Opacity Mask will help you to achieve this effect.
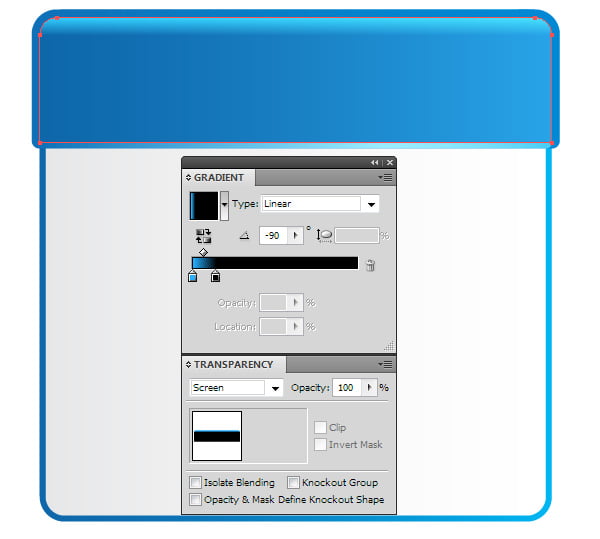
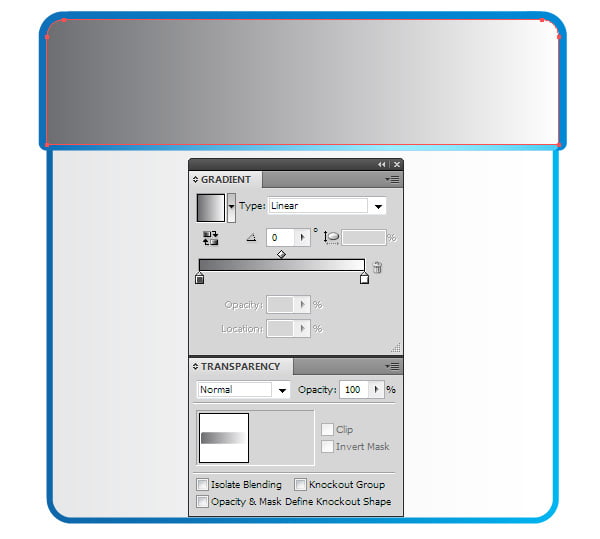
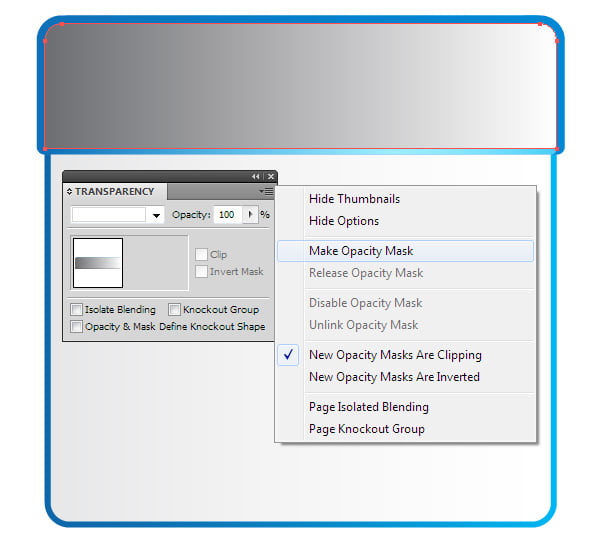
Step 6
Copy the rectangle and paste it to the front. And now fill the new object with horizontal linear gradient from white to grey and set the Normal blending mode in the Transparency panel.
Select two upper objects (it can be conveniently done in the Layers panel), then choose Make Opacity Mask in the fly-out menu of the Transparency panel.
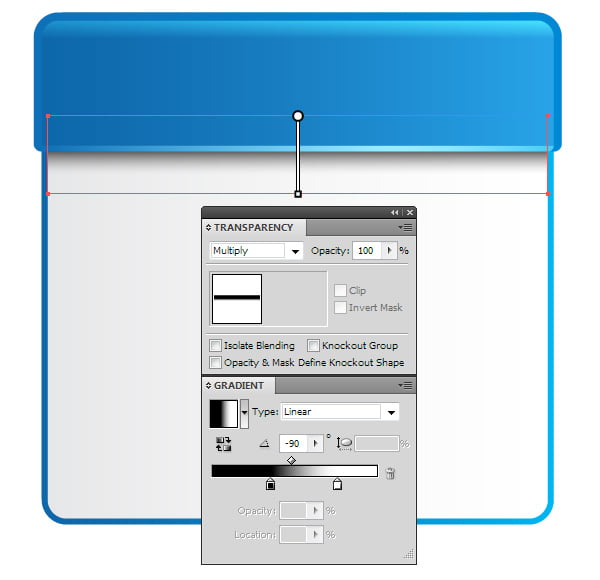
Step 7
Let’s create some shadow from the upper part of the calendar. Draw a new rectangle, which we fill with vertical gradient from black to white. Move this object underneath the elements of upper part of the calendar, then set the Multiply blending mode.
In this case, white becomes transparent.
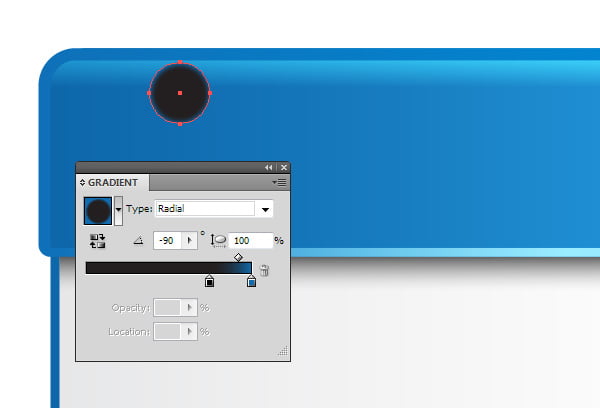
Step 8
Create a circle with the help of the Ellipse Tool (L), and then fill it with radial gradient from black to blue as it is indicated on the figure below.
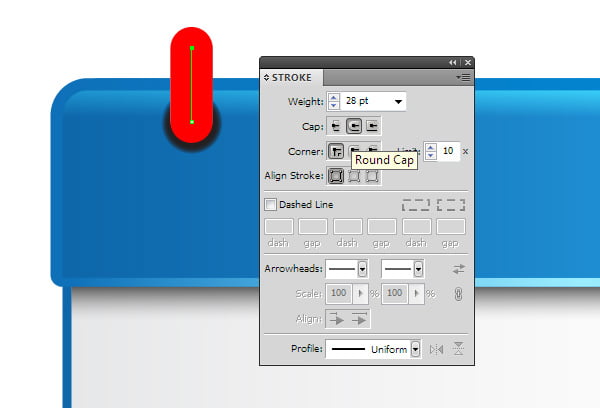
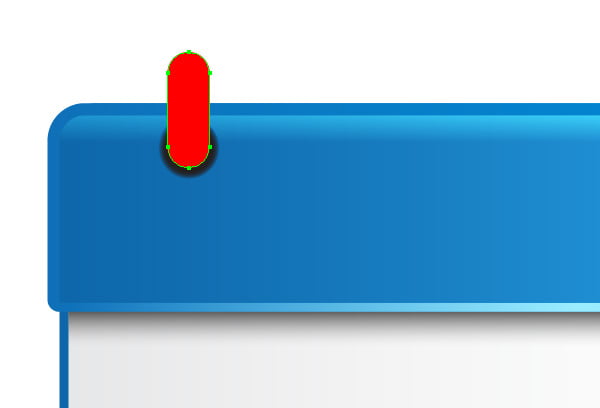
Draw a vertical line with the Pen Tool (P), set the suitable width and tick the Round Cap option in the Stroke panel.
Step 9
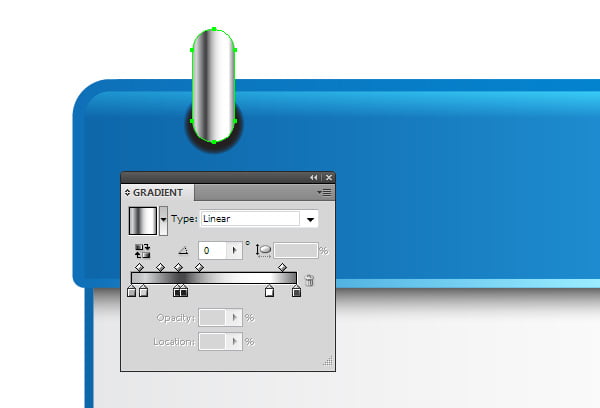
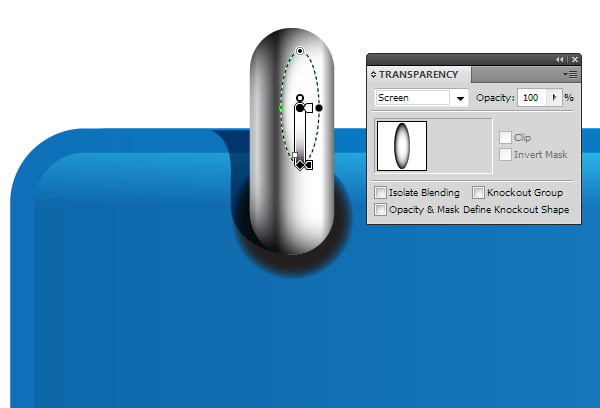
And now let’s go to the Object > Path > Outline Stroke; fill the object with linear gradient consisting of alternating light and dark shadows of grey.
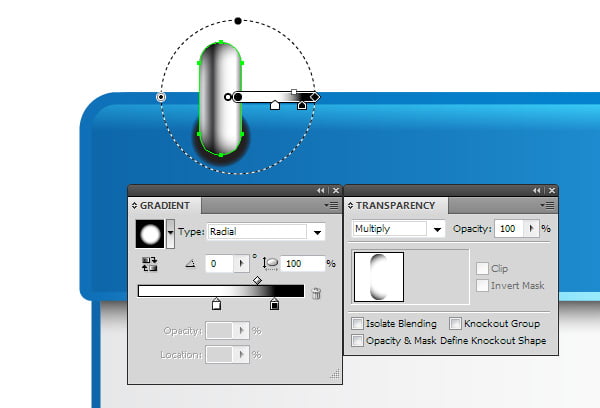
Copy the form and paste it to the front. Fill the new object with radial gradient from white to black, and then set the Multiply blending mode. So, in such a way, we darkened the edges of the metal object.
Step 10
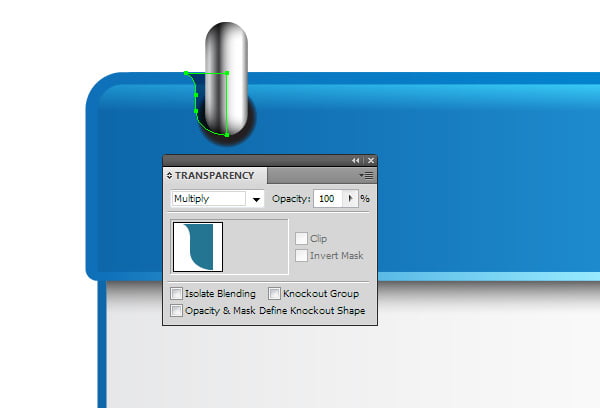
With the help of the Pen Tool (P) let’s draw a shape of a shadow as it is indicated on the figure below. Fill the form with blue and set the Multiply blending mode.
Draw an ellipsis, which we fill with elliptic gradient from white to black, and then set the Screen blending mode. Thereby, we’ve created the highlight on the metallic surface.
Step 11
Group the objects, created in the steps 8-10, and then double the group three times by placing new groups along the upper edge of our calendar.
Step 12
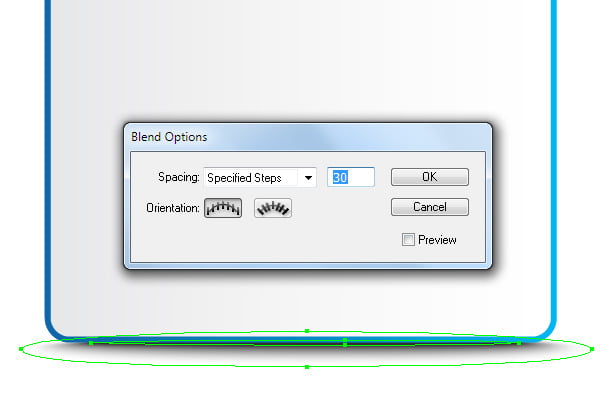
Create two ellipses and place them below all created objects. The upper smaller ellipse is filled with dark-grey; the bigger ellipse is filled with white. Select both ellipses and use Cmd / Ctrl + Option / Alt + B shortcuts to create a blend object. To set the necessary number of the Specified Steps, click twice on the Blend Tool (W) icon in the Tool panel.
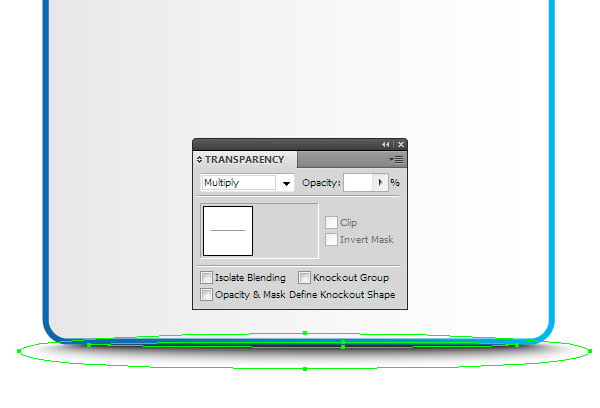
To make our shadow look good on any background, and not only on white, set the Multiply blending mode for the blend object.
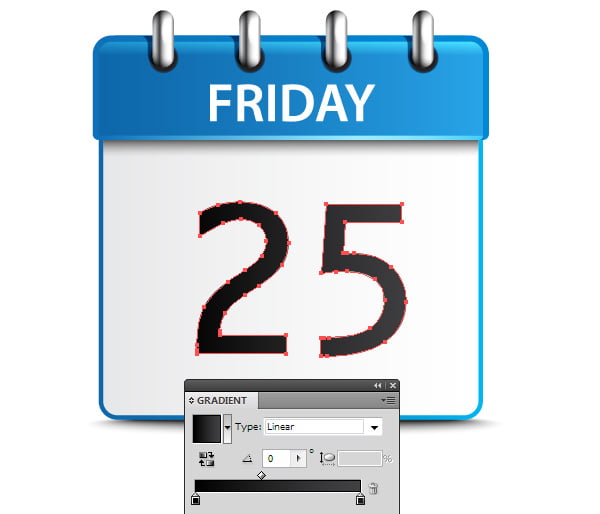
Step 13
With the help of the Type Tool (T) create some inscription on our calendar. Select the numbers, then go to the Type > Create Outlines. Now you can fill the numbers with linear gradient which fits the illumination of our icon.
Now our calendar icon is ready.
| 


 And the design itself is very appealing.