|
Final Image Preview In this Adobe Illustrator tutorial we will create a vector cloud using the Mesh Tormentor. We will also show you new functions of this great vector tool. The artwork, that took you hours before, now can be done by pressing on "magic buttons” in the Mesh Tormentor panel. Do you know how to paint all the nodes of the gradient mesh into necessary colors in the twinkling of an eye? Find out at the jump!
Illustrator Tutorial Details - Program: Adobe Illustrator CS3 -CS6; Mesh Tormentor
- Difficulty: beginner;
- Estimated Completion Time: 10 min;
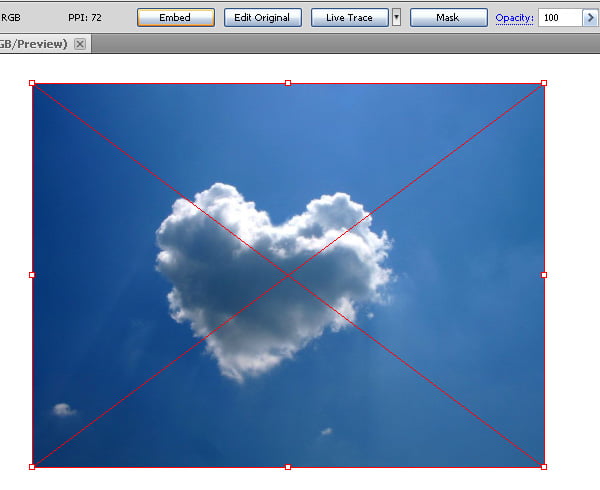
Step 1Paste a picture of a cloud which we will use as the reference image into the current document (File > Place…). Now click on the Embed in the Control panel which will make a picture an object of our document.
Step 2With the Pencil Tool (N) create an object which will repeat the shape of our cloud. We don’t need to repeat the shape in great detail; it is enough to repeat just the general outlines. For your convenience you can reduce the opacity of the created vector object.
The path of the vector cloud should be closed. To do so, hold the Option / Alt keys when approaching the Pencil Tool (N) to the starting point of the path. Double this form, then turn off its vision in the Layers panel. We will get back to it in the step number 9.
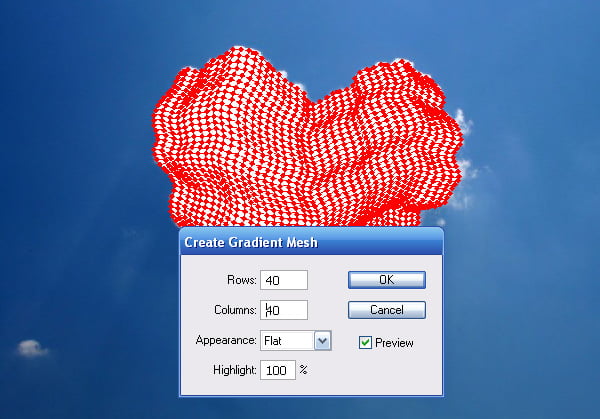
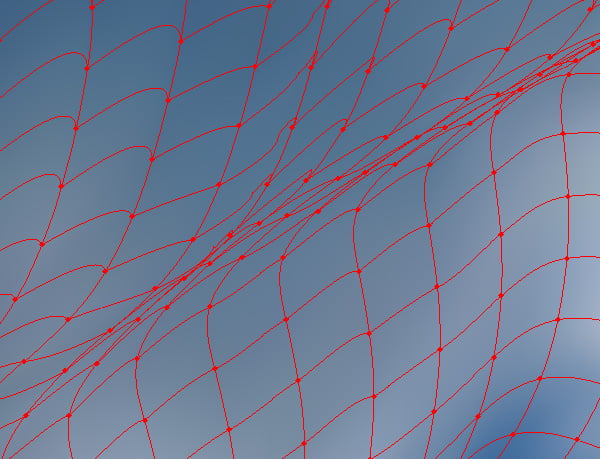
Step 3Return the opacity to the initial value (100%) and then go to the Object > Gradient Mesh… and set the number of columns and rows in the dialog box.
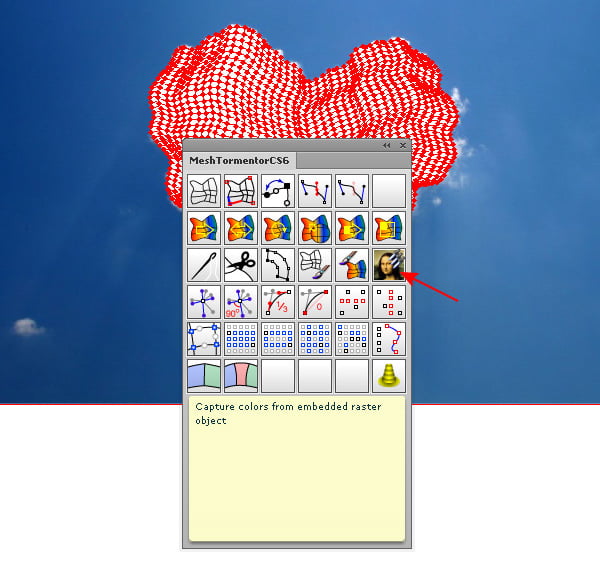
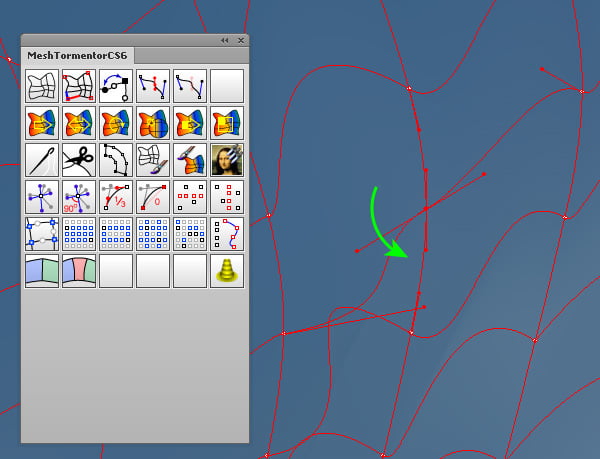
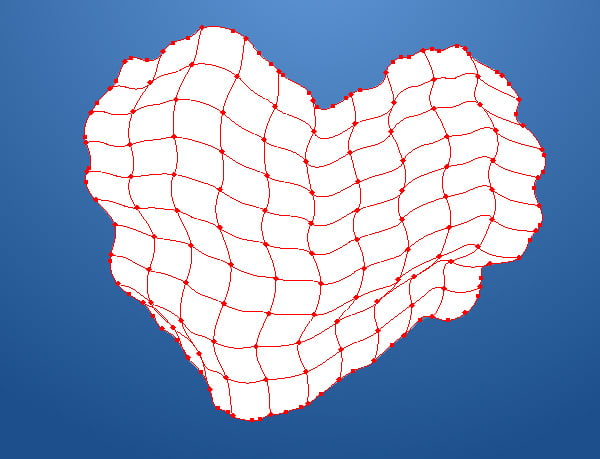
Step 4We’ve got a lot of nodes in Gradient Mesh. I think you’ll spend a couple of hours painting them into necessary colors. Usually, the Direct Selection Tool (A) and the Eyedropper Tool (I) is used for that while continually switching between them. Fortunately for us, digital technologies are constantly developing. And recently there appeared a "magic button” which allows us to paint all the nodes into necessary colors only in one touch. As you’ve probably guessed, the Mesh Tormentor has this button. So, select the embedded image and the gradient mesh, and then click on the Capture Colors in the Mesh Tormentor panel. All the nodes now have the colors of the pixels that lay underneath them.
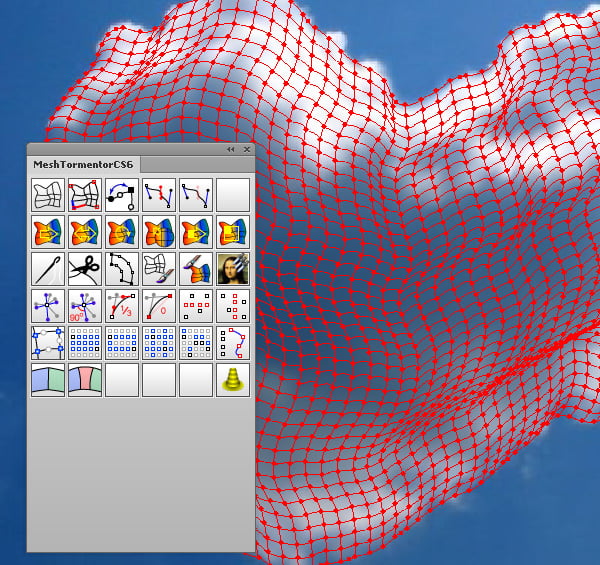
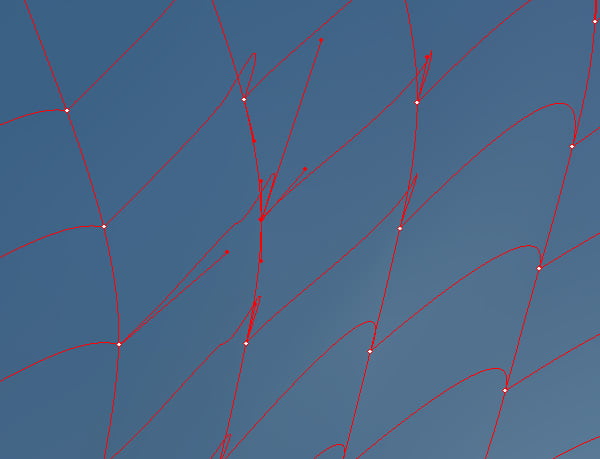
Step 5As our gradient mesh was made automatically, it is most likely we get unpleasant artifacts in the application sites of mesh lines on each other. You can delete some of the mesh’s lines using the Mesh Tool (U) and while holding the Option / Alt clicking on them. No matter what way you edited the mesh, you can always repeat the dyeing of the nodes. To do so, select the gradient mesh and the embedded image; then again click on the Capture Colors in the Mesh Tormentor panel.
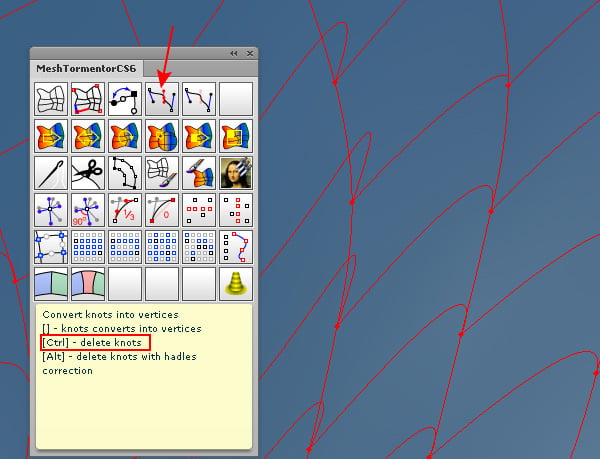
Step 6The Mesh Tormentor allows us automatically to edit the gradient mesh making it more manageable. Sometimes, the lines of the mesh look like springs and absolutely cannot be edited as opposed to the paths of the regular vector objects. The thing is that the mesh consists of the invisible nodes which are called knots. We can delete them with the help of the Mesh Tormentor. Select the whole gradient mesh and click on the Convert knots while holding the Command / Ctrl keys.
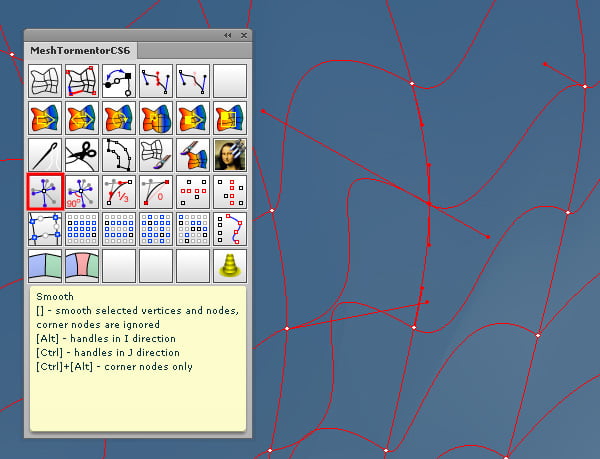
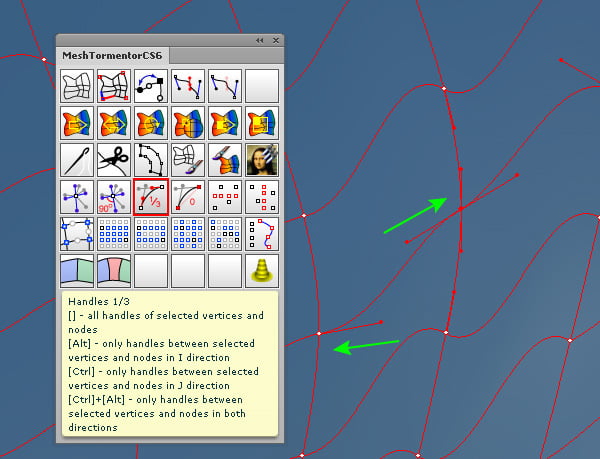
Step 7The handles of the mesh nodes can be connected which makes the process of edition even more complicated. After clicking on the Smooth in the Mesh Tormentor panel the nodes become smooth and its handles are not connected to each other anymore.
Step 8The artifacts can also appear because the handles of the nodes can be too long and cross the handles of other nodes or the lines of gradient mesh. You can shorten them all at once and its length will be 1/3 of the distance between nodes which guarantees that they won’t be crossed. The Handles 1/3 key is specially made for that. Surely, you can work simultaneously on all or on the part of the nodes if you select them. After all the described above changes the mesh is easy to control as well as the path of usual vector objects.
Step 9We don’t need the picture of a cloud anymore and you can delete it if you are satisfied with your result. Create a rectangle as a background; the rectangle should be filled with radiant gradient consisting of two shades of blue. The edges of our cloud look too harsh; I think we should soften them a little. Turn on the visibility of the cloud’s shape which we have hidden in step number 2 (this shape should be on the top of all the created objects; also it should be white).
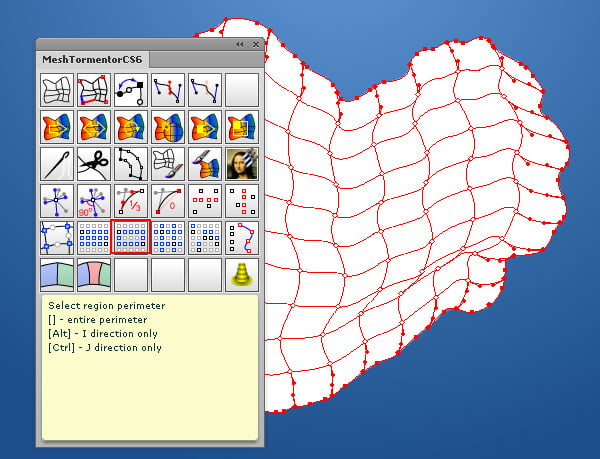
Step 10Select the white shape of the cloud and go to the Object > Gradient Mesh… and set the number of columns and rows. This time we should have 10 of each.
Now we need to select all the nodes in the gradient mesh which are located on the edges of the object. Those, who did it manually, know what a laborious work it is. Let the Mesh Tormentor do this difficult job. To select this types of nodes click on the Select region perimeter. Color all the selected nodes into black.
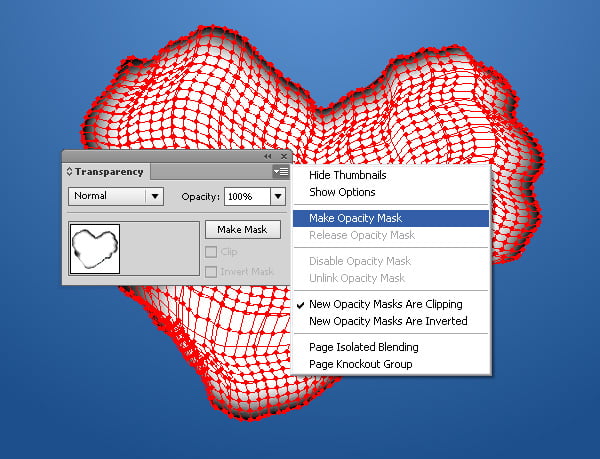
Step 11Select both gradient meshes and select the Make Opacity Mask in the flu-out menu of the Transparency panel. Finally, our cloud is ready
The additional information about the functions of the Mesh Tormentor you can get by clicking on the following links: Follow us if you want to be the first to know about the latest Adobe Illustrator tutorials, Interviews and articles. Vectorboom team works for you!
|