|
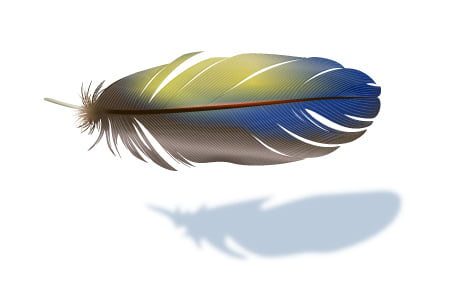
Final Image Preview
In this tutorial we will take a look at all the processes of creating a realistic vector feather, starting from a deigital sketch and finishing with a detailed result. Throughout the tutorial, we’ll be using DrawScribe’s Dynamic Sketch and InkScribe Tools, which will speed up the process of creating of complex shapes. We will also learn how to manage shadows with the help of the Phantasm CS Publisher.
Creating a sketch with the help of the Dynamic Sketch Tool
Step 1
Begin our tutorial with a creation of a sketch. Rarely designers create a sketch in Adobe Illustrator, preferring to rely on Photoshop, Sketchbook Pro or similar pixel-based packages. I think it’s just a matter of habit — one that can be broken. We can create a sketch directly in Illustrator. To do this, we will be using Dynamic Sketch Tool, one of the tools within the DrawScribe plugin, and aptly named!
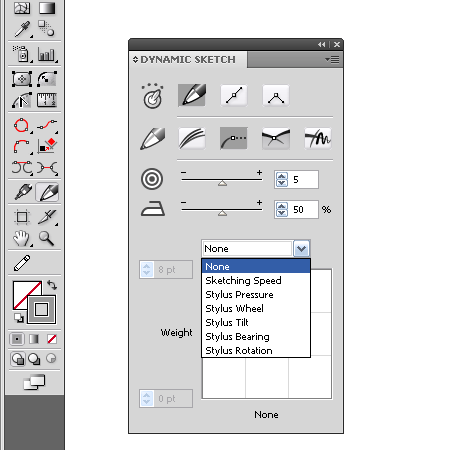
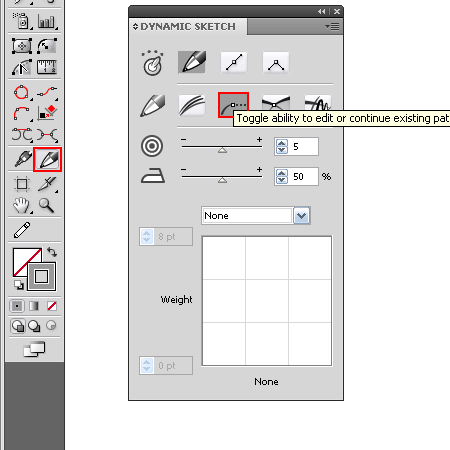 Choose this tool, then open its panel (Window > DrawScribe > Dynamic Sketch Panel). Turn on the "edit or continue existing paths” function in this panel. Set the amount of Accuracy and Smoothness levels. The higher the amount of Accuracy, the more precise the created path will follow the sketch input. The higher the Smoothness level is, the smoother the path. These amounts depend on the size of your sketch, and you can manage them during the drawing process. In addition, all the paths created with the help of the Dynamic Sketch Tool are dynamic, that means that their parameters can be changed at any time. You can set the relationship between the width of the contour and the selected parameter, for example, the pressure on the (Wacom) stylus or cursor speed.
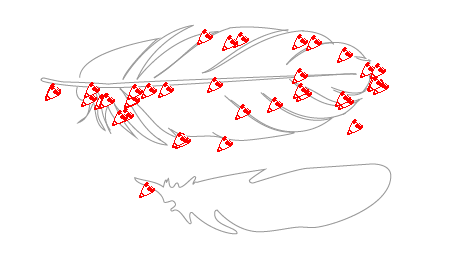
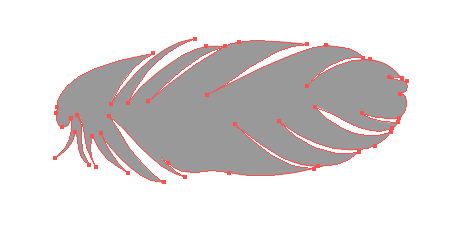
I chose "None”, that means the path will have a constant width. So, draw a feather and shape of a drop shadow.
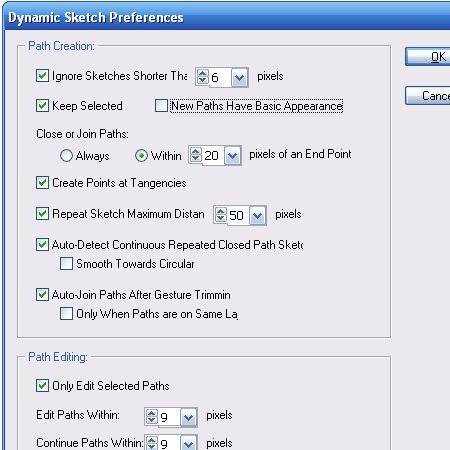
To configure the tool, you can also use the Dynamic Sketch Preferences dialog window. To open it, double-click on the tool icon in the Toolbar or press Enter/Return if already in the tool.
Creating vector shapes with the help of the InkScribe Tool
Step 2
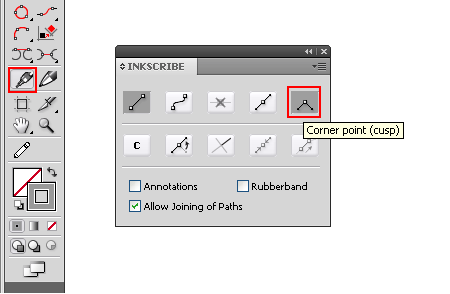
For the next stage, we need to create vector objects that we will fill with color. A feather shape is a fairly a complex one, so we’ll be using the InkScribe Tool (DrawScribe plugin). This tool is more flexible than the Pen Tool (P), which we’ll now prove. Group up all the elements of the sketch and lock them in the Layers panel. Take the InkScribe Tool, then open its panel (Window > DrawScribe > InkScribe Panel).
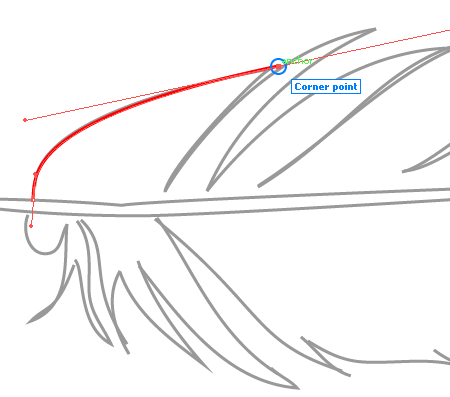
Since the shape will contain a lot of corner points, select this corner type in the InkScribe panel or annotation. Create the first curved segment. As you can see, its endpoint is a corner point. The InkScribe Tool tells us the type of point when you hover the cursor over it.
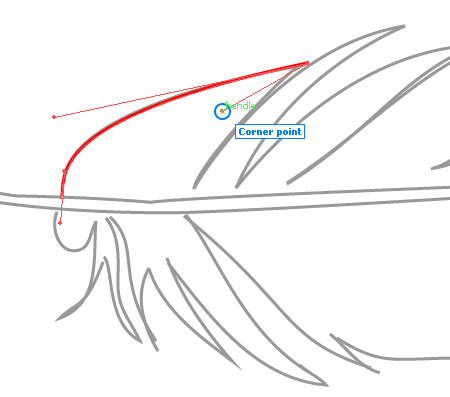
To control the handles of the point we do not need to change to the Direct Selection Tool (A) as all the manipulations are done with the InkScribe Tool.
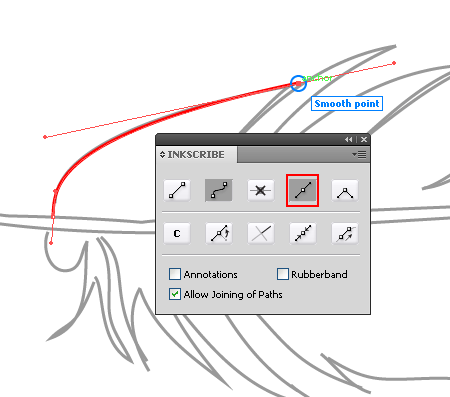
If you have a need to change the type of the point, then click on the appropriate option in the InkScribe panel/annotation or simply double-click on the point or its handle.
This allows us to create a complex shape without switching between the tools and using the shortcuts. This, as you know, saves time and does not irritate as much!
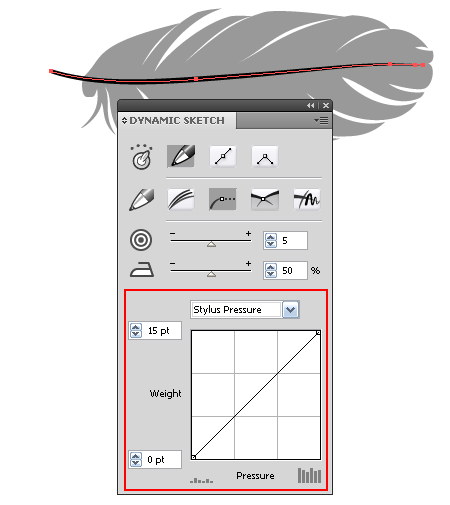
Creating the feather’s stem and detailing the shape using the Dynamic Sketch Tool
Step 3
To create a stem of feather, take the Dynamic Sketch Tool and set the relationship between the width of the path and the pressure on the stylus. You also need to set the minimum and maximum amount of path width. Now, create the path, as shown in the following picture.
You can read full version of this tutorial on AstuteGraphics.com
|