|
Final Image Preview
There’s a simple way of creating seamless repeating patterns like these. Let me show you how I created these shapes for geometric patterns using the “Constrain Distance” feature of the InkScribe plug-in together with the “Protractor” tool from VectorScribe!
Constrain distance with InkScribe
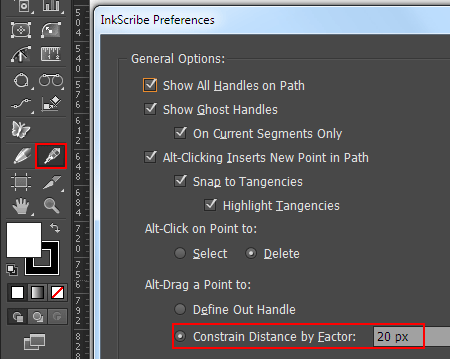
Double-click on the InkScribe icon in the Tool Panel or press on the Return / Enter key after choosing the InkScribe Tool. This will open InkScribe’s Preferences dialog box. Tick “Constrain Distance by Factor:” and then set the value in the digital field.
Now create a few straight-line segments using the InkScribe Tool, holding down the Option/Alt. As you can see, the new point of the path can only be placed at the constrain distance from the previous one. This distance is a multiple of the value that we set in InkScribe’s Preferences dialog box.
Quickly change the constrain angle with the Protractor
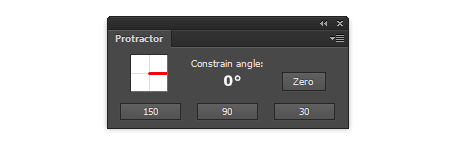
Open the Protractor Panel (Window> VectorScribe> Protractor panel). With its help, we can quickly change the constrain angle without opening Adobe Illustrator’s Preference dialog box. In other words, we get speedy access to this basic parameter.
Let’s see how it works. You can change the constrain angle using one of the three presets by clicking the appropriate button in the panel. Now if we create a straight-line segment (holding down Shift) it will be located just below the specified angle.
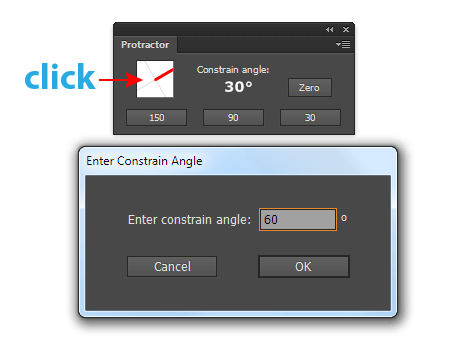
To set a different value of the constrain angle, click the annotation in the Protractor panel and set the desired angle in the open dialog box.
You can read full version of this tutorial on AstuteGraphics.com....
|