|
OPO plugin is designed to create a simple Parallel 3D Effect. This effect is also known as oblique projection. Oblique projection is often used in design, for example, to create the long shadow effect and typography. But Adobe Illustrator, unfortunately does not yet have such a function, and we have to use blend objects or Transform effect for such constructions. Both of these methods create steps at the edges of these projections, the removal of which can be a time consuming process. OPO plugin avoids these drawbacks and has a number of additional options. Let's check this out.
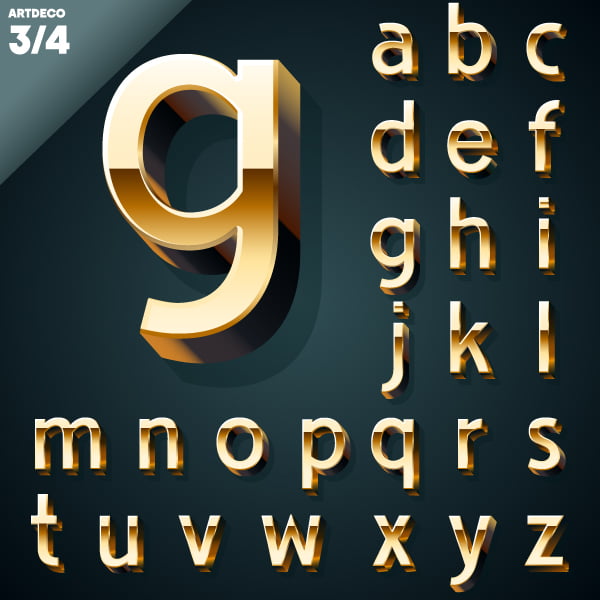
First let's take a look at a simple example of applying oblique projection to understand why this is necessary. It is a Vector Illustration of golden 3D alphabet from Shutterstock
The plugin is compatible with the latest releases of Adobe Illustrator (CS6, CC17.x and CC2014) and is installed using Adobe Extension Manager. You can download the application corresponding to your version of Illustrator by following these links:
For users CS6
For users of CC and CC2014
You can download a 30 day free trial of the OPO plugin or buy it for 6.15 euros.
After installing the plugin, restart Adobe Illustrator. To open its panel go to Window> Extensions> opo or Window> @ ccmutants> opo
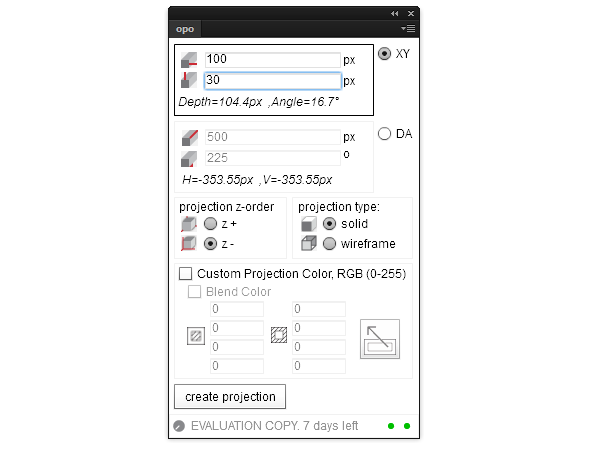
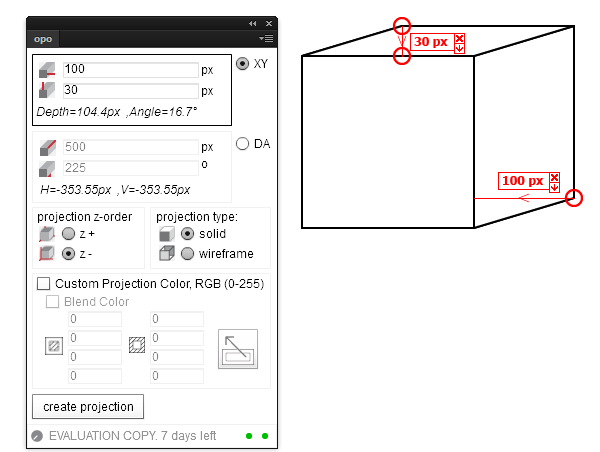
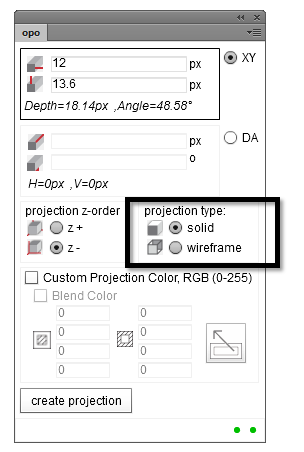
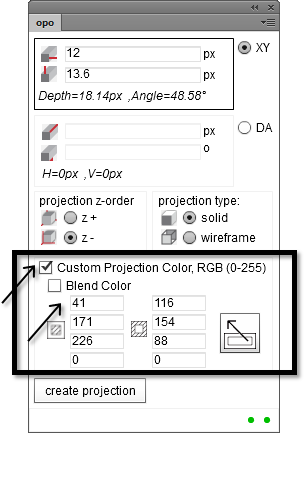
The panel is divided into three logical parts. The first part controls the projection of geometry. XY sets the width (X) and height (Y) of the projection
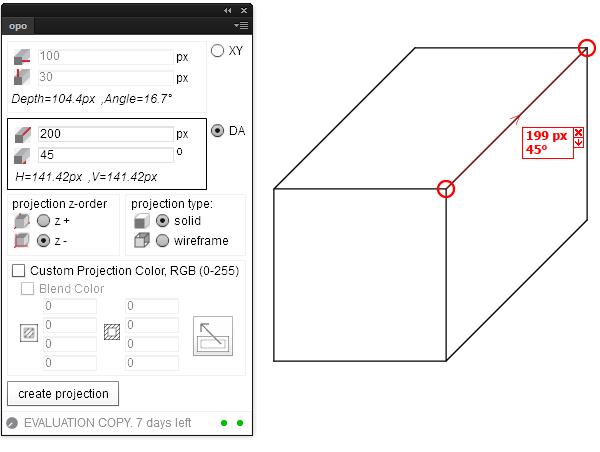
DA sets the depth (D) and angle (A) of the projection. As the picture shows the depth has a slight error (1px), though, I think it is not a very significant problem
The second part defines the direction of extrusion of the projection. Extrusion coming from the observer if Z- option is selected. On the other side extrusion coming towards the observer if Z+ option is selected
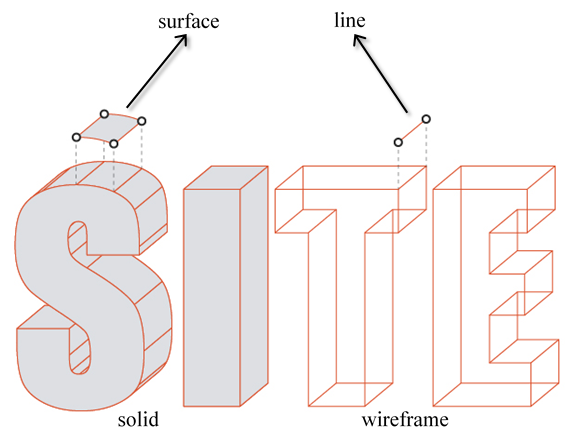
In the Projection type section you can choose between a solid and wireframe surface
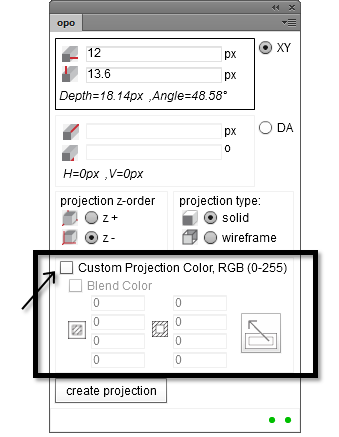
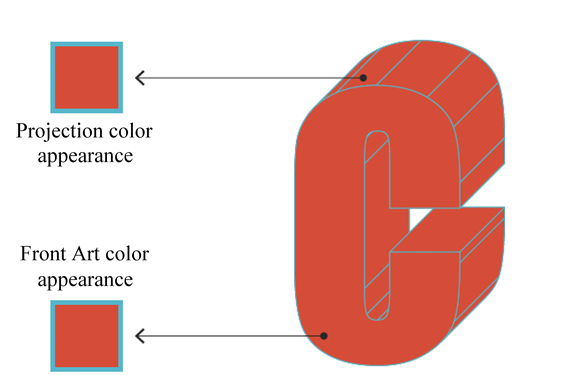
The last section is intended to control the color of the projection. If Custom Projection Color option is not selected, then the projection will copy fill and stroke colors of the front object
If this option is selected, you can set the desired colors for the fill and stroke of the projection in the numeric fields. If you use the RGB color model, the lower the numeric field should not be filled
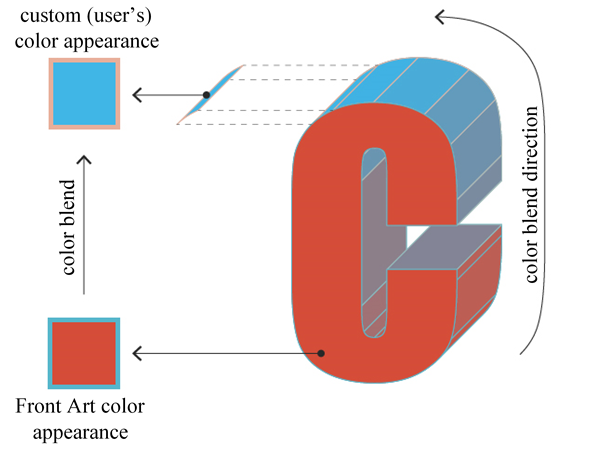
Blend Color option allows you to achieve the transition with optimal number of steps between the colors of the fill /stroke of the front object and projection
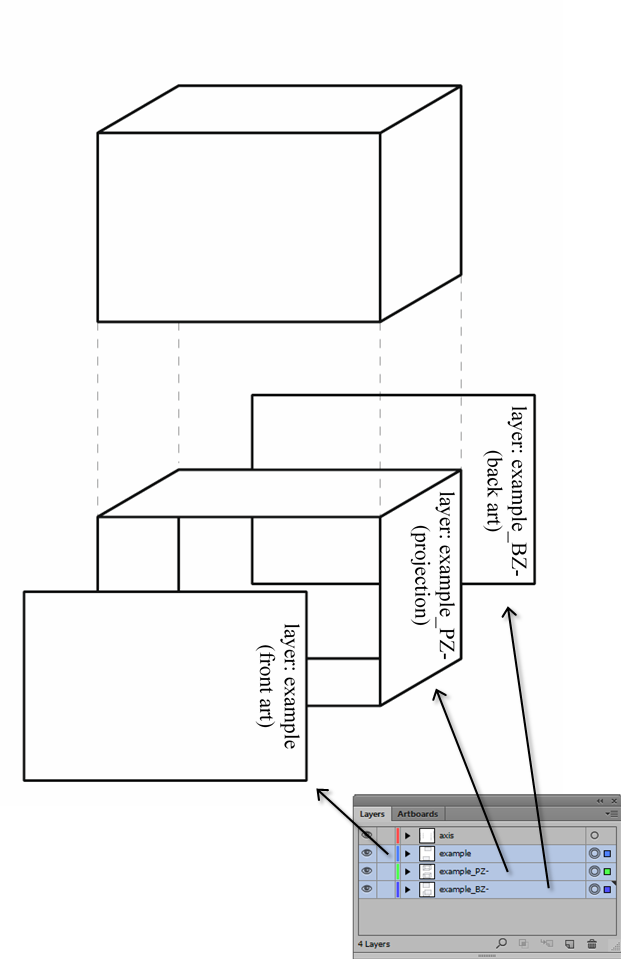
Once all the options are selected, click on the Create Projection button. Created objects will be located in two new layers - side projection in a separate layer and the back side in a separate layer. This allows you easily select and modify the achieved projection.
In my opinion, it's a pretty quick and easy way of building a parallel 3D effect. Apply the plugin when creating long shadows that are still in trend.
If you would want to use OPO plugin to work with letters, then you should know that they must first be converted to outlines (Type> Create Outlines). The plugin does not work with edited text.
|