|
Final Image Preview
You can download the source vector file for this tutorial

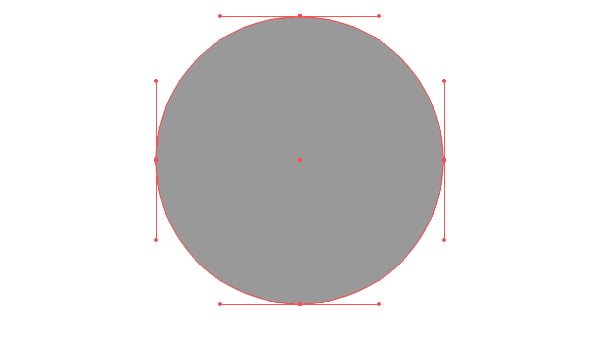
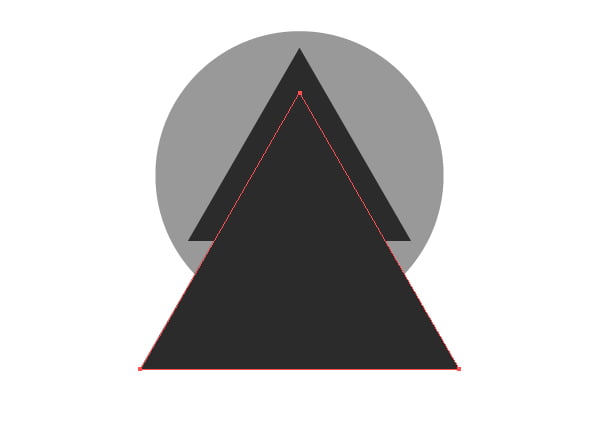
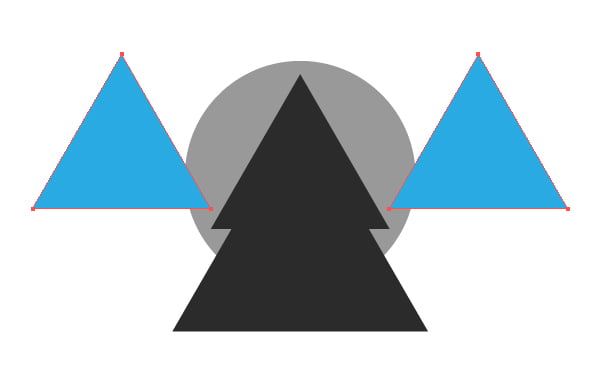
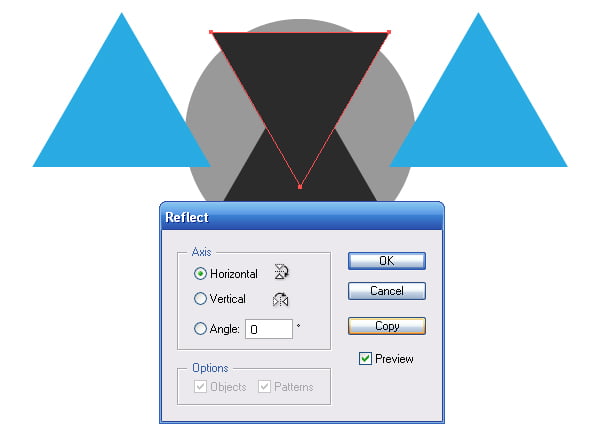
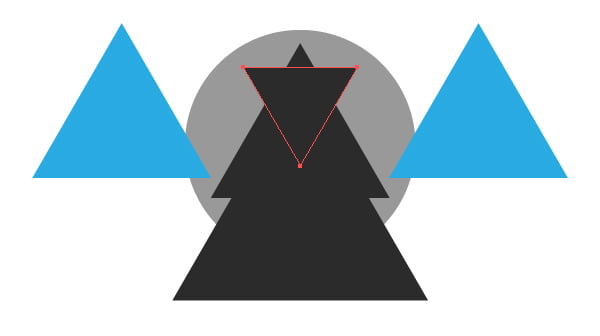
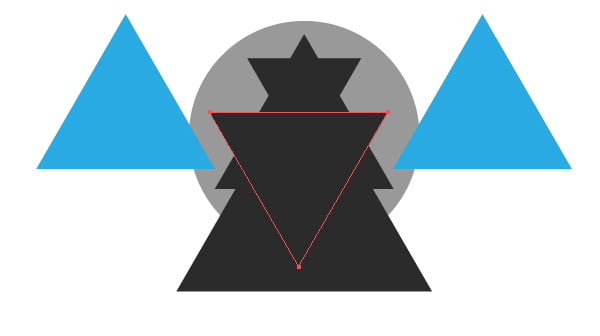
In this Adobe Illustrator tutorial we will learn how to create an abstract 3D spheres using some interesting techniques, which can be more effective than 3D effects. Have fun and enjoy our new Adobe Illustrator tutorial! Step 1Create a circle with the help of the Ellipse Tool (L). The size and color of the circle is not important at this stage of the form creation. Now crate a triangle with the help of the Polygon Tool. Align the two shapes in the vertical axis with the Align panel. Step 2Let's create a few more rectangles by duplicating the first one and resizing them with the Selection Tool (V) Select one of the central triangles, and then go to the Object> Transform> Reflect.... Tick the "Horizontal Axis” in the dialog box, and then click on the Copy button. Change the size of the new triangle and create another copy of this object. Step 3
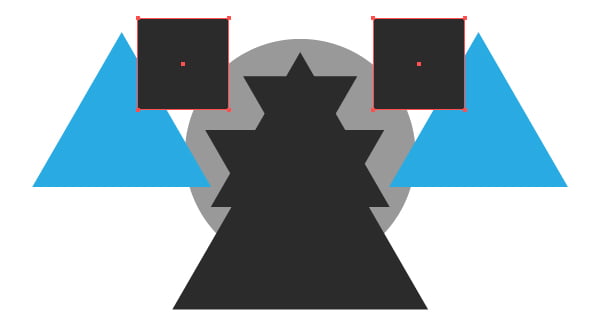
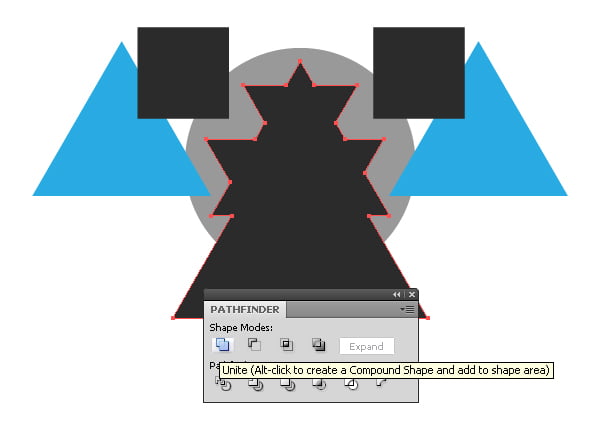
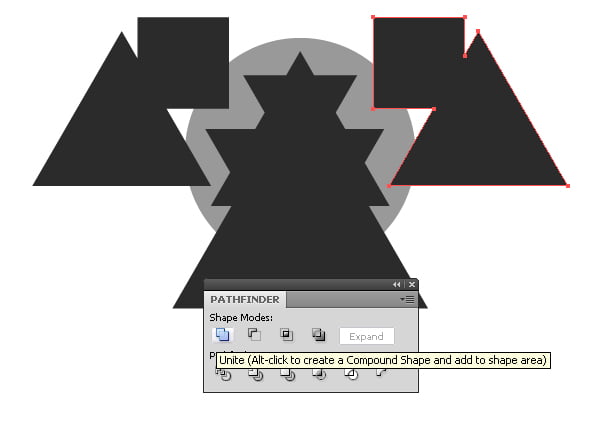
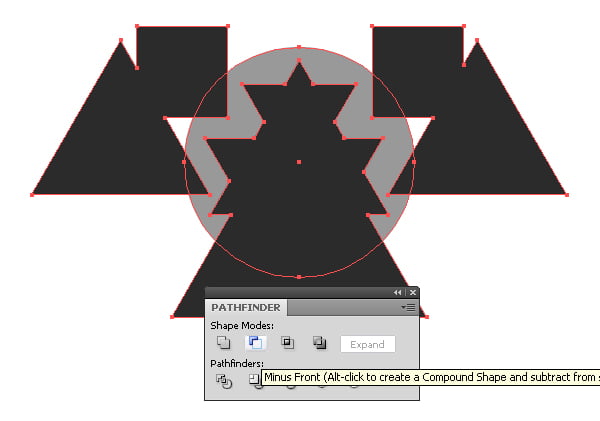
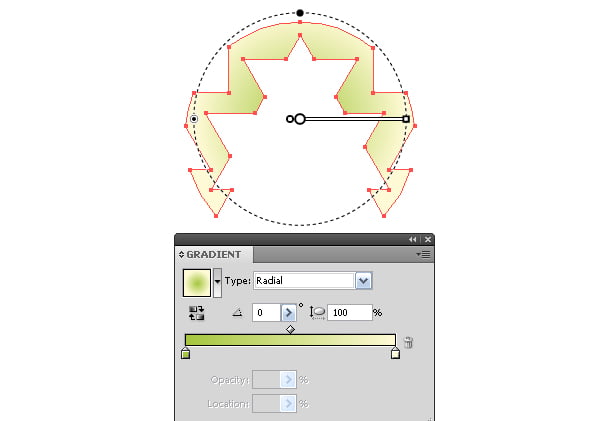
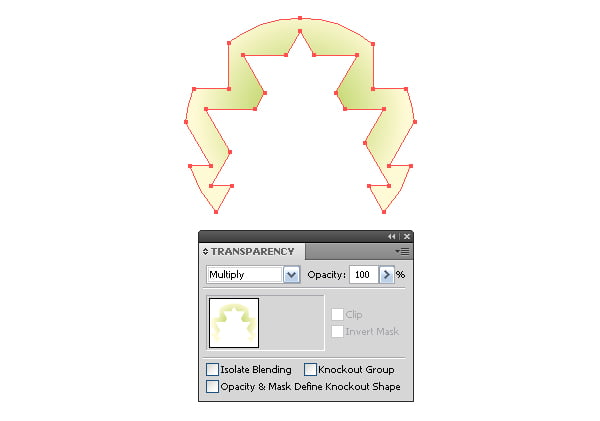
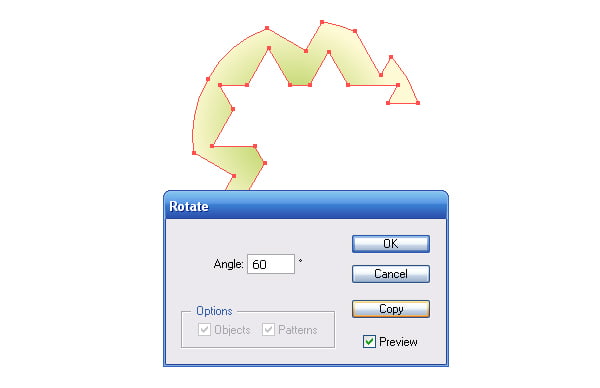
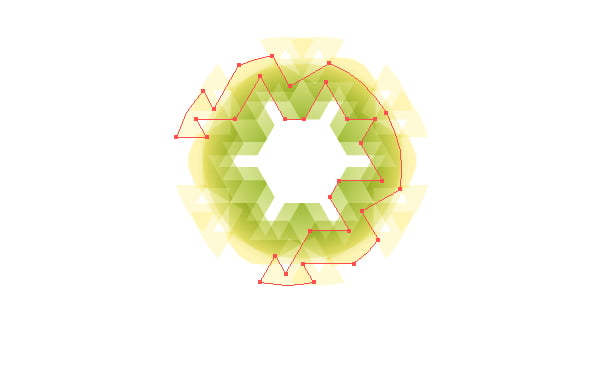
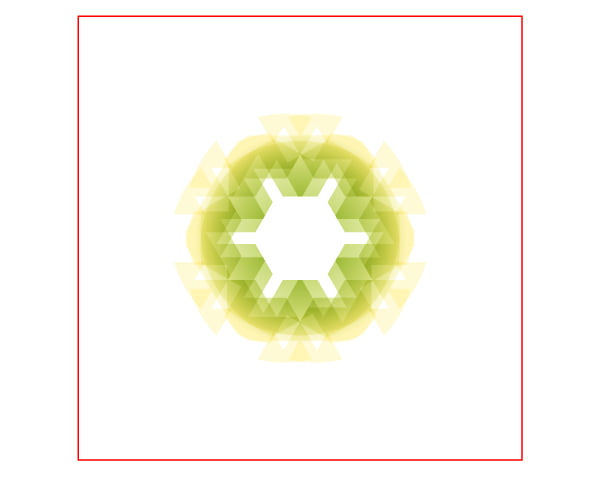
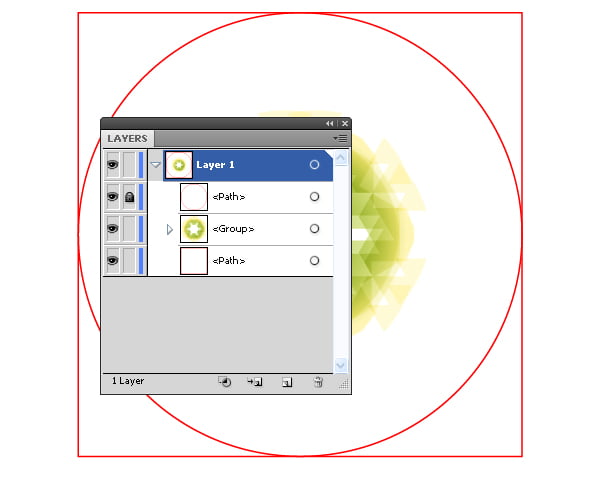
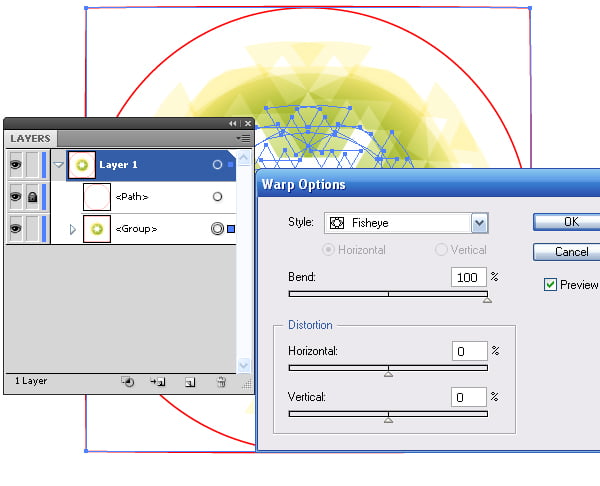
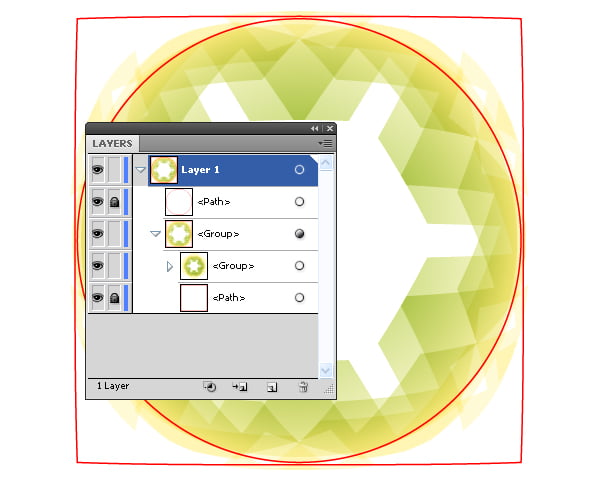
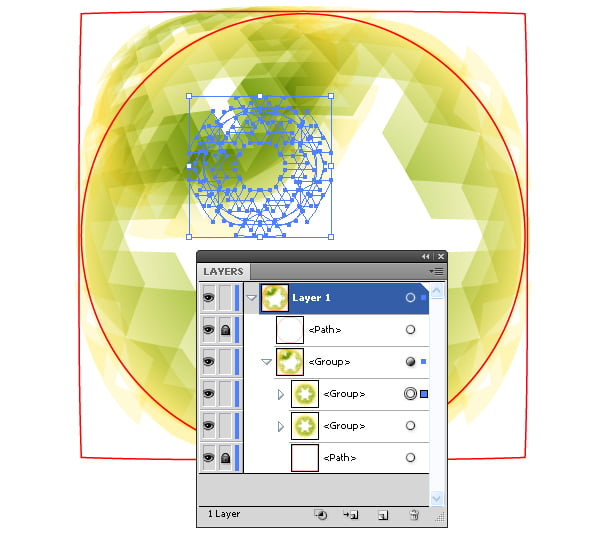
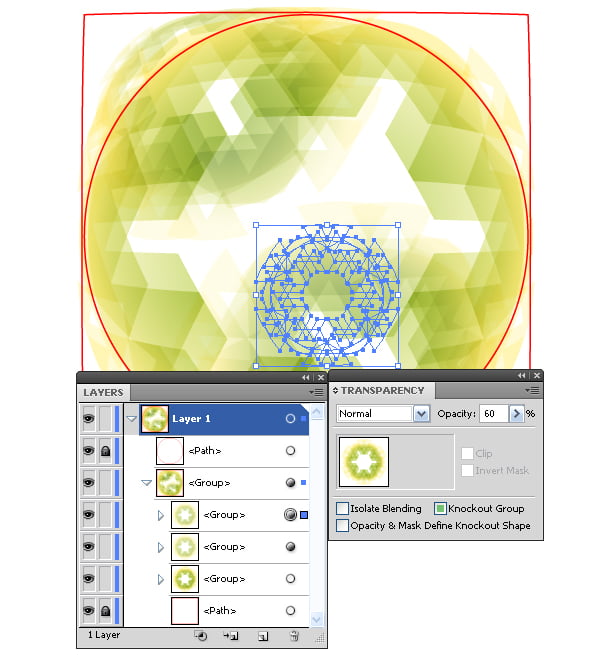
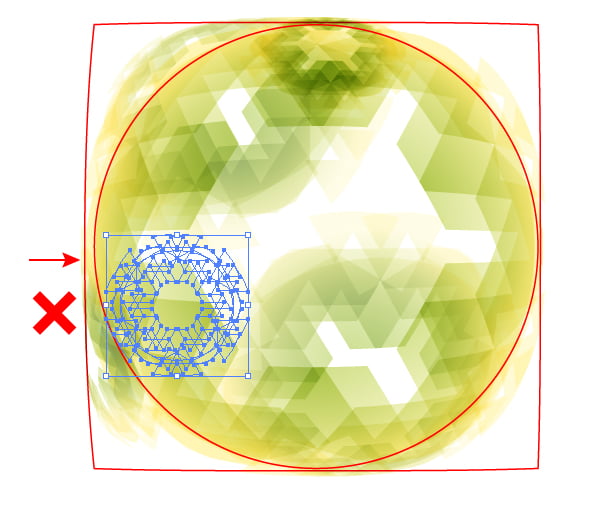
Now we will create two squares with the Rectangle Tool (M) and arrange them as it is shown on the following figure. Select all of the central triangles, and then click on the Unite button in the Pathfinder panel. Using the Pathfinder panel, unite the objects on the sides of the circle. Step 4Select all the shapes in dark gray, then go to the Object> Compound Path> Make or use the Command / Ctrl + 8 shortcut. Select the achieved Compound path and the circle, and then click on the Minus Front button in the Pathfinder panel. Step 5Fill the resulting shape with radial gradient from green to light yellow. Now set the Multiply Blending mode in the Transparency panel. Step 6Keep the object selected, go to the Object > Transform > Rotate… and set the angle of 60 degrees in the dialog box, then click on the Copy button. Now use the Command / Ctrl + D shortcuts five times in order to repeat consistently the last operation. Group all created objects. Step 7We need to pull on this group on the 3D sphere. Unfortunately, the 3D Revolve effect is not suitable for this purpose. Our objects that have a gradient fill will be transformed into a bitmap image. In addition, we will get a strong contraction of objects at the poles of 3D sphere, which, of course, does not correspond to the real situation. We will use another technique. Create a square with no fill and stroke of any color. We just have to see the boundaries of the object. Place the square below all the created objects. Step 8Create a circle. Its size must be the same as the size of the square. This circle will limit the objects of the 3D sphere in the next steps. Lock the circle in the Layers panel. Step 9Group the groups with objects and bottom square, then go to the Effect> Warp> Fisheye…, and set 100% Bend. Apply this effect again with the same parameters. Step 10Lock the lower rectangle in the Layers panel. Duplicate the group with the objects, then reduce the size of the new group with the Selection Tool (V), or go to the Object> Transform> Scale … Using this technique, fill all the space inside the circle of new groups of objects. For the best results, you can reduce the opacity of some groups. Step 11
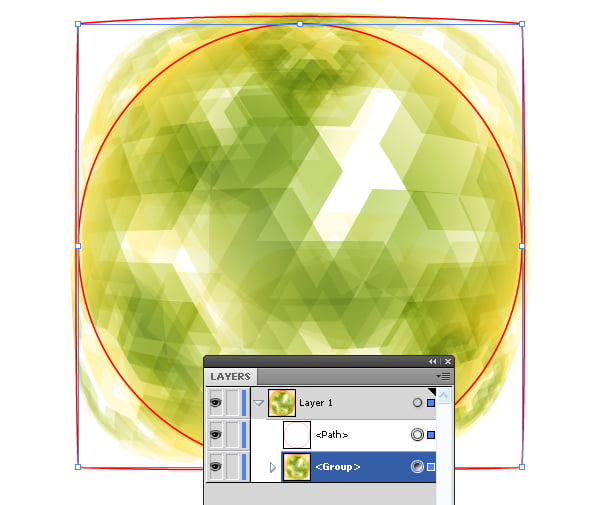
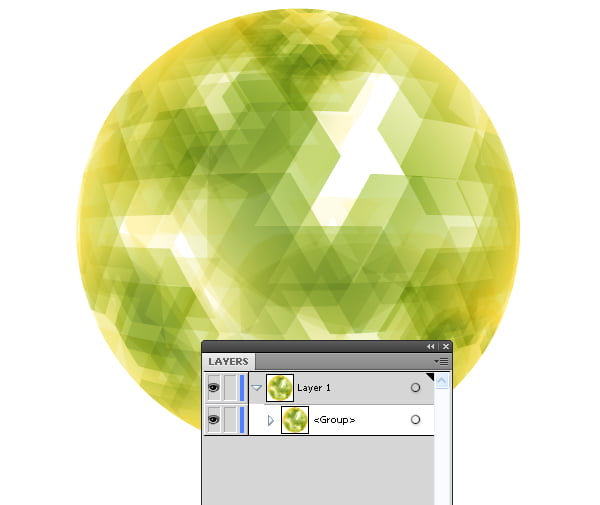
As you can see, the objects are distorted in accordance with their position on the surface of the 3D sphere. This is especially noticeable with the small size objects. In this case, there is no compression on the poles of the sphere. Be careful while moving the objects. You should not distort the boundary of the lower rectangle. Otherwise, the effect may look wrong. Step 12After the distribution of the objects on the 3D spheres surface , unlock the circle in the Layers panel, then select all of the existing objects, and go to the Object > Path > Clipping Path or use the Command / Ctrl + 7 shortcuts. Using objects of different shapes and the techniques, that were described in this illustrator tutorial, you will be able to get very interesting effects that can be used as elements of abstract backgrounds.
You can download the source vector file for this tutorial
You can also read Illustrator Tutorial: How to Create an Abstract Web Design with 3D Spheres
Follow us if you want to be the first to know about the latest Adobe Illustrator tutorials and articles. Vectorboom team works for you!
|