|
In this tutorial we will learn how to automate repetitive actions with the help of the Action feature in Illustrator. We will also find out how to test and edit the created action.
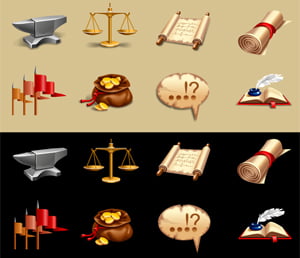
This Action feature in Illustrator is especially designed for accelerating the process of creation of your artworks. Today we will apply this function for the creation of the Outline Icon. Of course, it makes no sense to create the whole Action if one icon needs to be created. But if the Icon set must be created, such action can save you a lot of time. You can download such icons: Free Vectors: Outline Icons for Web and Mobile.
Step 1So, we have two objects: these are a globe and a form of a plane. These objects are pretty simple and I think there is no need to describe how to make them. This globe is the Compound Path. Simple overlap of the object to one another will be badly perceived by the users. That’s why when creating the outline icons better to separate the objects with a space, the shape of which follows the shape of the upper object. So here it is what we’re going to automate- the process of creation of such a space. Step 2Open the Actions panel (Window > Actions) and create a new action by selecting the appropriate option in the fly-out menu in the Actions panel. Name our action and then click on the Record in the opened dialog box. Step 3Select the plane shape and then go to the Object > Path > Offset Path… and set the offset value and click on OK. As you can see, the first action appeared in the Action panel. Step 4The new object appeared in the Layers panel, it is being currently selected. We need to select two lower objects for the next action. No problem, go to the Select > Next Object Above, and then to the Select > Inverse Step 5And now click on the Minus Front in the Pathfinder panel. The space between the objects is formed. All we need to do is to finish the action. Select all the objects and group them (Select > All, Object > Group). Cancel the selection (Select > Deselect) The icon is ready, click on the Stop in the Actions panel.
Step 6Let’s test our created action. You can test it in the step-by-step mode. To do so, select the upper object and click twice on the first action "Offset path” in the Actions panel. Oops! This time we have two instead of one selected objects as it was in the process of creation of the action. Why it happens so, I don’t know, but we will need to re-create the part of the action. Select and delete the lines from the Actions panel (as it is indicated on the figure below) Step 7Select the "Offset Path” line and then click on the Record. Go to the Select > Next Object Below. And now go to the Select > Next Object Above and one more time to the Select > Next Object Above. And finally, Select > Inverse. Click on the Stop. Check it again, now everything works well. There is just one remark that I want to make: if there are other objects in the current document, it might be already ready icons, and then you need to lock them in the Layers panel.
Follow us if you want to be the first to know about the latest Adobe Illustrator tutorials and articles. Vectorboom team works for you!
|