|
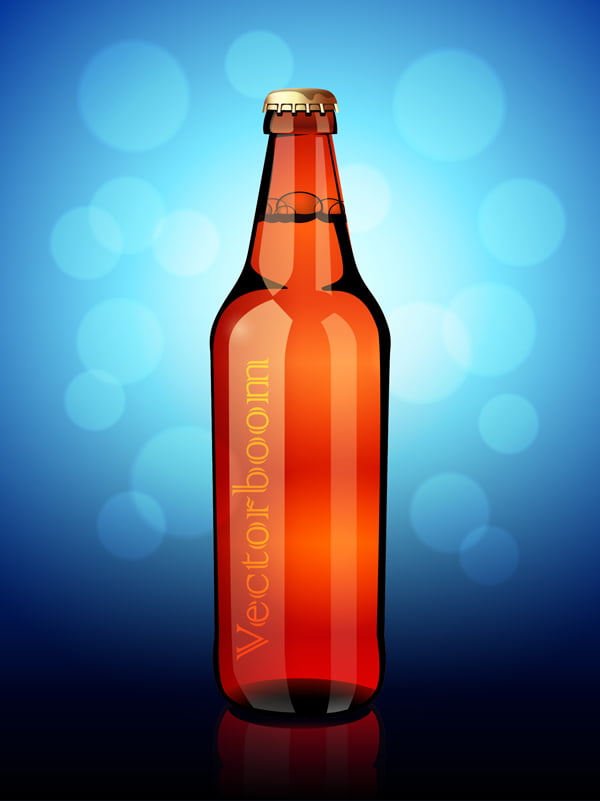
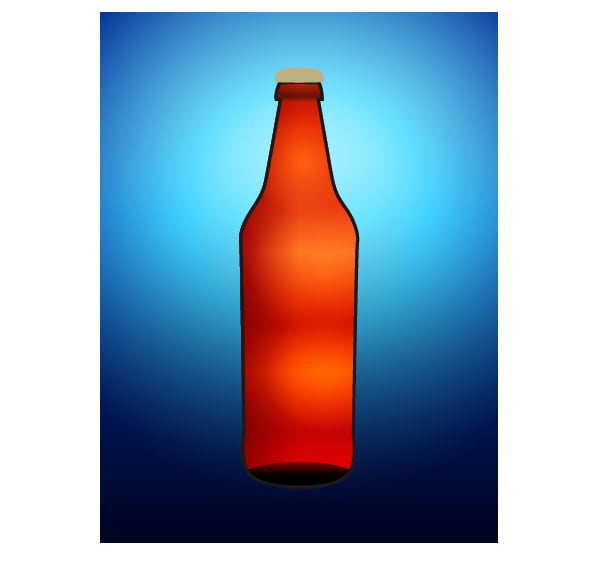
Final Image Preview
In this Illustrator Tutorial we will learn how to create a glass beer bottle. Many designers-beginners experience some difficulties while creating glass objects. In my point of view, it is not a big deal, since glass objects have some glows and shades with sharp boundaries which can be easily created with the help of Illustrator. We will use the 3D modeling and some other simple vector techniques for the creation of a bottle. I hope you have some fun while learning how to create a glass beer bottle in this Adobe Illustrator tutorial with us!
Step 1
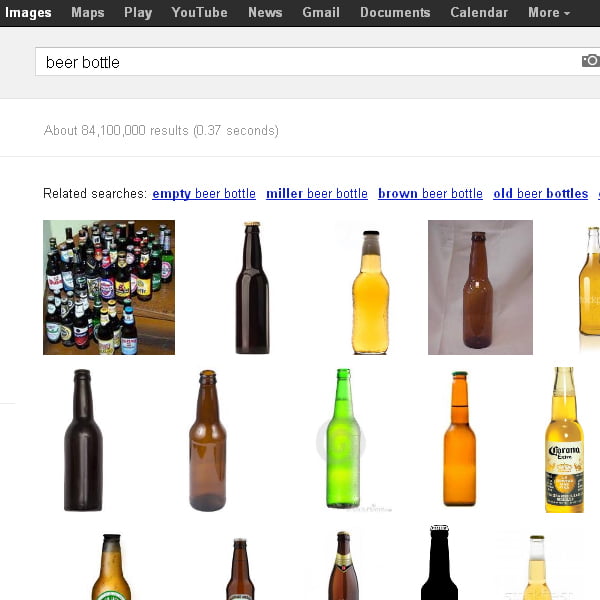
You can use the real-world objects when creating your vector artworks. This can be, for example, your photo or just a picture that you found in the internet. I don’t make you infringe the copyright, don’t take me wrong. I just want you to examine attentively the object that you want to reproduce. Pay attention to its form; think a little why you perceive it as a 3D object; take a closer look at the location of lights on the surface of the object. Sometimes, you need to examine hundreds or even thousands of photos in order to understand the object’s nature. Today, we will create a glass beer bottle together, so let’s check out the variety of beer bottles.
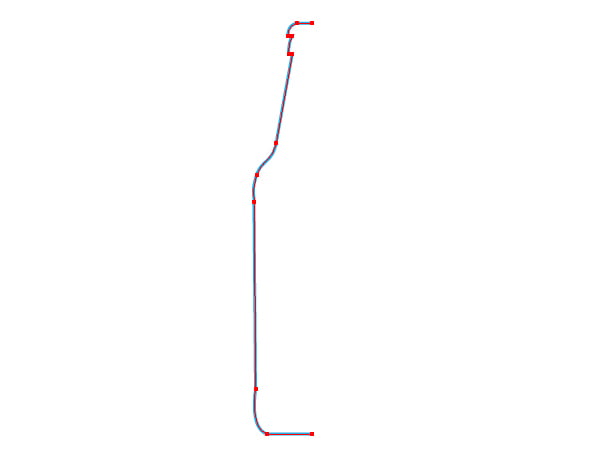
Find a photo of a beer bottle where it is located in the frontal plane (or just simply do such photo yourself). Paste the photo into the current document (File > Place…). Now with the Pen Tool create a path of half of the bottle.
Step 2
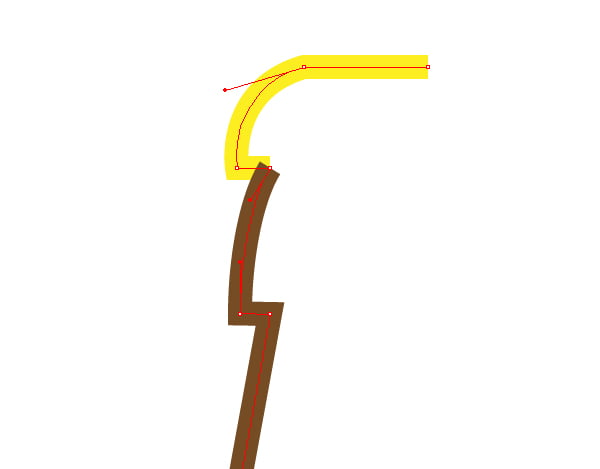
Take the Scissors Tool (C) and cut the path in the point A in order to separate the cap from the bottle.
Color the paths into different colors.
Group the created objects (Ctrl / Cmd + G).
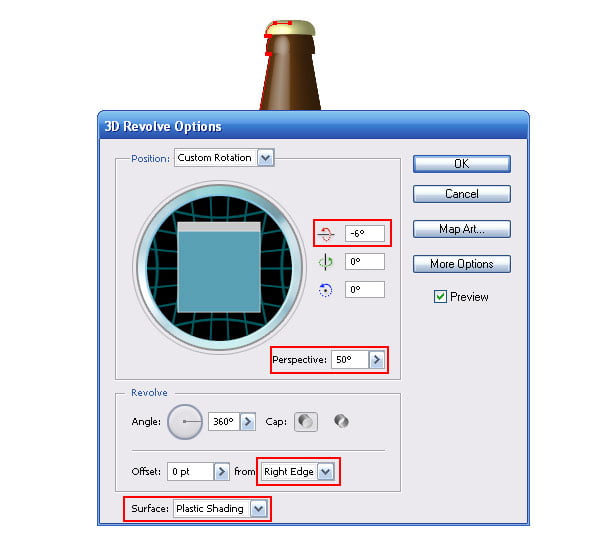
Step 3
Select the group, then go to the Effect > 3D > Revolve… and set the parameters indicated on the figure below.
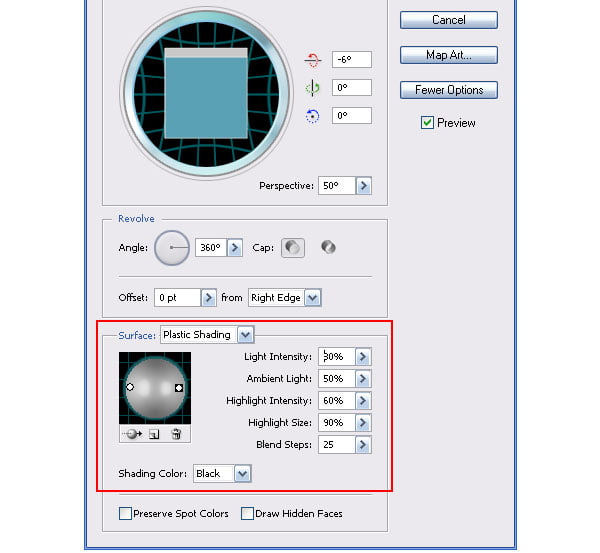
In the process of 3D modeling you can design the illumination of the object with the help of one or a couple of light sources. To do so, click on the More Options in the dialog box and experiment a little with the light sources.
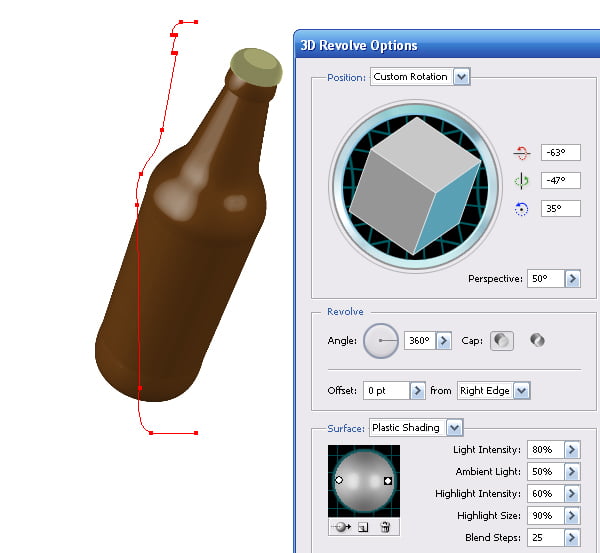
Step 4
You can also change the beer bottle’s location in the space by setting different parameters or by moving the tracking cube.
Double the 3D object when you’re done with experimenting. You can use it as the visual aid in your further works.
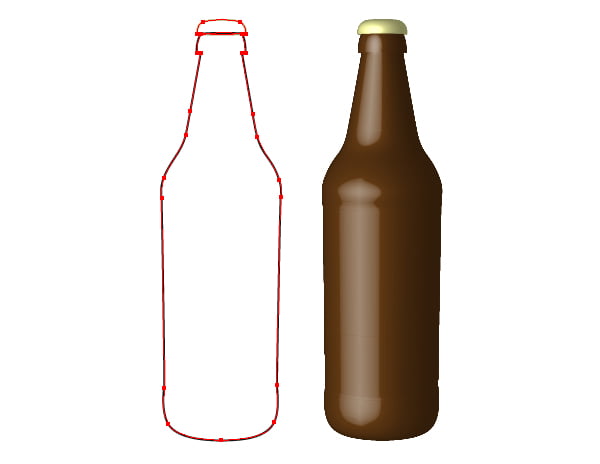
Step 5
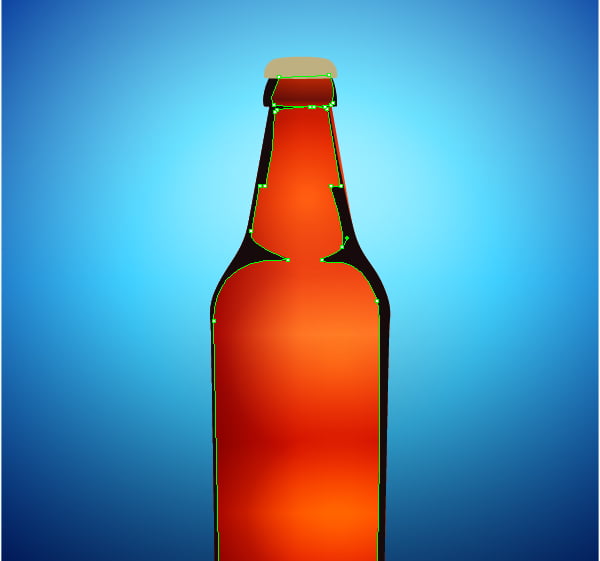
In our previous steps we’ve only created a shape of a bottle. Now we will need to transform the 3D object into regular vector objects with which we will work further. I described this difficult process many times, for example in Illustrator Tutorial "How to Create Advertising Billboard Using 3D Effects”. But I think the easiest way to recreate all the forms is while using the Pen Tool (P) in outlining of the 3D object. Believe me, it is much faster.
Step 6
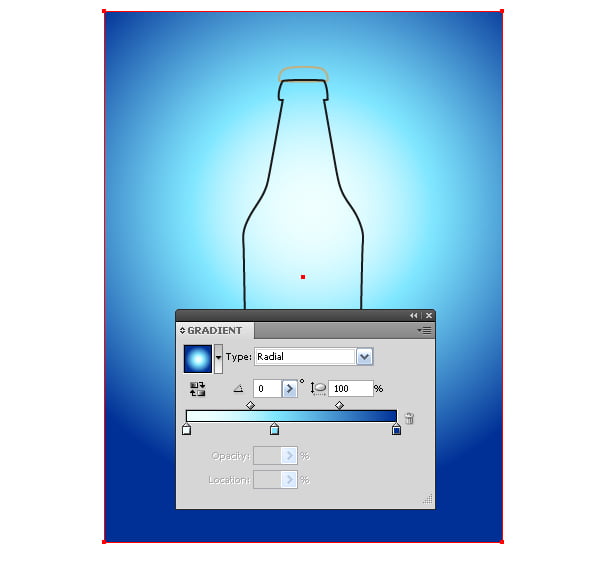
I always create some background before coloring the objects. This definitely helps me to choose the colors correctly. Create a rectangle with the Rectangle Tool (M) and fill it with the radial gradient which consists of different shades of blue.
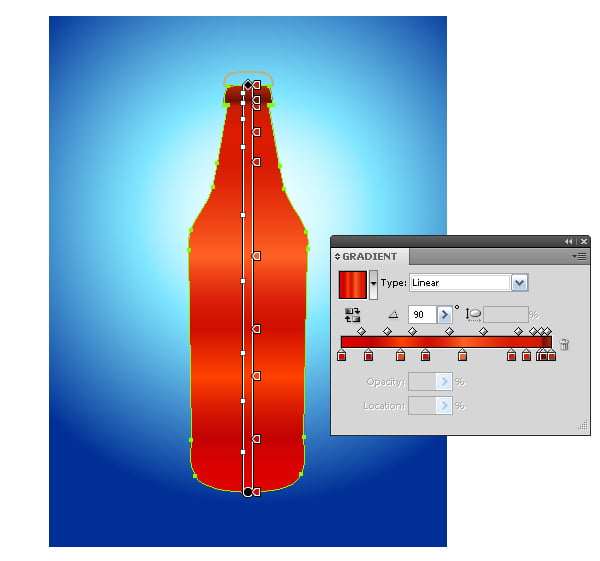
And now fill the shape of the bottle with the difficult gradient which consists of alternative shades of orange.
Step 7
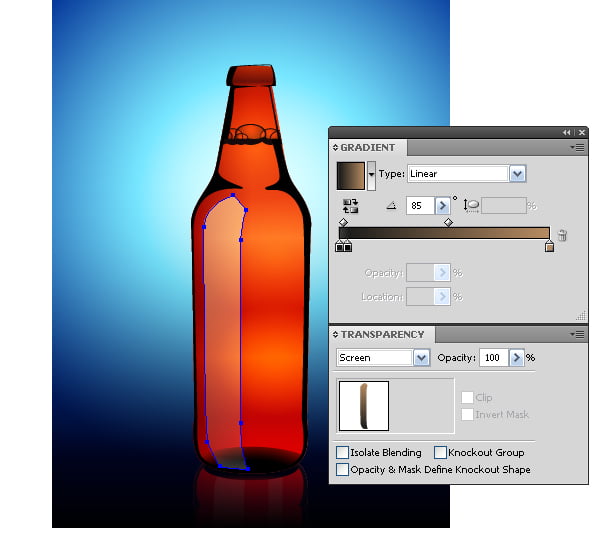
A lot of beginners fail because they try to convey the play of the light on the surface of the object with one fill. In reality, you must first set the general tones of the object and only then work with its parts. The whole visual art and vector graphics is based on it. Copy the form of the beer bottle and paste it to the front (Cmd / Ctrl + C; Cmd / Ctrl + F). Fill the form with the linear gradient from red to white.
Apply the Multiply blending mode to it.
Check it out, our vector beer bottle starts being 3D! And we have only darkened its left part. The white color of the gradient became transparent, and red made the left side of the bottle more saturated after the applying of the Multiply blending mode. Usually, the black-and-white gradient is been used for such purposes. However, the usage of the color slider avoids some "mess”.
Step 8
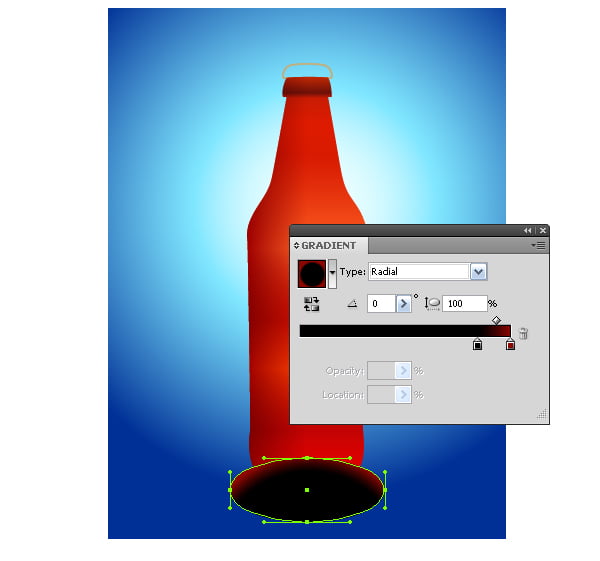
So, let’s work on the bottom of our beer bottle. Create an ellipse with the Ellipse Tool (L) and fill it with the radial gradient from black to dark-red.
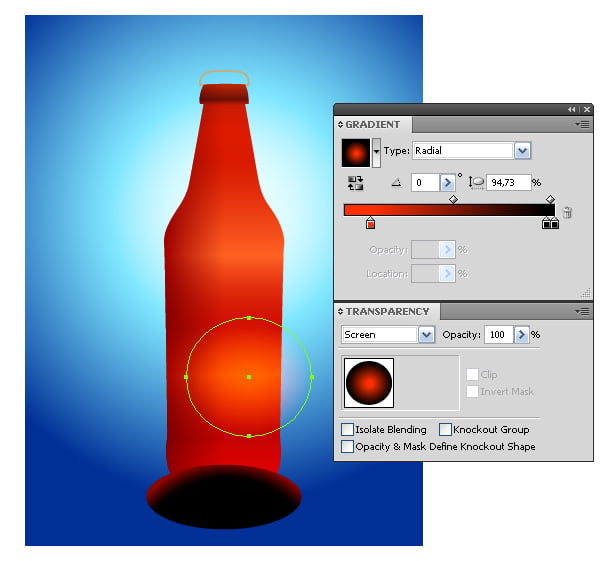
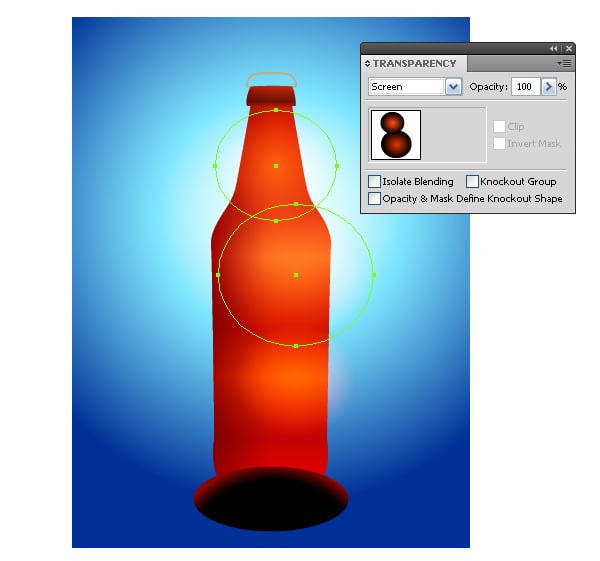
Now create some glow on the bottle glass. Draw a circle, and then fill it with the radial gradient from orange to black and apply the Screen blending mode to it. Then transform our circle into ellipse with the Selection Tool (V)
Let’s create similar glow in two other places.
Step 9
Copy the form of the bottle and paste it to the front (Cmd / Ctrl + C; Cmd / Ctrl + F), and then place the copy above all the created objects (these objects are filled with grey for better clearness).
Select the upper form of the bottle and all the ellipses, and then go to the Object > Clipping Path > Make (Cmd / Ctrl + 7).
Step 10
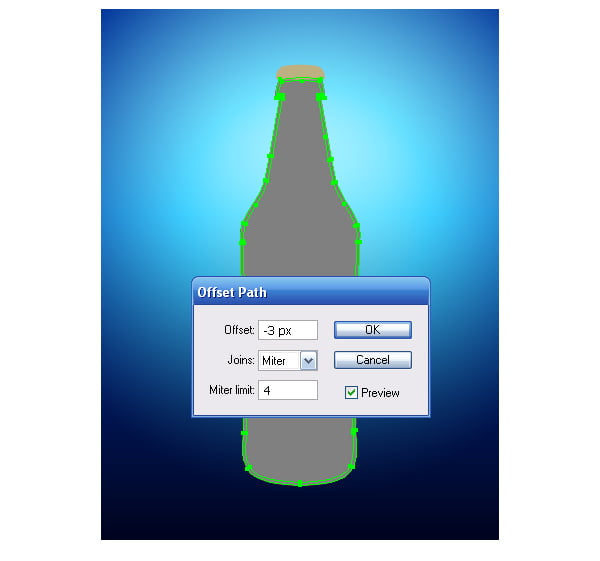
Copy the form of the bottle and place it to the front. Place this object above all the created objects. Go to the Object > Path > Offset Path… and set the shifting value.
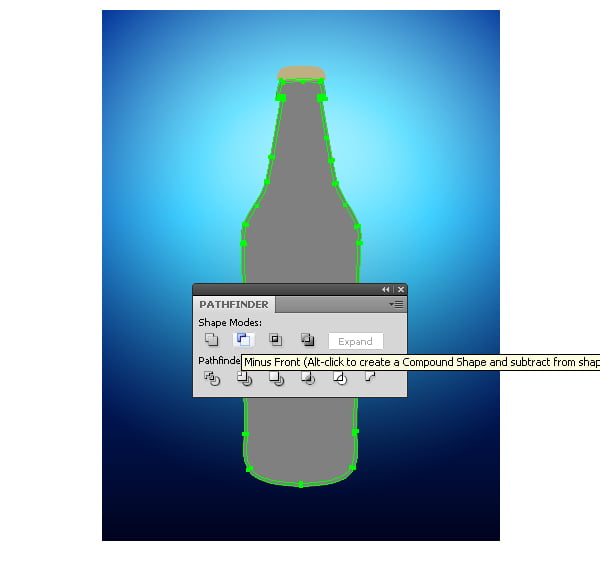
Select both grey forms, and then click on the Minus Front in the Pathfinder panel.
Fill the resulting Compound Path with black.
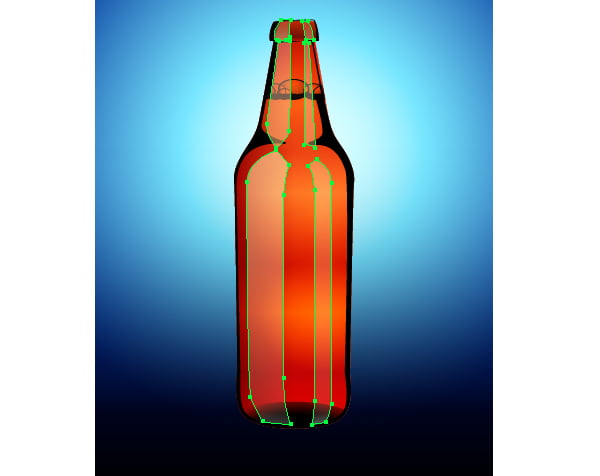
Step 11
Add some new points to the inner part of the Compound Path and move them with the help of the Direct Selection Tool (A). Here is what you’re supposed to get as the result (check out the figure below)
Step 12
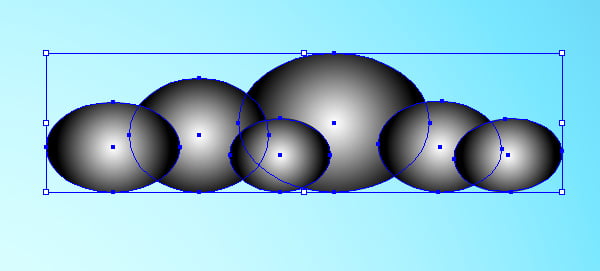
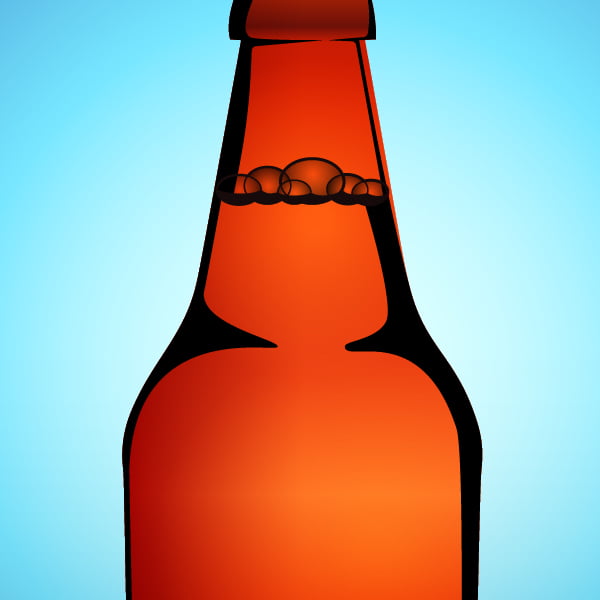
Let’s make some bubbles on the neck of the bottle. With the Ellipse Tool (L) create a couple of ellipses which should be aligned to the bottom edge with the Align panel.
Copy the ellipses and paste them back (Cmd / Ctrl + C; Cmd / Ctrl + B). Turn off the stroke in the bottom ellipses and fill them with black-and-white radiant gradient (the visibility of the upper ellipses is off for the clearness).
Step 13
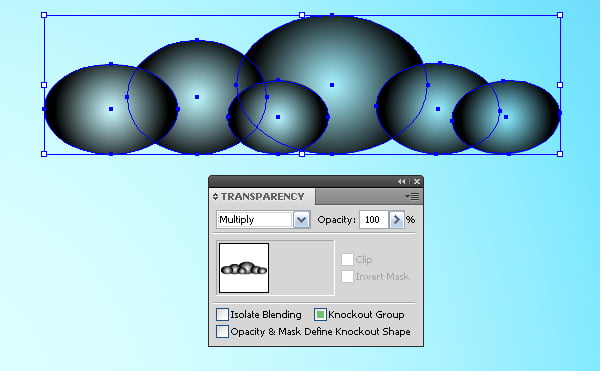
Group the bottom ellipses, and then apply to the group the Multiply Blending mode in the Transparency panel.
Increase the radial gradient areas with the Gradient Tool (G).
Create a form with the Pen Tool (P) as it is indicated on the figure below.
Step 14
Select the ellipses and the black form, and then delete the bottom part of the black from with the Shape Builder Tool (Shift+M) while holding down the Opt / Alt key.
Turn on the visibility of the upper ellipses.
Step 15
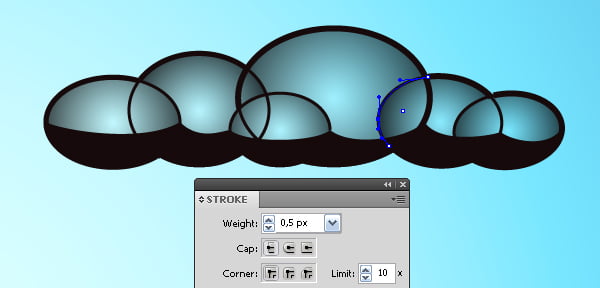
Take the Scissors Tool (C) and cut the upper ellipses in the intersection points.
Reduce the thickness of the segments which are located inside the bubbles. Group all the bubble objects and place them on the neck of the bottle.
Step 16
And now let’s work on some glows. Create a form of some glow with the Pen Tool (P). Fill the form with the linear gradient, and then apply the Screen blending mode to it.
Create some more glows on the bottle by analogy.
Step 17
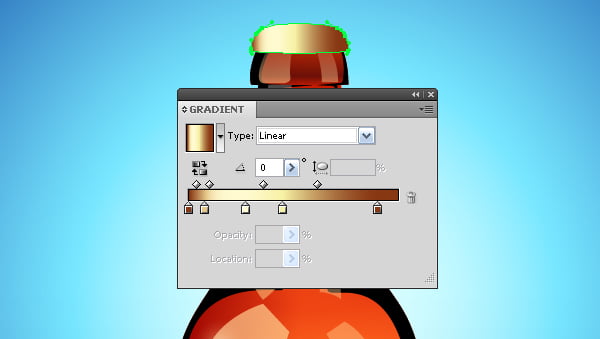
Let’s proceed to the coloring of the cap. Fill its form with the linear gradient which consists of the shades of yellow and light-blown.
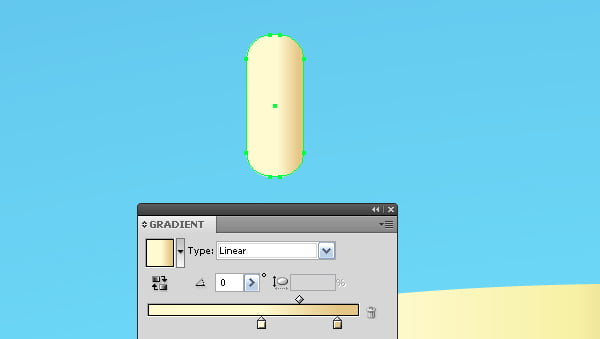
With the Rounded Rectangle Tool create a rectangle and fill it with linear gradient which consists of two shades of yellow.
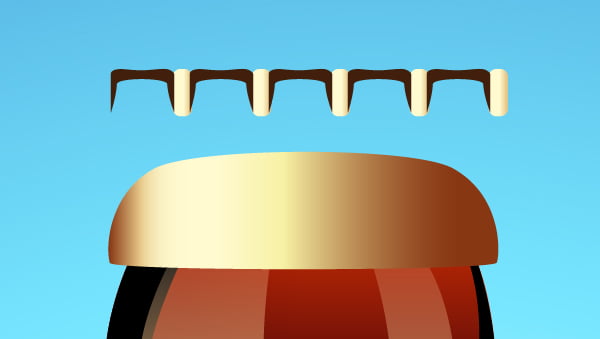
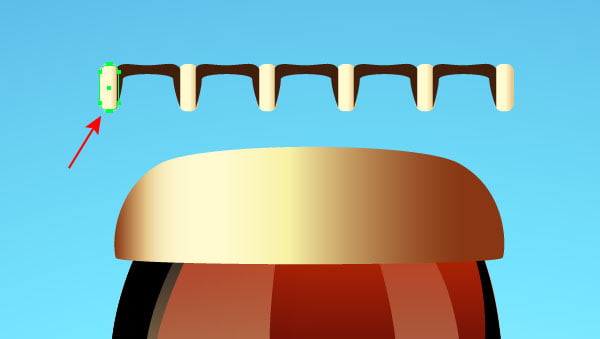
Step 18
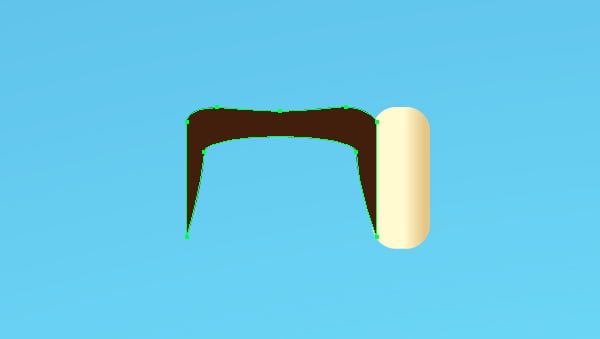
And now with the Pen Tool (P) create a form with brown fill as it is indicated on the figure below.
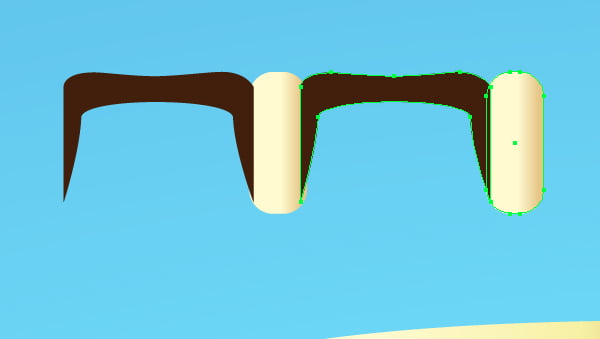
Group these objects then move the group to the right while holding down the Shift + Opt / Alt keys; these actions will double the form.
Use the Cmd / Ctrl + D shortcuts a couple of times in order to repeat the last action.
Double the rounded rectangle and place it to the left of created objects.
Step 19
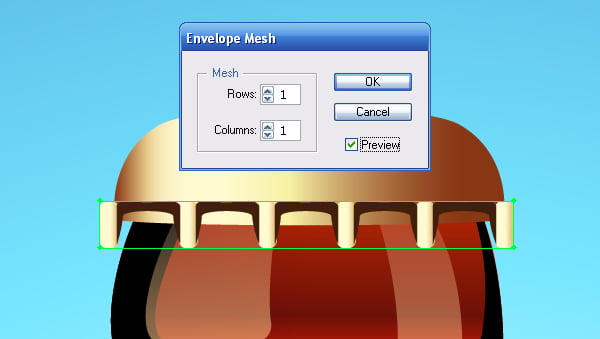
Select the crown of the cap and then go to the Object > Envelope Distort > Make with Mesh… and set the number of columns and rows in the dialog box.
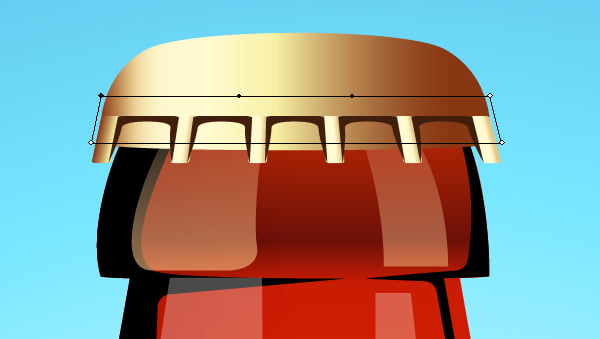
Now while manipulating with the handles and points of the gradient mesh make it look as it looks on the figure below.
At this point our tutorial is over. Check out how our vector beer bottle finally looks like.
Now, you can read the suggestions from network inventory software.
Follow us if you want to be the first to know about the latest Adobe Illustrator tutorials and articles. Vectorboom team works for you!
|