|
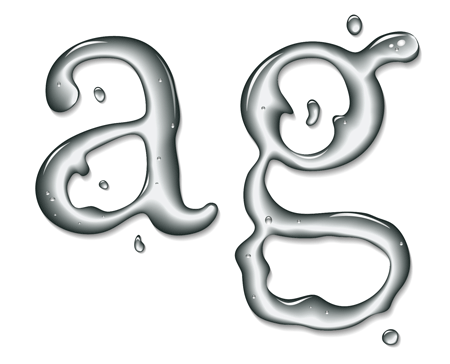
Final Image Preview
In this Adobe Illustrator tutorial we will cover the techniques of creating "liquid” objects with the help of the Dynamic Sketch Tool, part of the DrawScribe plugin, plus the Blend Tool. This tutorial includes detailed instructions and interesting tricks that will allow you to succeed in creating this kind of style.
Step 1
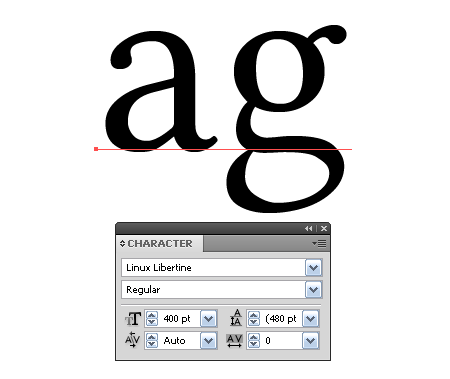
Take the Type Tool (T) and create the letters of our logo.
These letters will be used as a template in the future, so lock them in the Layers panel. Of course in this tutorial you can reproduce your logo — the techniques described below are suitable for all shapes.
Step 2
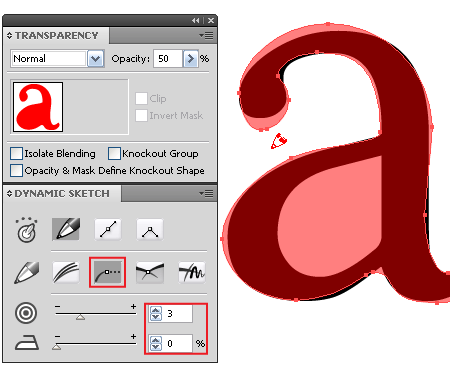
Now take the Dynamic Sketch Tool, which is one of the tools of the DrawScribe plugin and open its panel (Window > DrawScribe > Dynamic Sketch panel). Enable the "Edit or continue existing paths” mode and set the value of Accuracy and Smoothness. Choose a random fill color and set 50% opacity for it in the Transparency panel in order to be able to see the template of the logo in the process of drawing. Now create the outer outline of the first letter.
You do not have to closely follow the outline of the template, as we are dealing with a liquid logo, you just need to reproduce the basic proportions of the letter. Neither do you need to focus on the created shape, as it will be edited in the future.
Step 3
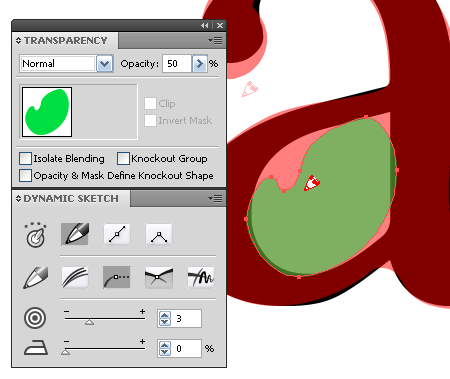
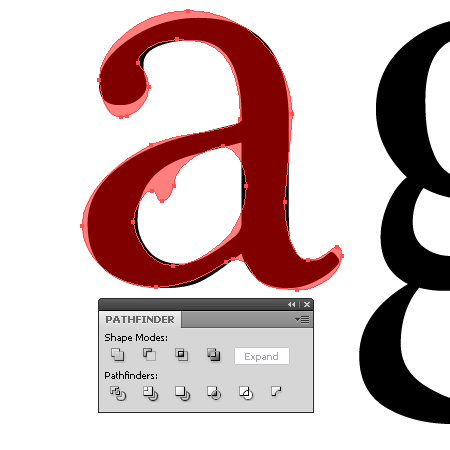
Create an inner outline of the letter using Dynamic Sketch Tool with the same settings.
For the filling, I chose a different color for clarity. Select both created shapes and click on the Minus Front button in the Pathfinder panel (Window > Pathfinder).
As a result of these actions we get a Compound Path.
You can read full version this vector tutorial on Astute Graphics
Follow us if you want to be the first to know about the latest Adobe Illustrator tutorials and articles. Vectorboom team works for you!
|