|
In this Adobe Illustrator tutorial, we will continue learning about the DrawScribe plugin, which is developed by Astute Graphics, allowing for more convenient work in Adobe Illustrator.
Today we will talk about the features of the Dynamic Sketch Tool, which is a fully-featured drawing tool and combines the functions of the Pencil Tool and the Paintbrush Tool, while possessing dynamic properties and other advantages at the same time. The properties of this tool and applying it in practice will be discussed in this part of the tutorial, as we complete our castle illustration.
Step 1
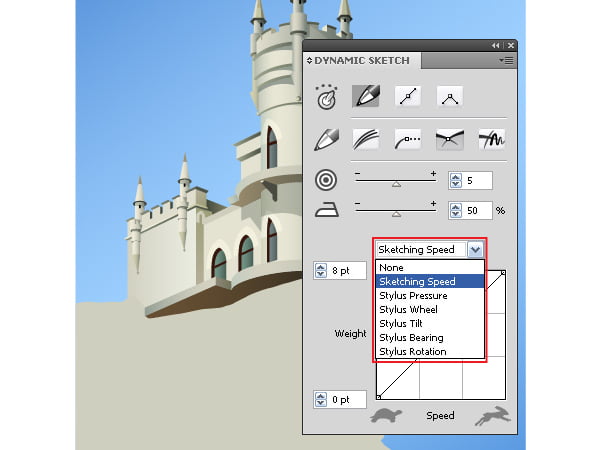
First of all, let’s take a look at the Dynamic Sketch Tool as a tool for creating a variable stroke width. Note that variable stroke widths are only possible in Illustrator CS5, which is the version that Adobe introduced their "Beautiful Strokes” technology.Take the Dynamic Sketch Tool and open its panel (Window > DrawScribe > Dynamic Sketch Panel). It may be necessary to extend the panel by opting for Expand Panel from the panel’s flyout menu.
Like with the Paintbrush Tool, we are able to set the relationship between the variable stroke width and several parameters.
If you are using a Graphic Tablet in your work, you should establish the relationship between the stroke width and the pressure of the stylus. If you use a mouse for drawing, then you need to set the relationship between the stroke width and the cursor speed (Sketching speed).
None of the standard tools of Adobe Illustrator possesses such a feature. You may also set the maximum and minimum stroke width, which would correspond, for example, to the stylus pressure or cursor speed.
Step 2
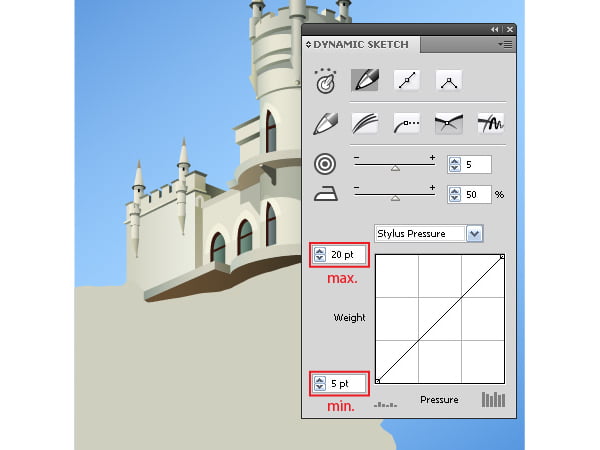
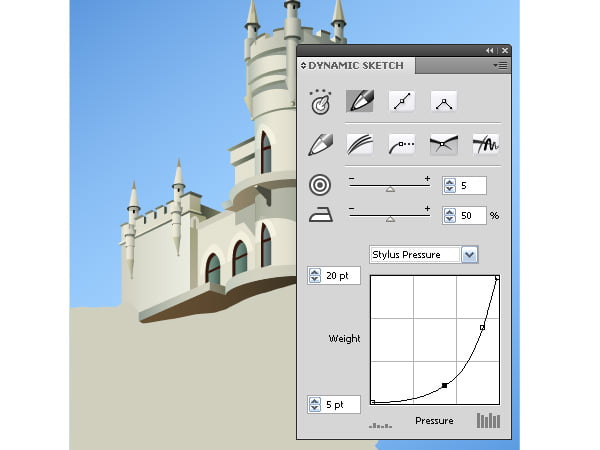
At the bottom of the Dynamic Sketch Panel, we can see a diagram of the dependence of the stroke width to the change in the selected parameter. By default, this diagram shows a linear relationship, but you can edit it (add points, move, bend, etc.), setting up the tool to work the way you want it to.
Step 3
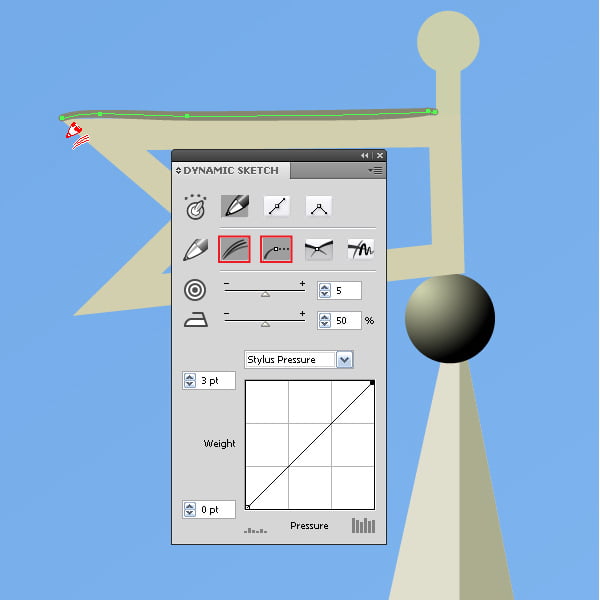
In this artwork, I used the Dynamic Sketch Tool for the creation of small details, such as shadows and highlights on the surface of the castle. Before we talk about using the tool, I would like to make a little digression. When you create vector artwork, make it of the same size its raster counterpart is supposed to be. This way you will not need to create unnecessary objects that will not be visible when viewing full-size and work less accurately.
This principle will save you plenty of time and this is how professionals work. To create small objects you will naturally zoom into the composition. And to quickly gain an overview of the entire image, use the shortcuts Command + 1.
Well, in this work I was using the Graphic Tablet, so I set the relationship of the stroke width to the stylus pressure. I then enabled the Repeat Sketch Traces and Edit or Continue paths buttons in the Dynamic Sketch Panel, and created the first stroke of variable thickness on top of the flag of the castle.
You can read full version this vector tutorial on VectorTuts+
Create a Fairy Castle Using Adobe Illustrator and DrawScribe Plugin — InkScribe Tool (Part 1)
Follow us if you want to be the first to know about the latest Adobe Illustrator tutorials and articles. Vectorboom team works for you!
|