|
Final Image Preview
In this Adobe Illustrator tutorial we will meet a new friend, the DrawScribe plugin, which is developed by Astute Graphics for a more convenient creative workflow in Adobe Illustrator. It consists of two tools; the InkScribe Tool and the Dynamic Sketch Tool.
I’ll tell you about the features of these tools in the process of creating an illustration of a castle. The tutorial consists of two parts, each one is related to the work of one tool. This first part deals with the InkScribe Tool. This tool is designed to create vector paths consisting of Bezier curves and straight segments, and not only combines the features of drawing and editing tools, but also contains a number of features that you’ll learn about after the jump.
Step 1
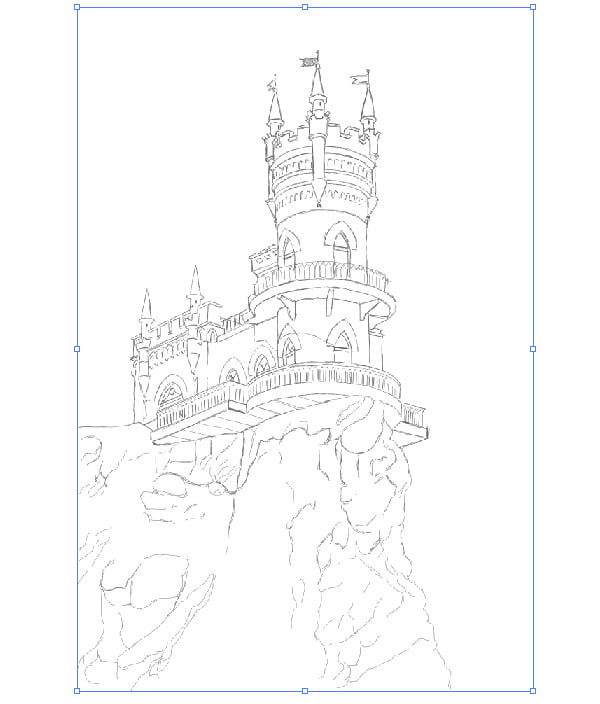
In this tutorial I will use a sketch of a castle, which must be pasted into the document workspace (File > Place).
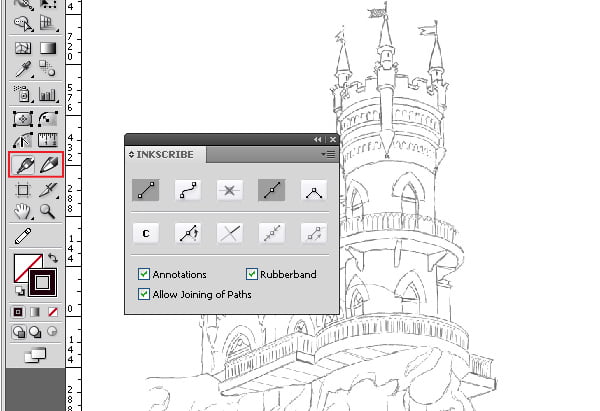
To create basic elements of this artwork, I’ll be using the InkScribe Tool. Let’s take a look at it. After downloading and installing the plugin, the icons with its tools will appear in the bottom of the toolbar. To open the InkScribe panel, go to Window > DrawScribe > InkScribe Panel.
Step 2
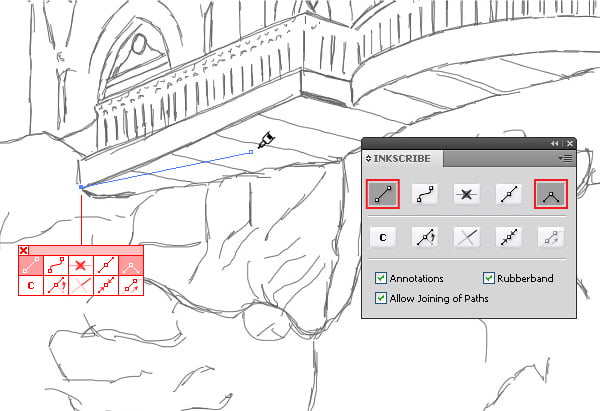
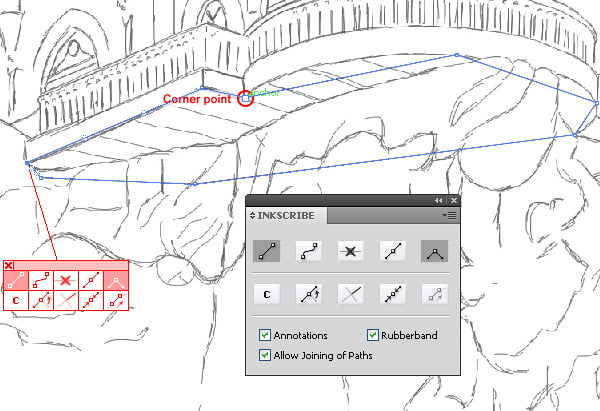
Take the InkScribe Tool, press on the "Draw a straight segment” button and the "Corner point” button in the InkScribe panel and create the first point of the path.
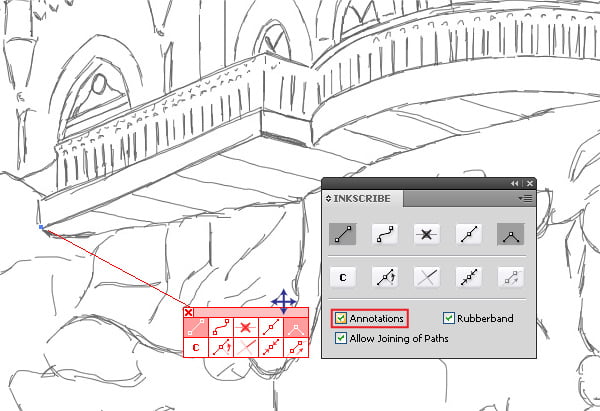
Annotations appear next to the created point, which may contain all of the buttons of the InkScribe panel as it is in my case, or contain only the ones that you use often in your work. The presence of the control elements next to the point will save you time finding the necessary panel, tool or button that can be located in different places of your workspace. You can move the annotations, or disable them if needed.
The annotations and the InkScribe panel buttons perform the same command, and you can use whichever is more comfortable for you. So, create a closed path consisting of straight-line segments and corner points.
Step 3
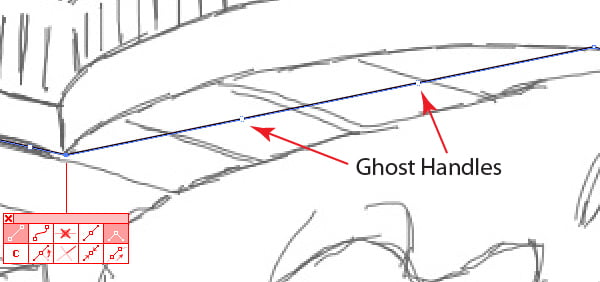
Straight-line segments created with the help of the InkScribe Tool have one remarkable feature. These segments have an additional control element called Ghost Handles.
You can read full version this vector tutorial on VectorTuts+
Follow us if you want to be the first to know about the latest Adobe Illustrator tutorials and articles. Vectorboom team works for you!
|