|
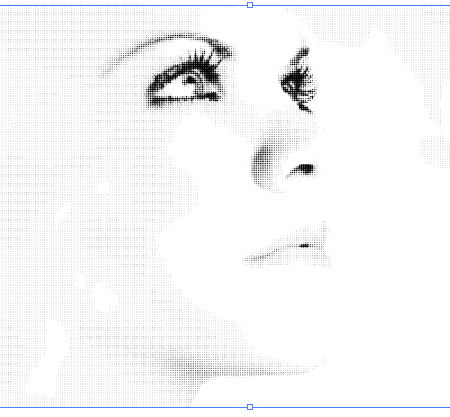
Final Image Preview
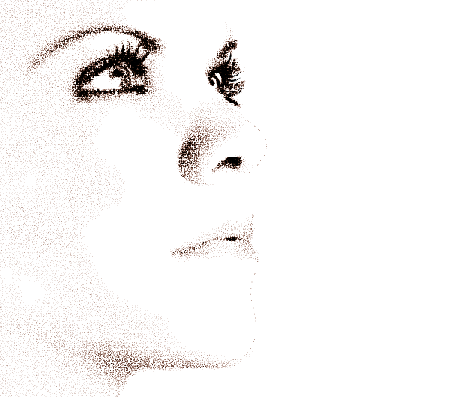
Stippling is the creation of a pattern simulating varying shades of tone by using small dots. Such a pattern may occur in nature and these effects are frequently emulated by artists (Wiki). These illustrations may contain many thousands of points, and creating them manually is a very time-consuming process. In addition, you will need special skills. For example, the illustration that you see in the preview for this tutorial contains more than 75,000 points. Today I’ll tell you how to create illustrations in the stippling style automatically. Let’s begin!
Step 1
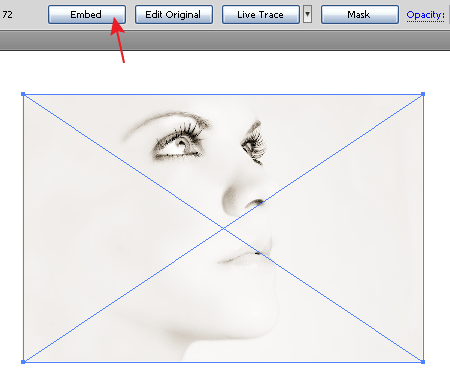
You can apply the techniques described below to create the illustrations in the stippling style based on raster and vector images. It is better if it is a high contrast image, made in the style of High-key lighting. In this tutorial I’ll use the photograph Face (credit to deviantART user ~rudla) which is made in that style. Paste the photo into the artwork (File > Place…) then click on the Embed button at the Control panel.
Duplicate the photograph (Cmd / Ctrl + C; Cmd / Ctrl + F). In further work we will need both images, but for now disable the visibility of the top one in the Layers panel.
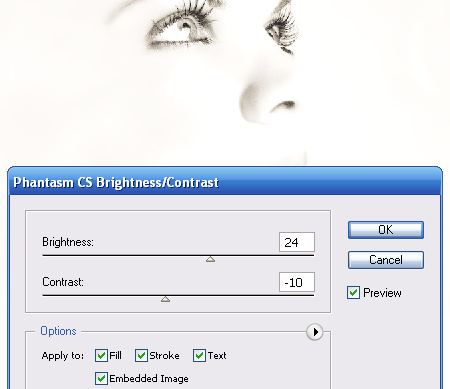
Step 2
You can work with raster objects in the Adobe Illustrator program if you are using the Phantasm CS plugin. Let’s change the brightness and contrast of the image in order to remove minor highlights and shadows on the face. Select the bottom picture and go to Effect > Phantasm CS > Brightness / Contrast….
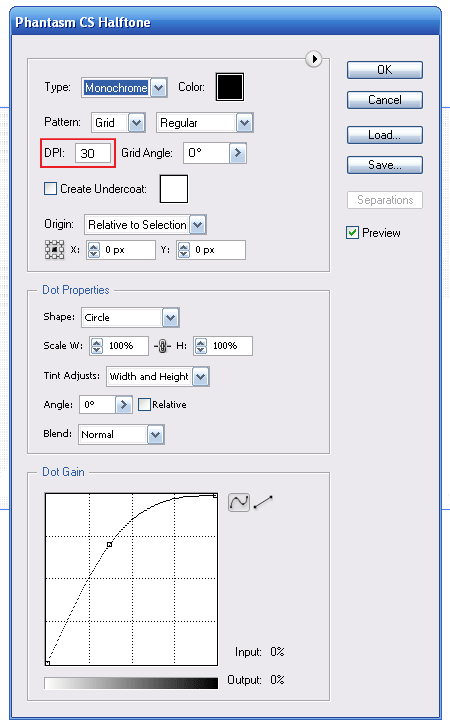
Keep the images selected, go to Effect > Phantasm CS > Halftone… and set the parameters indicated in the picture below.
Of course, I do not insist on the fact that the parameters must be exactly the same as you have an opportunity to observe the effect of changes along with the changes in its parameters. Perhaps, I would recommend you this: the DPI value should be high enough, about 30dpi (dependant on scale of the artwork). This parameter affects the number of points of the effect and on the level of image detail conveyed.
Step 3
The resultant illustration only vaguely reminds of the stippling style. However, with the help of Phantasm CS, we got an array of points of varying size that accurately conveys the play of light on the modelís face.
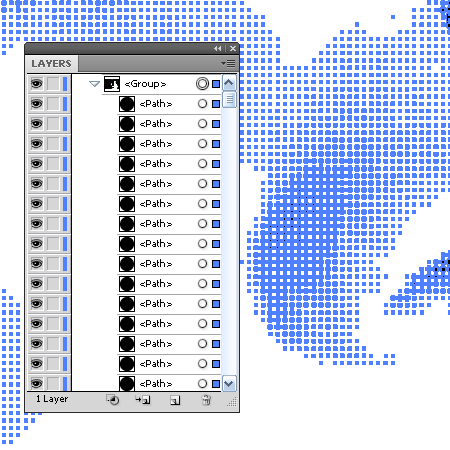
Let us add to the strict rows of the automatically-generated points with some "man made” mess. Select the image and go to Object > Expand Appearance. Now the illustration is a group that consists of a bunch of regular vector circles.
You can read full version this vector tutorial on Astute Graphics
Follow us if you want to be the first to know about the latest Adobe Illustrator tutorials and articles. Vectorboom team works for you!
|