|
Final Image Preview
In this Adobe Illustrator tutorial we will learn how to create a vector diamond. Every diamond has a complex shape, especially when it comes to the largest and most beautiful diamond which is the Star of Africa. In order to simplify the upcoming work, use VectorScribe and DrawScribe plugins which really help when drawing geometric artwork.
The Star of Africa
All the diamonds of the world cannot be compared with the huge stone that appeared to world in the "Premier” mine in South Africa. Originally it weighed 621 grams (3106 carats). This remarkable stone was presented to the British monarch King Edward VII on his birthday, November 9, 1907. After careful consideration, it was cut into several parts and each faceted. The largest of the resultant diamonds was named the Star of Africa. That is the one that adorns the Royal Scepter.
The Star of Africa, a tear shaped diamond has 74 facets, and is the largest diamond in the world. And today it was chosen to help commemorate the Queen’s Diamond Jubilee celebrations — 60 years since her ascent to the throne — with a tutorial showing how to draw this in vector.
After a brief digression into the history of diamonds, let’s proceed to the creation of its shape.
Step 1
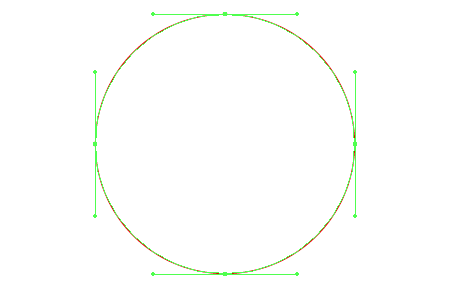
The geometry of the diamond is quite complicated, so I will simplify it a little bit, since we are illustrators, not stone cutters. Take the Ellipse Tool (L) and create a circle.
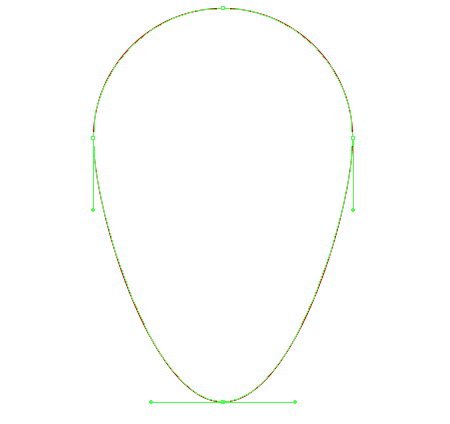
Select the lowest point of the circle and move it vertically down, as it is shown in the picture below. By holding down the Shift key whilst dragging the point, you can ensure it’s a perfectly vertical movement.
Step 2
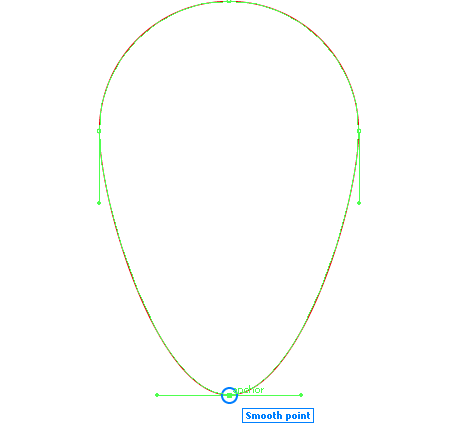
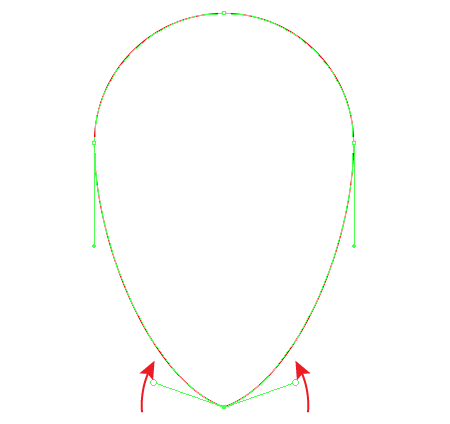
The lowest point of the shape is smooth
Transform it into a corner point. If you are using in your work the plugins developed by the Astute Graphics, such transformation is done in a very simple way. You can double-click on this point, using the InkScribe Tool (DrawScribe plugin), or click on the appropriate buttons in the InkScribe panel or PathScribe panel (VectorScribe plugin)
You will not be able to make such transformations using the standard features of the Adobe Illustrator. For example, the convert selected anchor points to corner command will change the original shape and retract handles, as it is shown in the picture below.
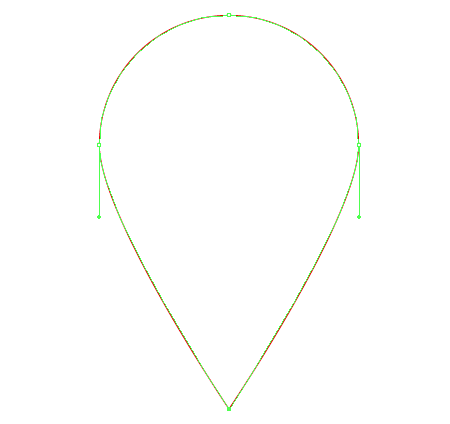
Step 3
We need to rotate the handles to the lowest point of the ellipse at the same angle. To do this, select the ends of the handles with the help of the Path Scribe Tool (VectorScribe plugin) and move them up achieving an absolutely symmetric shape
You can read full version this vector tutorial on AstuteGraphics.com
Follow us if you want to be the first to know about the latest Adobe Illustrator tutorials and articles. Vectorboom team works for you!
|