It is well-know that among all the vector editors Adobe Illustrator has the most advanced means of three-dimensional modeling, but sometimes even they are also not enough. Often, in order to create a complex three-dimensional object, or properly locate multiple objects in perspective view, it is necessary to have a reference image. And the usage of traditional three-dimensional graphic-editors can be unnecessary complicated. However, there is an editor that allows even beginners to create three-dimension objects of any complexity only in a couple of minutes; moreover, they can be easily converted into vector format.
It is Trimble SketchUp that we mean, which was, until recently, owned by Google, but now has a new owner. So why would we use SketchUp, rather than any other three-dimensional editor? This is for a number of reasons. First, SketchUp is intuitive measuring and easy to learn three-dimension editor; it is enough to watch a couple of short instructional videos to start your work with it. Second, as the name implies, it has no photo-realistic rendering, and the graphics is presented in the style of illustration, which simplifies the vectorization process. And the last, but not the least, the editor has the most remarkable feature - the professional version of the package has the ability to export three-dimensional scenes directly to the vector PDF or EPS format without rasterization. Are you thrilled? Let’s look at it closely.
Step 1
As I mentioned before, SketchUp is presented in two versions, basic and professional. And since the basic version is free and almost functionally equal to professional, we will begin with it. Go to the download page, select your language form the twelve available, and click on Download SketchUp.
After installing the program check out a couple of short video tutorials, they are designed for a "quick start” in SketchUp.
Getting started with SketchUp - Part 1
Getting started with SketchUp - Part 2
Getting started with SketchUp - Part 3
Getting started with SketchUp - Part 4
You can also visit a page where a complete video course about the work of the SketchUp editor is presented.
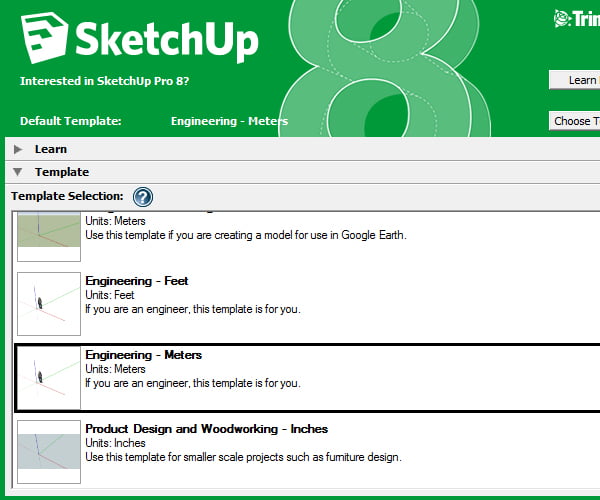
In the next few steps we will look at the highlights to create a model city; since the process of modeling will not be described, you can download an archive with a ready scene in SKP format and directly go to the export in 2D.So, start SketchUp and go to the Template tab in the opened window; choose the Engineering template and a convenient system of calculation- meters or feet, and click on the Start using SketchUp.
Well, now we are ready to model our city, and without wasting time, we proceed to the next step.
Step 2
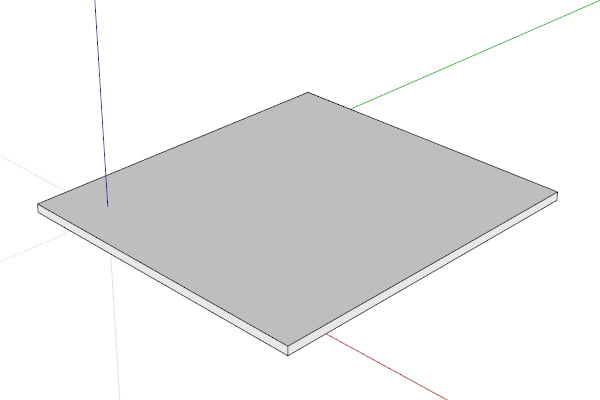
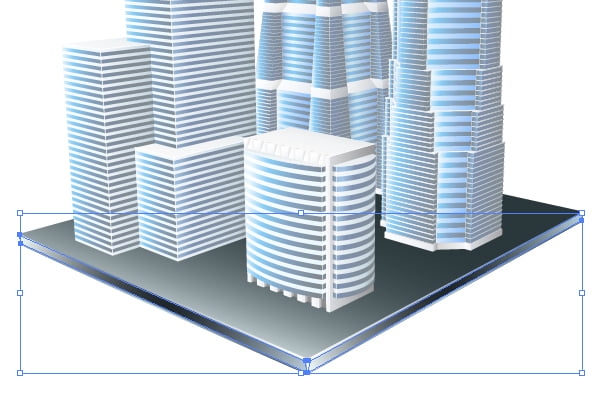
To start, create a rectangular base or a platform for our future city.
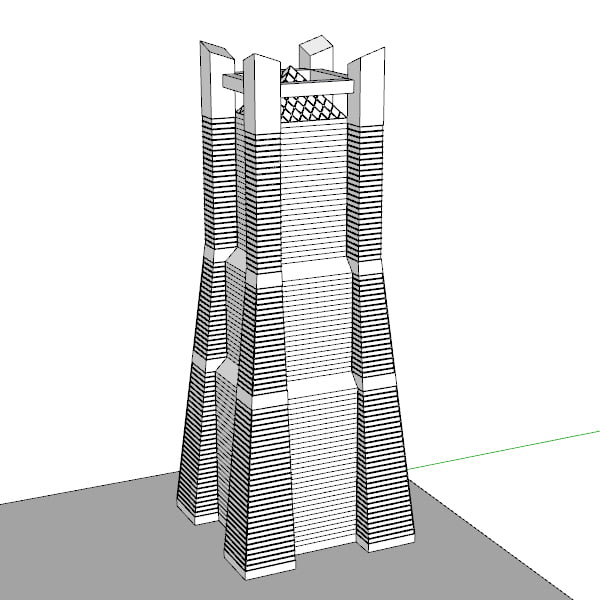
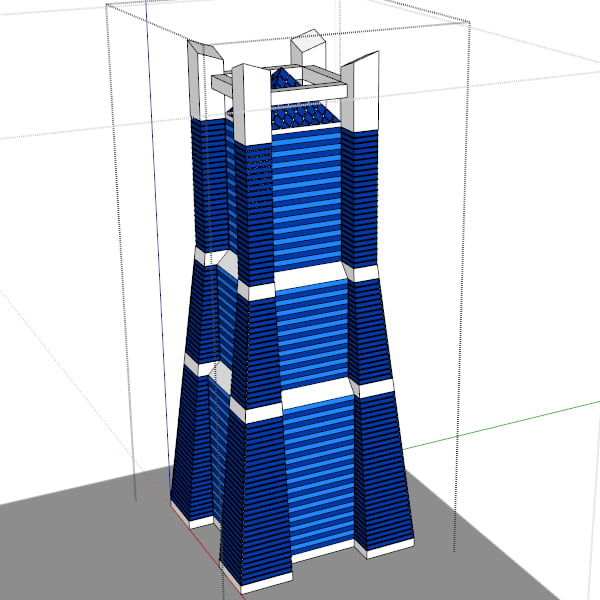
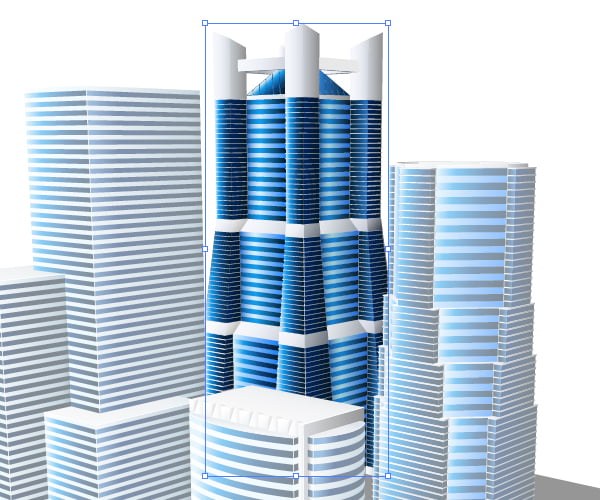
So now turn on your imagination at your most and begin building the skyscrapers! We will need four buildings which should vary in shape and height. As the skyscrapers become higher when getting further from them, we will start with the farthest. I’ve got this futuristic tower.
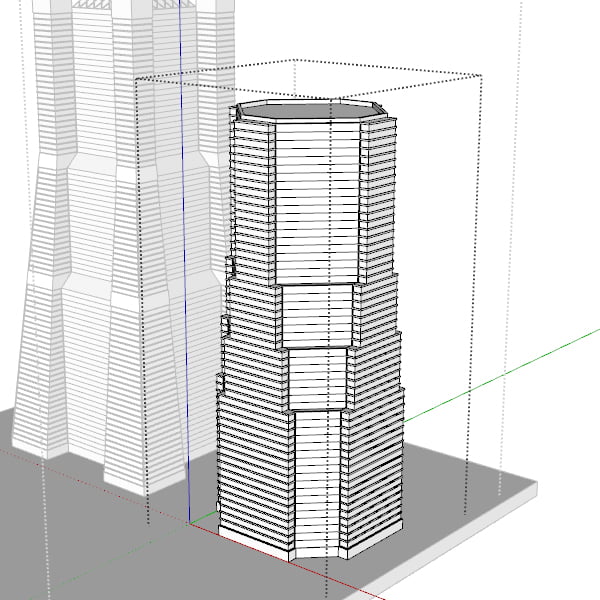
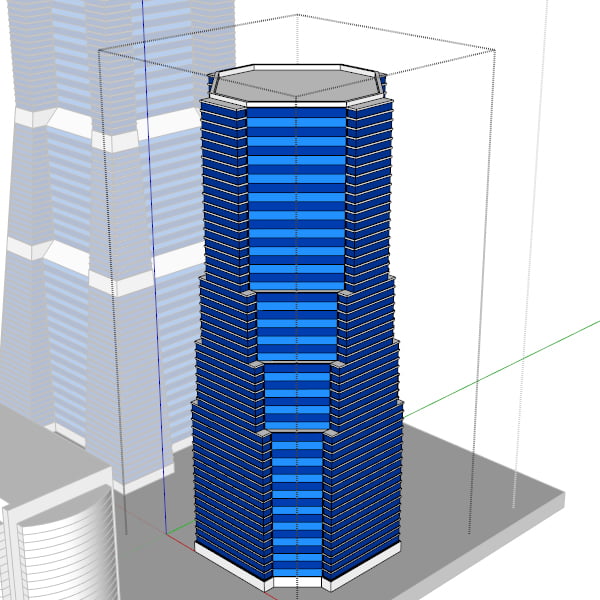
You can copy the outlines of my skyscraper, or create your own, like-nothing-on-earth design. Now model octagonal tower, which height is a little less than the previous one. Then dispose it as it is indicated on the figure below.
Step 3
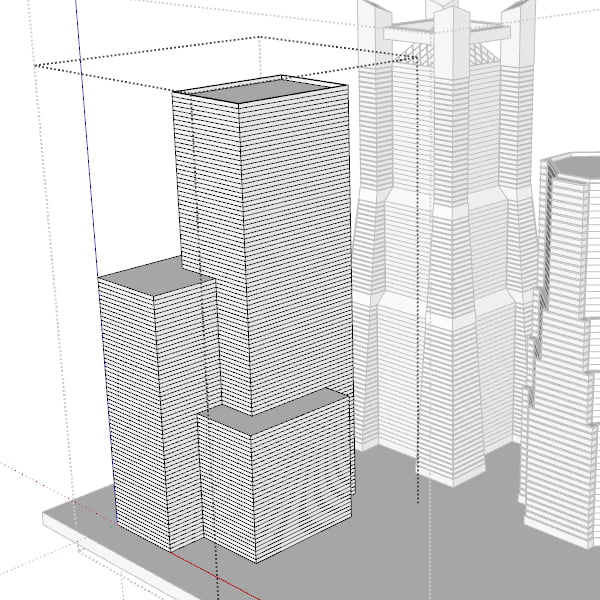
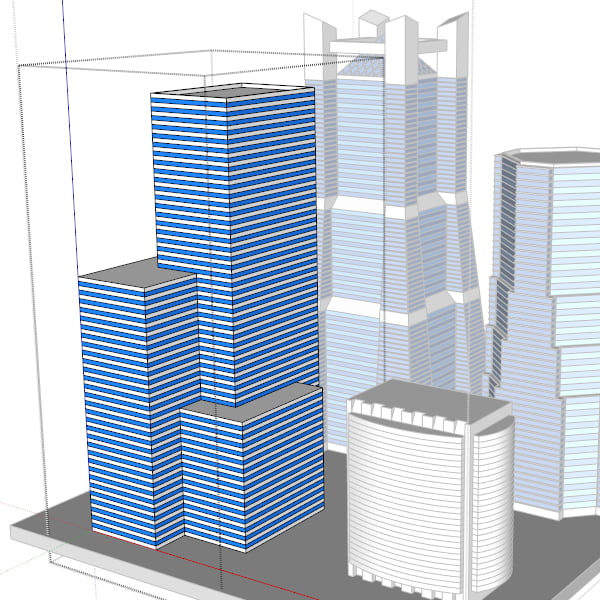
I’ve chosen more simple construction for our next building; I disposed it to the left of our first building.
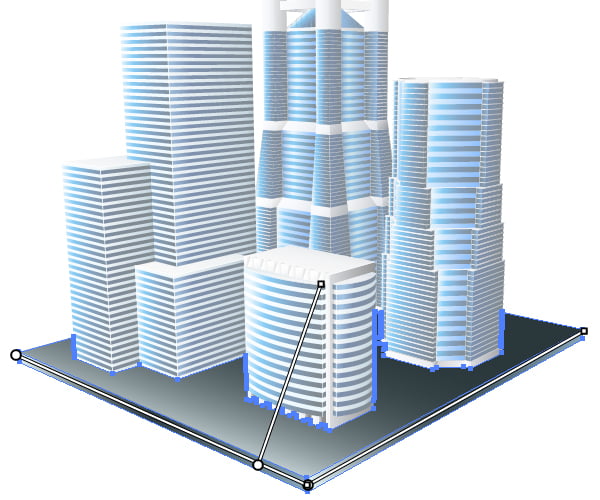
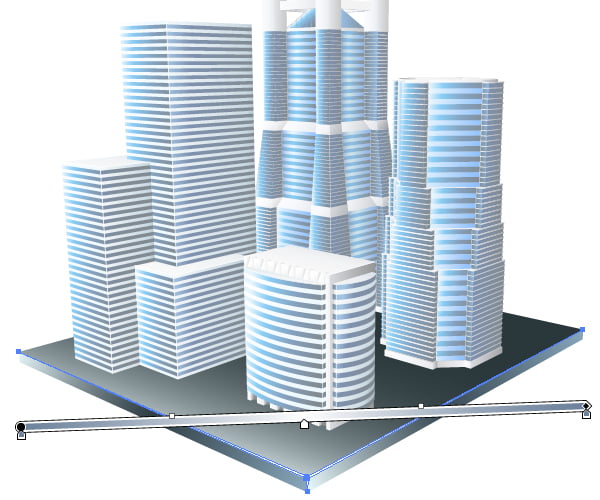
At this point, the scene should look like this.
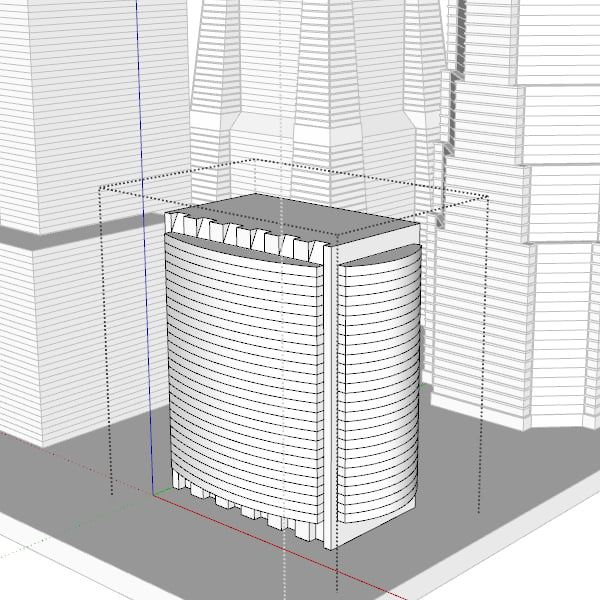
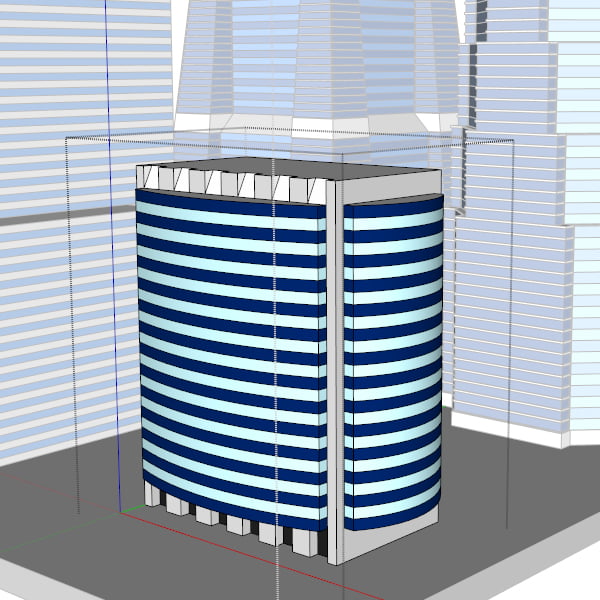
Create the lowest building on the foreground; it shouldn’t obscure the view of the buildings located behind. And for convenience of our work place every skyscraper into a separate group.
Step 4
In this step we will brighten up the scenery while adding some colors. As our final work with colors and gradients will be done in Adobe Illustrator, we will limit ourselves to only some basic colors.Color the platform into basic grey, and apply some shades of blue and light-grey to the skyscrapers on the background.
Color the octagonal tower by the same principle.
It is even simpler with the following buildings - apply some grey and light-blue.
And now the color scheme for the building on the foreground.
Step 5
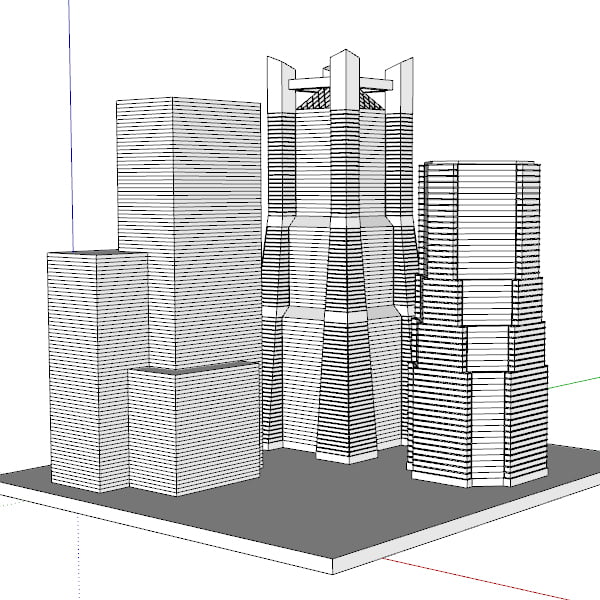
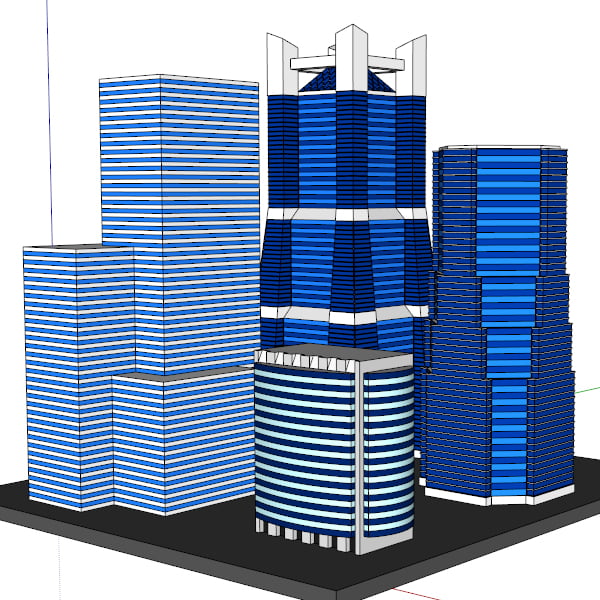
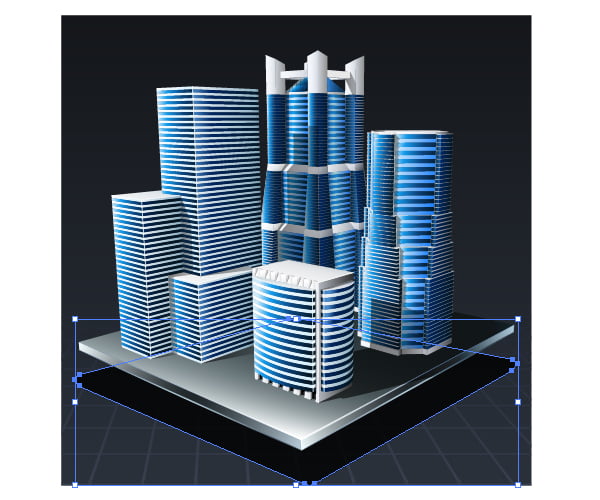
Well, by this time the main work in SketchUp is done; let’s see what we’ve got.
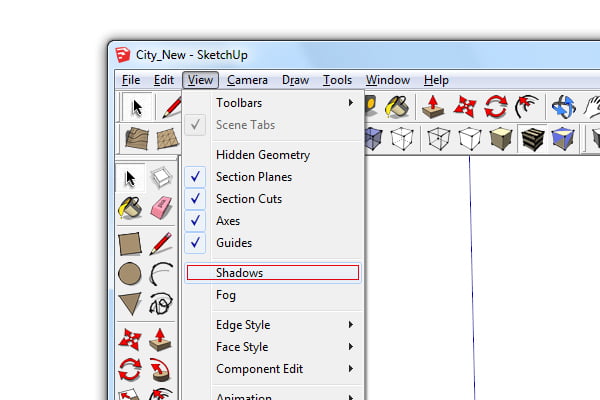
Now our scene is illuminated equally, so it doesn’t have enough light-and-shade; and as SketchUp can simulate sunlight, let’s turn it on in the menu item View > Shadows.
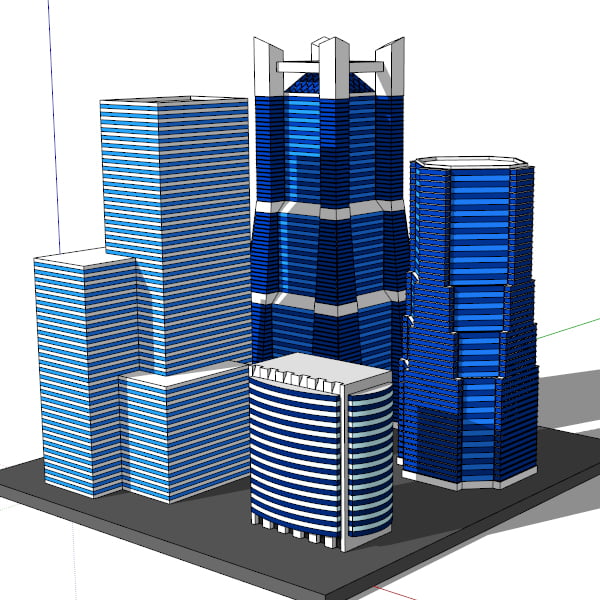
Check out how more realistic our picture looks like.
On this, our work on three-dimension scene is finished. In our next step, we will check out some various ways of two-dimension export, and begin the vectorization process.
To tell the truth, I was very amused by the city blocks creation process; I felt like a real architect or a designer of skyscrapers.
Step 6
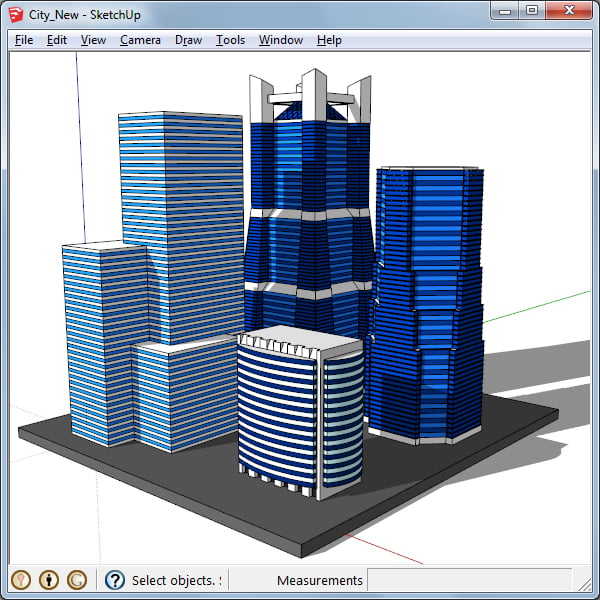
A distinctive feature of SketchUp is that the entire working field is like a "camera view”. In practice it means, that we will get exactly what we see on our screens. Therefore, for the convenience of positioning, expand your window to full screen and hide all the unnecessary toolbars.
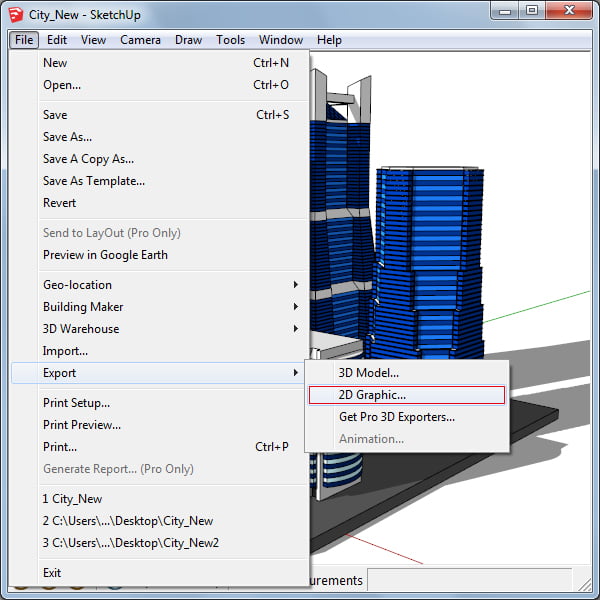
Now arrange and scale the stage so, that all the elements were visible with as little empty space as possible. And go to File > Export > 2D Graphic…
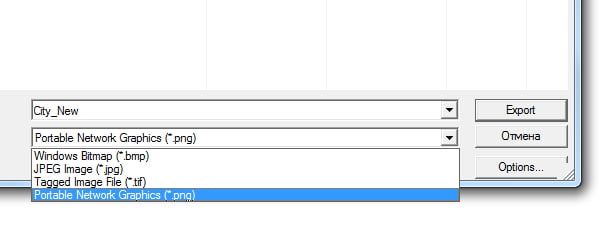
As you see, only four raster formats are available for selection. This is a limitation of the basic SketchUp version.
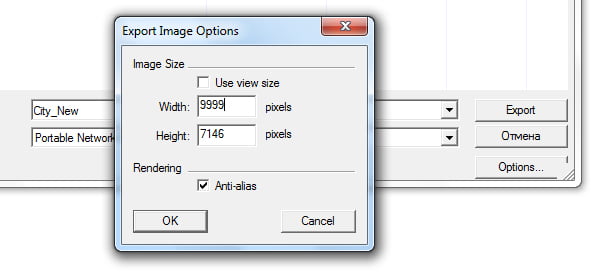
However, it doesn’t necessarily mean that the usage of the raster format is not suitable for the vectorization. In the options for exporting we can put almost any size up to 9999 pixels on the long side.
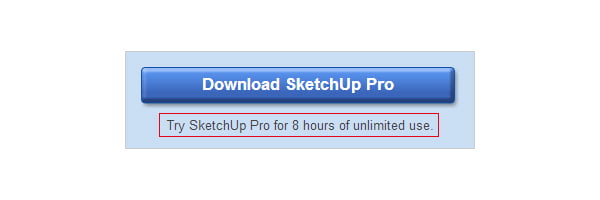
Well, now we need the professional version of the program. Let us go to the download page and download SketchUp Pro.
We can use all its features for eight hours for free. So, without wasting our limited time, open the file with our stage and go straight to File > Export > 2D Graphic…
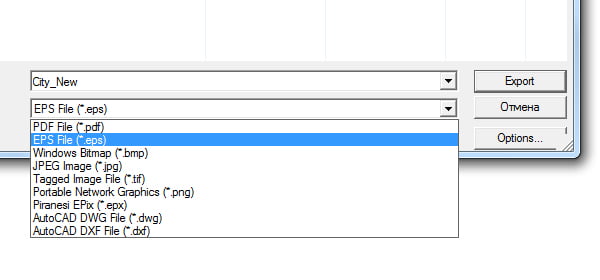
As you can see on the screenshot, the list of the supported formats is more extend. But we’re interested only in vector formats, so take the EPS and click on Export. And now open the resulting EPS file in Adobe Illustrator.
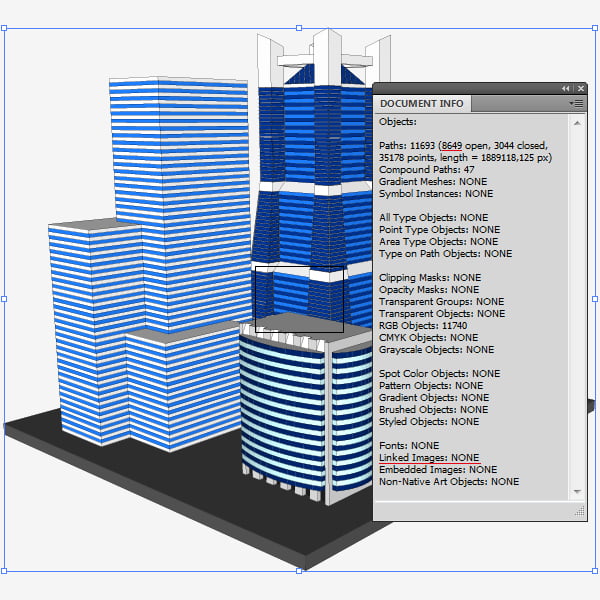
So, now we have a 100% vector document which can be easily edited. However, is has the following disadvantages- some open paths and lack of shadows from the sunlight. Also, gradients on the curved surfaces were transformed into a set of polygons with a uniform fill.
Obviously, such vector file needs some manual polishing, which we’re going to perform in our next steps.
Step 8
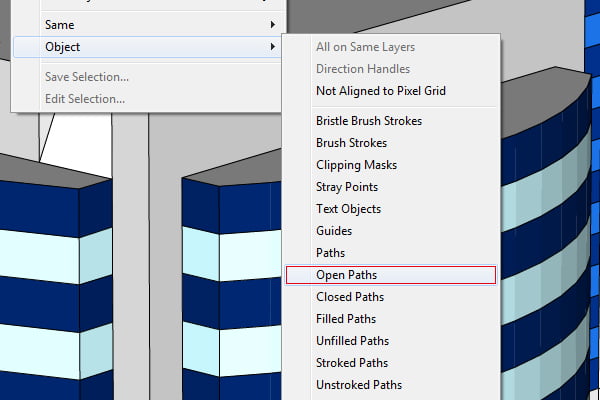
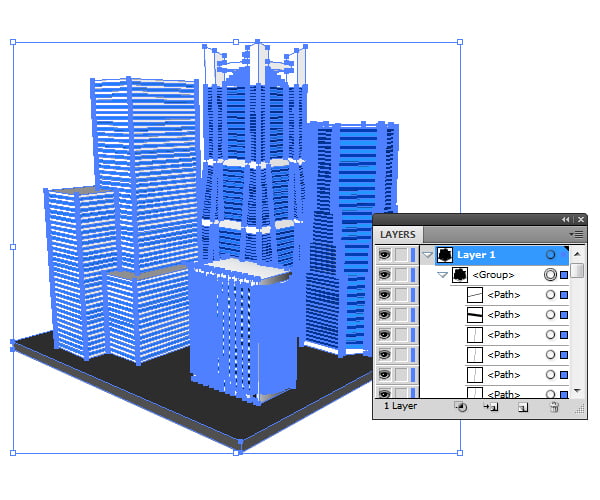
So, to begin with, select all the open paths. You can do it quickly with the help of a free plug-in Select Menu. To do so, download it and unpack it into the folder Program Files Dir\Adobe\Adobe Illustrator CSx.x\Plug-ins\. Then select the menu item Select > Object > Open Paths.
Group them (Ctrl+G), and in the Layers panel turn off the visibility of the group. We temporarily don’t need this group, but we will get back to it later.
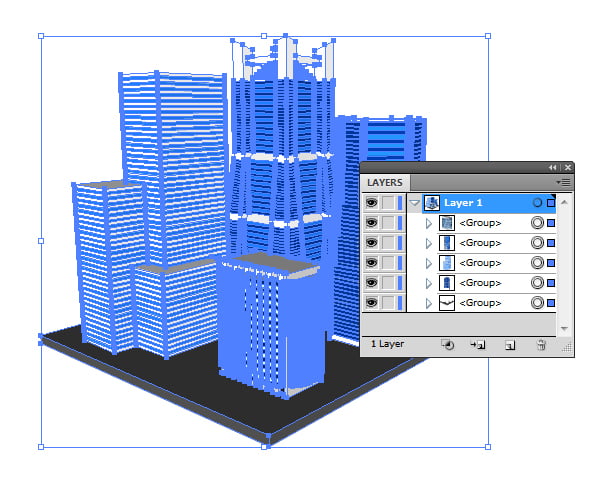
And now divide the remaining paths into five groups- four skyscrapers and one platform. They can also be separated into different layers, although it is not required.
Step 9
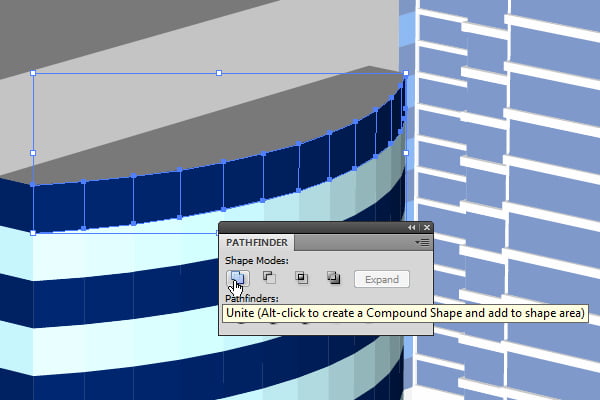
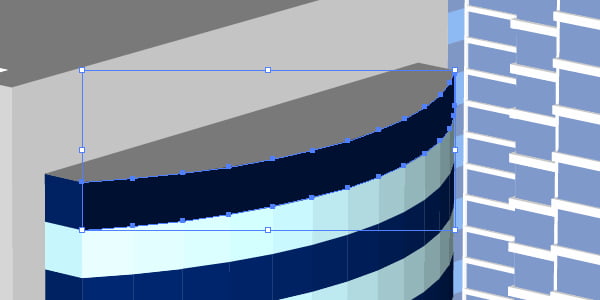
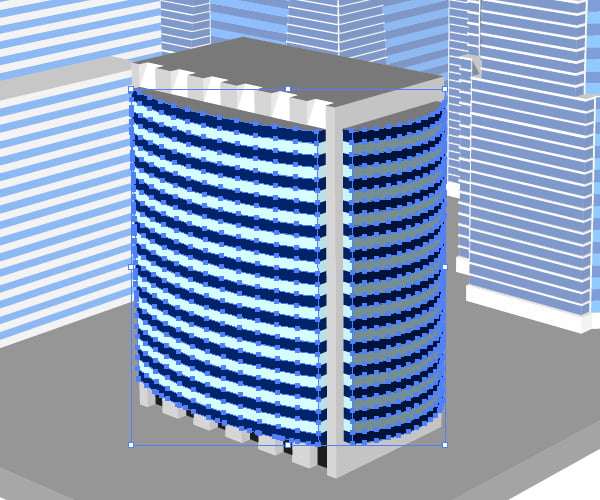
Select the group with the first building, and go to the isolation mode. Our task for now is to unite in one form the polygons comprising a single curved surface. To do so, select them and apply the Unite in the Pathfinder panel.
Or use the Shape Builder Tool (Shift+M).
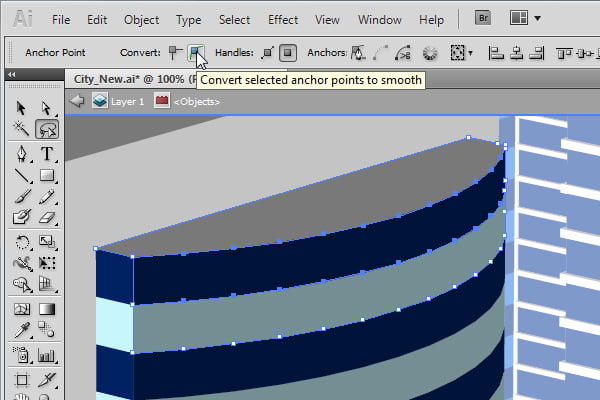
Then with the help of the Lasso Tool (Q) select the points on the adjacent outlines, which should be smoothed out and transform them into smooth points.
Perform this operation with all the objects which need to be smoothed out.
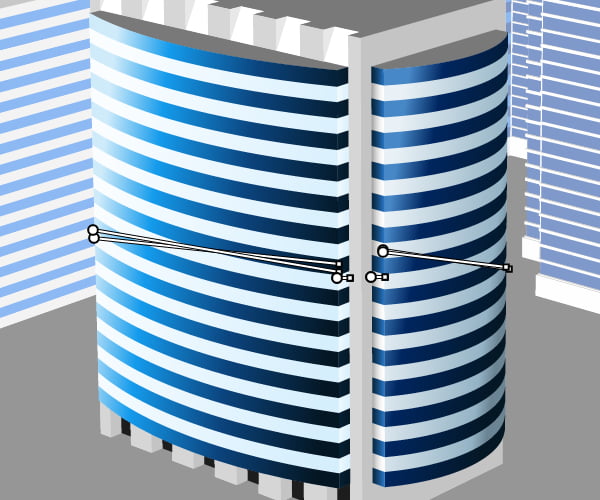
Step 10
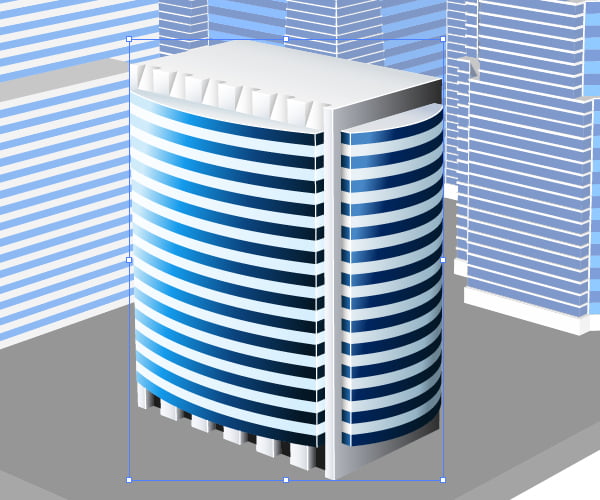
Without extending the isolation mode, group the one-color forms into a compound path; it can be quickly done with the menu item Select > Same > Fill & Stroke, and then go to Object > Compound Path > Make or use Cmd / Ctrl + 8 shortcuts. Now apply the linear gradient from light-blue to dark-blue to our compound path.
You can find out how to get the right colors for your gradients in Adobe Illustrator by reading this tutorial.
Therefore, to each surface of the building apply the gradient fill.
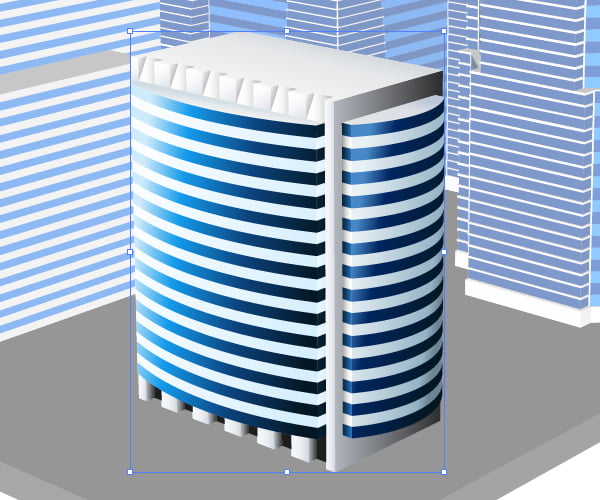
Step 11
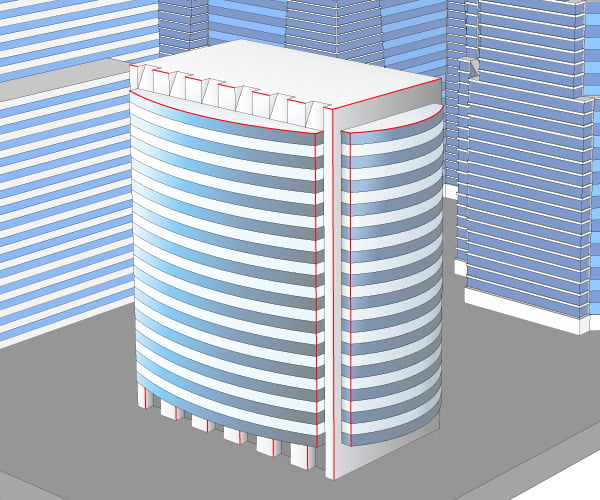
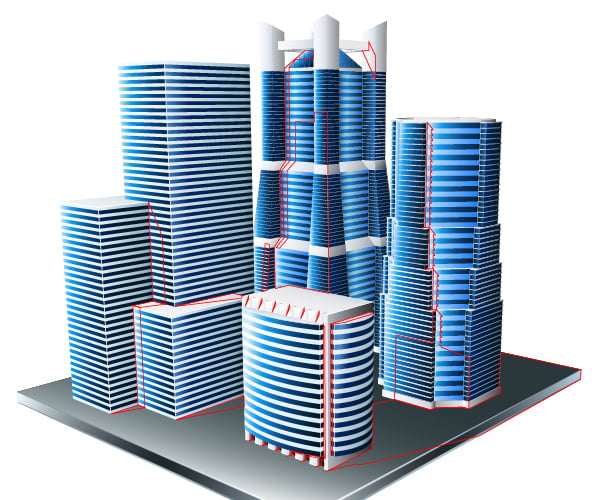
Now turn off the isolation mode, and turn on the visibility of a hidden group. This group completely consists of open paths with stroke with no fill, some of which are connected into compound paths in random order. That’s why with the help of the plug-in Select Menu, select them (Select > Object > Compound Path) and take them apart (Object > Compound Path > Release (Opt / Alt + Shift + Cmd / Ctrl + 8)).
With the help of the Selection Tool (V), select the paths marked with red of the screenshot; the rest of the paths should be grouped and hidden.
Change the outline width to 5px, and the color to white, and group it with the building.
Step 12
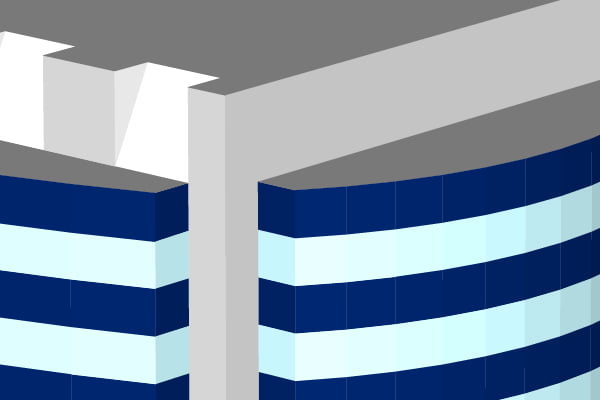
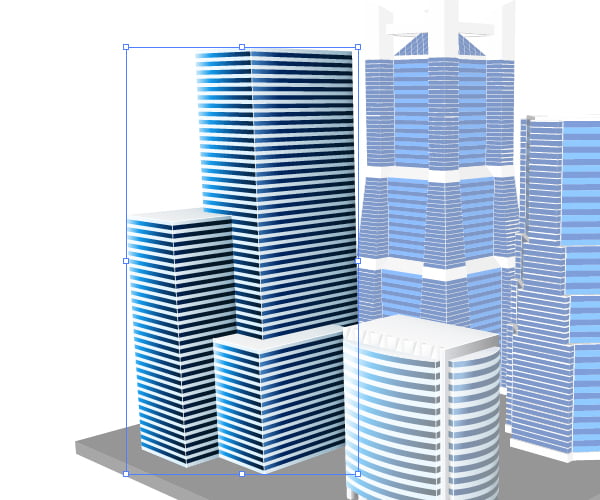
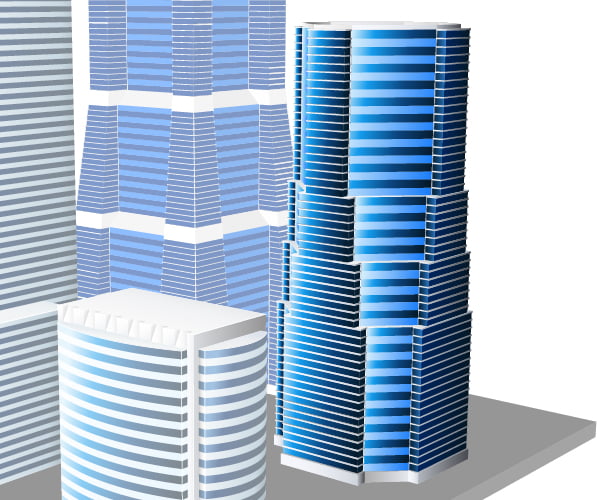
Repeating the steps 9 to 11, make the neighbor skyscraper similar to what you see on the figure below.
And now the octagonal tower on the right.
And also the skyscraper on the background.
Step 13
In this step we will work on the platform to the city. Apply the linear gradients as the fill for the three existing planes.
Create a form as on the screenshot below, and apply linear gradient to it.
And now two small objects underneath the platform.
And two objects on the sides of the platform.
And at the end of our work, duplicate the plane (Cmd / Ctrl + C, Cmd / Ctrl + F), and apply the linear gradient from white to black to the fill, and switch the blending mode from Normal to Screen.
Step 14
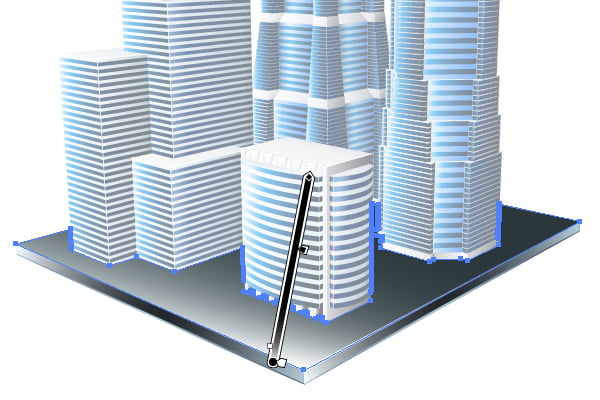
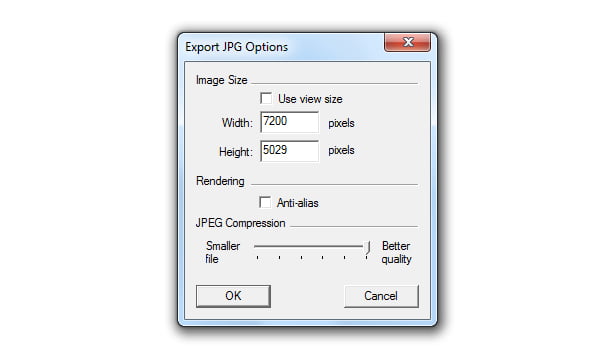
As we remember, SketchUp Pro exported three-dimension scene into EPS file without shades from the sunlight, even though some shadows made our picture more attractive to the eye, and more realistic of course. Let’s restore them. Open our scene again in SketchUp, and go to File > Export > 2D Graphic… Select the raster format, JPG for example, and paste the parameters corresponding to the image.
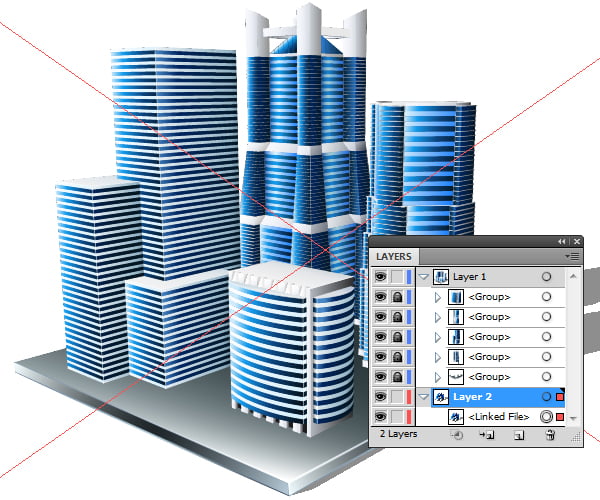
And now, in Adobe Illustrator, create a new layer, and with the help of menu File > Place, place a raster image into it, which we locate exactly below the vector image.
Turn off the visibility of the vector layer, and, in the layer configurations with the raster image, turn on the Template function. With the Pen Tool (P) shape the outline of the shadow.
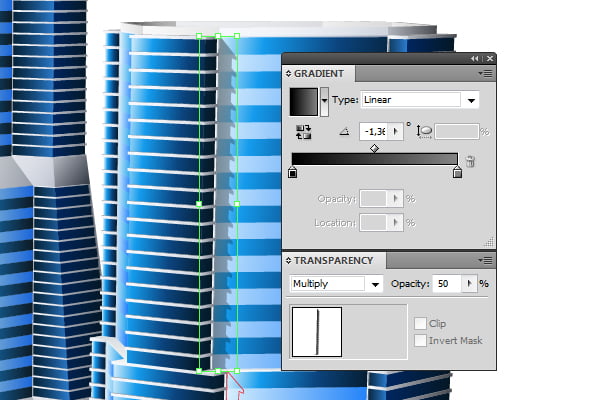
Apply to every outline the gradient fill from black to grey, Multiply blending mode, opacity 50%, and turn off the stroke.
And here is what we’ve got as the result.
Step 15
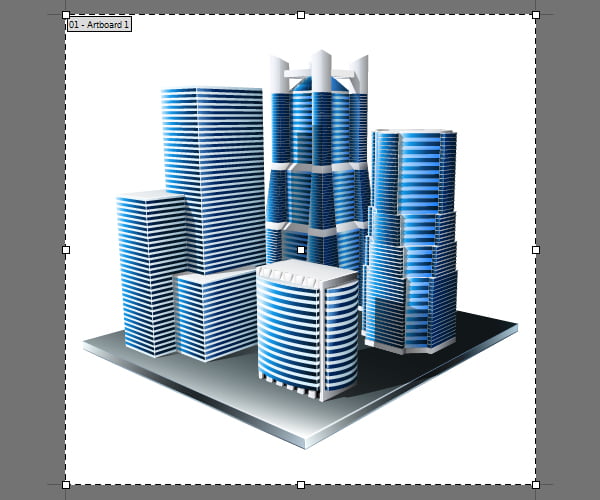
If you select all the elements (Cmd / Ctrl + A) and open Transform panel, you’ll see that our illustration has a gigantic size - more than 5000px along the larger side.
Until this moment, it was quite convenient to work with the file of this size, but now it is needles. That’s why with the help of the Artboard Tool (Shift+O) change the size of the working area roughly to 940 x 940 px, and also scale the image as it is indicated on the screenshot.
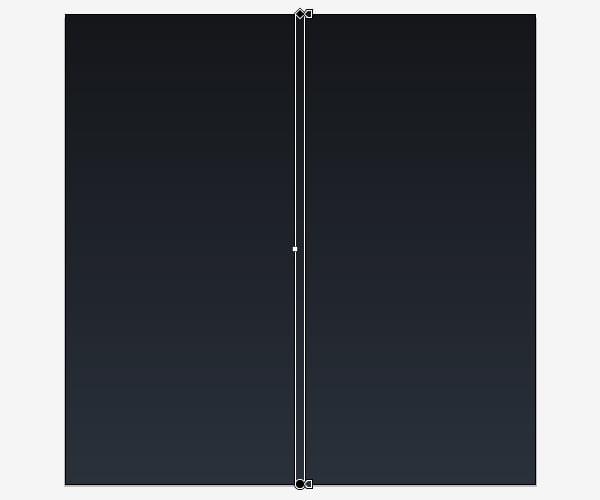
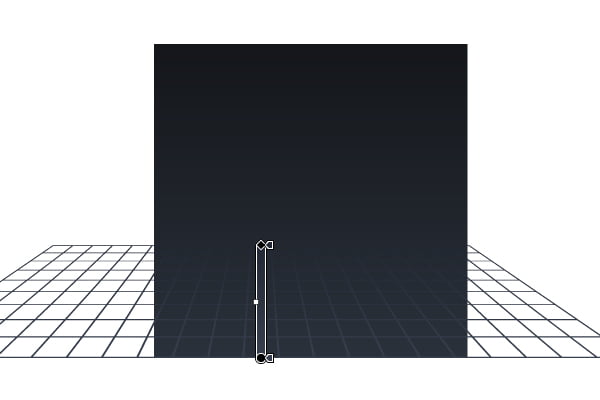
Turn off the visibility of the platform with the skyscrapers and the platform, and place a square form with linear gradient on the size of your working area.
Step 16
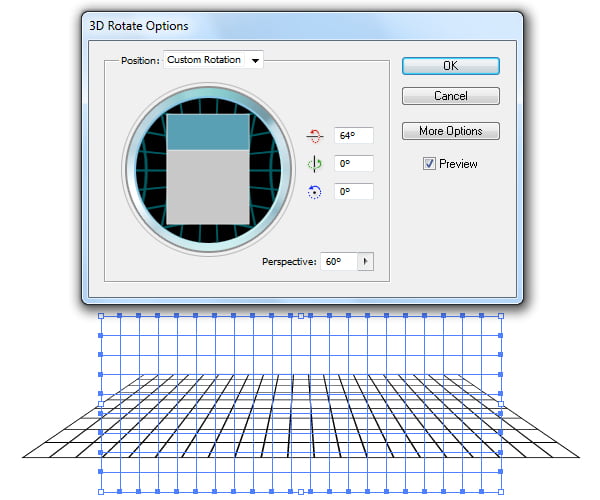
Select the Rectangular Grid Tool and draw a mesh similar to what you see on the screenshot below.
Leaving the mesh selected, change the thickness of the stroke to 4px, and go to the Effect > 3D > Rotate… In the dialog box, set the following parameters.
Then apply command Object > Expand Appearance. In created group delete the Clipping Path, and apply Unite command from the Pathfinder panel to the rest of the group. The resulting compound path should be filled with linear gradient, and placed as it is indicated on the picture below.
Step 17
Turn on the visibility of all objects in the Layers panel. Below the group with the skyscrapers, create a form with rounded corners, black fill, and with Multiply blending mode.
Apply the Gaussian Blur filter with the radius of 125px to this form. If after you applied this filter some artifacts showed up, visit this page, where you’ll be able to find the solution to your problem.
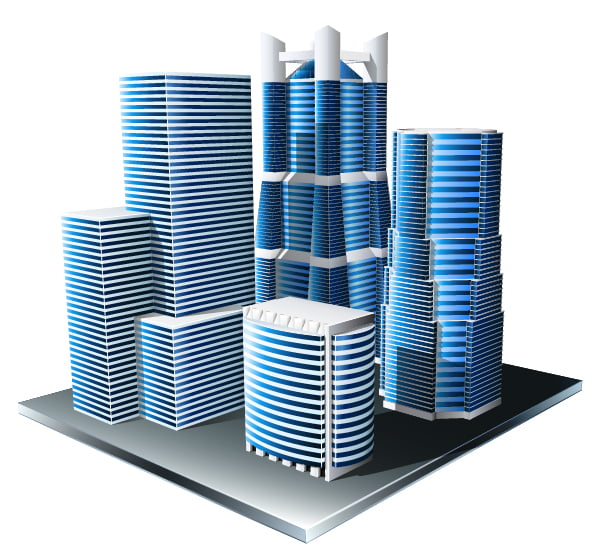
And at the end of our work, apply the Outer Glow filter to the group with platform and skyscrapers. You can see the parameters on the picture below.
Conclusion
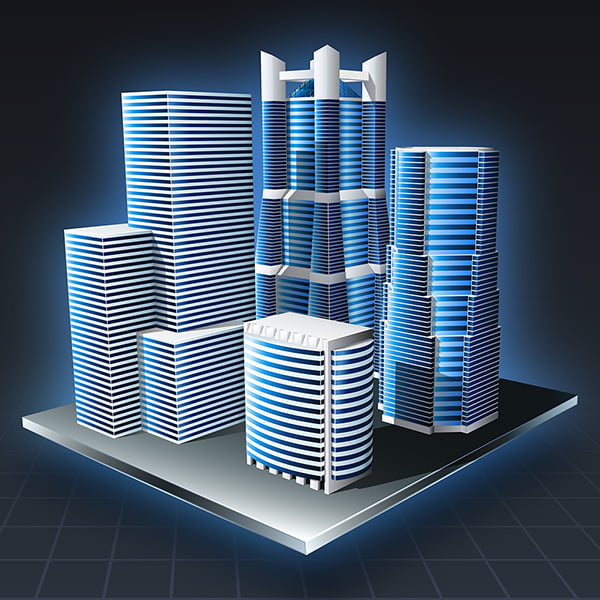
In this tutorial, we’ve created some stylized illustration of the city, starting from three-dimension modeling in SketchUp, proceeding to final processing and stylization in Adobe Illustrator. What is this method good for? For absolutely all kind of tasks, where Adobe Illustrator is not enough. With SketchUp, you can create any objects. Moreover, you have opportunity to import to your project thousands of free models from the web-site maintained by the user community- 3Dwarehouse.Now any task is within your depths!