|
This tuition has the description of photography technique of glass goblets with the help of an ordinary computer monitor. A monitor can fulfill two functions. The first one shows that the monitor is the source of backlight light. The second function is a background. A glass with the water is a lens which focuses the picture on a monitor. You can get interesting effects with such simple devices. Let's get started!
Tutorial Details - Program: Adobe Photoshop CS 3
- Difficulty: Intermediate
- Estimated Completion Time: 1-2 hours
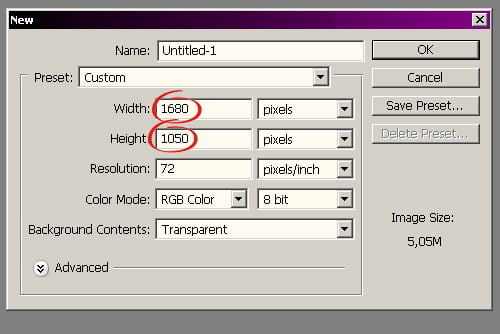
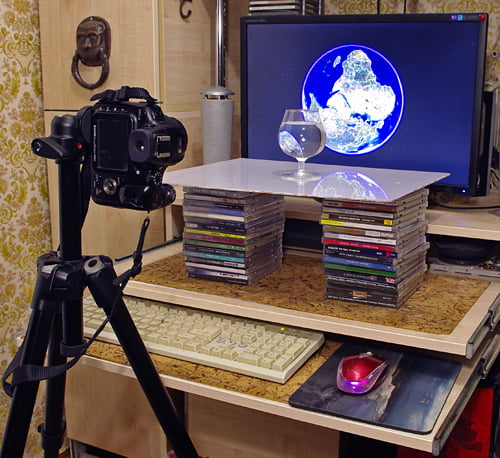
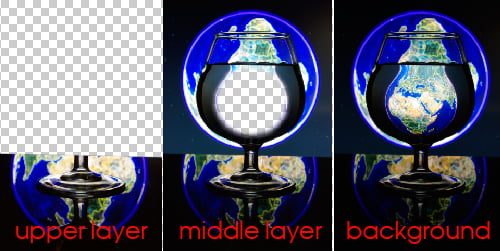
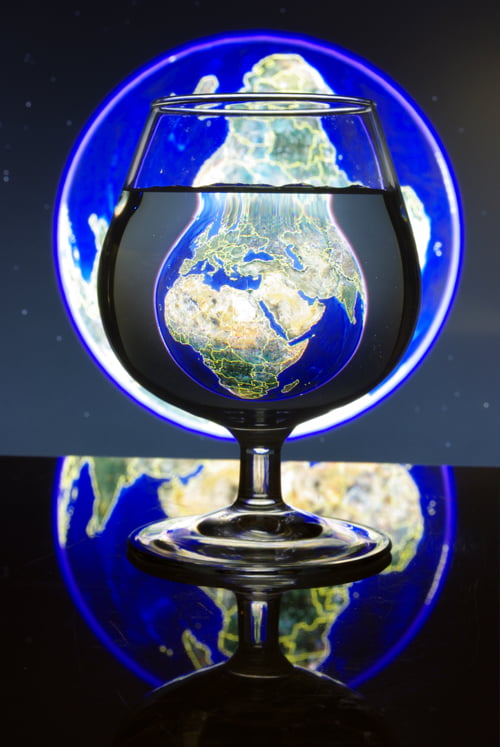
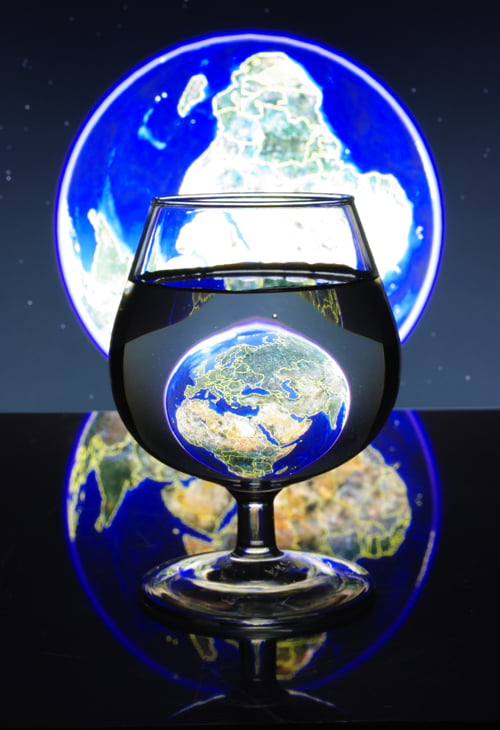
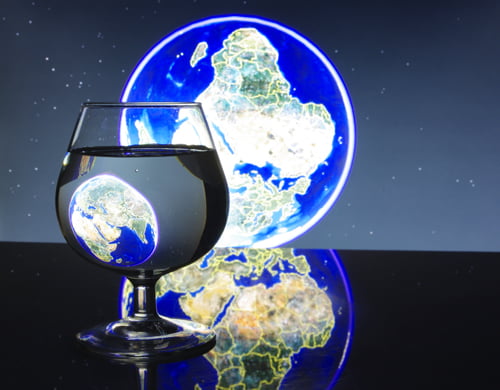
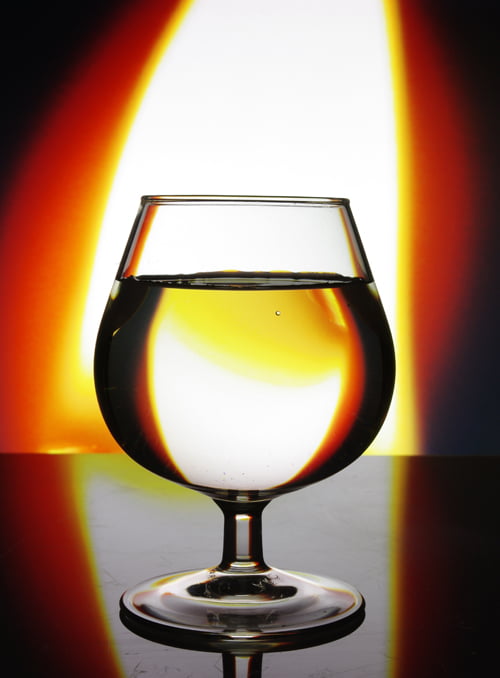
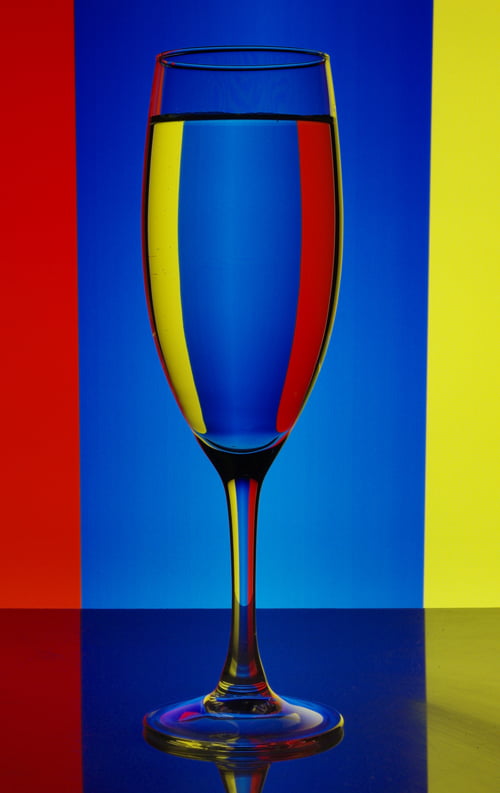
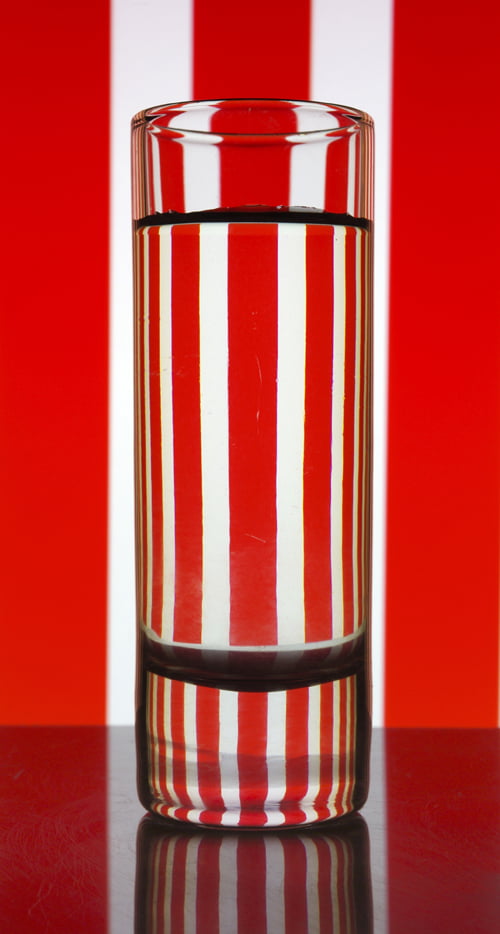
Step 1Equipment description. You will need only a camera and a tripod because the time of exposure will be long. As a rule a computer is used for images machining. We will use a computer just during the process of photography. A computer (its monitor) will be used both as an illuminator and a background. ( I used the monitor — Samsung Sync Master 2243). We will need the program Photoshop and the program of images' preview which allows looking images through in a full screen regime. A piece of frosted plastic is used as a glass support with the thickness 3-4 mm and with the size approximately 30x40 cm as well as a stack of boxes of CDs for regulating the height of plastic installation. Step 2Objects for photography. Everyday glasses filled with water are used as objects. In this tuition I took an ordinary glass on a low stem (for brandy). It is necessary to keep a glass in a clean state to avoid the imprints and water spots. That's why a microfiber napkin and cotton gloves will be needed. Before the process of photography you have to clean glasses inside and outside very well. You should use gloves in photography while taking and moving glasses. Step 3A file which is supposed to be the basis for background image is created. Photoshop is switched on. Then we create a file with sizes that should be the same as your monitor sizes in pixels. ( In my case it is 1680x1050). For this we go to File>New and introduce the meanings. Step 4The glasses that we will photograph in the background of a monitor ought to have their real geometrical sizes. That's why we should know the geometrical sizes of elements in a full screen image for a background creation. For this purpose let's reduce the geometrical sizes of a file to the geometrical sizes of a monitor screen. (In my case it is 47,6x29,7 mm). Make a measurement of a monitor screen with a liner or measuring reel. Then go to Image >Image size, switch off Resample Image (in order not to change the sizes of a file in pixels). Then the height and width are determined in cm. Then click OK. We got a file simulating our monitor. Save it under the name BG. Now we can see what geometrical sizes of a picture and its elements might be while a full screen viewing. It will be enough to look at the rulers in the left and above of a file window. (If the rulers are not switched on, go to View> Rulers, or click Cmd+R). Step 5We will create the background for the plot. I called the first plot "The sunken Earth". Create the background. Switch on Photoshop. Open a created file BG (it is empty for the present). Open a file with the picture of the Earth in the background of a star sky ( I used an image from a program Google Earth). Put the picture of the Earth into a file BG on a new layer. It can simply be done by pulling the image from one window to another while pressing the mouse button. Then go to Edit>Transform>Scale and change the picture sizes up to: The Earth diameter which is in the centre is 21cm. If installed picture appears to be less, we will color the space with black ( or will clone the picture of a star sky with the help of Clone Stamp Tool). Created file will be open in viewer, that's why it is needed to be saved in a format JPG. For this purpose the layers should be united into one. Go to Layer>Flatten Image. Now the image should be turned over. Go to Image>Rotate>Canvas> 180'. Save the file with a new name, for example BGEarth. 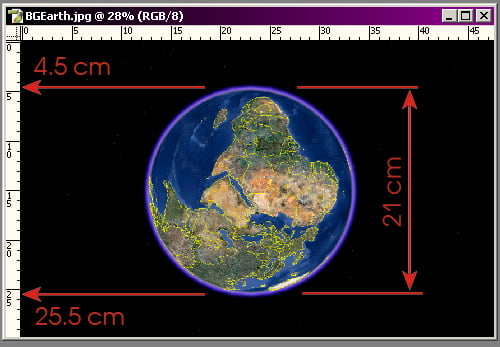 Step 6Equipment making. Set the plastic sheet higher than the lower monitor frame on a stack of CD boxes. Set the camera on a tripod; pour water into a glass, put it in front of a monitor. Turn on viewer and open a file BGEarth.JPG using a full screen. Now the process of a creation begins. We can get absolutely different compositions by moving a glass, by changing the position and the angle of camera inclination. Step 7Illumination. The room for photography should be completely darkened. Otherwise any light object in a room will be reflected in a glass as the other light spot. A monitor must be the only source of a light. If the image on a monitor is too dark we should increase the monitor brightness and reduce contrast a bit. But try to remember the present parameters in order to be back to the normal state. Step 8Photography technique. Displayed photography was created as it is shown in a diagram with a relative place of a camera, glass and monitor. Focus distance is 47,5 mm. The depth of sharpness should be sharp enough for an excellent image of a glass. Set Aperture F22. Don't trust the camera automation. The proposed still was taken from Shutter Speed 20 sec, compensation + 1, 3Ev, (ISO 100). Step 9The brightness range of a scene is too large. The Earth came out to be overexposed, reflection underexposed. Take two additional stills. One for the Earth using Aperture F22 and Shutter Speed 10 sec. The next for reflection creation using Aperture F20 and Shutter Speed 30 sec, (ISO 100).
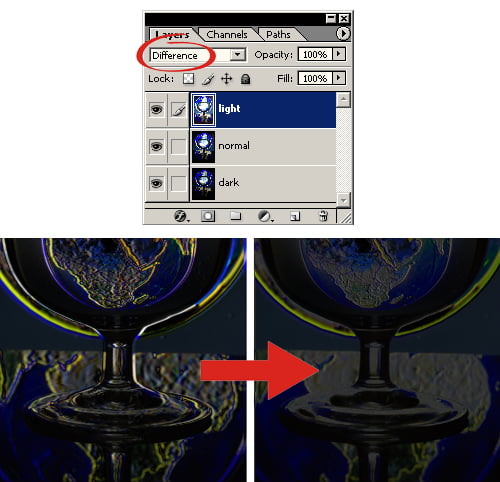
Step 10You can unite the stills using the HDR technology, but as for our plot it should be mentioned that zones of brightness are accurately limited. That's why it would be better to act in the other way. Copy all three images into the same file. The darkest still is placed on the lower layer, then the less dark still is replaced in the middle, the brightest one is placed on the top. We can exactly fit the image by using Difference mode for an above layer and by moving it with key pointers. Step 11Everything except the reflection is cut from the above layer. Delete the Earth from the middle layer with Eraser Tool. Step 12Now we should unite the layers. Go to Layer>Flatten Image. The image is ready. Step 13As it was said different kinds of composition can be obtained by the usage of one background and different positions of a camera and a glass. ConclusionThus using simple objects which are present in absolutely each house we can create interesting photos. Special equipment isn't needed. Even a special place in a room isn't needed. Everything can be set on your desk. Be a success! Follow us if you want to be the first to know about the latest Adobe Illustrator tutorials and articles. Vectorboom team works for you!
|