|
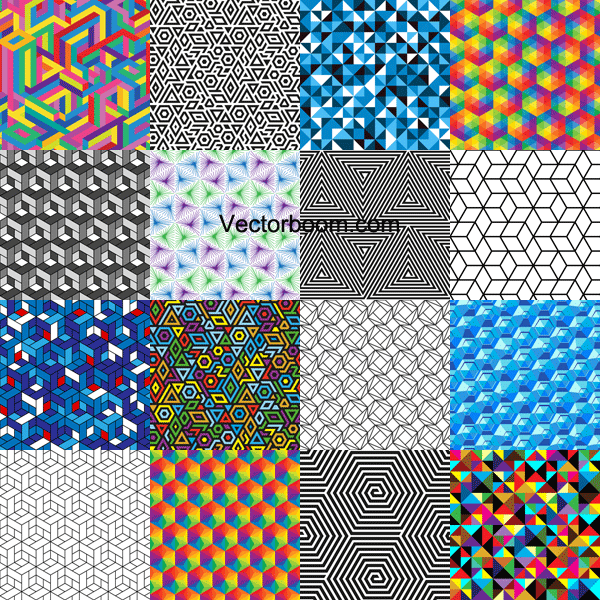
Final Image Preview
In this tutorial we will take a look at several ways to create grids, including hexagonal grids, which will be a basis for seamless geometric patterns. Such types of patterns are relatively easy to create; they remain, however, in demand in different design spheres, such as print design, textile design and web design.
You can download the source vector file for this tutorial

Creation of geometric grids with the help of the Scriptographer plug-in
You can quickly create geometric grids with the help of the Scriptographer plug-in and the Grid Generator script, which works inside mentioned plug-in. This method is, unfortunately, available only for users of the earlier Adobe Illustrator releases (9- CS5). The users of the latest releases of the application (CS6-CC) will need to create such grids manually, and we will talk about it later.
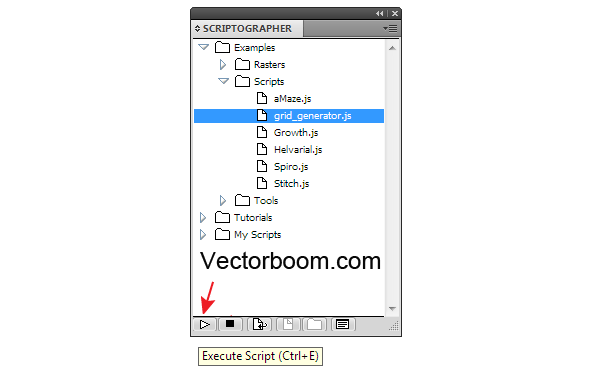
Download the Scriptographer plug-in on the Download page. Before installing the plug-in, take a look at the instruction. And now download the Grid Generator script and place it in the folder with the Scriptographer’s scripts. On my computer, the path to this folder looks as follows: C:\Program Files\Adobe\Adobe Illustrator CS5\Plug-ins\Scriptographer\Scripts\Examples\Scripts. Start Adobe Illustrator or restart the script, if it was started during the installation process. Now go to the Window > Scriptographer > Show Main Palette, then find the Grid Generator script and click on the Play button in the lower part of the panel.
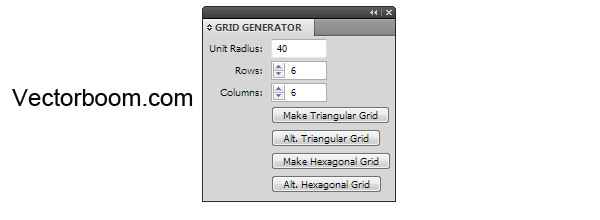
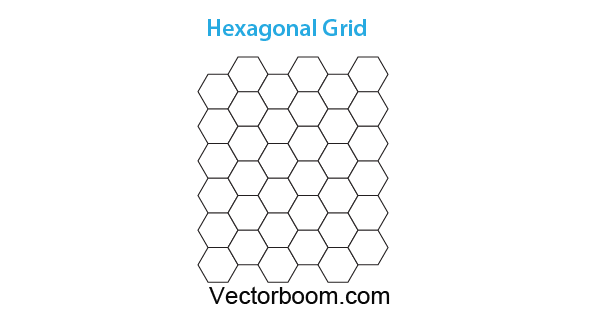
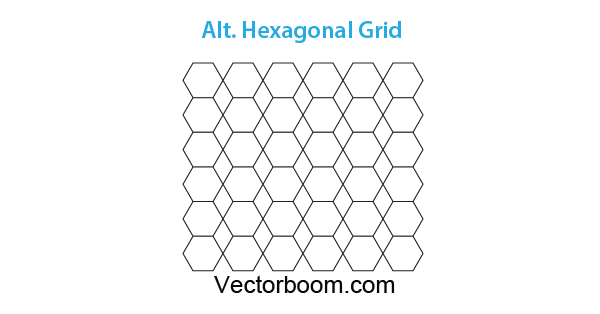
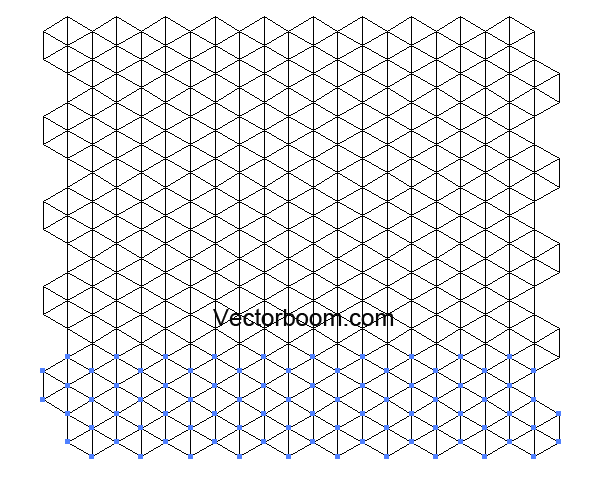
Now we have an opportunity to choose one of four types of grid, specify the size and the number of cells.
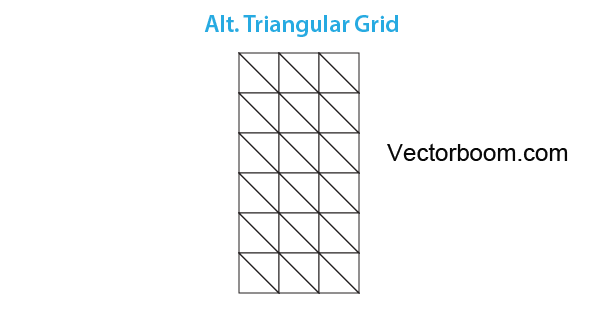
On the figures below four variants of grids are indicated; they were generated by this script.
Manual Creation of Geometric Grids
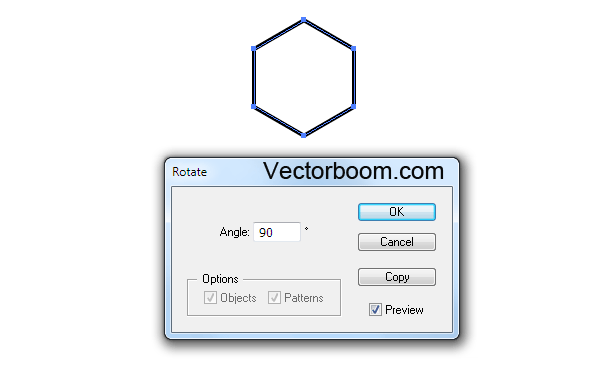
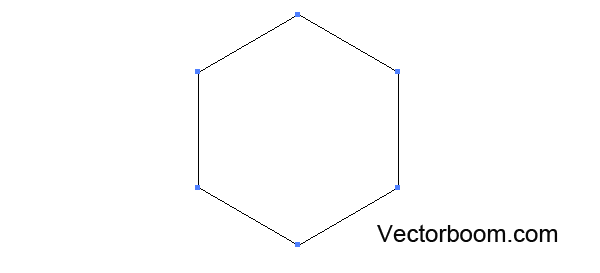
Manual methods suit the users of Adobe Illustrator CS6-CC, they have greater flexibility in creating grids, and i.e. you’re not limited to four options, which are offered by the Grid Generator script. Let’s take a look at manual grid creation on the example of the Triangular grid creation. This is, probably, the most common type of grid. Other methods are based on the same principle. Create a hexagon with the help of Polygon Tool.
Keep the object selected, go to the Object > Transform > Rotate… and set a 90 degrees angle in the dialog box.
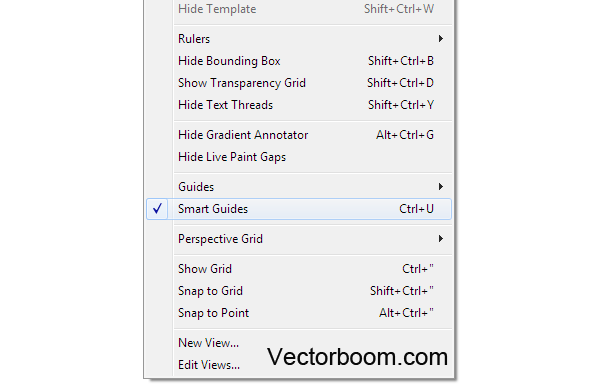
Check if you have the Smart Guides on (View > Smart Guides or Cmd/Ctrl +U shortcuts).
For better precision you can also turn on the Outline Preview mode (View > Outline or Cmd/Ctrl + Y shortcuts).
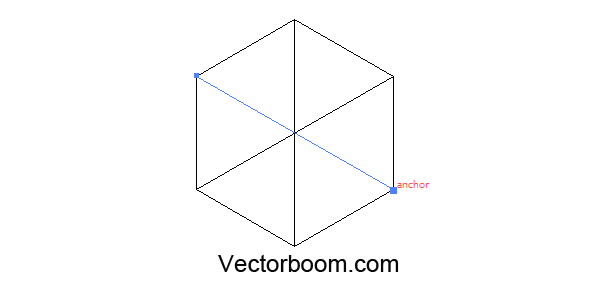
Take the Line Tool (\) and connect the opposite vertices as it is indicated on the figure below. If you have an exact match with the vertex, the inscription "anchor” appears- this is the work of smart guides.
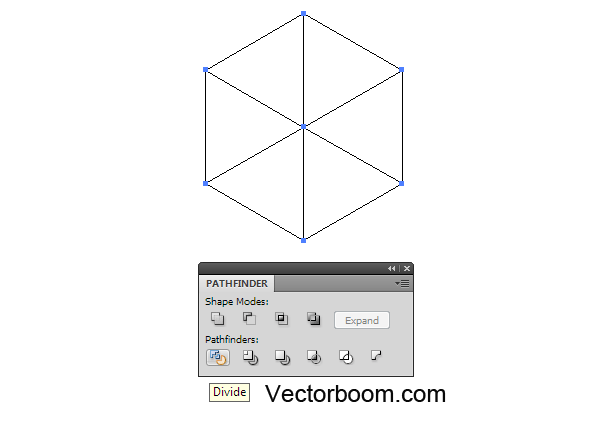
Select all the created objects, then click on the Divide in the Pathfinder panel (Window > Pathfinder).
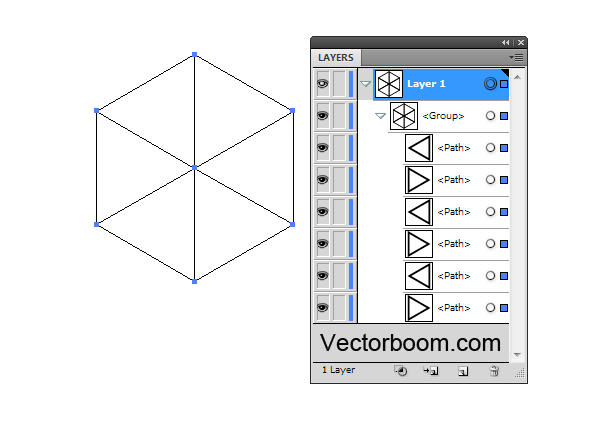
As the result, we get a group consisting of six triangles.
Despite the precise positioning of the objects, sometimes we can get stray points. That’s why check the Layers panel and delete them for example, go to Object > Path > Clean Up….
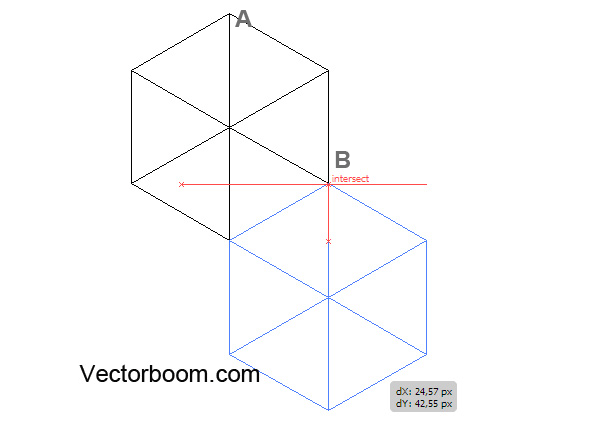
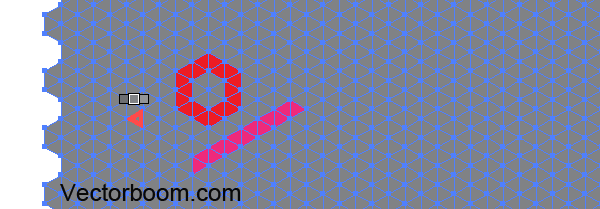
Move the group of triangles down and to the right so that the top A coincides with the top B. The smart guides help us to do it accurately. When there appears the inscription "intersect”, we need to stop. Press the Opt/Alt key down while dragging, which will lead to a duplication of the group.
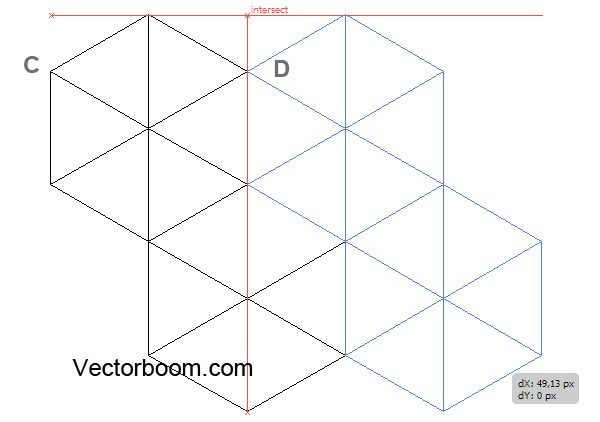
Select both groups then shift them to the right by holding the Shift + Opt/Alt keys down. This time we combine the top of the letters marked B and C and double the groups.
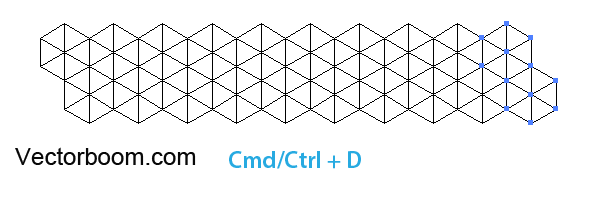
Now use the Cmd/Ctrl + D shortcuts as many times as needed to repeat the last action (moving and duplication).
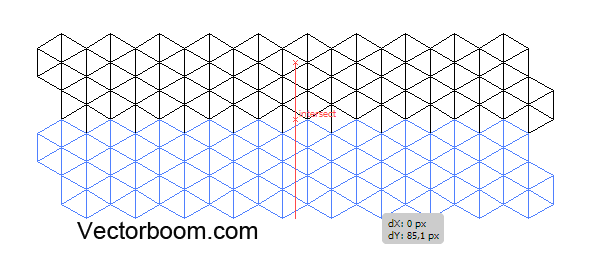
Select all the created objects and repeat the last actions in the vertical direction- i.e. shift it down by holding the Shift + Opt/Alt keys down, then use the Cmd/Ctrl + D shortcuts.
Despite the bulky description, such grid is very easy to create. Practice a bit and you’ll make sure that I’m right.
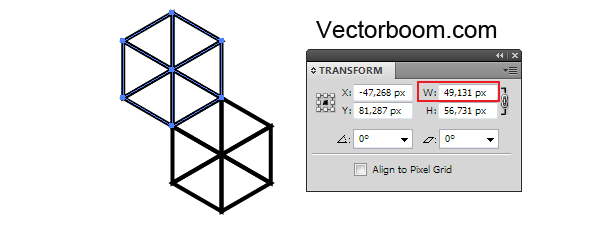
You can also use the Transform effect to duplicate the cells of the grid. However, before we apply the effect, we need to make some measurements. Select one of the groups with triangles. Its width is equal to the horizontal shift. This value can be seen in the Control panel or in the Transform panel.
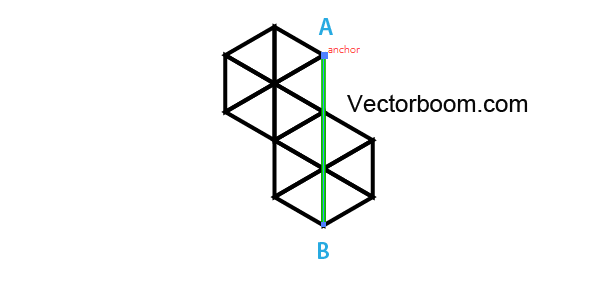
To determine the value of the vertical shift we need to measure the distance between points A and B. Unfortunately, the Measure Tool is generally not suitable for accurate measurements. But we can use the Line Tool (\) for such purposes. Create a straight segment between points A and B. The smart guides can help us to position its points perfectly.
The segment’s length is the desired quantity of the vertical shift.
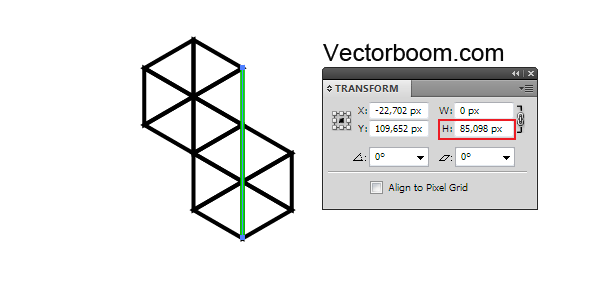
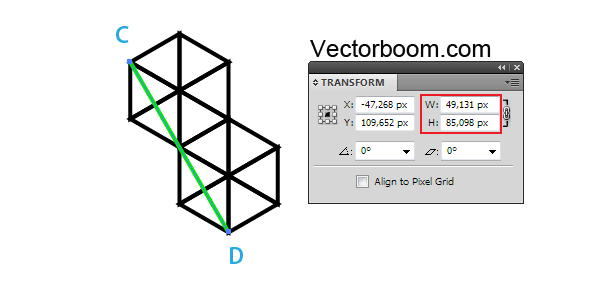
If we think a little bit, then it appears that with the help of the Line Tool (\) the size of horizontal and vertical shift can be immediately determined. To do this, draw a straight segment between points C and D, as it is indicated on the figure below.
The width of the segment is equal to the size of the horizontal shift, and its height corresponds to the vertical shift. One way or another, all measurements are done, let’s proceed to the application of the effect. Select both groups, then go to the Effect > Distort & Transform > Transform…. Set the value of the horizontal shift and the necessary number of copies, click OK.
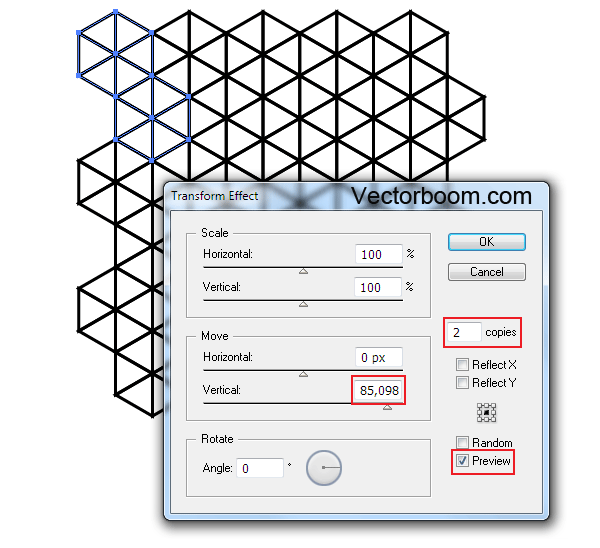
Now apply the effect again (Effect > Distort & Transform > Transform…). This time set the size of the vertical shift and the necessary number of copies.
Benefit of the Transform effect usage is that you can always change the number of cells in the grid by getting the access to the parameters of the applied effects in the Appearance panel.
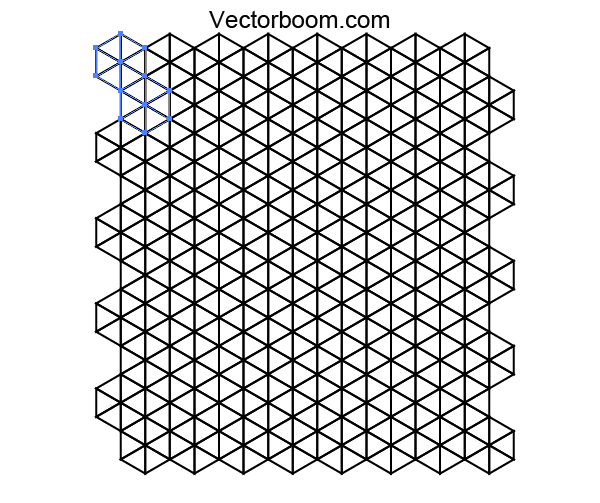
Such grid can be used as a template in the future artworks. However, if you’re going to color it, then you need to go to the Object > Expand Appearance to get rid of some effects.
Coloring of the cells of the grid
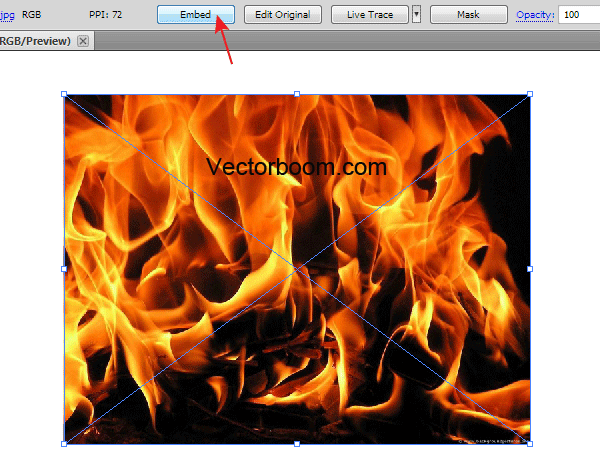
There are automatic and manual ways to color the geometric grid. You can color the cells into colors of raster image with the help of the Scriptographer’s rasterColor script, which can be downloaded here. Paste the raster image into the current document then click on the Embed in the Control panel.
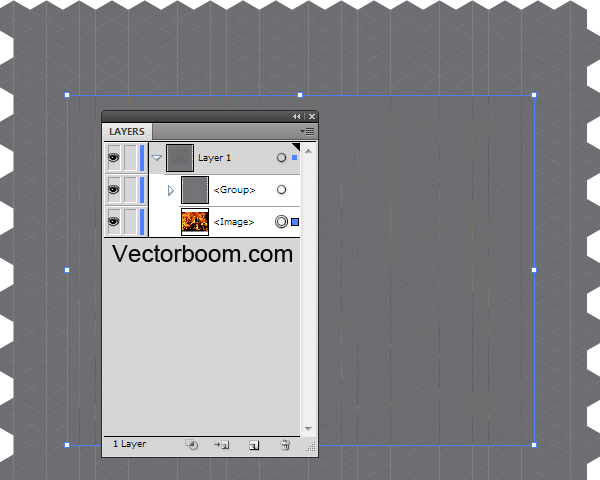
Place the image below the elements of the grid (I turned off the stroke and filled the grid with any grey color).
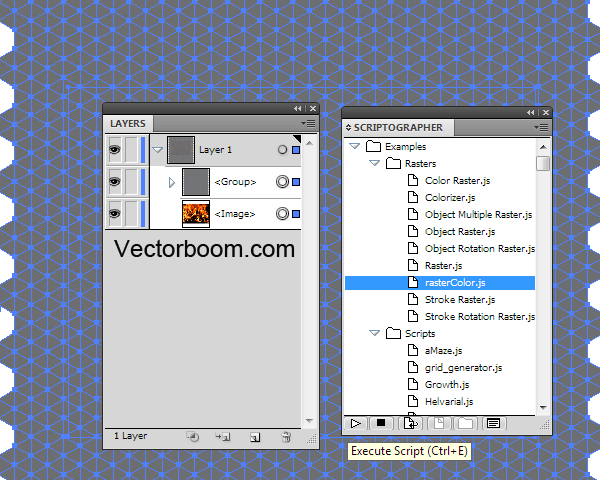
Select the grid and the raster image then start the rasterColor script in the Scriptographer palette.
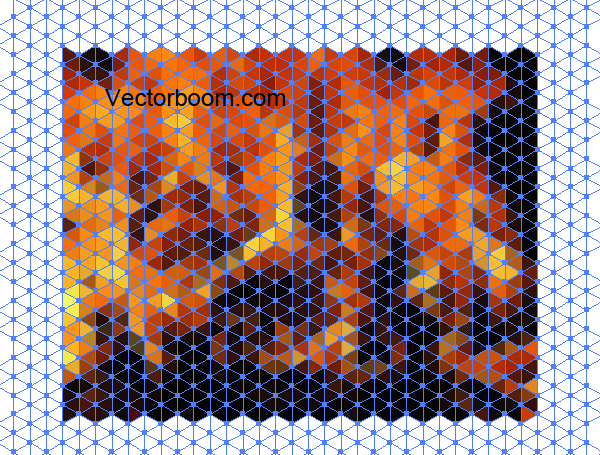
Raster images and cells with white fill can be deleted. White fill appeared above places where there was no raster image.
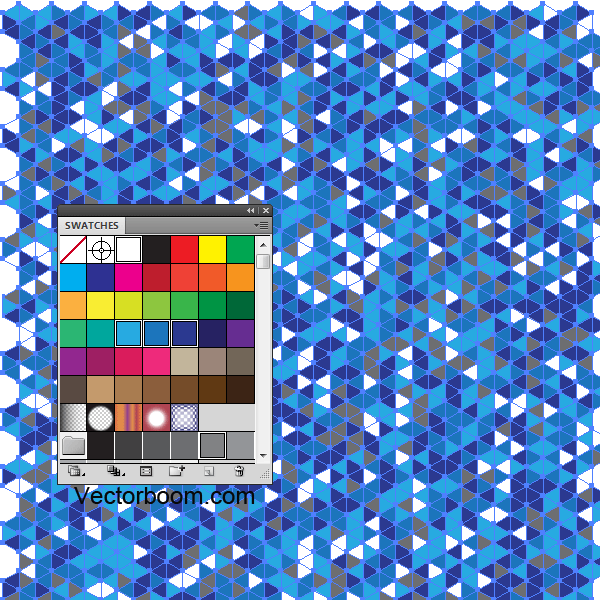
You can also color the cells of the grid by using the Random Swatches script, which can be downloaded here. This script allows coloring the cells of the grid into selected colors from the Swatches panel in random order. You can find out more about the script usage technique from the article, the link to which you can find above.
Surely, you can color the cells of the grid by simply selecting them and coloring them into desired colors, which might result in interesting patterns. The cells of the grid can be also colored with the help of the Live Paint Bucket Tool (K). This tool allows us to color faster.
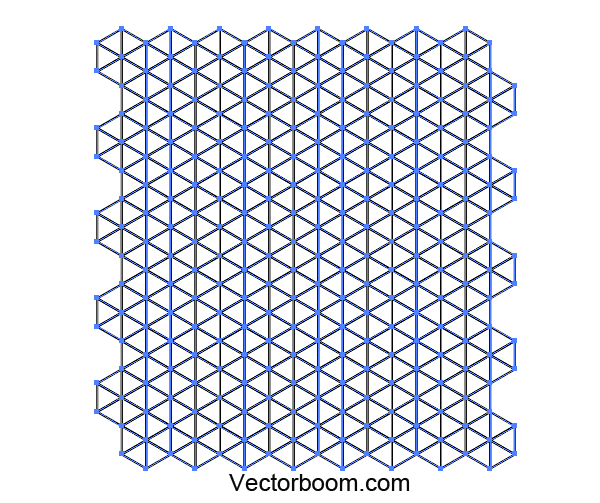
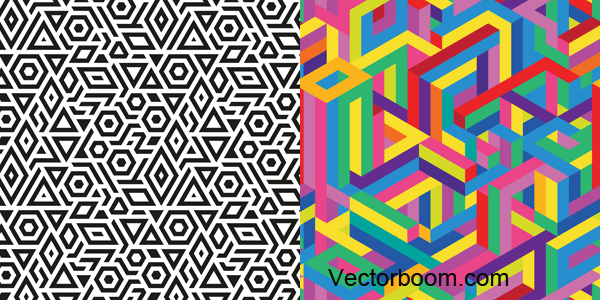
But don’t forget to go to the Object > Live Paint > Expand after coloring. The seamless patterns, indicated on the figures below, were received exactly this way.
Creation of the seamless patterns
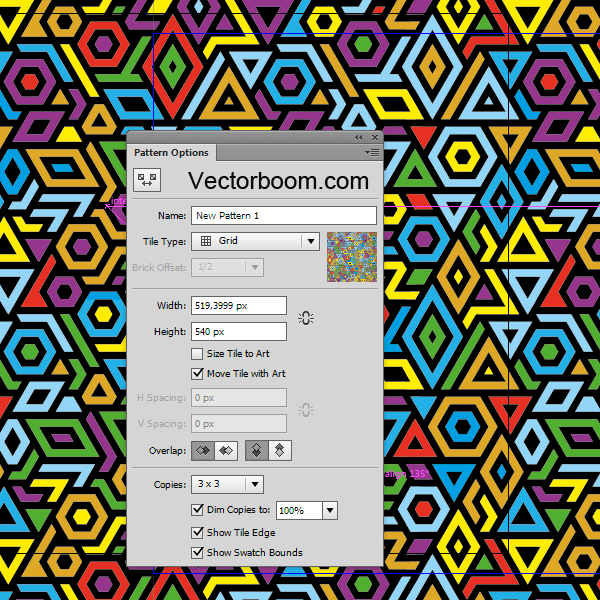
The users of the latest Adobe Illustrator (CS6-CC) releases can use the Pattern Creation feature (Object > Pattern > Make) for creation of the seamless pattern. The final coloring of the cells of the grid, which is located on the edges of the tiles, should take place in the Pattern Creation mode.
For users of earlier releases there are a couple of ways of seamless pattern creation; you can find out about some of them from the article How to Create a Seamless Pattern in Illustrator.
You can also buy 16 ready seamless patterns for only 15$ by clicking the Download button in this article. I’ve created all of them based on the geometric grids.
You can download the source vector file for this tutorial
|