|
Today we'll create an infographic template using the forms called Metaballs. We'll quickly learn how to create such forms and compositions consisting of these forms. Infographics is still a super popular topic, so I devote this tutorial to it.
Final Image Preview
Metaball Form Creation
Step 1
A metaball or a metasphere is a three-dimensional object, which is formed when two spheres merge. Its silhouette in the frontal plane looks like a number eight.
It is not easy to create this form with the help of standard Adobe Illustrator tools. Fortunately, there is a script, which allows creation of such objects in the blink of an eye. It was developed by a popular Japanese designer Hiroyuki Sato. The script has two versions: the Metaball (Arc) and the Metaball. Download zip archive with the scripts here.
Step 2
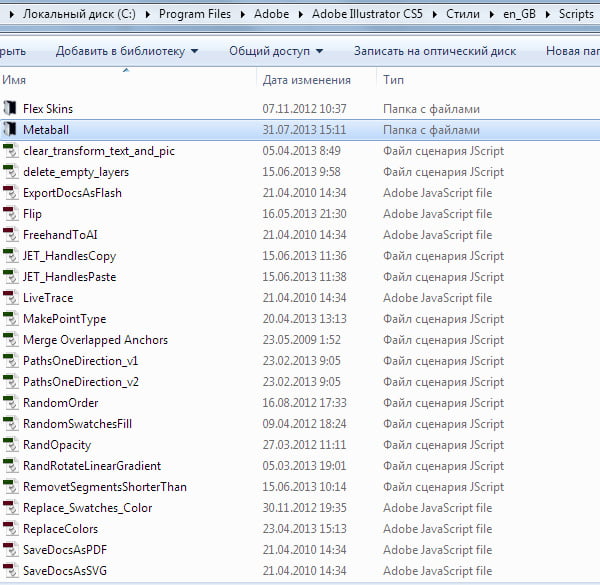
To install the script, first unzip the file, then paste the folder with scripts into the folder where other Illustrator scripts are located. For example, if you work in Adobe Illustrator CS5, the folder path is following:
-
- For Windows: C:\Program Files\Adobe\Adobe Illustrator CS5\Presets\en_GB\Scripts
-
- For Mac: Applications / Adobe\Adobe Illustrator CS5\Presets\en_GB\Scripts
Step 3
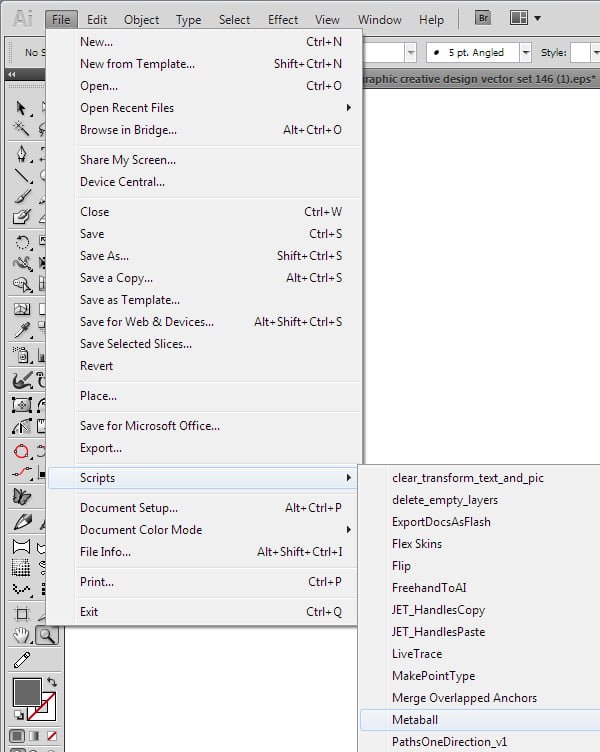
And now, after Adobe Illustrator has been restarted, you'll find scripts in the File menu (File > Scripts > Metaball).
The scripts Metaball (Arc) and Metaball slightly differ in character of the curve between the circles and the parameter to be entered in the dialog box. Any of them fulfills our needs in this tutorial. I'll use the Metaball. Let's see how it works.
Step 4
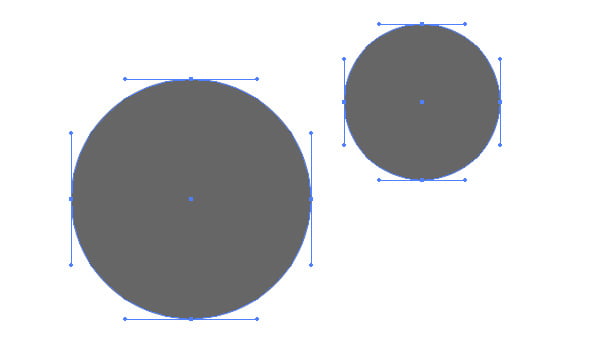
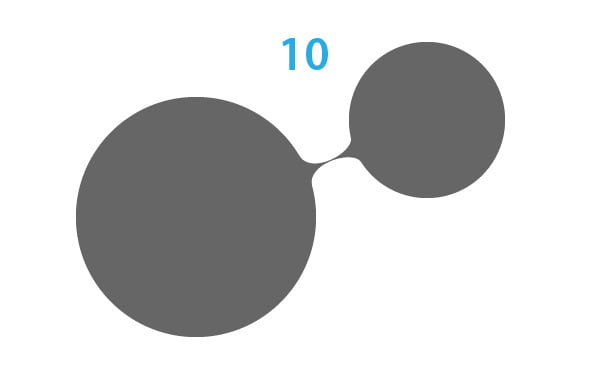
Create two circles with the help of the Ellipse Tool (L).
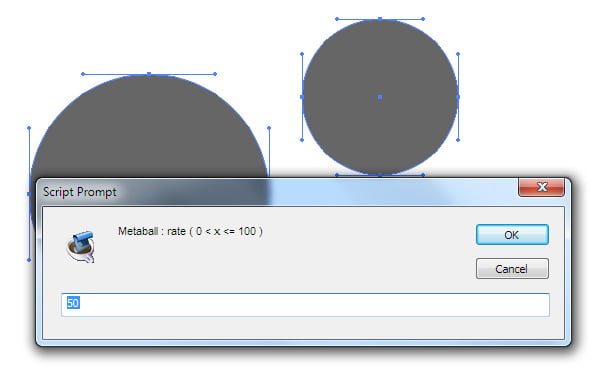
Select them, then start the script (File > Scripts > Metaball > Metaball). And now we need to enter a value from 0 to 100 into the Script Prompt (value 50 is set by default), then click OK.
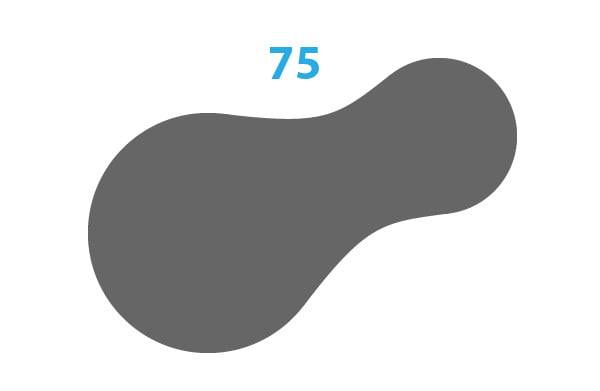
As you can see, a crosspiece appeared between two circles. Its curvature perfectly matches two circles.
The smaller the entered value, the tinier the crosspiece.
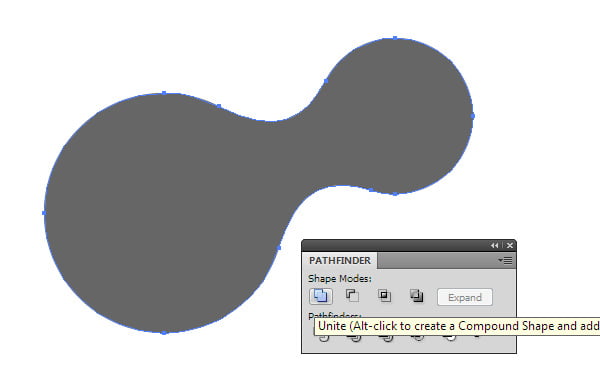
Select all the created objects, then click on the Unite in the Pathfinder panel. That's it - the metaball form is ready.
How to arrange the elements of infographics
Step 5
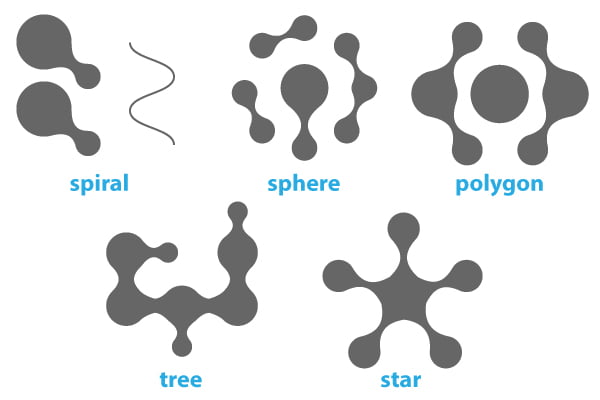
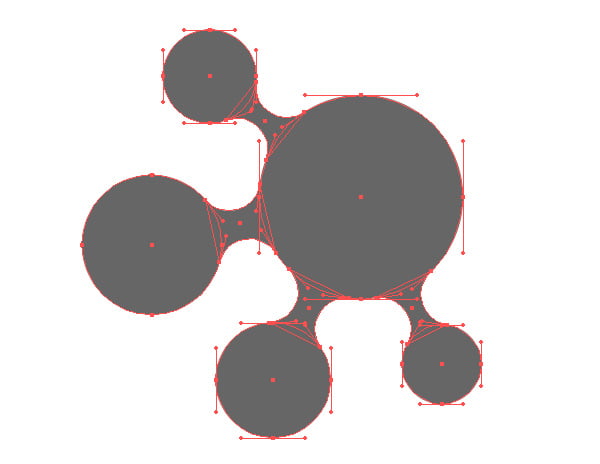
There are popular forms of visual arts. They correspond to elementary forms, which we can find in nature. These forms are so-called "bricks” that built a variety of complex forms. The variety of these "bricks” is not that big. These are: a spiral, a sphere, a polyhedron, a pipe, a tree and a star. In nature, these forms were formed in accordance with the "laws of economy", according to which nature is always seeking for shortcuts and chooses the most economic solutions. Now let's see how we can use some basic forms for the elements of infographics or, in other words, for the creation of a simple composition. On the figures below all the forms are presented, except for a pipe (sorry, I lost my imagination!). The circles are connected, as you understand, with the help of the Metaball script.
For further work, I'll use the arrangement of the elements in a star's form.
I joined the elements with the help of the mentioned script.
Coloring of infographic template
Step 6
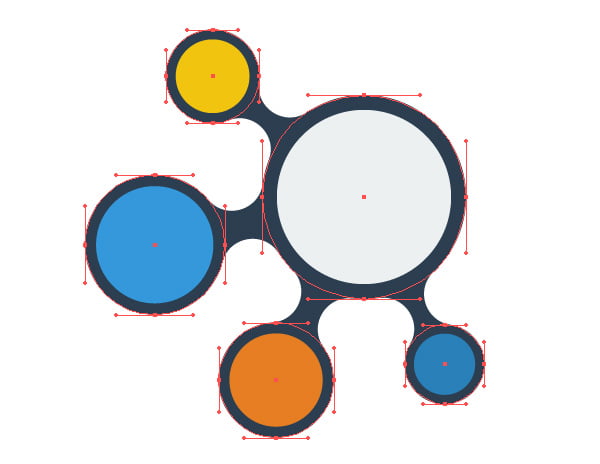
You probably know, that flat design is popular this year. In addition, there are some popular colors for this type of design. For coloring, I'll use ready samples, which you can copy by clicking on this link flatuicolors.com.
After I created five more circles, our design looks like this.
Step 7
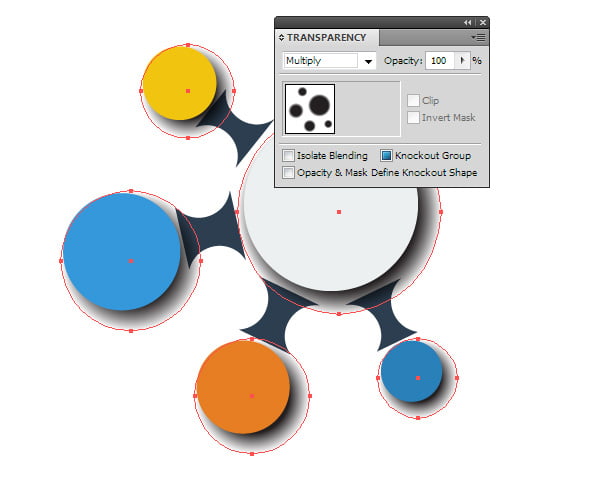
Let's create drop shadows. Select and copy all dark-grey circles, then paste them to the back (Command/Ctrl + C; Command/Ctrl +B).
Fill new circles with radial gradient from dark-grey to white, then shift them a couple of pixels down and to the right. For these circles set the Multiply blending mode in the Transparency panel. On the figure below visibility of the upper circles is turned off for better clarity.
Step 8
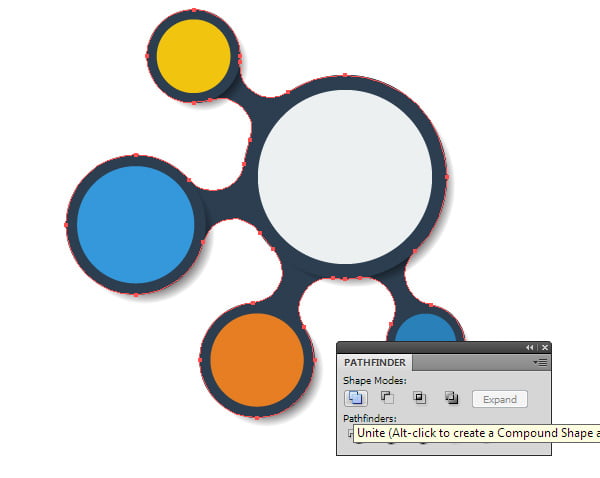
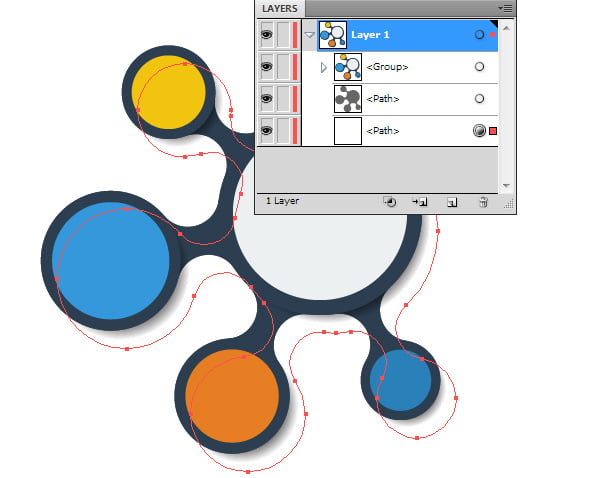
Select all dark-grey objects. It is enough to select any of them, and then go to the Select > Same > Fill Color.
Copy them, then paste them to the back (Command/Ctrl + C; Command/Ctrl +B). And now place the selected objects underneath all the existing ones. To do so, go to the Object > Arrange > Send to Back. Join them into one object - click on the Unite in the Pathfinder panel.
Step 9
Copy the received form and paste it to the back. Recolor the received object into white. Shift the white object down and to the right as it is indicated on the figure below.
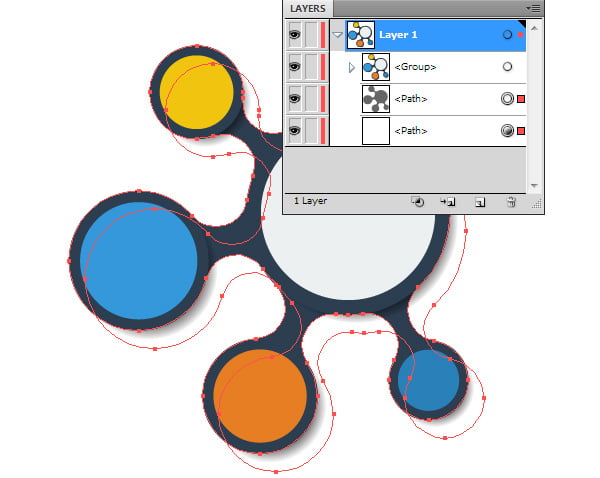
Select dark-grey and white objects (it is easily done in the Layers panel).
Step 10
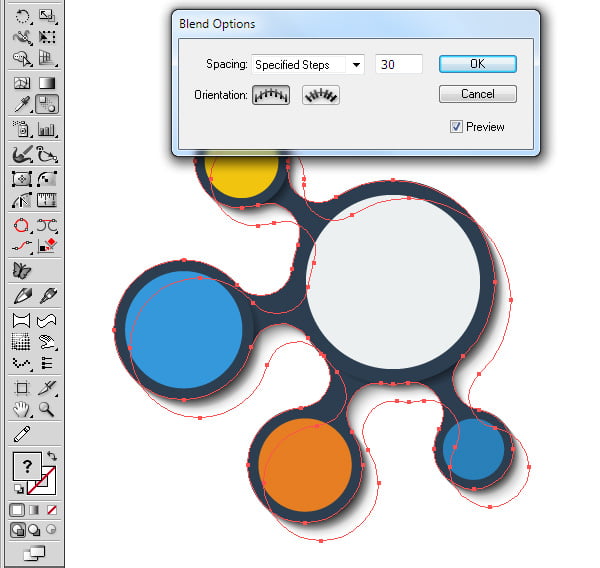
And now use the Command/Ctrl + Option/Alt + B shortcuts to create a blend object based on the selected forms. To set the desired number of Specified steps click twice on the Blend Tool (W) icon in the Tool panel.
Our drop shadow is ready. All we have left to do, is to create some sample text and place it on the elements of the infographic template.
|