|
Final Image Preview In this tutorial we will create a vector rose petals using gradient mesh. Free gradient mesh plugin, Mesh Tormentor, will help us to make it fast. With its help, we'll also be able to create a scatter brush from the gradient mesh, which in no other way can be done in Adobe Illustrator. Color all the nodes with one click, change the structure of the gradient mesh is not all that can be using this wonderful plugin. Have fun and enjoy our new Adobe Illustrator tutorial!
You can download the source vector file for this tutorial

Tutorial Details:- Program: Adobe Illustrator CS3 - CS6;
- Difficulty: Intermediate;
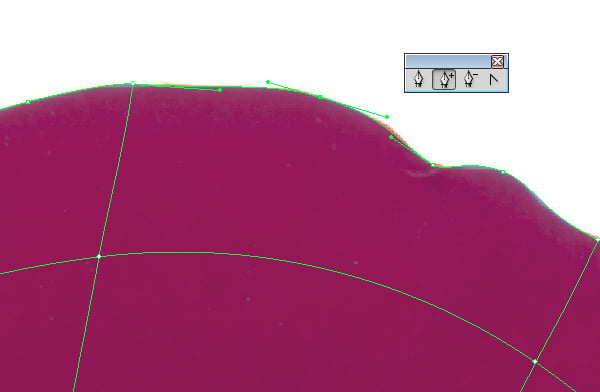
- Estimated Completion Time: 45 minutes;
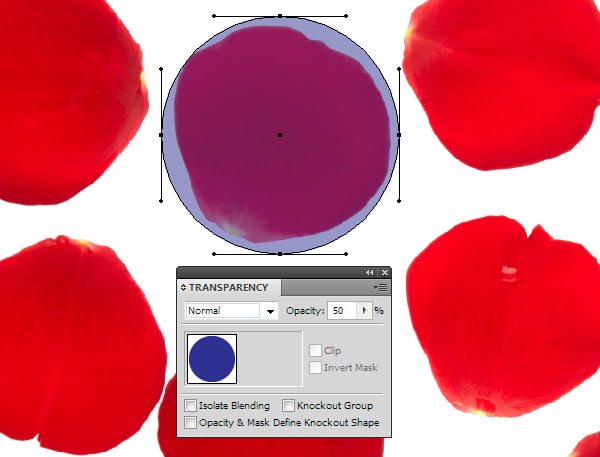
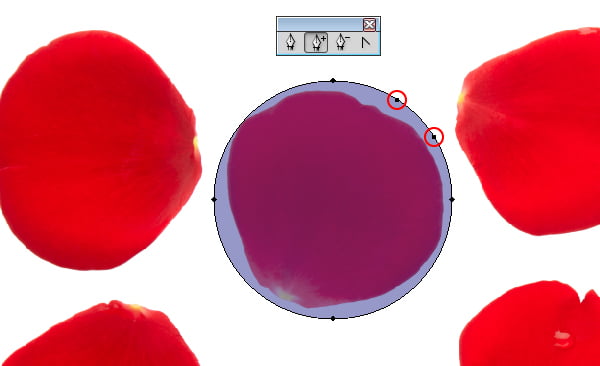
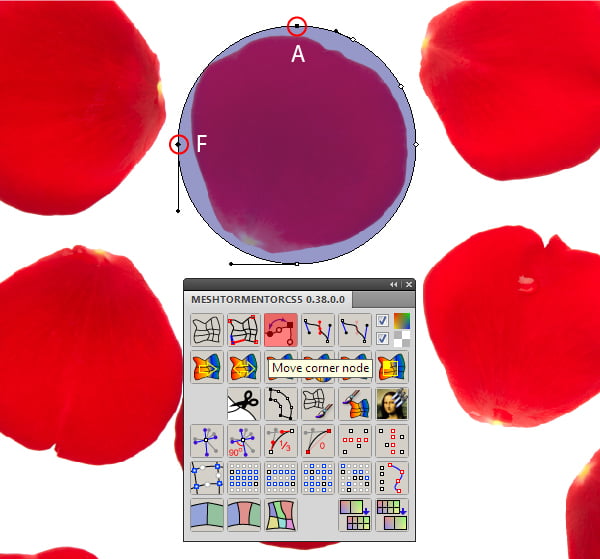
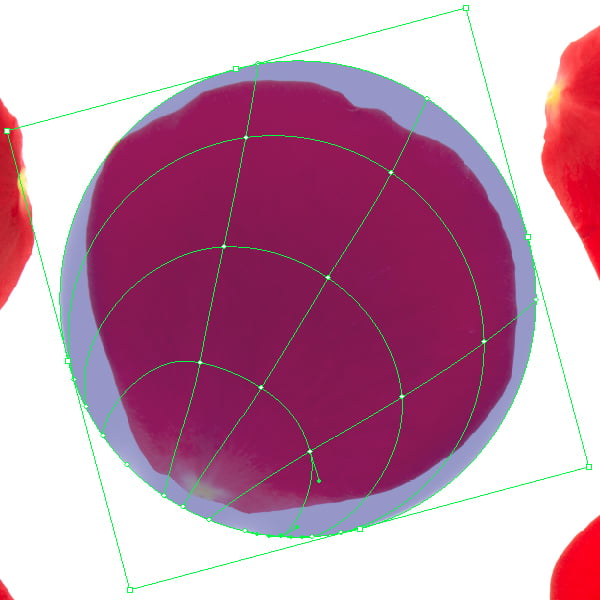
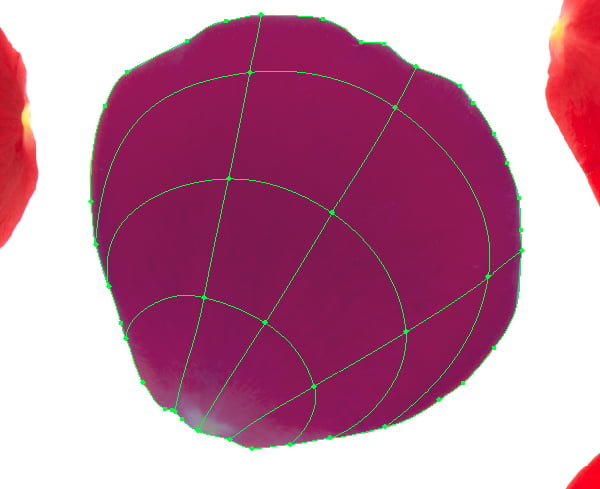
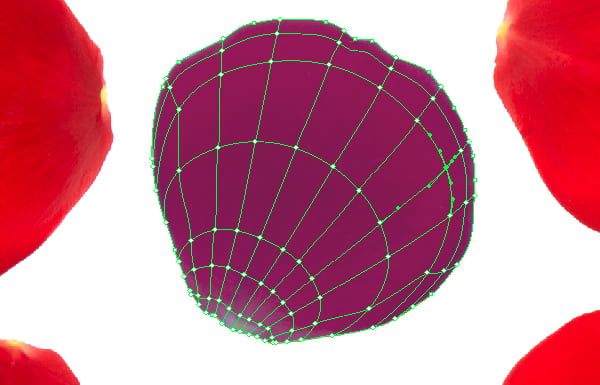
Creating an unusual gradient meshStep 1As a reference image, we will use Red rose petal collection from Shutterstock. Run Adobe Illustrator, then open the reference image (File > Open …). Create a circle with the help of the Ellipse Tool (L) with a fill of any color and no stroke. Reduce the opacity of this circle in the Transparency panel. The size of the circle should be able to cover one of the petals.
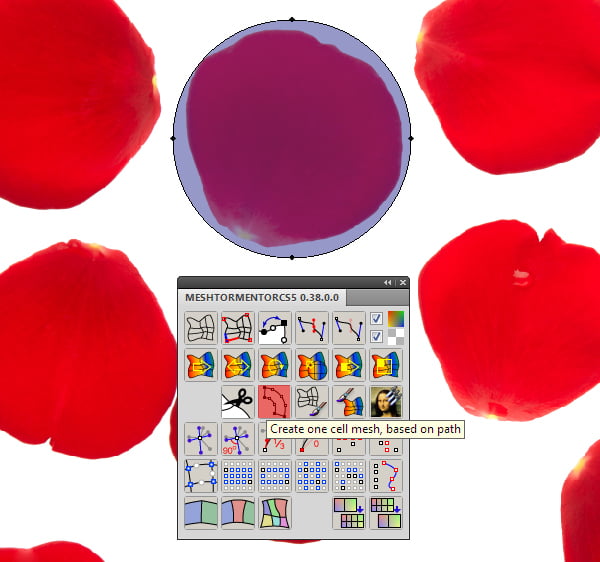
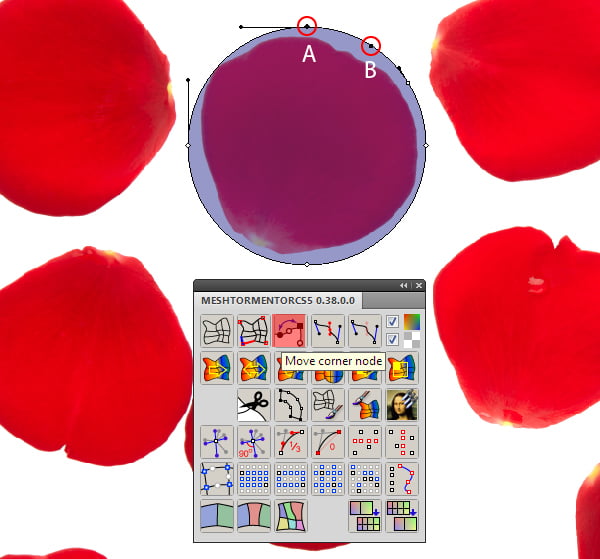
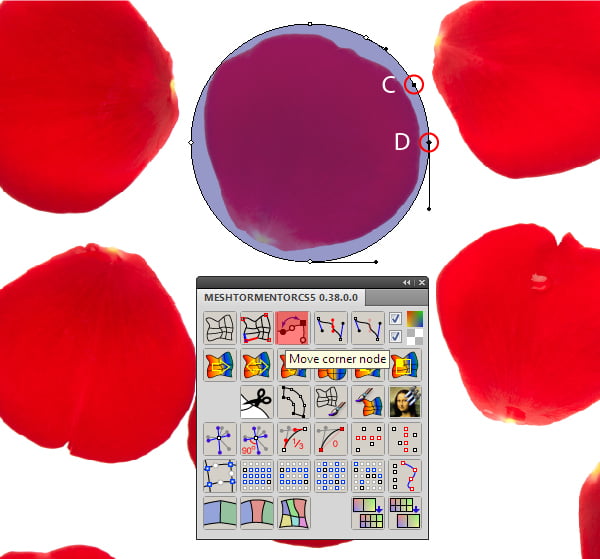
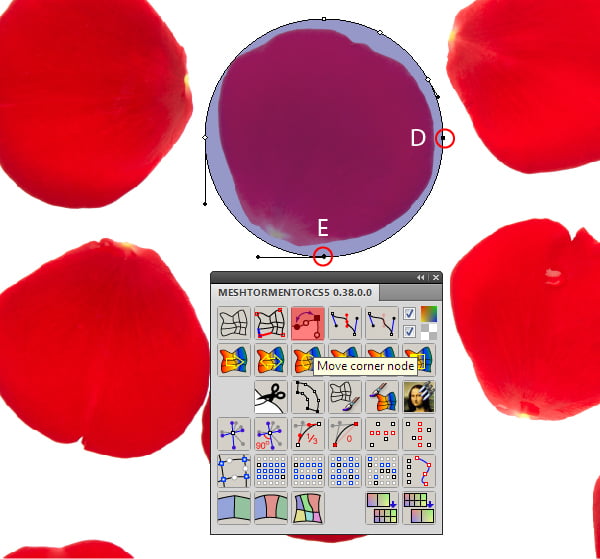
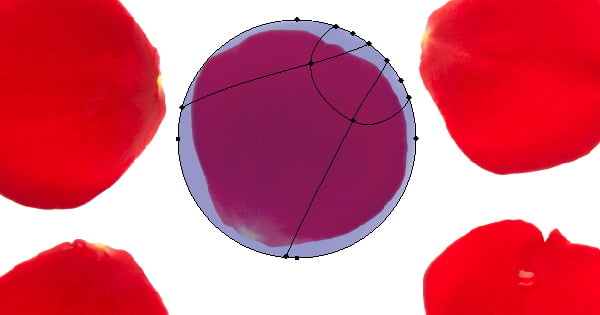
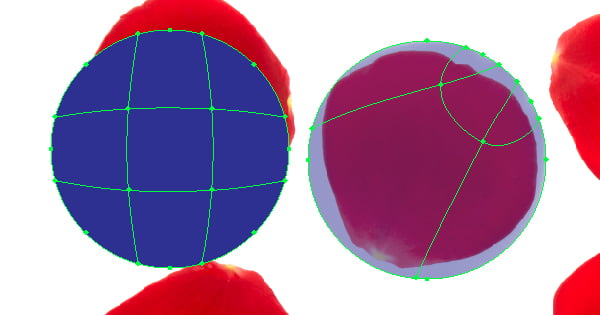
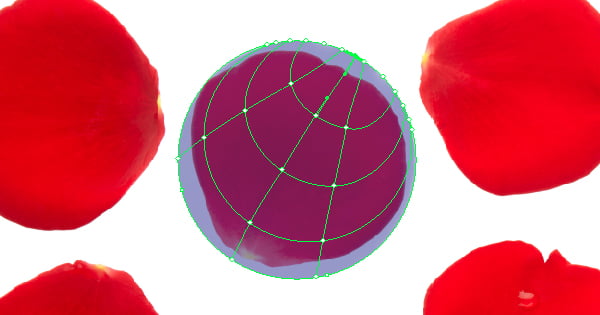
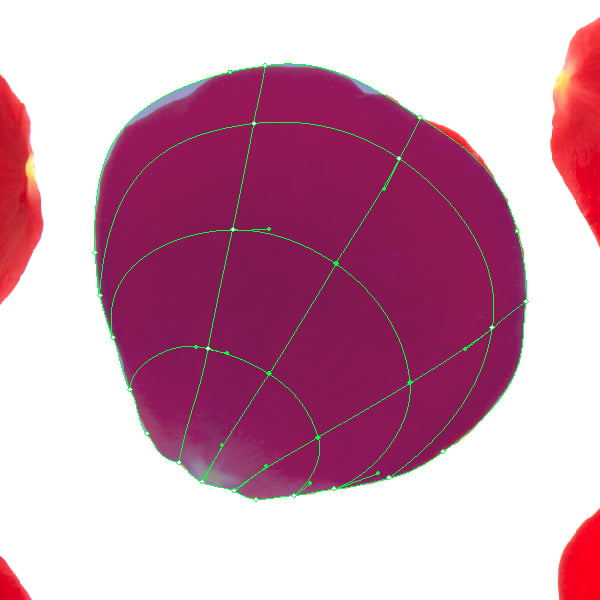
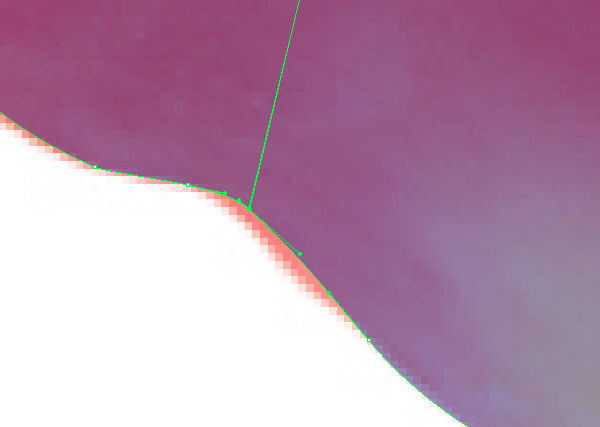
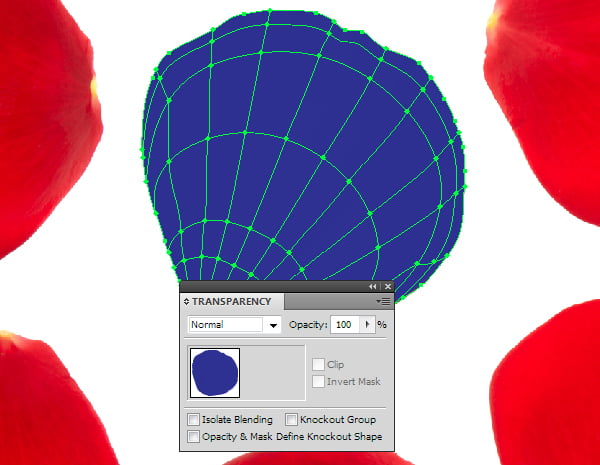
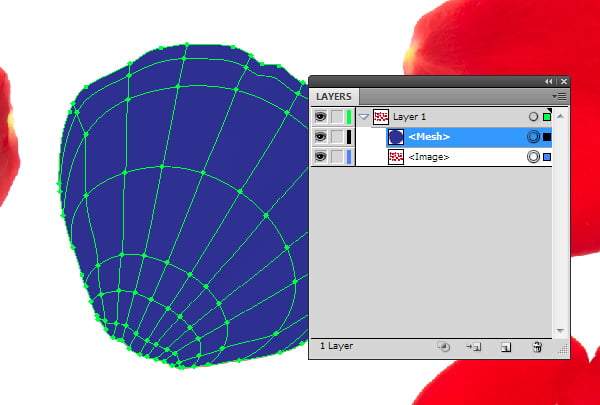
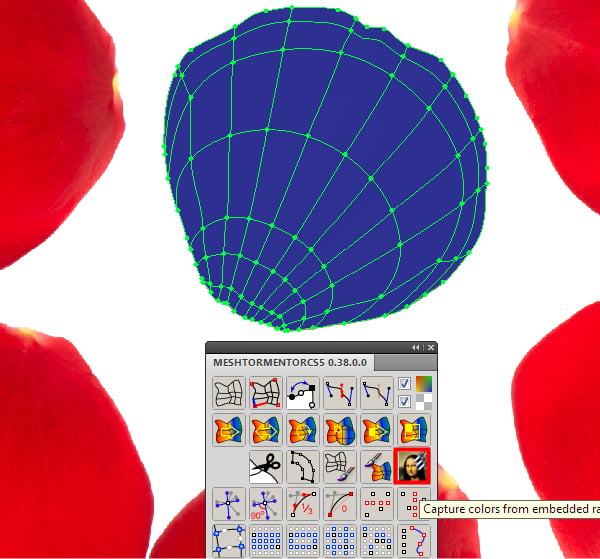
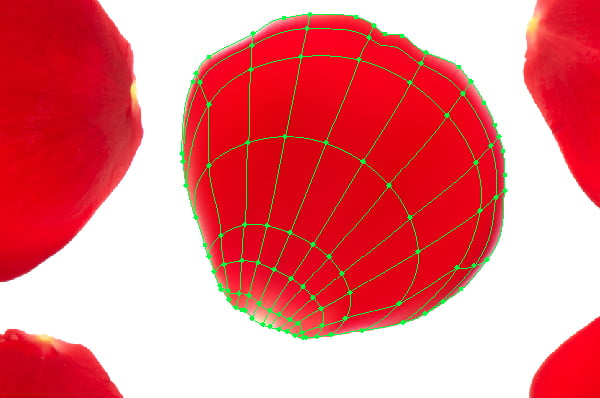
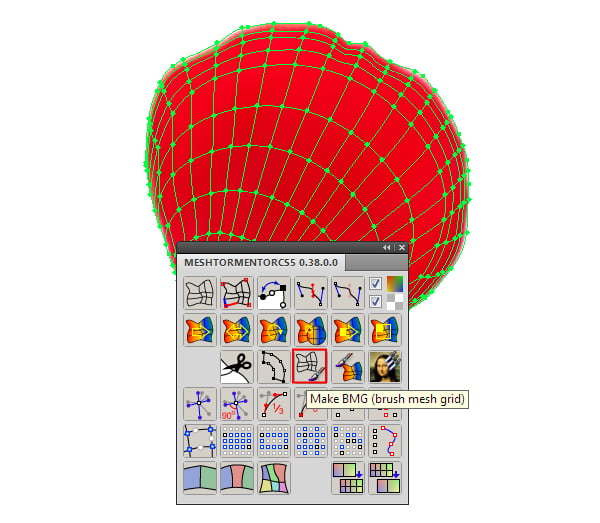
Step 2Now create the gradient mesh so that the location of its lines corresponds with the structure of a rose petal. For further work, we will need the Mesh Tormentor plugin, which you can download following this link. Open the Mesh Tormentor panel (Window > Mesh Tormentor) and keeping the circle selected, click on the "Create one cell mesh" button. Circle has converted into a gradient mesh that contains the same number of nodes as the original object. I would like to note that the operation Object > Create Gradient Meshes … will cause the change of the number of nodes and, therefore, is not going to work for us. Step 3Take the Add Anchor Point Tool and create two new points on the upper right arc of the circle. Using the Direct Selection Tool (A) or the Lasso Tool (Q) select points A and B, then click on the "Move Corner Node" button in the Mesh Tormentor panel. Select the points C and D, and press the Move Corner Node button. Do the same with the mesh points D and E, then with the mesh points F and A.Procedures done in this step led to the change of axes of the gradient mesh. You can see this, if you create some new nodes using the Mesh Tool (U). Let's compare it to a gradient mesh, which was set up in the usual way. Step 4Rotate the gradient mesh so that its axis coincides with the axis of the petal, and add a few new nodes. Oops! I think it is better to rotate the grid at 180 degrees, in this case it will match the structure of the petal. Editing the shape and color of the gradient meshStep 5With the help of the Direct Selection Tool (A) change the position of the nodes lying on the edges of the mesh, so that its shape matches the shape of petals. During this work, lock the reference image in the Layers panel in order not to move it accidentally while editing mesh points. Add new mesh points to the contour of the mesh using the Add Anchor Point Tool and continue editing the contour of the gradient mesh. Perfect accuracy is not needed, but make sure that the points of mesh lines intersection were located on top of the petal, and not on a white background. These points will be colored in the future. Step 6The more points the gradient mesh has, the more vector petal is similar to the original. That is why I added a few more nodes with the help of the Mesh Tool (U). I would like to mention that too many nodes though would add realism, but would greatly increase the file size, so go easy on the process. Step 7Increase transparency up to 100% in the Transparency panel. Unlock the reference image in the Layers panel, select it, and select the gradient mesh. Now click on the "Capture colors from embedded raster image" button in the Mesh Tormentor panel. Mesh nodes are immediately colored with the colors of the reference image. Think of how much time you will save while coloring the nodes! Step 8
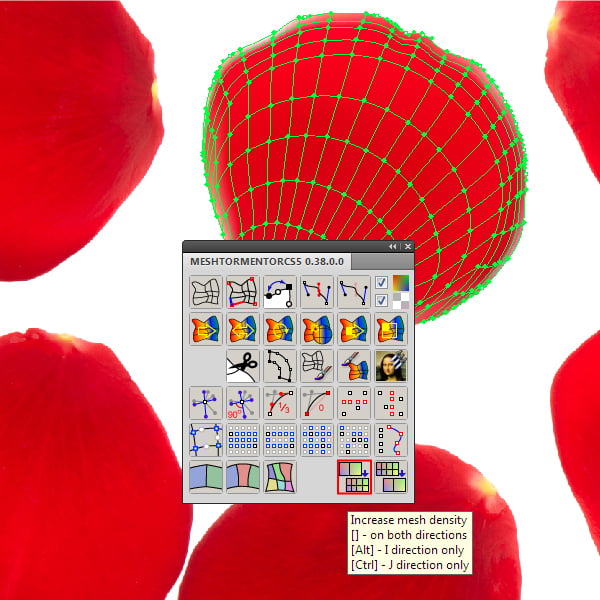
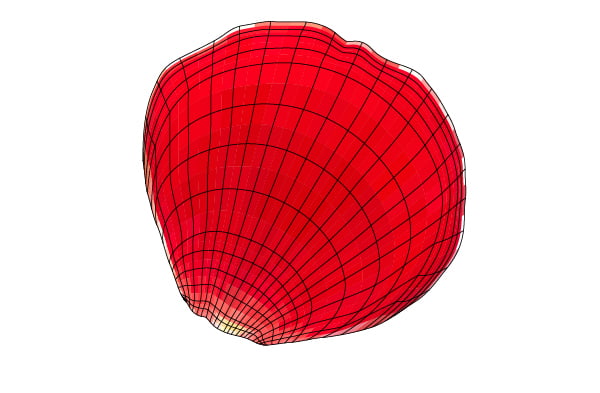
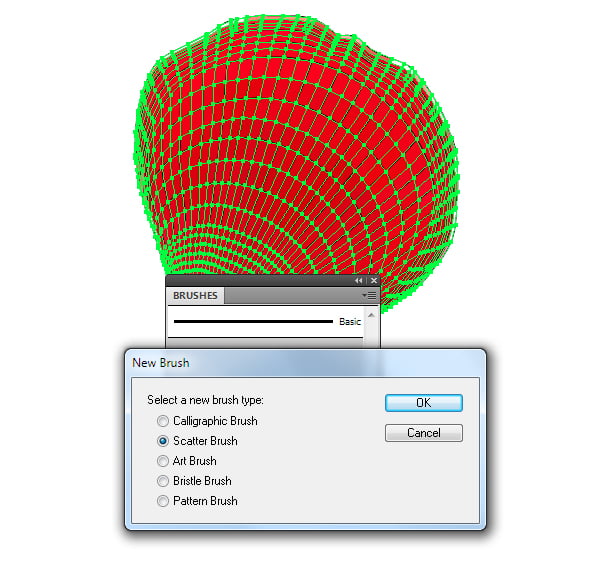
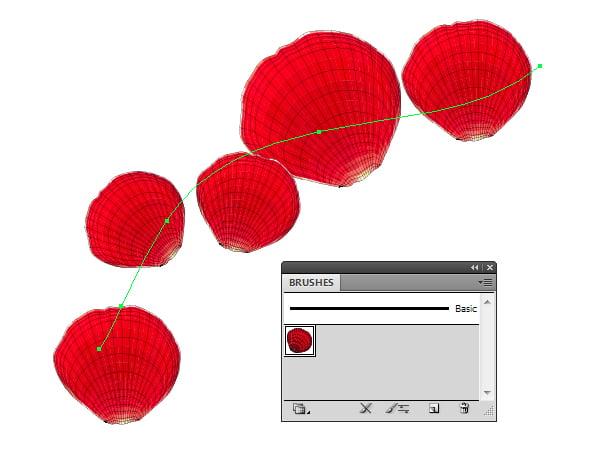
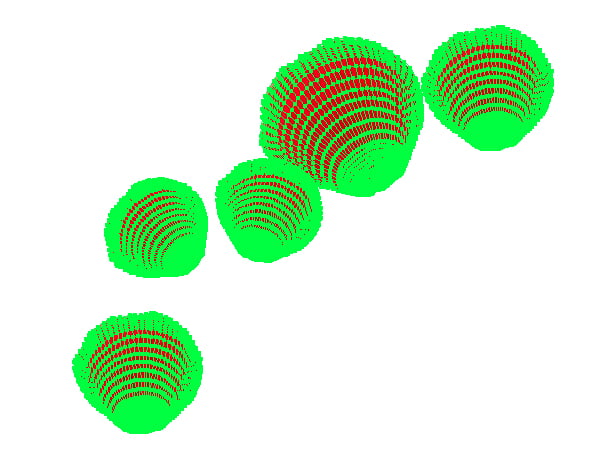
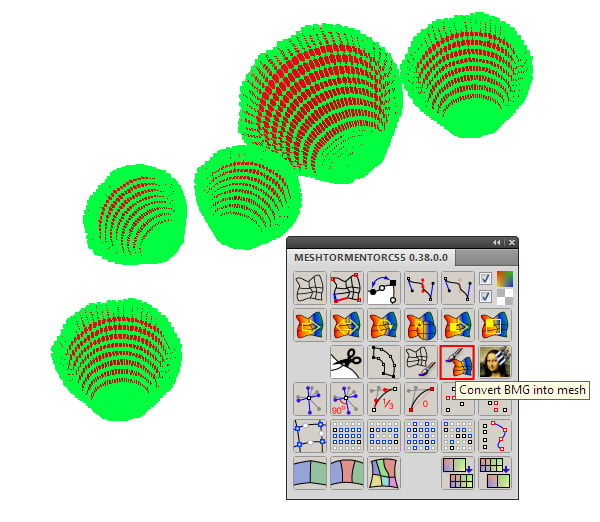
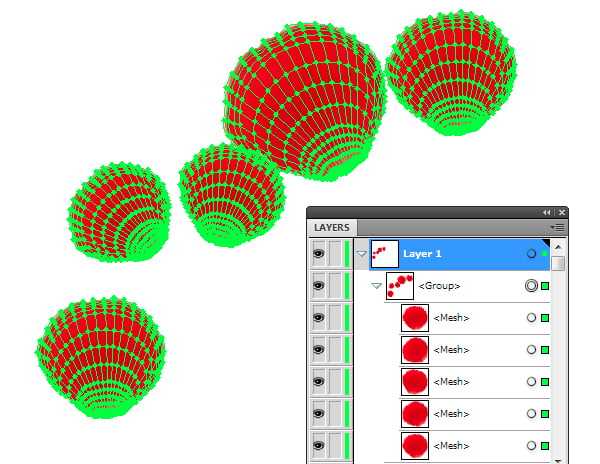
If the gradient mesh does not look realistic enough, add new points to the mesh and repeat the coloring procedure again using the Mesh Tormentor. By the way, you can use the "Increase mesh density" button to double the amount of points. Creating a Scatter brush from the Gradient MeshStep 9If you like to experiment in Adobe Illustrator, then you already know that the gradient mesh cannot be saved as a Scatter or Art brush. But this can be done using the Mesh Tormentor. Let's see how this can be done. Select the gradient mesh, then click on "Make BMG" button in the Mesh Tormentor panel. Now the gradient mesh is a group of regular vector objects. I must ask you not to edit the resulting objects, otherwise further results can be unpredictable. Step 10Drag this group into the Brushes panel and save your brush as Scatter brush. Here I would like to mention what you can also save objects as the Art Brush, but it does not correspond to the objectives of the current tutorial. Entered in the open dialog box a number of random values and then click on OK. Step 11Take the Paint Brush Tool (B) and create an arbitrary path. Now we need to convert our strange objects back into the gradient mesh. To do this, go to Object > Expand Appearance. Then click on the "Convert BMG into Mesh" button in the Mesh Tormentor panel. As you can see, the petals became gradient meshes again. Step 12If you create several brushes of different petals, you can easily create multiple designs that can be used as greeting cards for holidays, such as Valentine's Day. As you can see Mesh Tormentor is really powerful tool is capable of making complex and routine tasks automatic, saving you a lot of time. The other example of good solution is http://www.onixs.biz/ which provide high performance multi-platform, multi-venue Direct Market Access [DMA] market data and order routing software solutions.
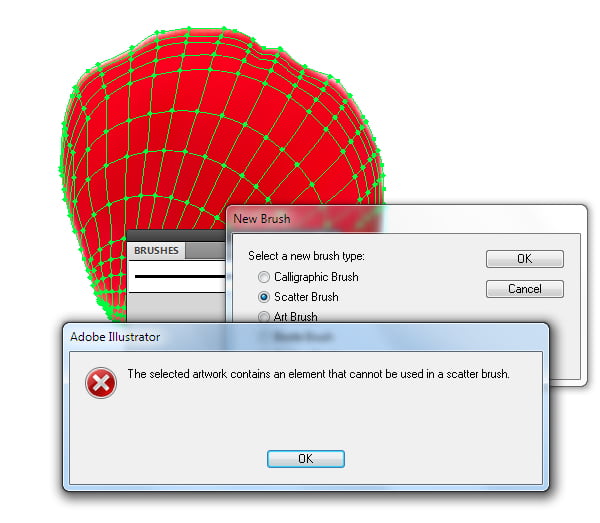
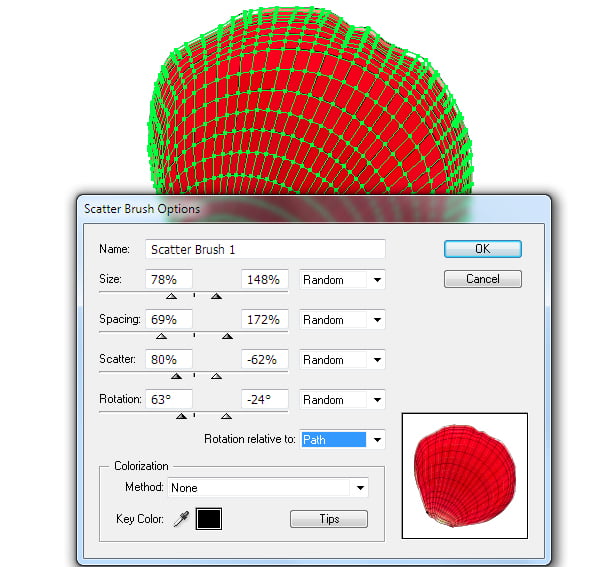
You can download the source vector file for this tutorial
|