|
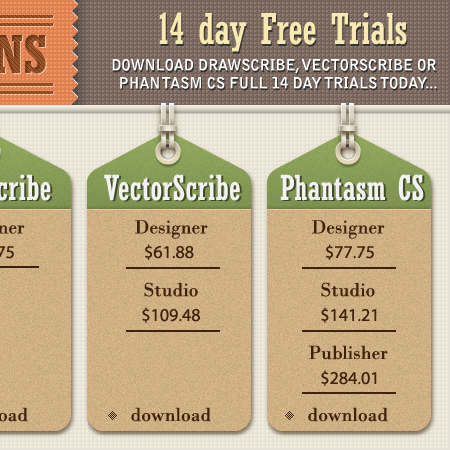
Final Image Preview
This tutorial is primarily intended for beginners, that is why it contains detailed instructions for creating the objects of the Pricing Box artwork. Dynamic Shapes Tool and Dynamic Corners Tool (VectorScribe Studio plugin) were used in the process of work. I will compare their functions with the functions of the standard tools of Adobe Illustrator in order for you to see the advantages and to make the right choice.
Step 1
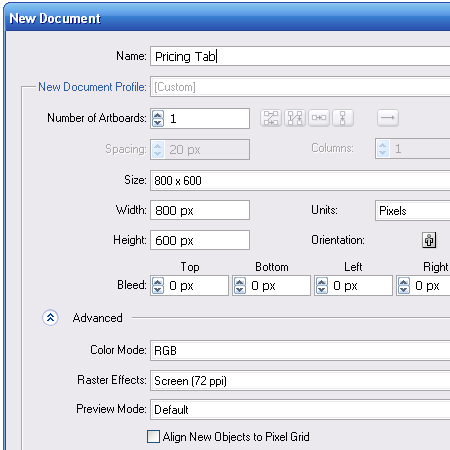
Create a new document with an artboard of 800 x 600px (RGB).
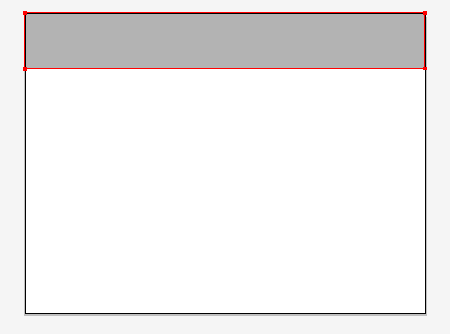
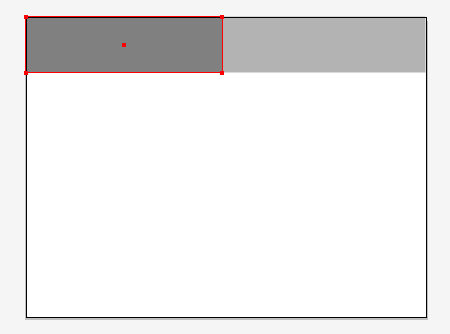
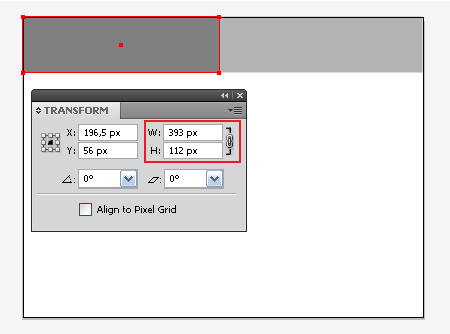
Now take the Rectangle Tool (M) and create two rectangles in the upper side of the artboard.
The color of the objects is not important right now. First we need to put together the basic elements of the pricing tab. To make the edges of objects look sharp, use only integer (whole) values for their sizes.
Using integers for the sizes ensures they fit into the pixel grid, avoiding the edges becoming blurred through anti-aliasing.
Step 2
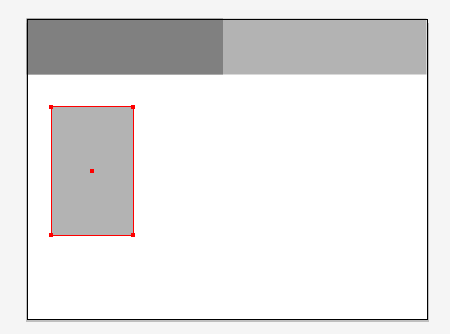
The names of the products and their prices will be located on the labels. Create the shape of the first one with the help of the Rectangle Tool (M).
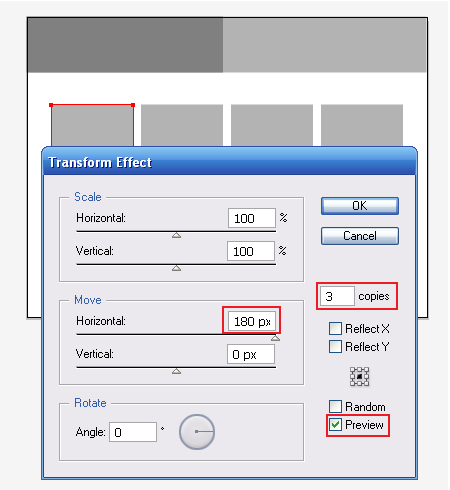
Keeping the rectangle selected, go to Object > Distort & Transform > Transform… and set the horizontal offset value and the amount of copies.
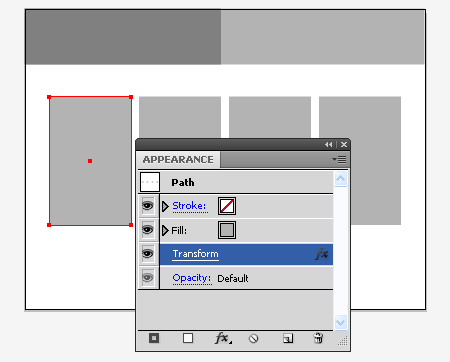
With the help of the Transform effect it is easier to work with the identical elements and you can always change the distance between them determined by the live Effect at any stage via Appearance panel (Window > Appearance).
On top of that, any changes to the underlying shape will immediately be replicated across all copies.
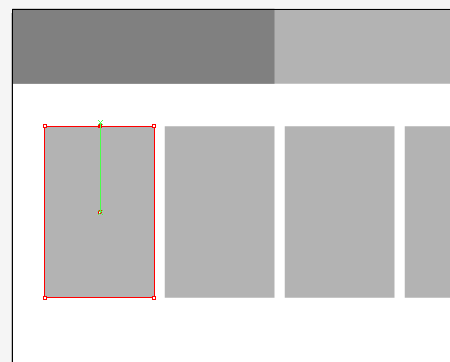
Step 3
Take the Pen Tool (P) and set a new point in the center of the upper side of the rectangle.
If you have the Smart Guides mode on (Cmd / Ctrl + U), then you can easily find a center. Move the created point straight up holding Shift.
The main elements are created and placed on the artboard.
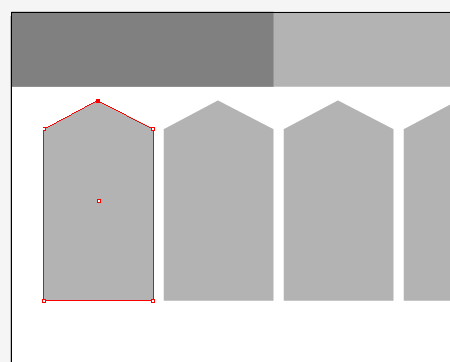
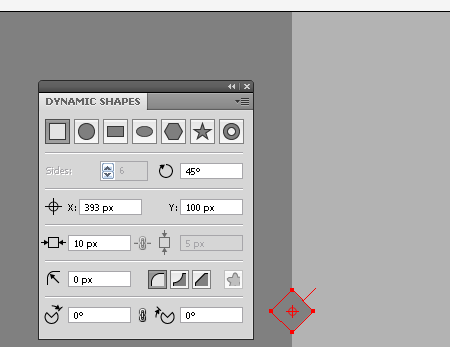
Step 4
Start creating smaller details. Create teeth in the header of the pricing tab. With the help of the Dynamic Shapes Tool (VectorScribe Studio plugin) create a 10 x 10px square at an angle of 45°.
I prefer to use this tool as it allows you to dynamically control the parameters of the shape in the Dynamic Shapes panel (Window > VectorScribe > Dynamic Shapes) and immediately turn the shape at the constrain angle. To do this, hold down Shift in the process of its creation.
You can read full version this tutorial on AstuteGraphics.com
Follow us if you want to be the first to know about the latest Adobe Illustrator tutorials and articles. Vectorboom team works for you!
|