|
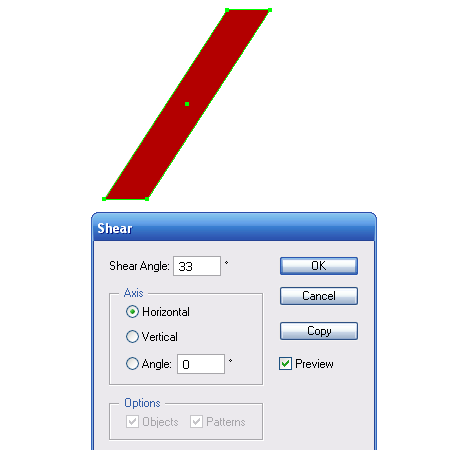
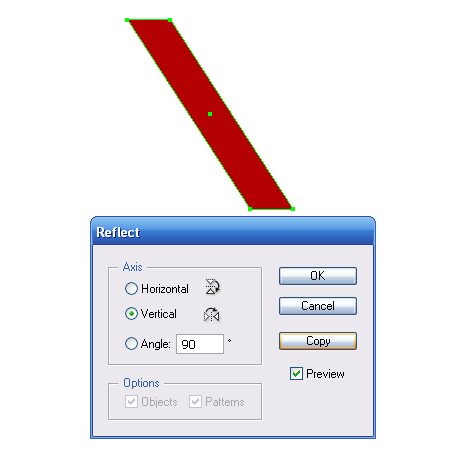
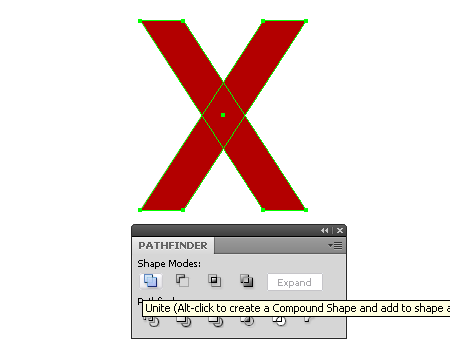
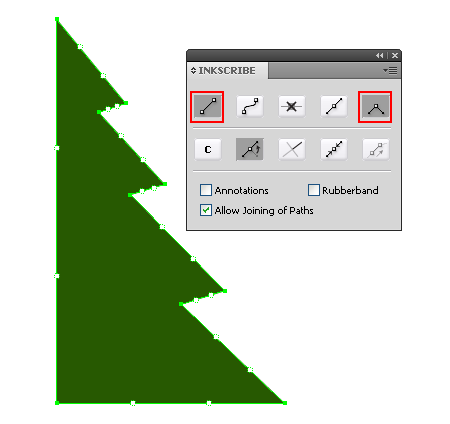
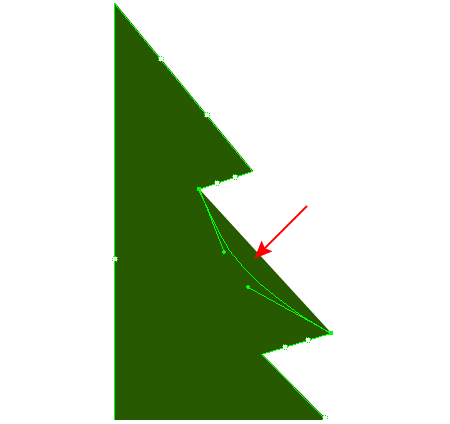
Final Image Preview In this tutorial we will learn how to create a greeting card using a very simple, and therefore accessible methods for everyone. If you are doing the first steps in learning Adobe Illustrator, then this tutorial is right for you, dear friends. Happy Holidays to all of you! Step 1Begin our tutorial with a letter "X". Take the Rectangle Tool (M) and create a rectangle, as shown in the following picture. Keeping the rectangle selected, go to Object > Transform > Shear …, then set Shear Angel in the dialog box. Step 2Now go to Object > Transform > Reflect …, then select the Vertical Axis and click on Copy in the dialog box. Select both of the created objects and click on the Unite from the Pathfinder Panel. Letter "X" shape is ready. Step 3Proceed to the creation of the shape of the Christmas tree. I think it is better to use the InkScribe Tool (DrawScribe plugin) for these purposes. Take this tool and open its panel (Window > DrawScribe > InkScribe Panel). Choose "Draw a straight segment" and "Corner point" in the InkScribe panel. Create half of the Christmas tree shape, which only consists of straight line segments. Step 4As you can see, the straight-line segments contain inactive handles, they are called Ghost handles. In order to convert a straight-line segment into a curved one, just pull it to the side or move one of the ghost handles with the InkScribe Tool. Bend four segments, as it is shown in the following picture.
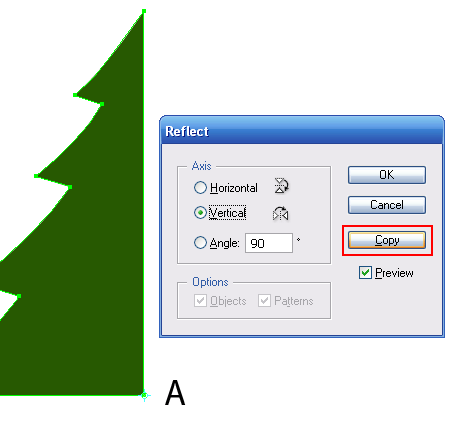
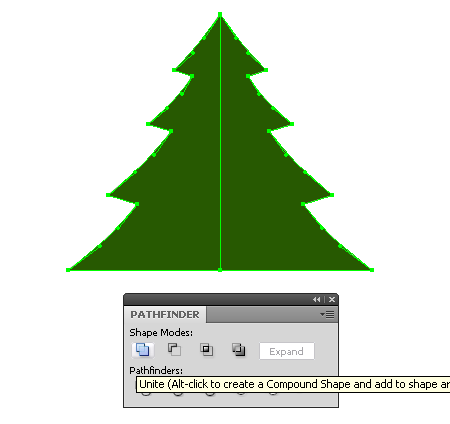
I am sure that this type of shape can be more quickly created with the InkScribe Tool, rather than using the Pen Tool (P). Step 5Take the Reflect Tool (O) and set the center at point A, while holding Opt / Alt key. Click on Copy in the open dialog box. Select both halves of the Christmas tree, then click on Unite in the Pathfinder panel. You can read full version this tutorial on AstuteGraphics.com
Follow us if you want to be the first to know about the latest Adobe Illustrator tutorials and articles. Vectorboom team works for you!
|