|
Final Image Preview
In this tutorial we will learn how to create tender floral composition using simple vector techniques. Have fun and enjoy our new Adobe Illustrator tutorial!
Illustrator Tutorial Details
- Program: Adobe Illustrator CS - CS6;
- Difficulty:Intermediate;
- Estimated Completion Time: 60 minutes;
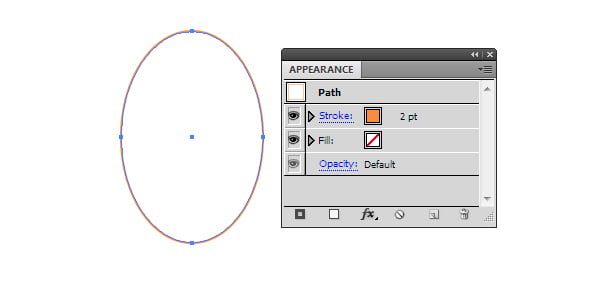
Step 1
Let's begin our tutorial with creation of some elements of floral composition. I want to note, the background was created in the RGB color mode (File > Document Color Mode > RGB color). Take the Ellipse Tool (L) and create an ellipse without fill with the orange stroke 2px thick.
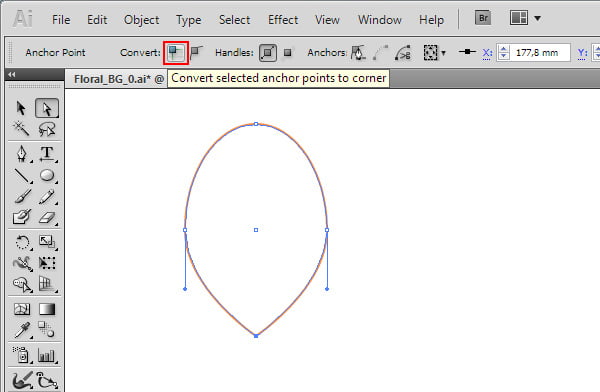
With the Direct Selection Tool (A) select the bottom point of the ellipse, and then convert it to the corner by clicking on the appropriate button in the Control panel.
Step 2
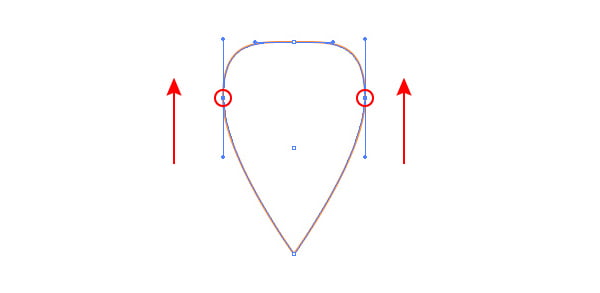
Select the side points of the ellipse and move them up using the Up Arrow key.
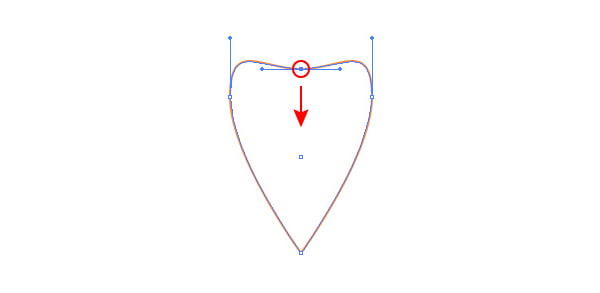
And now move the upper point of the ellipse down using the Down arrow key.
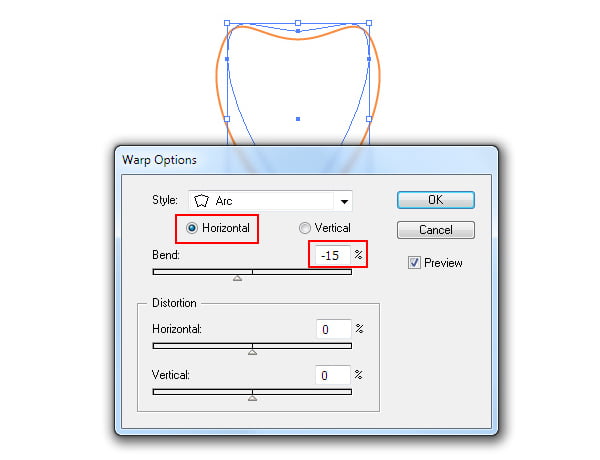
Select the whole object with the Selection Tool (A), and then go to the Effect > Warp>Arc… and set the parameters indicated on the picture below.
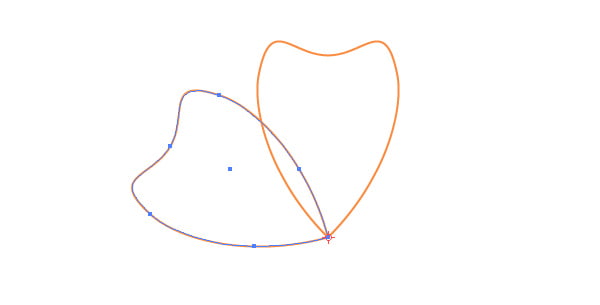
Step 3
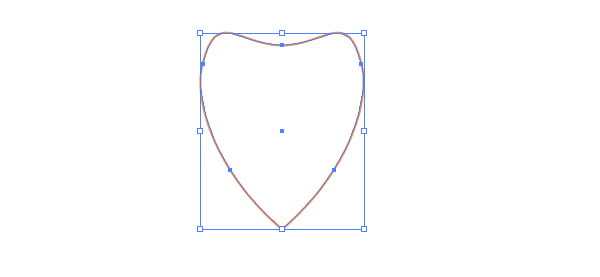
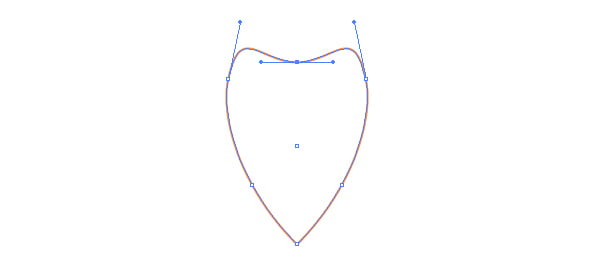
Go to the Object > Expand Appearance.
I slightly reduced the width of the resulting figures and moved down its upper point.
The form of one petal is ready.
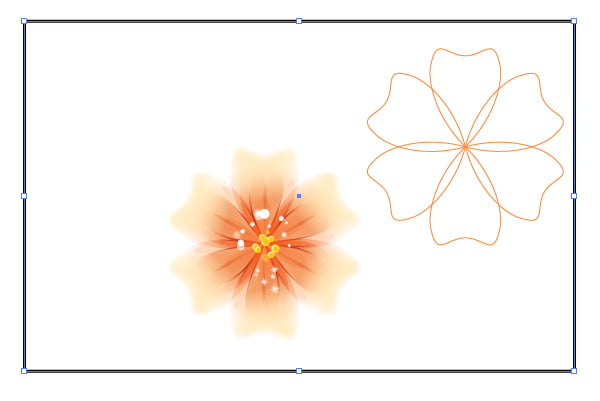
Step 4
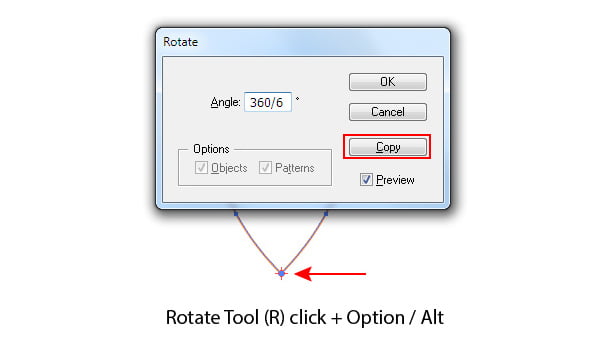
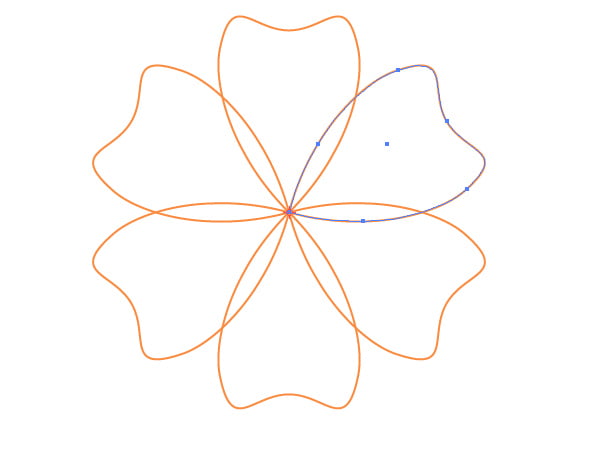
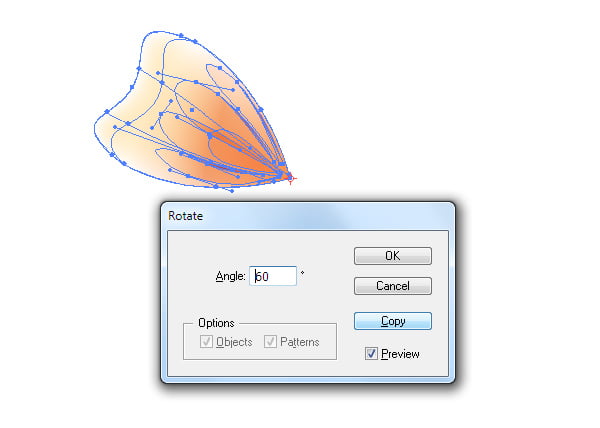
Select the whole created object, take the Rotate Tool (R) and holding down the Option / Alt key click on the lower point of the figure. These actions will open the dialog box Rotate. Put in a number field 360/6 formula and click on the Copy.
Click Command / Ctrl + D four times for successive repetition of the last action.
Select and group all the created objects (Command / Ctrl + G). The first element of our background is ready.
Step 5
Now we will work on creation of more complex flower. You can use previously created form for the creation of its petals. Fill this object with radial gradient from orange to white and apply the Multiply blending mode to it.
Step 6
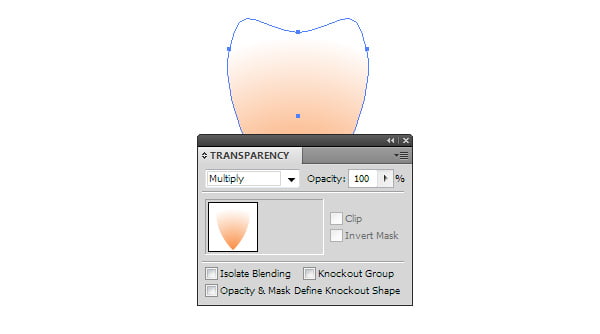
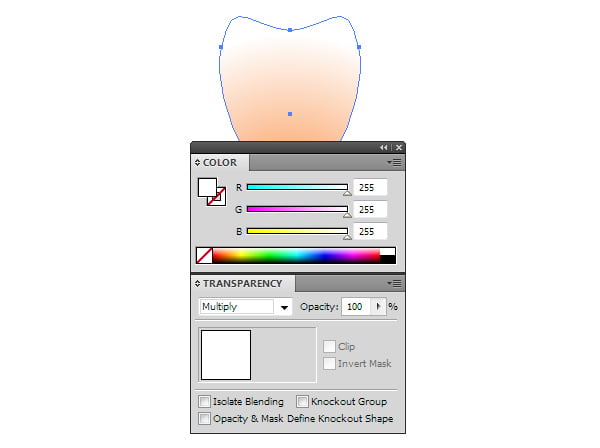
Copy the form of the petal and paste it to the front (Cmd / Ctrl + C; Cmd / Ctrl + F), then fill it with white.
The upper petal turned transparent (white turns transparent if the Multiply blending mode is applied to the object).
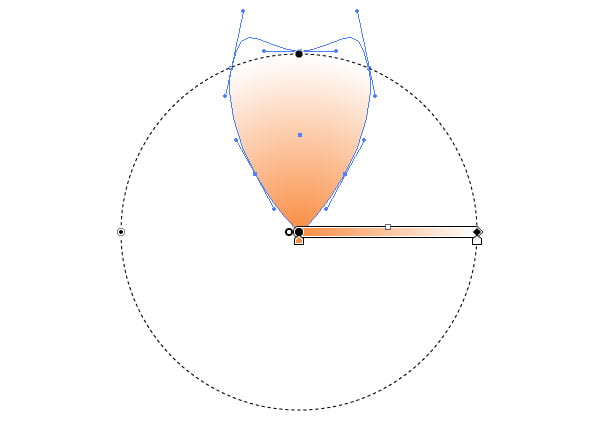
Step 7
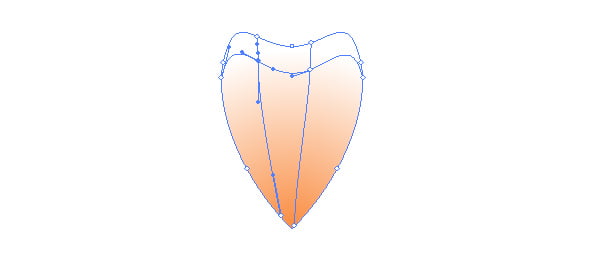
Take the Mesh Tool (U) and create a simple mesh by clicking on the contour of the upper petal.
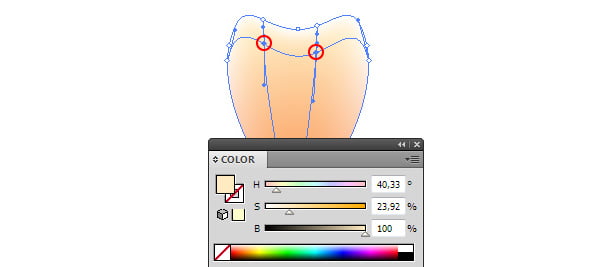
Select the central nodes of the gradient mesh with the Direct Selection Tool (A) then color them into light-orange color.
Step 8
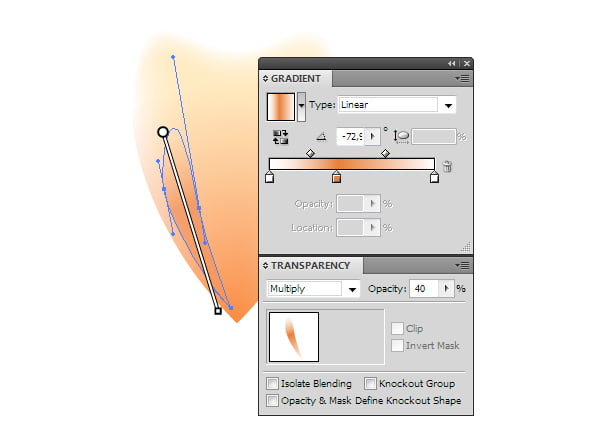
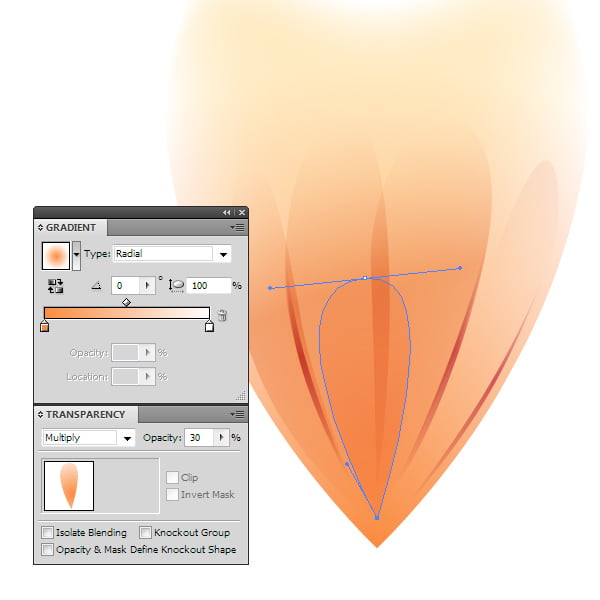
Let's create a new form with the Pen Tool (P). Fill it with linear gradient which consists of two white and one orange slider. Apply the Multiply blending mode to the object and reduce the opacity in the Transparency panel.
Let's create some more similar forms with the same appearance.
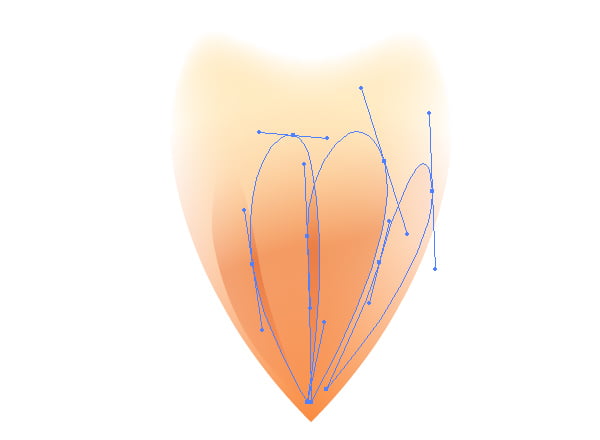
Step 9
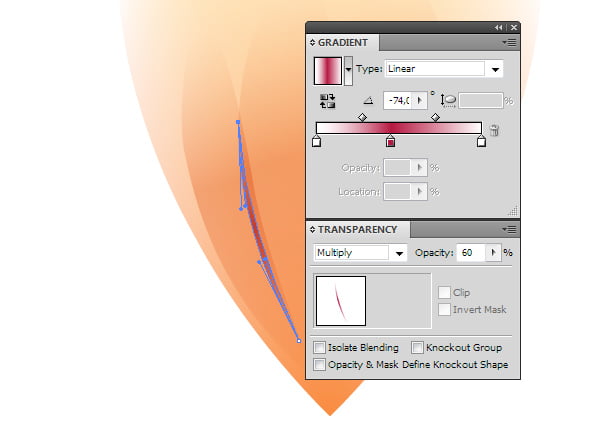
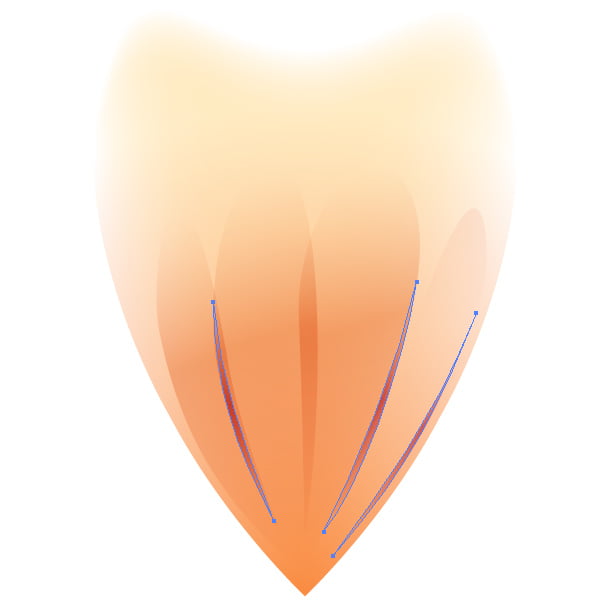
Let's create a couple of veins on our petal. This time we use the linear gradient which consists of two white and one dark pink. These objects also have the Multiply blending mode. Color intensity can be adjusted by the opacity change in the Transparency panel.
Let's work on the last object on the petal, its appearance can be seen on the figure below.
Group all the petal's objects.
Step 10
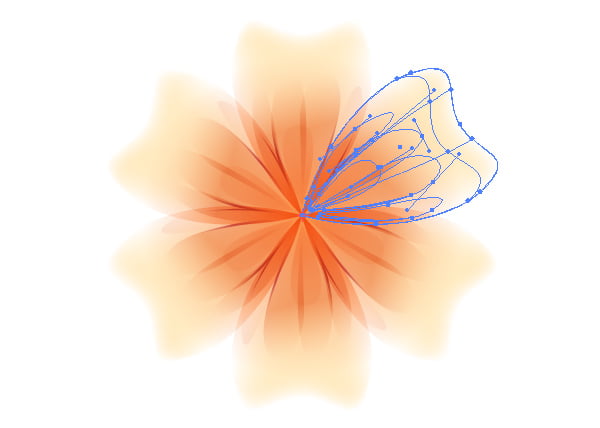
Let's turn a petal into a flower by using the Rotate Tool (R) and Cmd / Ctrl + D shortcuts as it was described on the 4th step of our tutorial.
Group all petals together.
Step 11
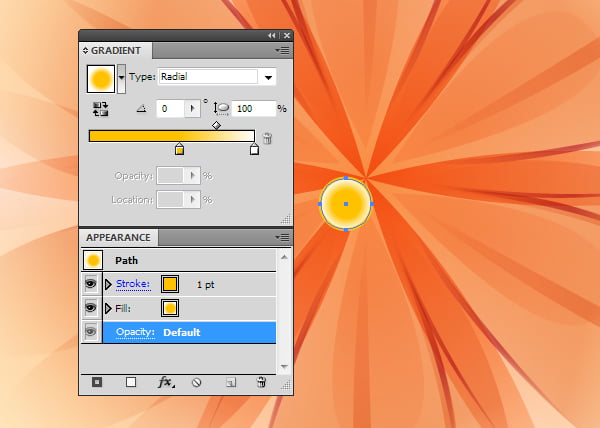
Now we will create some stamens. Create a circle with the Ellipse Tool (L). Our circle has a yellow stroke and a radial gradient fill from yellow to white.
Double the circle a couple of times and change the parameters of new circles. You can also reduce the opacity of some circles.
Step 12
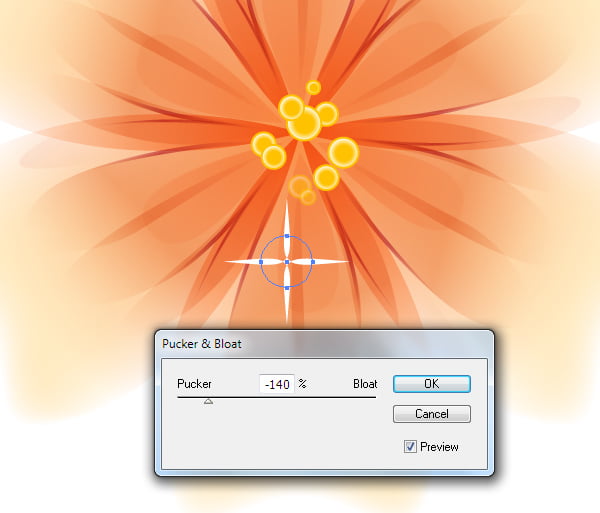
Let's create some glowing sparks. Draw a white circle, then go to the Effect > Transform & Distort > Pucker & Boat… and set the value -140%.
Now go to the Object > Expand Appearance.
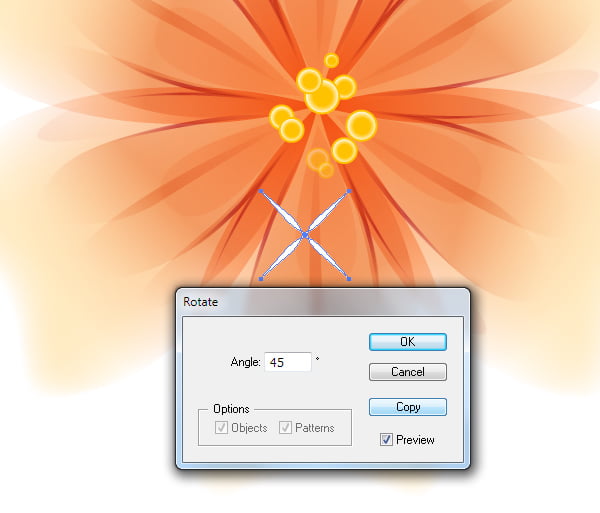
Step 13
Go to the Object > Transform > Rotate… and set the 45 degrees angle and click on Copy.
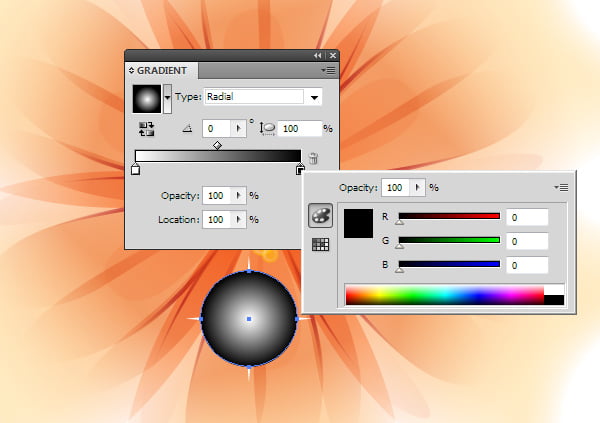
Reduce the size of the new star. Draw the circles with radial gradient fill from white to black.
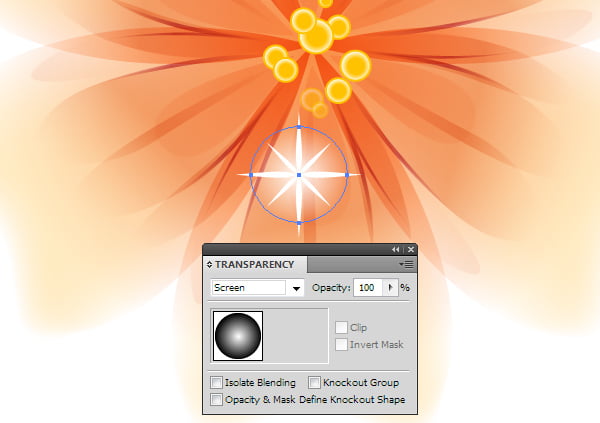
Apply the Screen blending mode to the circle.
Group all the elements of the star and reduce its size by using the Selection Tool (V). Double our star a couple of times and play with the size of copies and its transparency.
Step 14
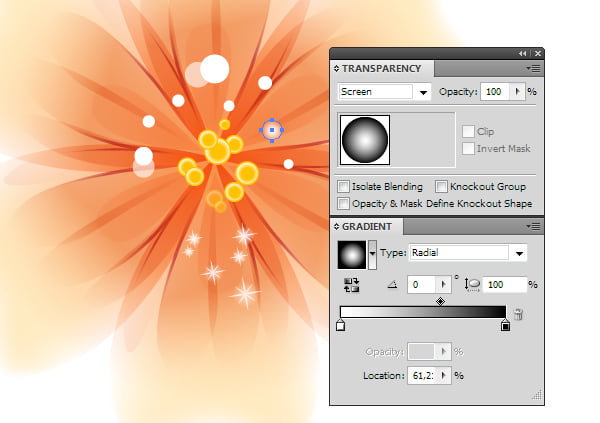
Create a couple of white circles of different sizes and reduce the opacity of some of them.
Now let's create a couple of circles with soft edges. We can do it with the help of the Screen blending mode and black & white radial gradient.
Finally, all the elements of our flower are created, we can group them.
Step 15
Create a rectangle with a black stroke which will further limit our composition.
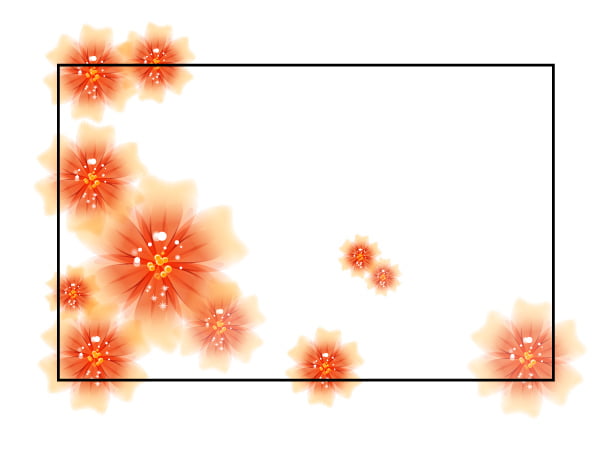
Double our flower and while changing the sizes and opacity of the copies a simple composition can be created.
Add some elements, which were created in the first steps of our tutorial, to our composition.
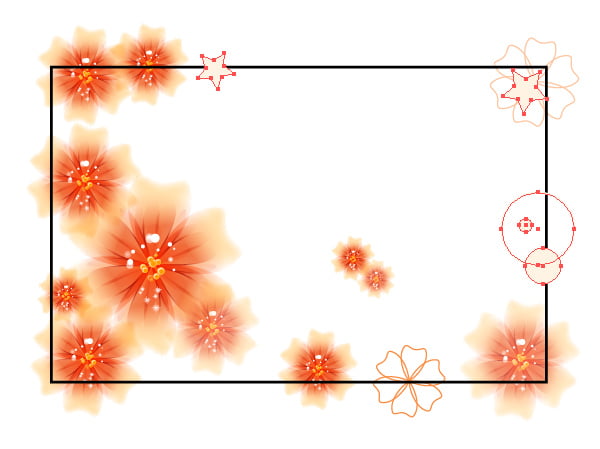
And now add a couple of circles and stars which were created with the Ellipse Tool (L) and the Star Tool.
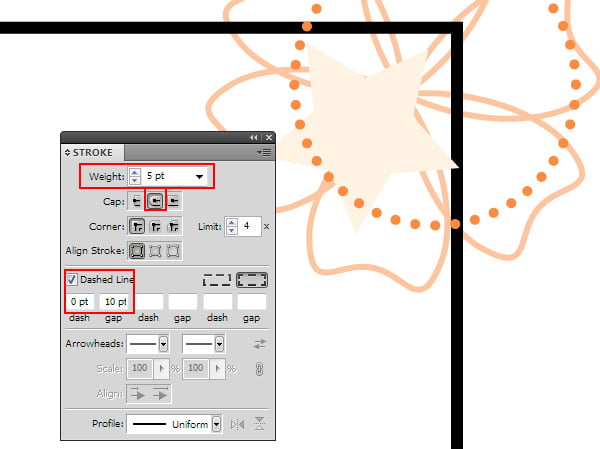
And finally, add some circles with dashed stroke.
Step 16
Select the rectangle with black stroke and place it above all created objects (Shift + Cmd / Ctrl + ]). Now select all the objects (Cmd / Ctrl +A) and click on Cmd / Ctrl + 7 to create the Clipping Mask.
This step concludes our tutorial, BFN.
|