|
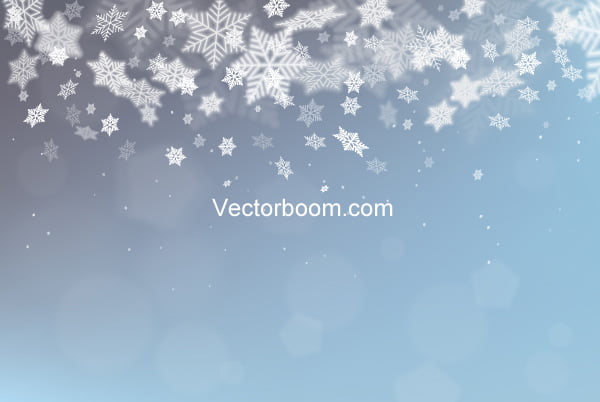
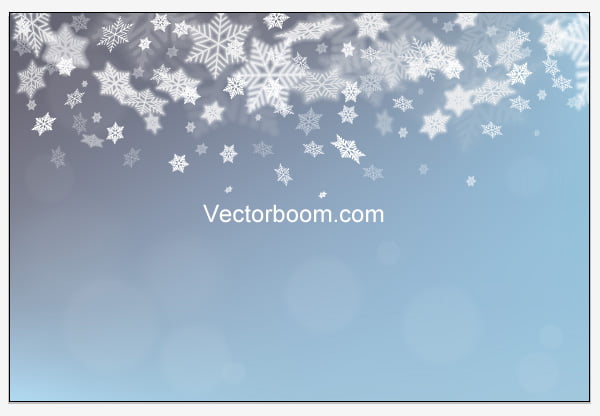
Final Image Preview
In this tutorial we will learn how to draw a winter background by using the vector blurring technique, which allows us to create illusion of motion and depth of scene.
Creation of vector snowflake
Step 1
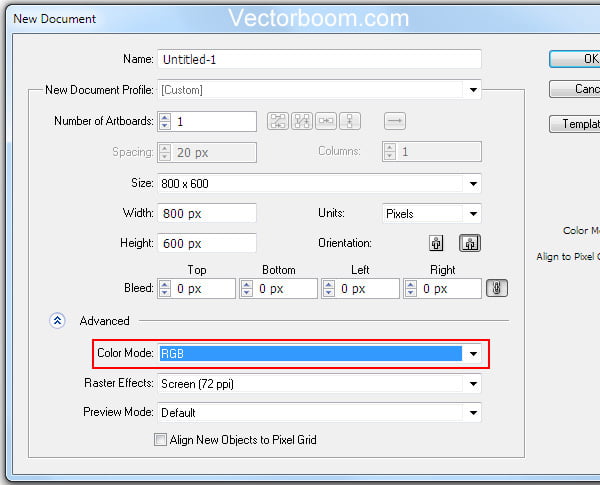
Start Illustrator and create a new document. In the opened dialog box set the necessary size of our artboard and choose the RGB color mode.
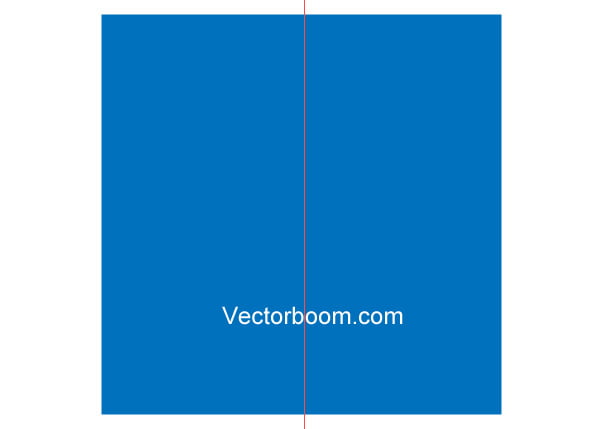
Begin our tutorial with the creation of a snowflake. Draw a colored rectangle of any size - on its background we will create a white snowflake.
Step 2
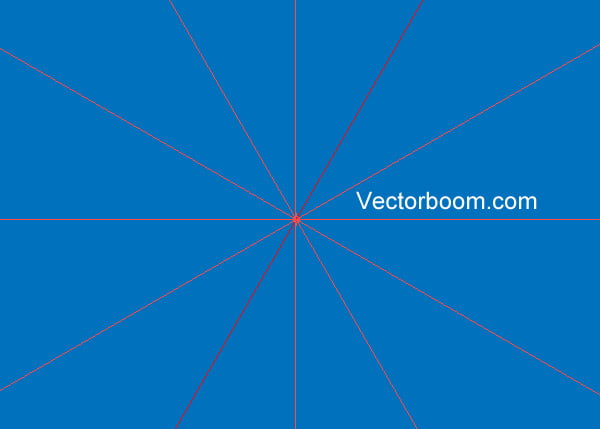
Snowflakes will be created with the help of guides. Turn on rulers, if they are not on yet (Cmd/Ctrl + R). Create a vertical guide by dragging it from a corresponding guide.
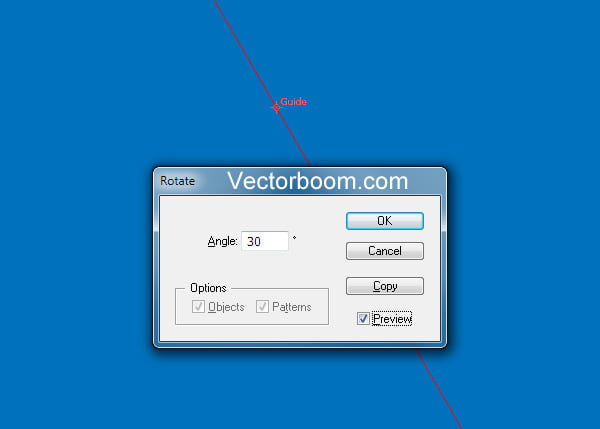
Take the Rotate Tool (R), and while holding the Opt/Alt key click on the guide. Enter a 30 degrees angle into the opened dialog box; click on Copy.
Use the Cmd/Ctrl + D shortcuts four times to repeat the last action, i.e. the turn to 30 degrees.
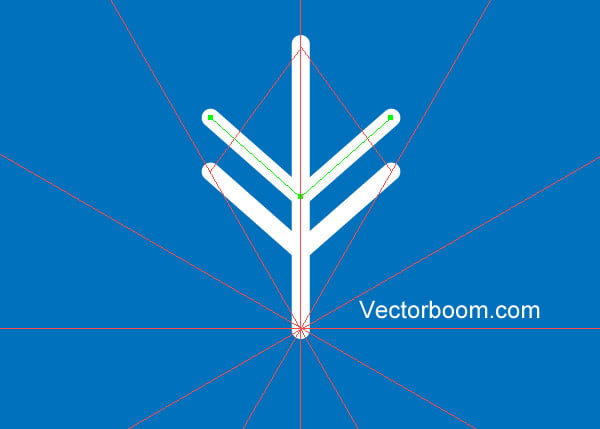
Step 3
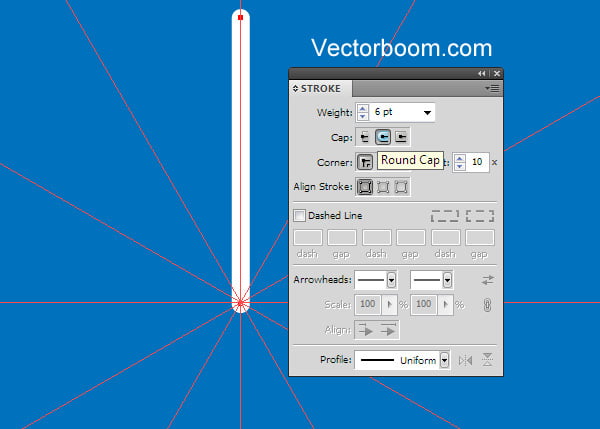
With the help of the Pen Tool (P) create a vertical line from the point of intersection of guides. This will be the center of the future snowflake. Set the width of the line and choose the Round Cap option in the Stroke panel.
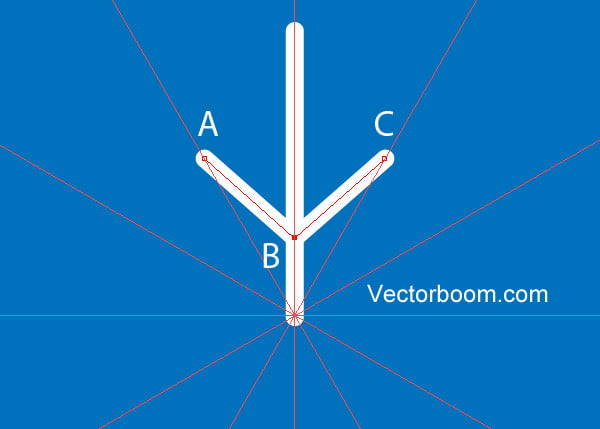
Create a line consisting of two straight-line segments. The points of this path lay on the guides, with points A and C on the same heights.
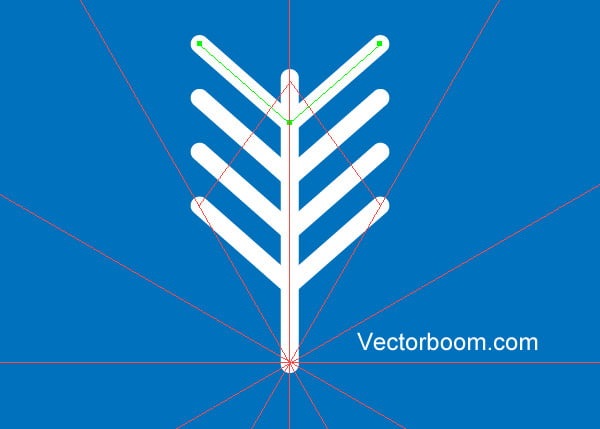
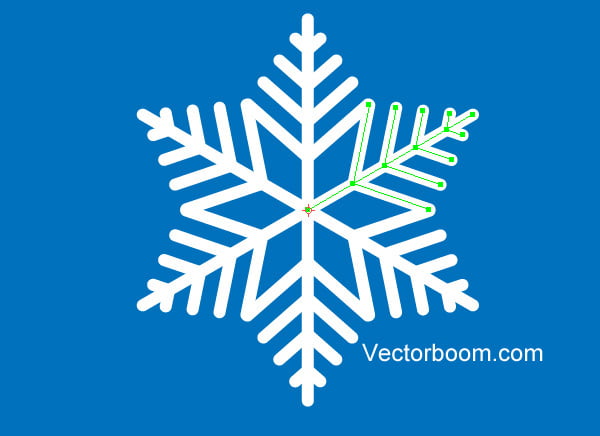
Step 4
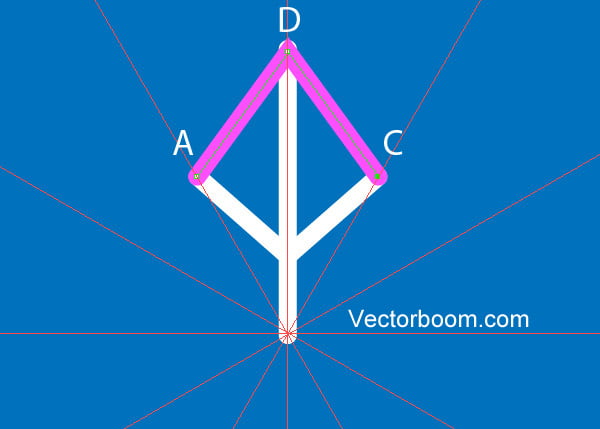
Let’s create one more path that this time goes through points A, D and C.
Turn it into a guide - to do so, go to the View > Guides > Make Guides or use Cmd/Ctrl + 5 shortcuts.
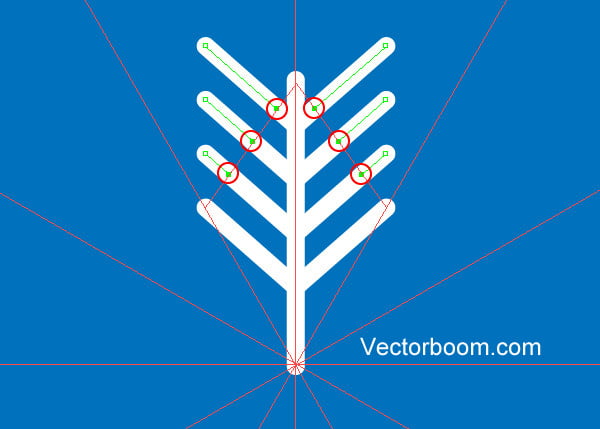
Step 5
Move the ABC path vertically up, by holding Shift and Opt/Alt keys which also leads to its duplication.
Use the Cmd/Ctrl + D shortcuts two times.
Cut V-paths with the help of the Scissors Tool (C) at the places of intersection with the guide, as it is indicated on the figure below.
Delete outer parts of the paths.
And now all the guides can be deleted (View > Guides > Clear Guides).
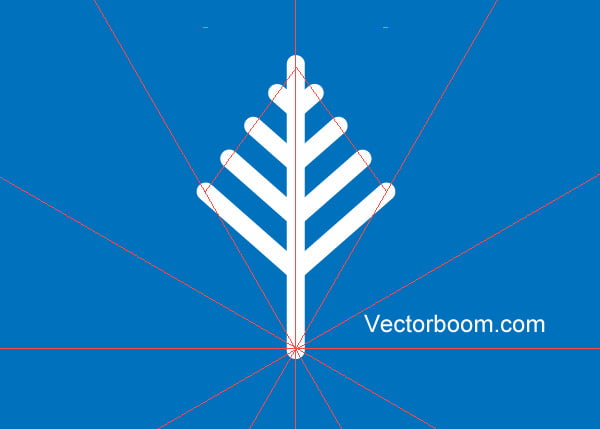
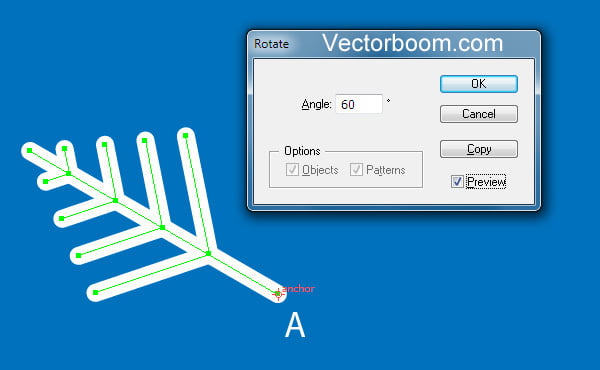
Step 6
Select the created paths, take the Rotate Tool (R) and click at the point A. Set a 60 degrees angle. Click Copy.
Use the Cmd/Ctrl + D shortcuts four times.
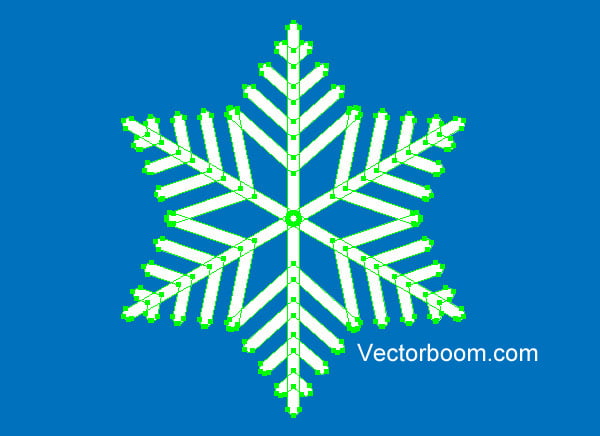
Step 7
Select all the elements of the snowflake, then go to the Object > Path > Outline Stroke.
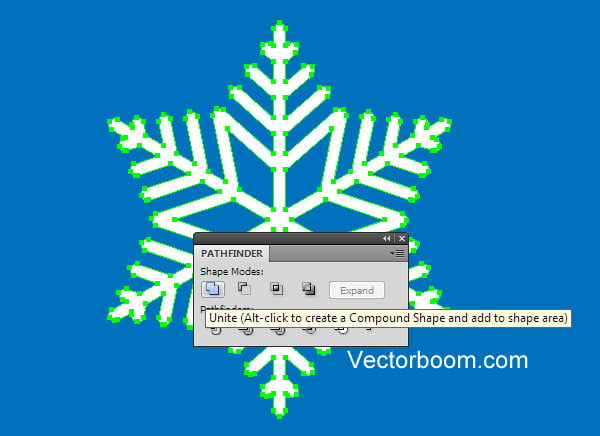
And now click on the Unite icon in the Pathfinder panel, by turning the snowflake into a Compound path.
The main element of our Christmas background is ready.
Creation of vector blurring
Step 8
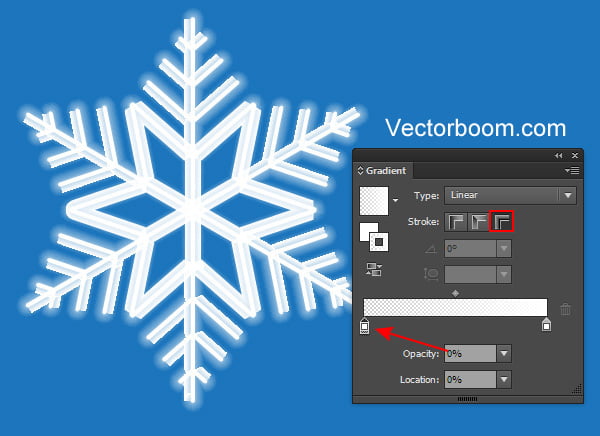
Some of our snowflakes should look blurred to create an illusion of motion. It’s is easily done with the help of raster effects, for example the Effect > Blur > Gaussian Blur…. But since most of my readers (including me) are contributors to mickrostock websites, then we will look at the method of vector blurring creation in detail. Such effect can be achieved with the help of the Blend Tool; however the form of the snowflake is too complex in order to use this method. You’ll also need a lot of patience and effort to receive a blend object with blurred edges with no artifacts and desired look. I tried it - take my word for it. We also can use the Gradient on Stroke feature in Adobe Illustrator CS6-CC. In this case, it also gives unacceptable artifacts - which you can see at the following figure.
The only method I have left is to use the Appearance panel, i.e. a couple of fills with different effects. Exactly this method will be described in detail in the next steps.
Step 9
Select the snowflake and go to the Effect > Path > Offset Path… and set the negative value, which in my case is 2,5px. Choose the Round in the dropdown menu.
I chose the negative shifting value, because some blurring should also be placed inside the snowflake.
Step 10
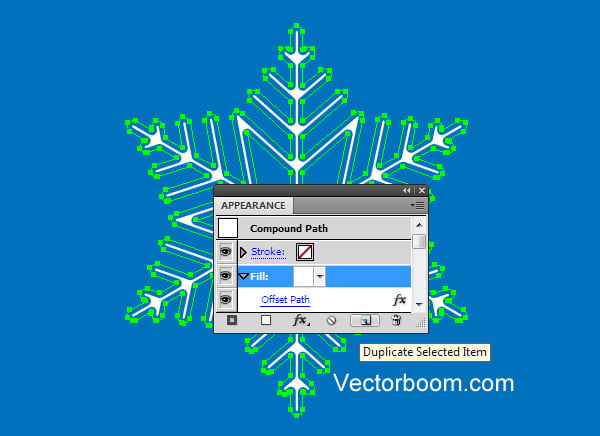
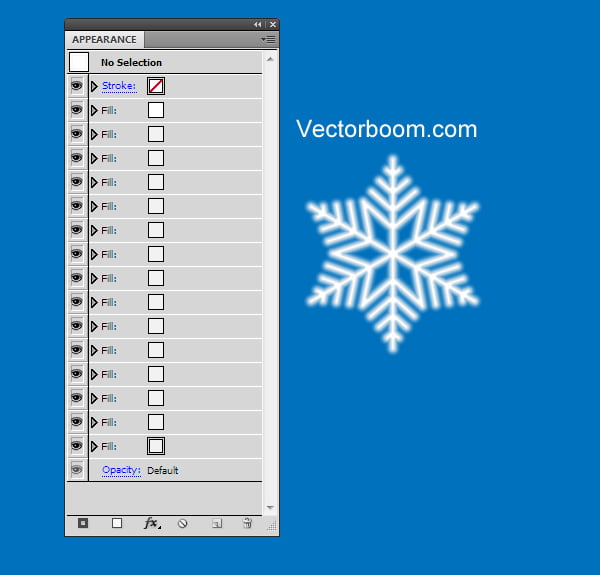
Open the Appearance panel, select fill item in it, then click on the Duplicate Selected Item in the lower part of the panel.
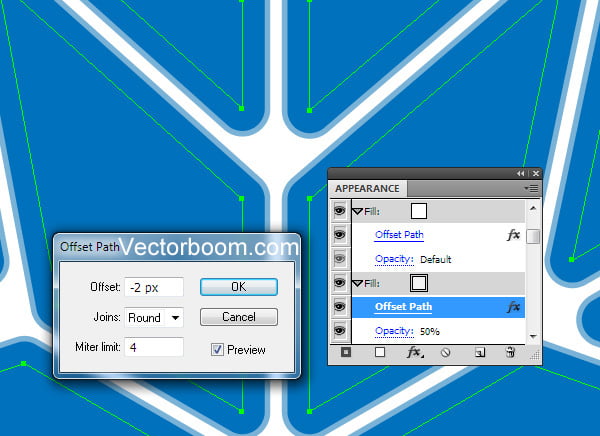
Change the opacity of the lower fill to 50% then click on the Offset Path in the panel and set a new value on the opened dialog box -2px.
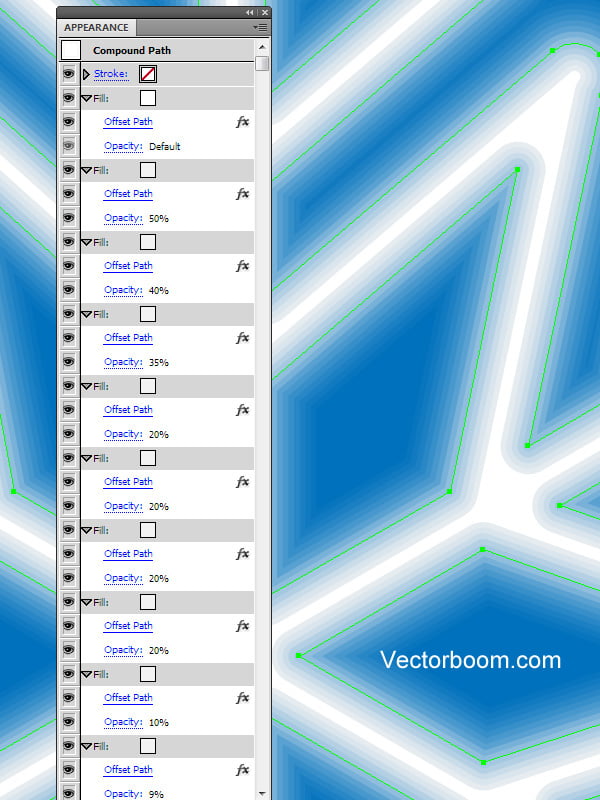
In all the following fills we will reduce the opacity and change the shifting value with a step which is 0,5px.
I used 15 fills to create a vector blurring effect.
Step 11
You can achieve different blurring effects by changing a step of opacity reduction and the amount of fills.
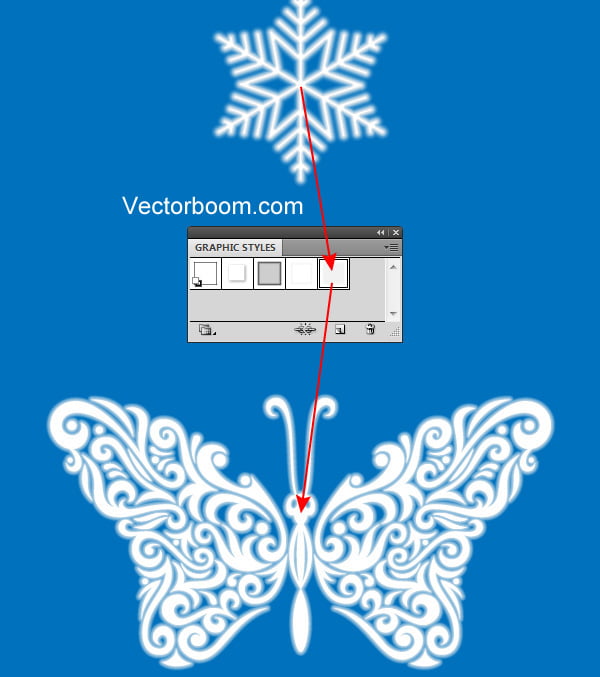
If you select a snowflake and save a style in the Graphic Style panel, then you can apply it to the objects of any forms to create vector effect of blurring. This shows that the suggested method is universal.
Creation of Christmas background
Step 12
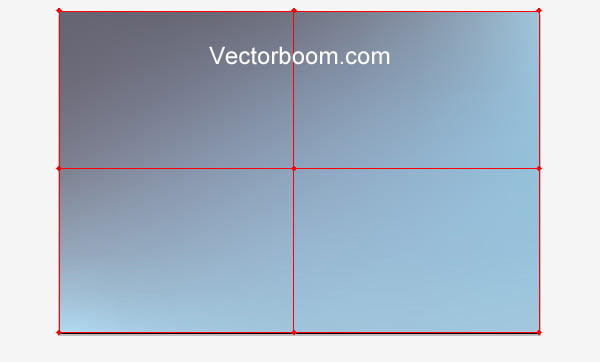
Create a rectangle with the help of the Rectangle Tool (M), then transform it into gradient mesh (Object > Create Gradient Mesh) with two rows and two columns. Color the mesh nods into colors of winter sky.
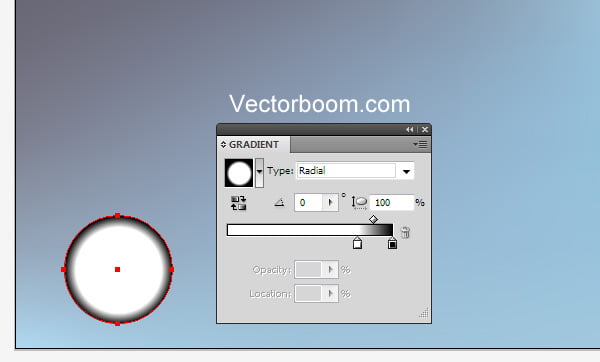
Step 13
Let’s start working on creation of the Bokeh effect. Draw a circle with the help of the Ellipse Tool (L), which we fill with black-and-white radial gradient.
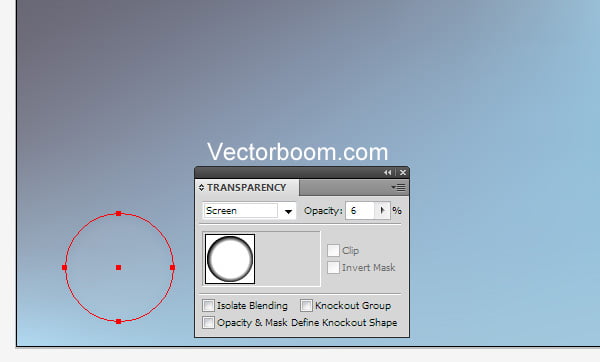
Set the Screen blending mode for our circle and reduce opacity in the Transparency panel.
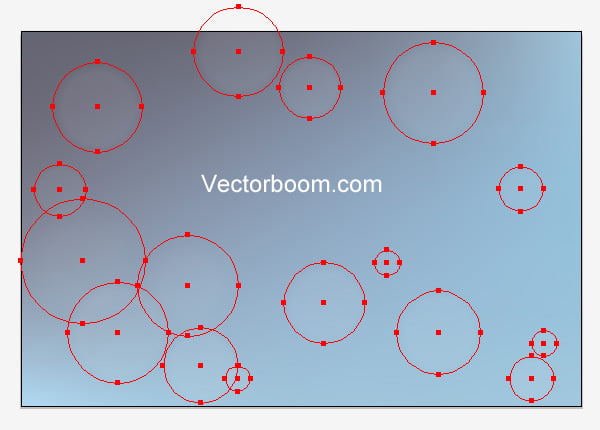
Create a couple of similar circles of different size and opacity.
Step 14
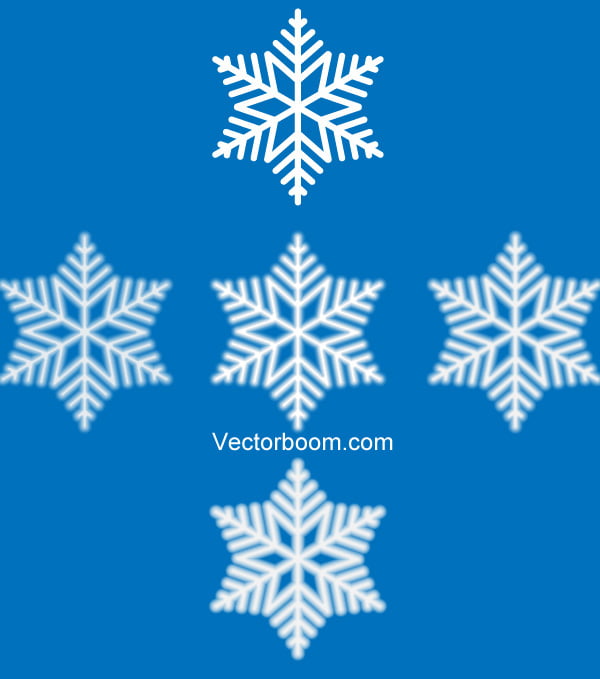
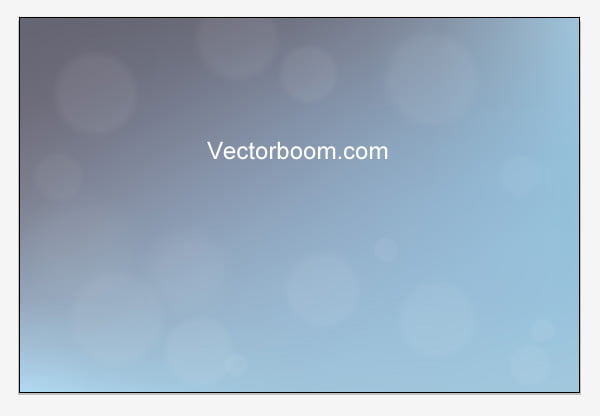
Now all we have left to do is to place the snowflakes with blurring and with no blurring on the upper part of the background. For spatial distortion of the snowflakes use the Shear Tool. You also should apply different opacity values for your snowflakes.
And finally, add many little ellipses. Here we go - our winter background is ready.
|