|
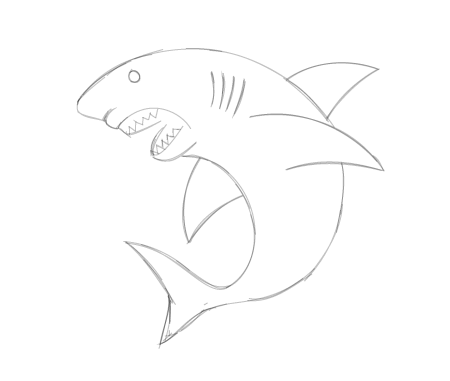
Final Image Preview
In this tutorial I’ll talk about how to combine work of DynamicSketch and InkScribe tools to create a cartoon shark. With the help of the DynamicSketch Tool we will create character outline, which has several times more levels of control than the native Illustrator’s brush strokes. Then we will use InkScribe Tool to color the illustration. This accurate and convenient tool allows you to create the perfect shapes of the paths thanks to its rich and convenient functionality. These tools are sharper than shark’s teeth!
Step 1
The first thing I made was a sketch of a shark using DynamicSketch. This tool allows you to quickly make the necessary sketches directly in Adobe Illustrator, without wasting paper and spending time on sharpening pencils, and so on.
You can read more about the settings DynamicSketch for this phase of work in the article Create a comic speech bubble with DynamicSketch in Illustrator.
Step 2
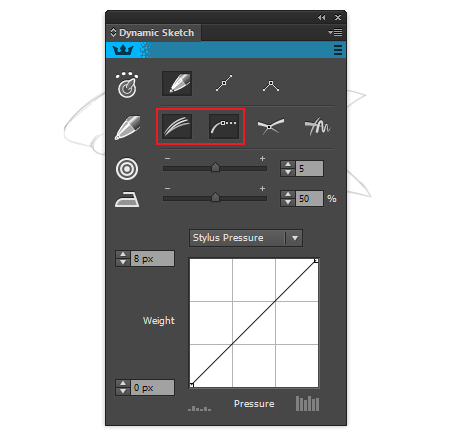
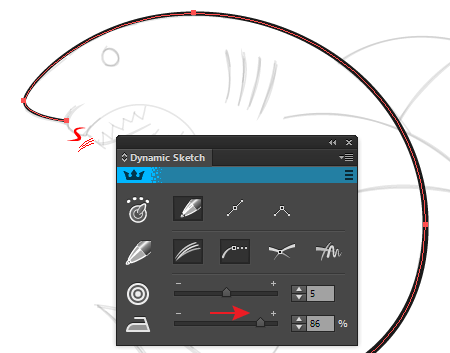
Now we can proceed to the creation of the character outline. To open the DynamicSketch Tool panel, go to Window > DynamicSketch > DynamicSketch Panel. The panel allows us to set the variable path width depending on several parameters. In my work I will be using the Graphic Tablet (eg. those by Wacom), therefore set the path width to be based on the graphics tablet pen pressure.
Here you can also set the path width value at the minimum and maximum pressure on the stylus. In contrast to the Paint Brush Tool and the Blob Brush Tool dialog windows, the DynamicSketch panel stays available during the work. This allows us to change the settings of the tool fast. Besides, the created path is dynamic, allowing us to change its properties after the creation. Enable “Toggle repeat sketch traces” and “Toggle ability to edit or continue existing paths” modes in the tool’s panel. These functions allow us to re-profile sketch traces and to continue the created path.
Step 3
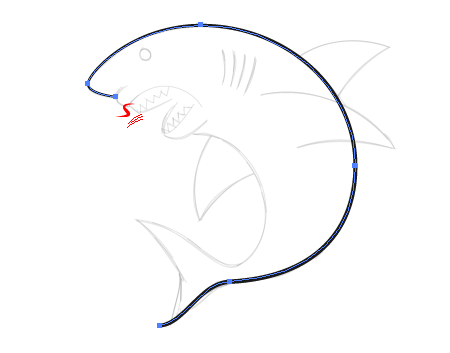
Choose black color for stroke and no fill. Take the stylus and draw first path, varying the pressure of the pen as you go.
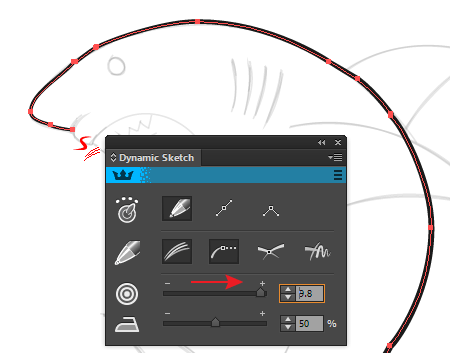
Let’s see how we can control the shape of the contour. By controlling the accuracy level slider, we can change the number of points in the resultant path and adjust how closely it resembles the original sketch trail. The higher the value is, the more detailed the path will be.
To smooth the path, use the Smoothness level. By controlling it, you can also adjust the smoothness of the variable width change.
You can read full version of this tutorial on AstuteGraphics.com....
|