|
Today I am introducing for your consideration the first tutorial devoted to work with the WidthScribe. This plugin has a number of unique features that none of the vector editors ever had. Now we are able to change the width of paths' group, applying the Width Gradient Tool to them or affect one or more paths locally using the Width Brush Tool. WidthScribe has a number of useful features for work with variable width strokes, and we will learn about some of them in this tutorial.
Step 1
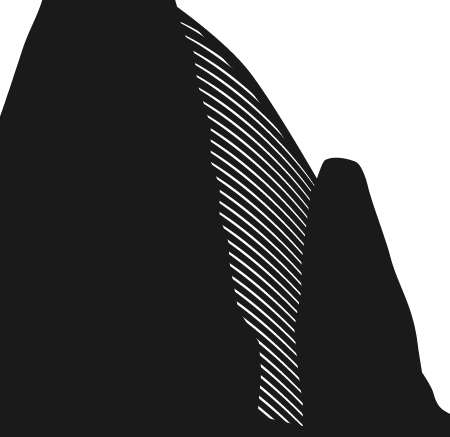
Begin our tutorial creating with a silhouette of the mountain. Create its shape out of straight-line segments using the InkScribe Tool (DrawScribe plugin) or Pen Tool (P).
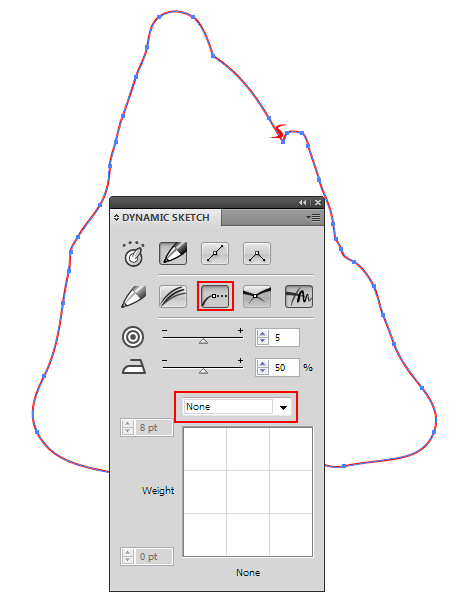
Now give the silhouette more realistic look. To do this, edit the path with the help of the Dynamic Sketch Tool (DrawScribe plugin) while having the editing paths mode on.
Step 2
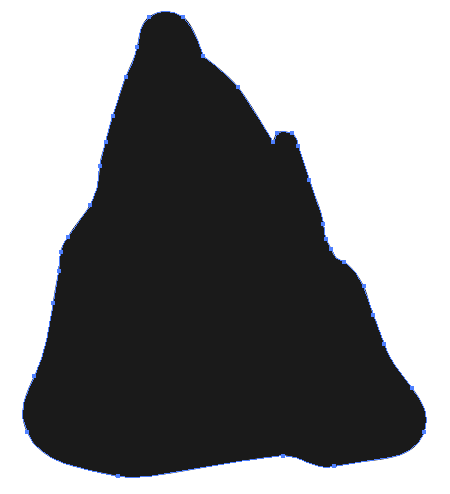
Choose black color for the fill of a newly created object.
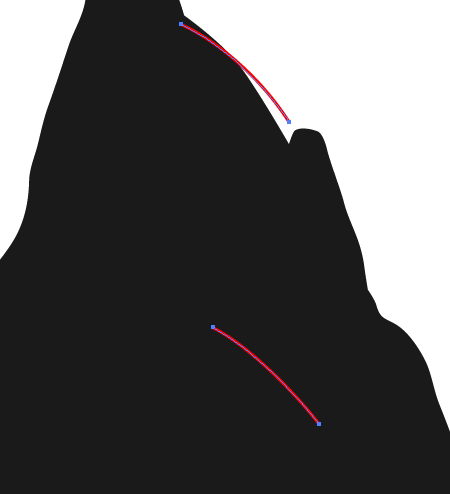
Start creating the illuminated areas of the mountain that will add volume to it. Highlights will represent hatching, like in any engraving. The easiest way to create it in Adobe Illustrator is when you use the Blend Tool (W). Let's see how this can be done. Create two curved segments at a certain distance one from each other.
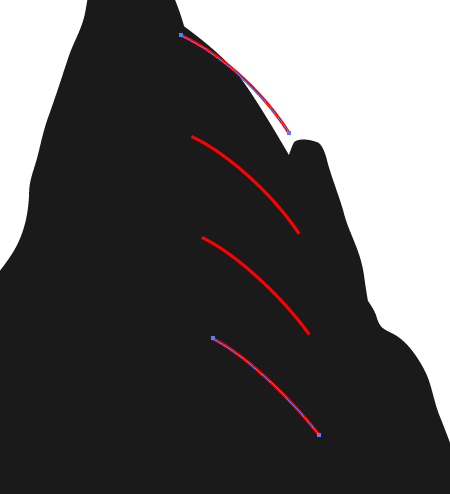
Select them and go to Object > Blend > Make or use the shortcut Cmd / Ctrl + Opt / Alt + B.
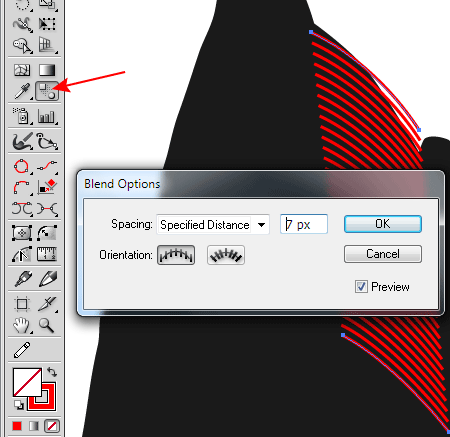
Double click on the Blend Tool icon on the toolbar that will open the Blend Options dialog box. Select the "Specified Distance" and pick the amount in order to achieve the desired density of the stroke.
Step 3
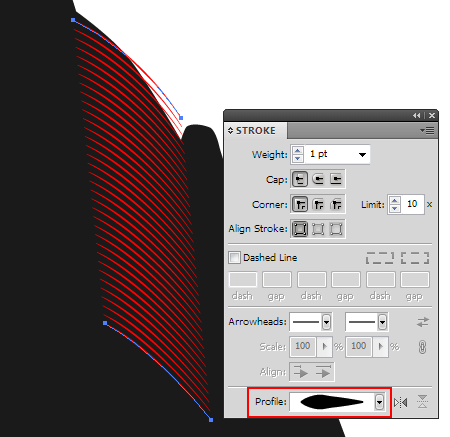
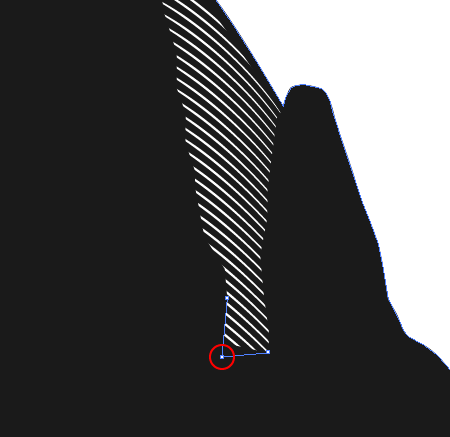
To achieve the desired effect, you can also change the position of curved segments and their points using the Direct Selection Tool (A), change the width of paths and apply the appropriate profile in the Stroke panel.
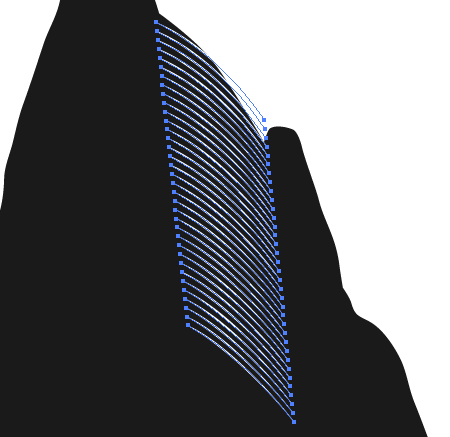
Convert the blend object into the group of paths. To do this, go to Object > Blend > Expand. Choose white color for the stroke.
Step 4
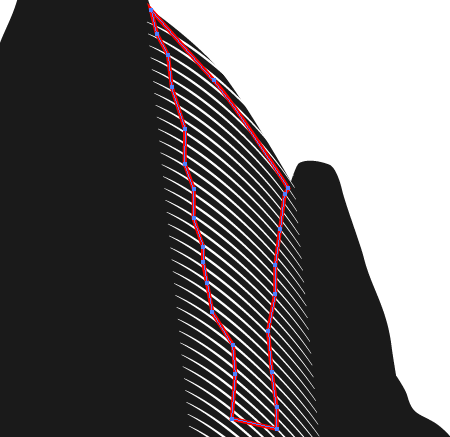
Now we need to limit the shape of the light spot. To do this, create a closed path, the shape of which will correspond with the shape of the light spot.
To feel the light spot better, select the group with the strokes and the closed path, then go to Object > Clipping Mask > Make (Cmd / Ctrl + 7).
Now, nothing prevents us from perceiving its shape. If you need to edit it, then simply move the point of the Clipping Path with the Direct Selection Tool (A), you can also add new points to it, for example, using the Pen Tool (P).
You can read full version of this tutorial on AstuteGraphics.com
|