|
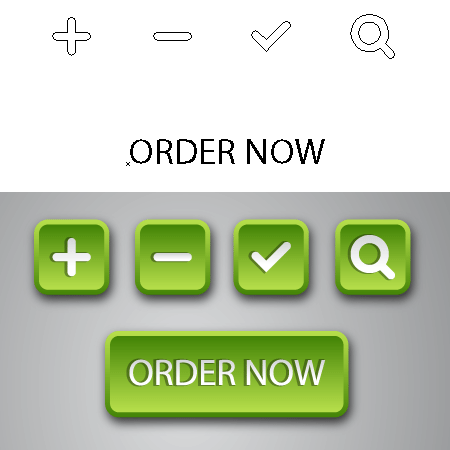
Today we will learn how to work with the Appearance panel on the example of creating web buttons. Ability to use this panel in combination with applying the graphic styles will speed up your workflow by several times, moreover, the created styles will be useful in future projects. This tutorial is primarily designed for beginners, but advanced users can refresh their knowledge and pay attention to details that previously may have gone unnoticed.
Appearance panel is a native Illustrator panel (Window> Appearance or Shift + F6), where all the properties of the selected object or group of objects of an entire layer are indicated. Target object or objects may have multiple fills and strokes, to which different live effects, blending modes and opacities may be applied. This gives us the ability to create quite complex and thus easily controlled objects.
Let's get learn about the peculiarities of working with the Appearance panel while practising, by creating simple web buttons. Before we begin, I would like to make one important comment: make sure an object is selected when you access the Appearance panel. When it is not selected, the Appearance panel shows elements of the last selected objects, but nothing happens when you edit it.
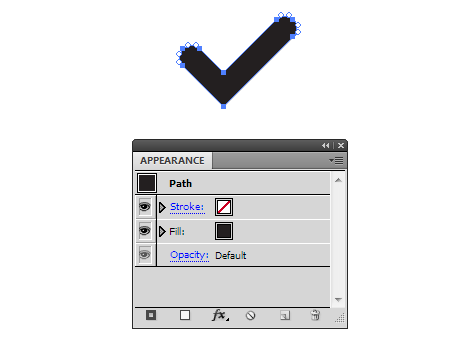
I drew Check mark sign with black color fill and no stroke. As you can see, all of the attributes of this object are listed in the Appearance panel.
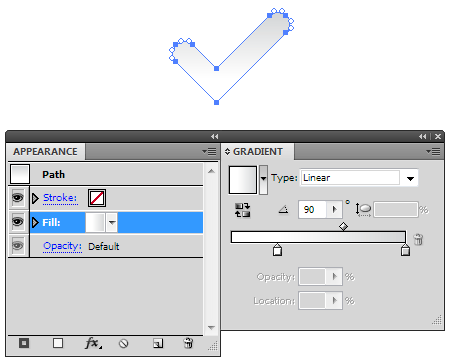
Apply linear gradient from white to light gray color to the object's fill, using Gradient panel (Window> Gradient or Cmd / Ctrl + F9).
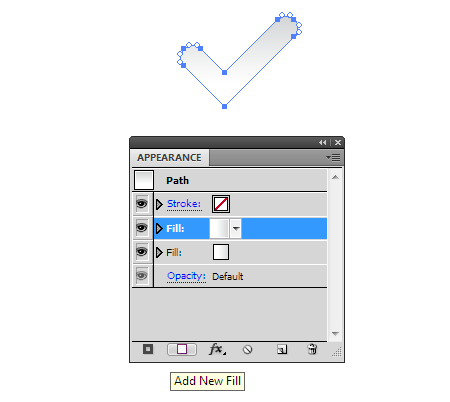
Now let's create a new fill. Add New Fill key in the Appearance panel is intended for these purposes. After clicking on this button, a new fill will be created above the existing fill.
You can read full version of this tutorial on AstuteGraphics.com....
|