|
Final Image Preview
In this tutorial we will learn how to create a weather icon using gradient fills, blending modes and the Gaussian blur effect. I think that it will take you no more than half an hour to draw such icon — and this tutorial does require any plug-ins! Have fun learning with our new Adobe Illustrator tutorial…
Step 1
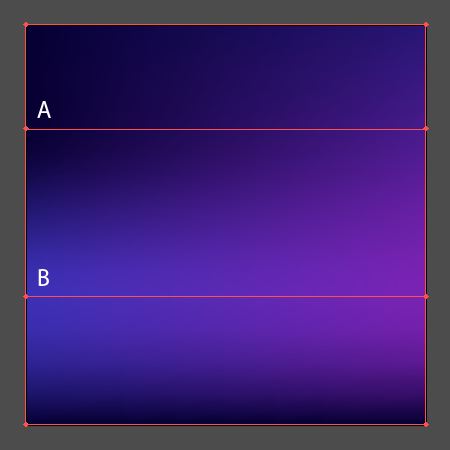
Run Adobe Illustrator, and then hit Control + N to create a new document. In the opened dialog box, set the parameters of the artboard and choose the RGB color mode. Create rectangles with the help of the Rectangle Tool (M), the size of which matches the size of the artboard. Take the Mesh Tool (U) and create two mesh lines, clicking at the points A and B. Color the mesh points with different shades of blue color, as it is shown below.
In this step, we have created a background for our icon.
Step 2
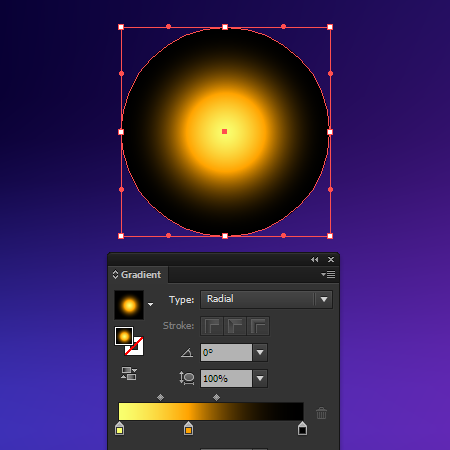
Start creating the sun. Using the Ellipse Tool (L) create a circle, which must be filled with a radial gradient, consisting of black, orange and yellow colors.
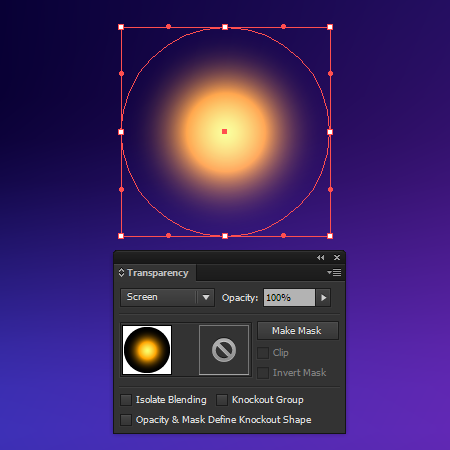
Apply to the circle the Screen blending mode in the Transparency panel.
Now with the help of the Selection Tool (V) reduce the height of the circle, transforming it into an ellipse.
Step 3
Keeping the ellipse selected, go to Object > Transform > Rotate…, then type into the numeric field 360/14 (the sun will have 14 rays). Click on the Copy button.
You can read full version of this tutorial on AstuteGraphics.com....
|