|
Until today I used a couple of vector triangulators and can assure you that Image Triangulator App from Concept Art is the most convenient from all. You have an opportunity to work in three active modes. You can add points to an original image, work with mesh and with colored polygons. As a result, you export a pdf file which could be easily edited in Adobe Illustrator. Read about how to get the excellent result in polygonal art style in minimal time period.
You can download a free beta version of the application here. Image Triangulator is compatible with OSX, Windows (64bit) and Windows (32bit).
Starting the application
For Windows x86 users: after extracting the archive start the file TriangulateImage5.exe
For Windows x64 users: after extracting the archive start the file TriangulateImage5.bat
For OSX users: after extracting the archive start the file TriangulateImage5.app
Work with the application
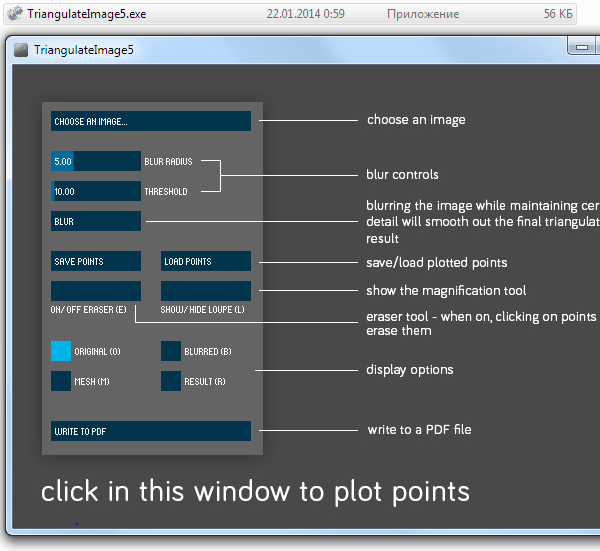
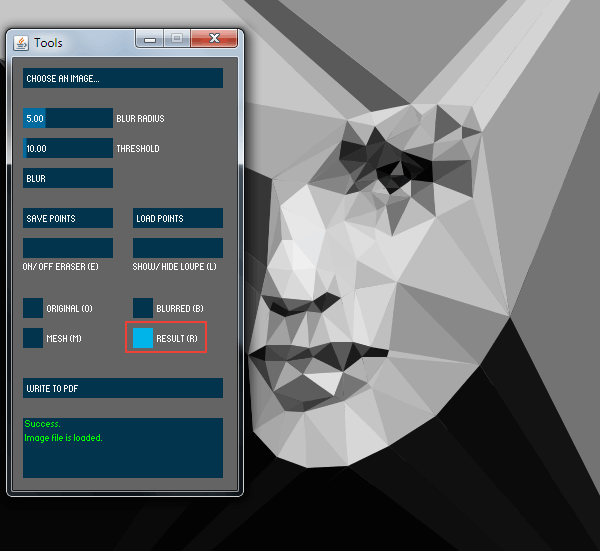
After the application is started, the panel of application and the work window will be opened. In the work window you can read about the functions of all options of panel.
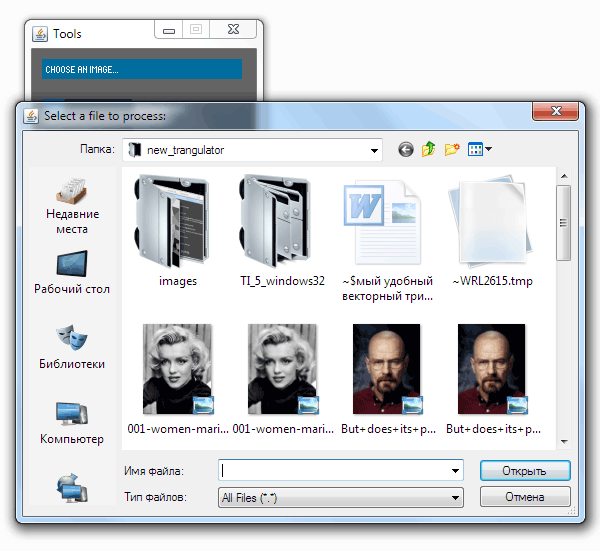
To download the picture click on Choose an Image button in application panel and choose a picture in an opened dialog box.
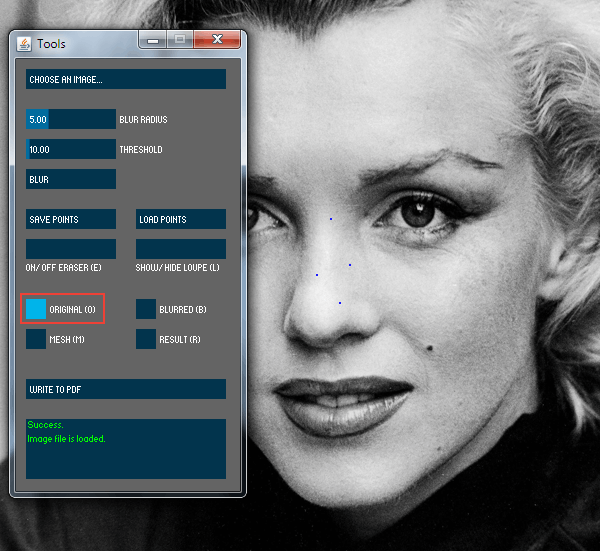
The image opens in the working window where you can create the peaks of the polygons simply by clicking on necessary places with your mouse. The images of different formats (gif, png, jpg) suit for uploading. The size of the image should be convenient for your work and should commensurate with the size of your monitor. To my point of view, leaving the points without seeing how polygons are formed is very convenient. By default you begin working in the Original (O) mode.
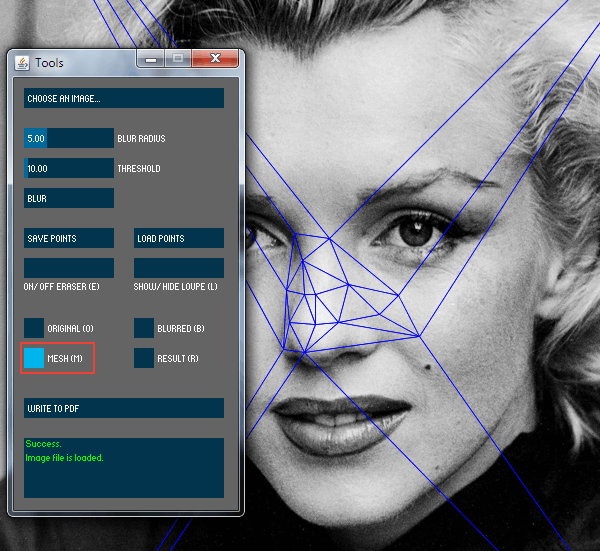
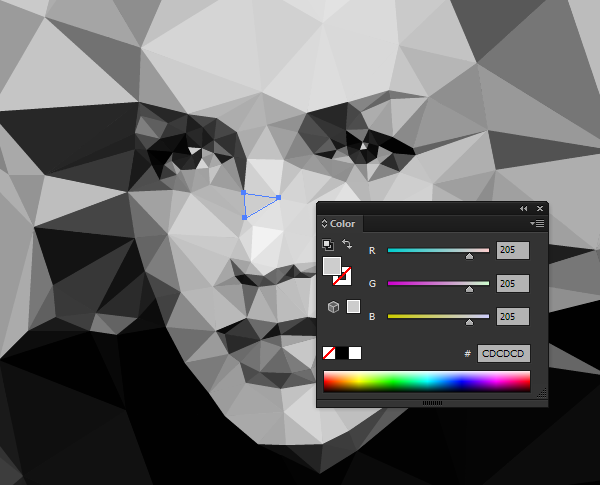
The Mesh (M) mode is designed for displaying of the mesh. This is also an active mode, i.e. you can continue forming some new polygons here. While moving the cursor you’ll be able to see the preview of the grid which can be formed after the click.
To view the colored polygons switch to the Result (R) mode. As well as previous modes, this mode is active. You could reach a pretty good result when switching between tree modes.
To delete the peaks of polygons designed by mistake, click on ON/OFF Eraser in the application panel. Unfortunately, we don’t have an opportunity to move the existing nodes of the mesh.
Before creating polygons you can blur the image. The numeric fields Blur radius, the Threshold and the Blur button are specially designed to apply the effect. Supposedly nodes of polygons are easier to create on the blurred image. After blurring the image, you have an opportunity to switch between normal and blur images by clicking on buttons Original (O) and Blur (B) accordingly. I didn’t use this option but I think it will be useful for you.
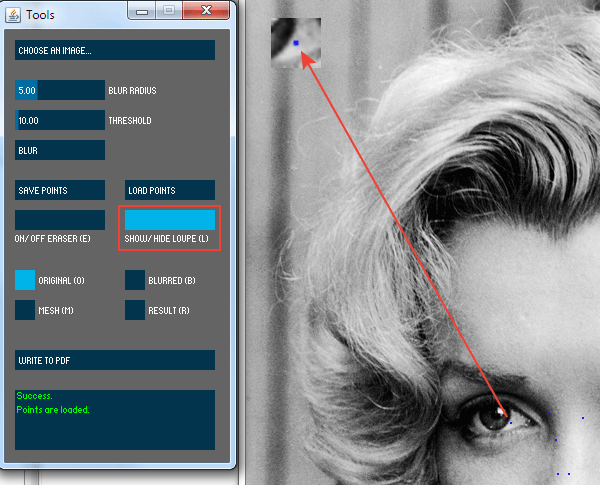
The button Show/Hide Loupe switches on the local zooming in of the image fragment which helps you accurately to set the next peak on the cutting edge of the color, for example.
If you’re not done working you can save the mesh by clicking on Save Points button. Coordinates of polygons will be saved in a text file. In order to continue working after the application is closed (the closing of the working window closes the application without information being saved) you need to upload the image again by clicking on Choose an Image, and then upload the peaks of polygons by clicking on Load Points button.
After the work is done, click on Write to PDF button which saves the file. And now you can open the PDF file in Adobe Illustrator and if necessary continue editing. Polygons are vector objects filled with solid colors.
PDF file also contains the initial raster image which could be deleted if needed.
|