|
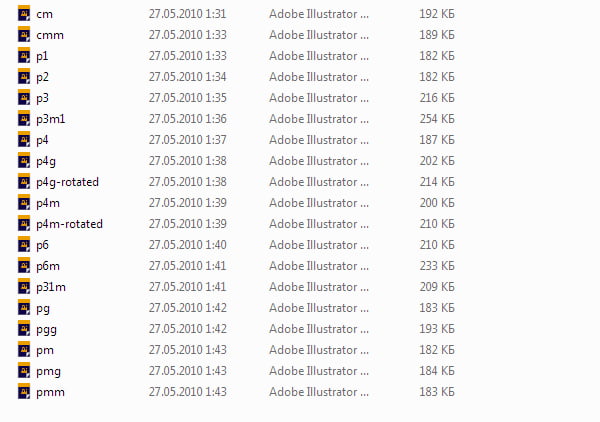
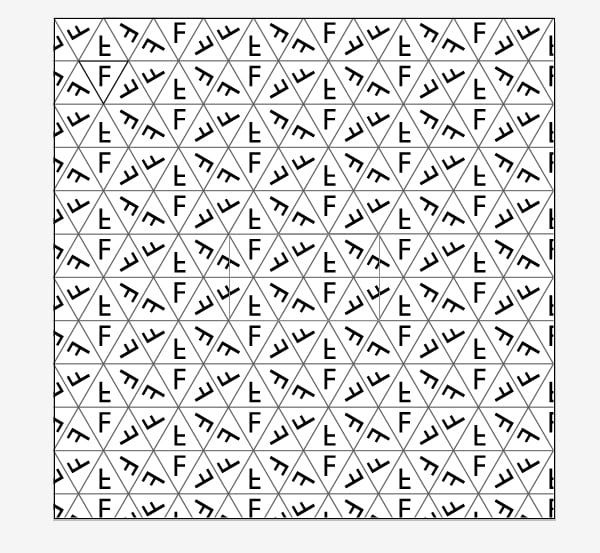
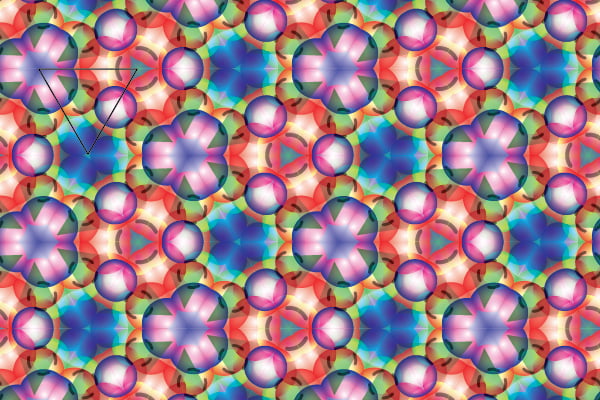
Final Image Preview In this tutorial we will learn how to create a seamless pattern, using a collection of free Adobe Illustrator templates. Using these templates, you can create 19 kinds of these patterns, that is much more than the Pattern Creation feature can offer us in Adobe Illustrator CS6. We will also take a look at how to save this pattern in vector, which is especially important for the contributors of microstock sites. Step 1You can download a collection of templates following this link Mad Pattern. After unzipping the archive, you will see 19 templates. Each pattern has its own formula for the creation of seamless patterns. Let's open the template P3M1. Position of the letter F shows us how the elements of the seamless pattern will be located. I would like to note that all the Madpattern templates have the CMYK color mode. If you are preparing a pattern for printing, keep this mode. However, most of the contributors of microstock sites use RGB color mode. This mode allows to use of brighter colors. To switch the mode, go to File > Document Color Mode> RGB color.
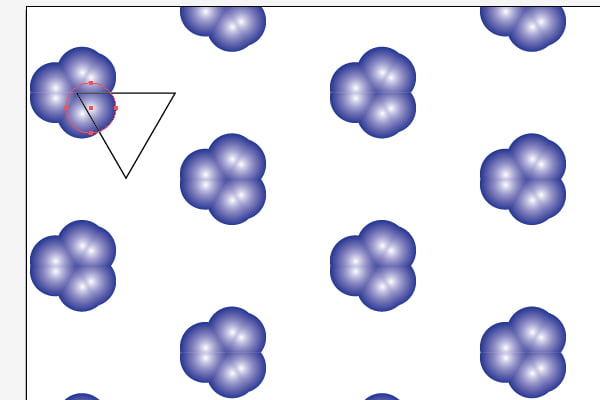
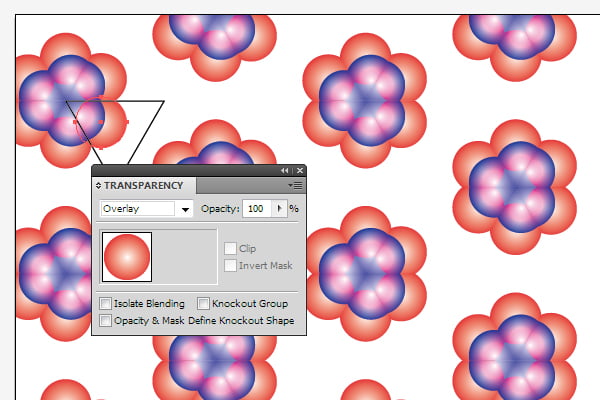
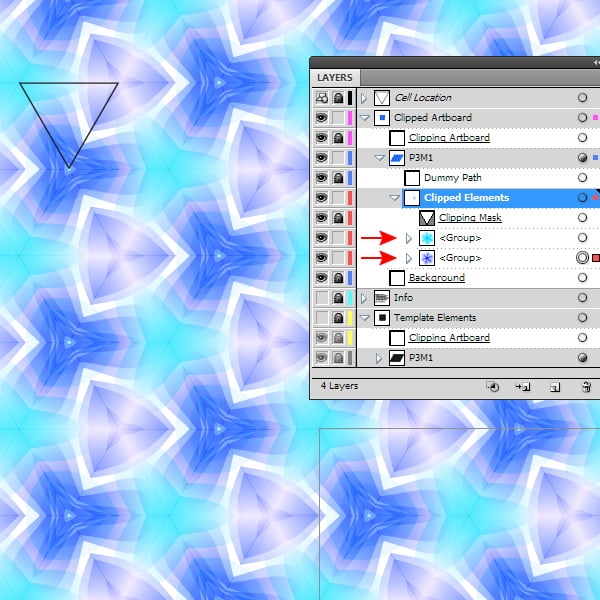
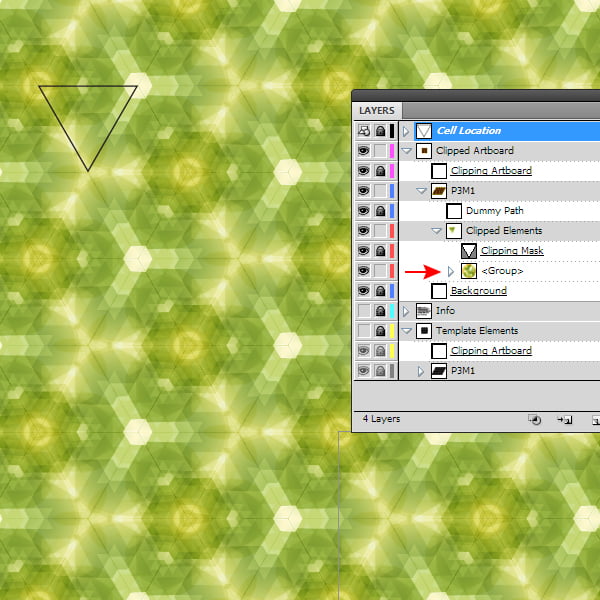
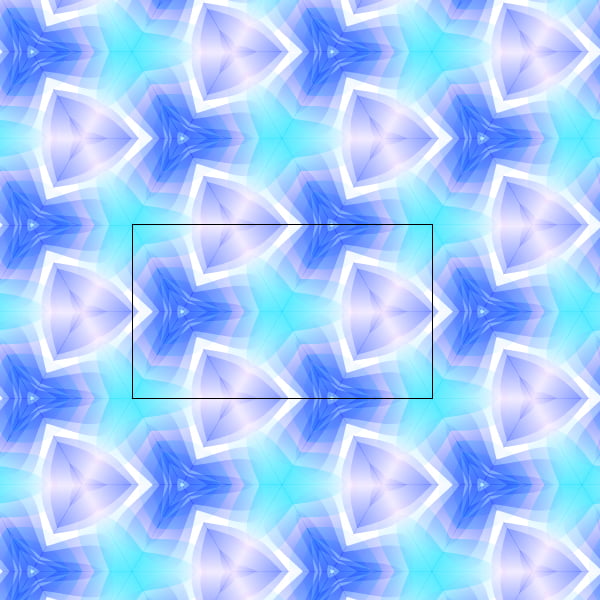
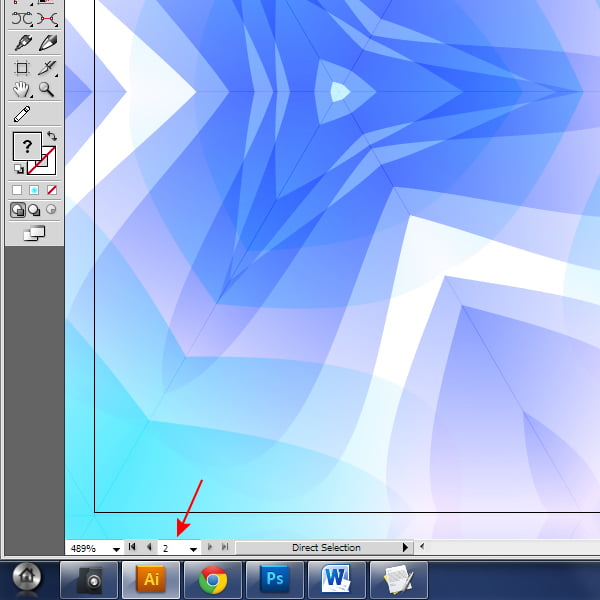
Step 2Before you begin, turn off the visibility of the Template Elements layer in the Layers panel. Now select the Clipped Elements layer. You need to draw or place the ready objects inside the shape that has a black stroke. Objects outside this shape will not be seen. Create a circle with a radial gradient fill inside the shape that was mentioned above. As you can see, the circle has immediately duplicated several times forming a pattern. Step 3Create a new circle with a gradient of a different color, and then apply the Overlay blending mode to it. I created a few more different colored circles, and simple geometric shapes. You can see the result on the picture below. It takes a few minutes to create such a pattern. Step 4You can create patterns by drawing with a Paint Brush Tool or Blob Brush Tool in Clipped Element. This time I used the pattern P6. If you need to create the background, create an object of the desired color with the help of the Pen Tool (P) and place it below all objects of the pattern. The size of this object should be a little bit bigger than the Clipped Element, so you can avoid gaps. Step 5To create a seamless pattern, you can use ready-made elements. To create two of the following patterns, I have been using objects from my tutorial Create Abstract 3D Spheres in Illustrator. If you're planning to use the ready-made elements to create a seamless pattern, I should warn you about something. The use of very complex objects can make the application freeze. For example, I was trying to create a pattern with fireworks from my tutorial How to Create Colorful Vector Fireworks in Illustrator. As a result, I had to restart Adobe Illustrator due to lack of RAM resources. In any case, you may want to experiment as you might be working with more powerful machines. Step 6Now that the pattern is created, of course, we will need to save it as a seamless pattern. To do this, select the entire layer with the name of the template, for example, P3M1, then go to Object > Expand Appearance. You can see the artboard 2 in the middle of the working space. Its boundaries precisely match the tiles of our pattern. If you want to save the pattern in raster form, switch to the second artboard.
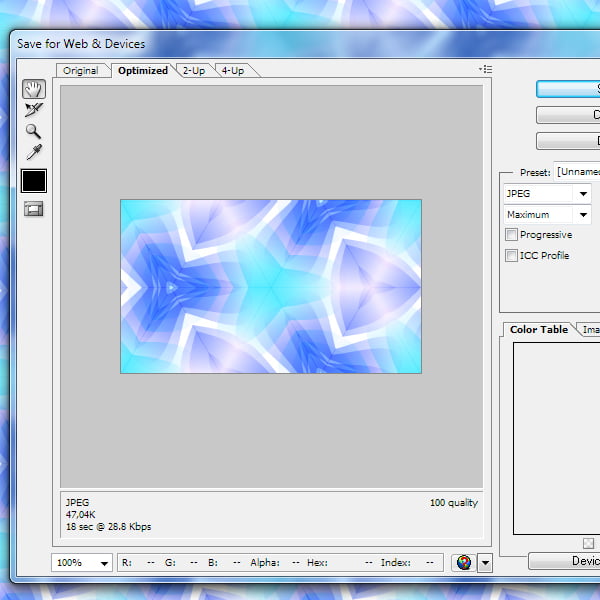
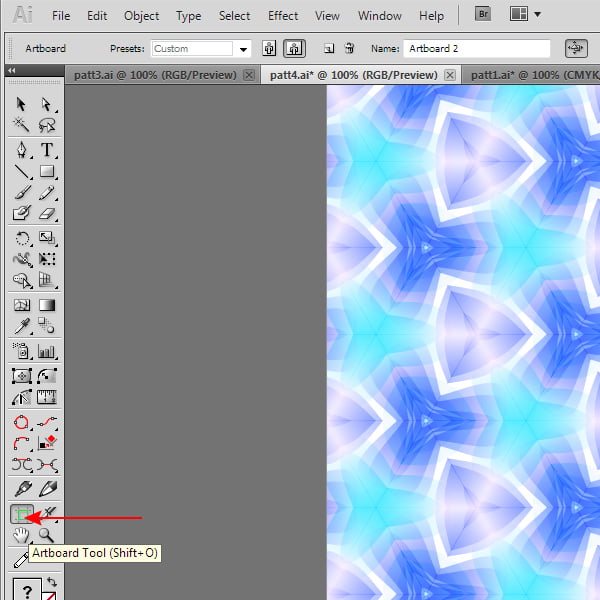
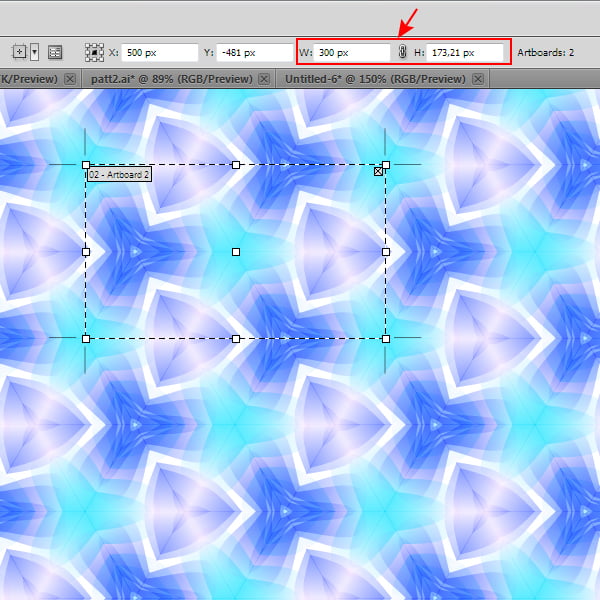
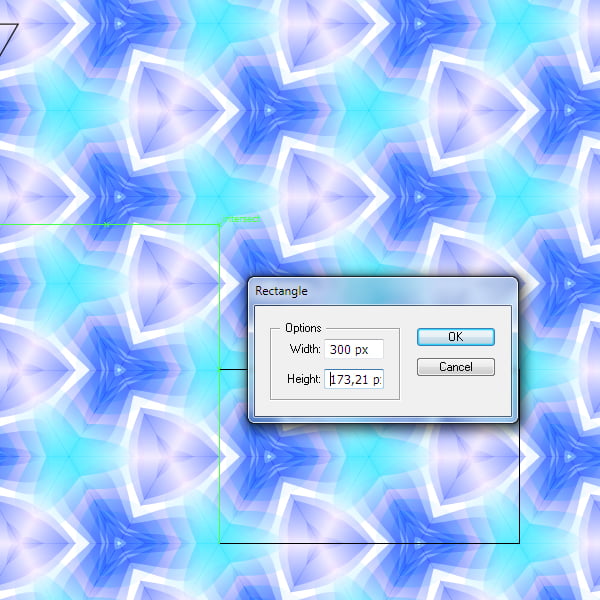
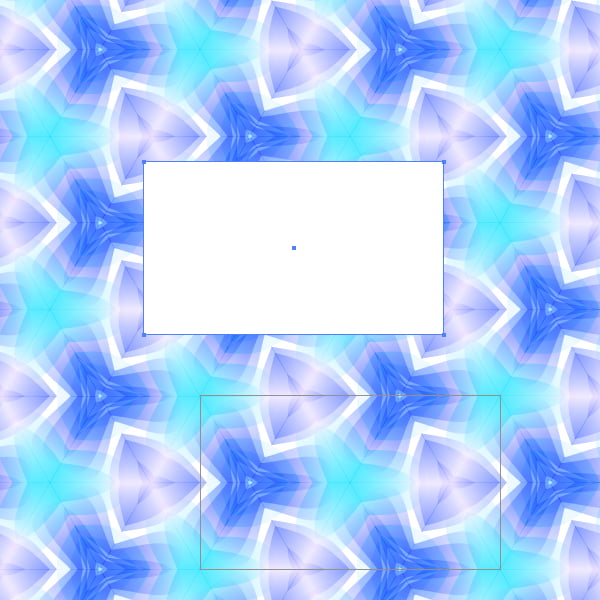
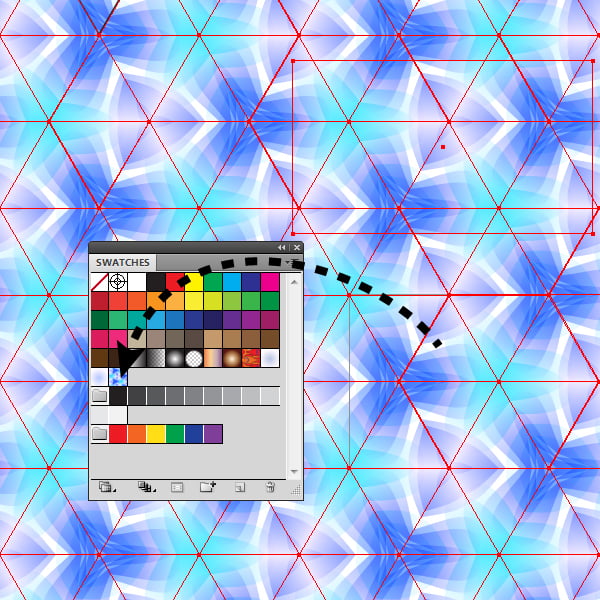
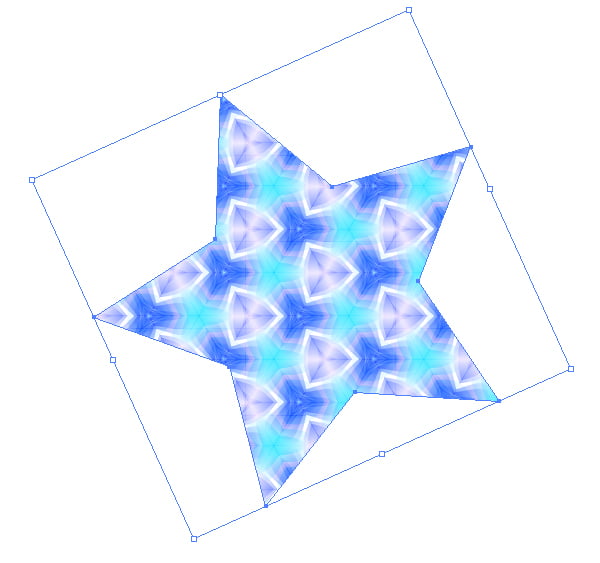
Now go to File > Save for Web … and save the file. Step 7To save the pattern in vector format, take the Artboard Tool (Shift + O) and write down or remember the sizes of the artboard that will appear on the Control panel. Now take the Rectangle Tool (M) and create a rectangle, the size of which must exactly match the size of the artboard 2. This rectangle can be located anywhere on the pattern. Turn off the stroke and fill of the rectangle and place it below all the objects of the pattern in the Layers panel. Step 8Select this rectangle and all the elements of the pattern, then drag them into the Swatches panel. Our vector seamless pattern is ready. To test it, create an object of arbitrary shape and apply the created pattern to it. As you can see, everything works perfectly.
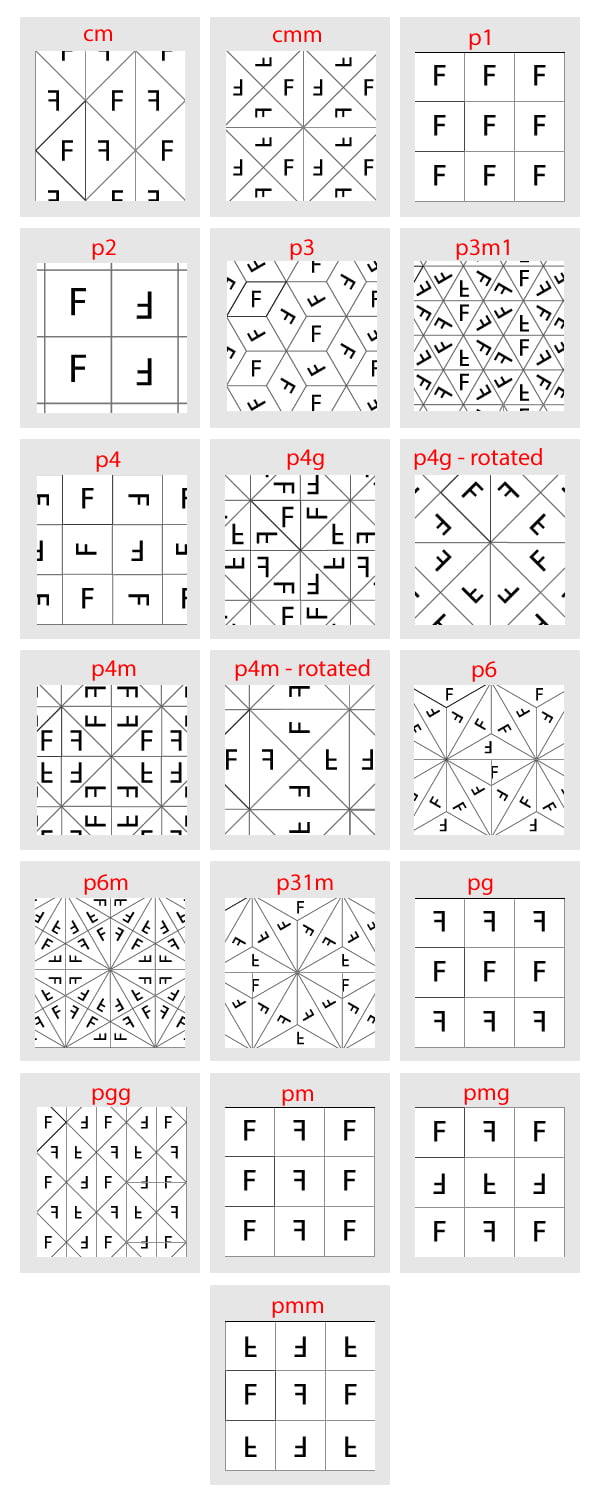
At this point our tutorial is over. I created a table that illustrates what design each pattern creates. I think it is more convenient to use the table than opening every template each time.
|