|
Final Image Preview
Today we will learn how to create a text which is located in different planes. One very interesting trick with the Bounding box will let us do it without using 3D modeling. Find out more at the jump!
Tutorial Details
-
- Program: Adobe Illustrator
-
- Difficulty: Beginner
-
- Estimated Completion Time: 30 Minutes
Step 1
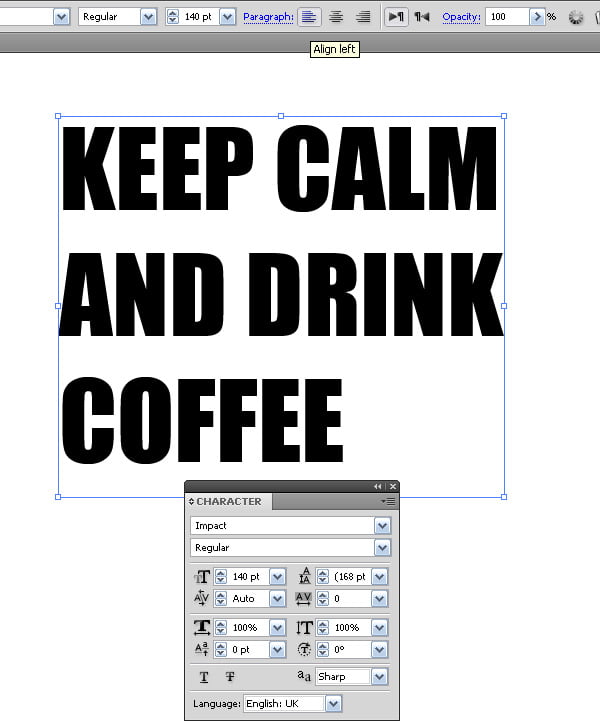
Take the Type Tool (T) and create an inscription.
I used the Impact font. If you don’t have any fond set, choose one of the Sans serif fonts. There is a good selection of fonts here. Align the text to the left by pressing the appropriate button in the Control panel. It is better to use the Character panel (Window > Type > Character) to control the text parameters.
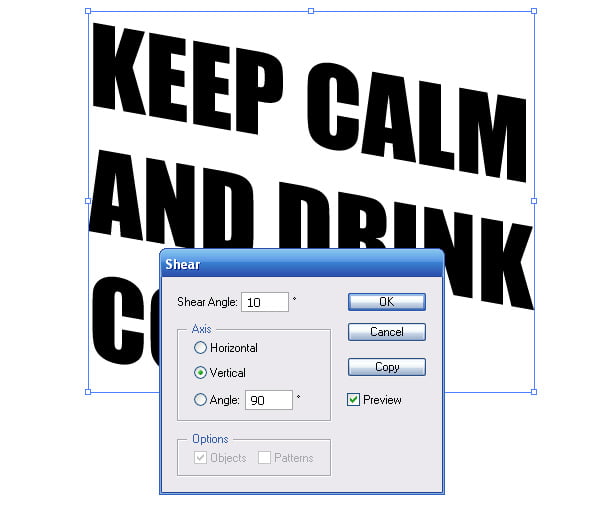
Step 2
Without removing the selection from the text, go to the Object > Transform > Shear…, set the angle and choose the axis in the dialog box.
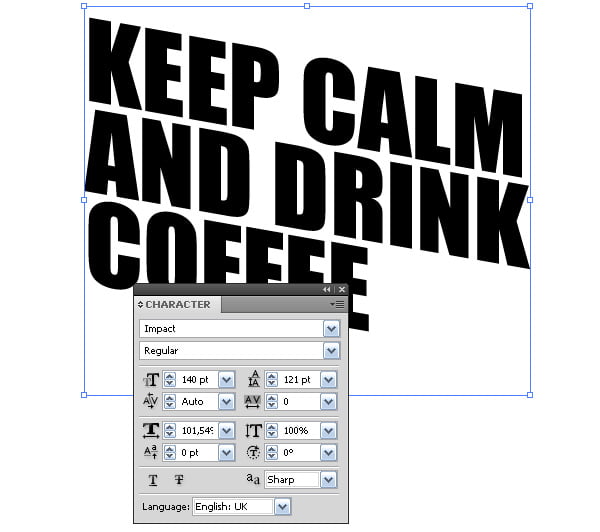
Reduce the leading in the Character panel.
Step 3
Turn the text into the group of the regular vector objects (Type > Create Outlines)
Create three horizontal lines with the Line Segment Tool (/) of the Pen Tool (P). Turn them at different angles of 45, 25 and 100 degrees. To do so, select the first segment and go to the Object > Transform > Rotate… and set a necessary angle in the dialog box.
Turn the other segments at the indicated degree in the same way as we just did. Set the lines as it is shown on the picture below.
You can read full version this vector tutorial on VectorTuts+
Follow us if you want to be the first to know about the latest Adobe Illustrator tutorials and articles. Vectorboom team works for you!
|