|
Final Image Preview
Today we will learn a new drawing tool for Adobe Illustrator called the Dynamic Sketch Tool — one of the tools of the new DrawScribe plugin. The Dynamic Sketch Tool has many convenient features that makes your daily creative work much easier. Mastering the new tool should not take you much time as it’s easy to manage and its user-friendly features are quite understandable.
Step 1
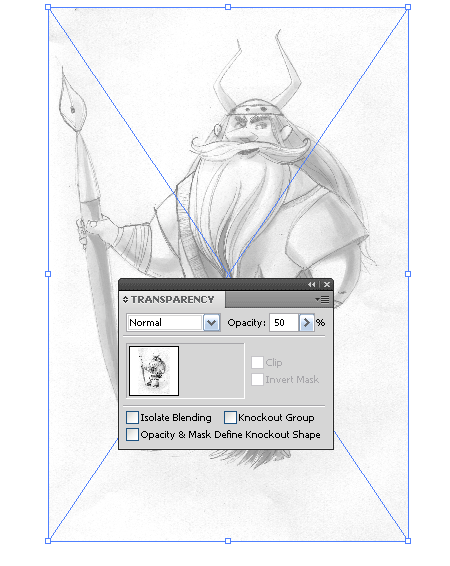
In this tutorial I will be using the sketch of a Viking which was created by Catherine Dedova. Paste the sketch into the current document (File > Place…) and set 50% opacity for it in the Transparency panel, and then lock the layer with the sketch in the layers panel.
This step is a standard procedure for manual tracing of the sketch in vector.
Step 2
The first stage is the creation of the vector character; creation of an outline. This process is called "inking”. To create an outline of variable thickness (Adobe Illustrator CS5+ users only), we are using different tools. Usually we resort to the Paint Brush Tool (B) and the Blob Brush Tool (Shift + B), but today we are going to apply a new tool to inking — it is called the Dynamic Sketch Tool. It is one of the tools of the DrawScribe plugin. Let’s take a look at this tool.
After downloading and installing the plugin to your computer, icons associated with the new tools will appear on the Toolbox. To open the Dynamic Sketch Tool panel, go to Window > DrawScribe > Dynamic Sketch Panel.
Step 3
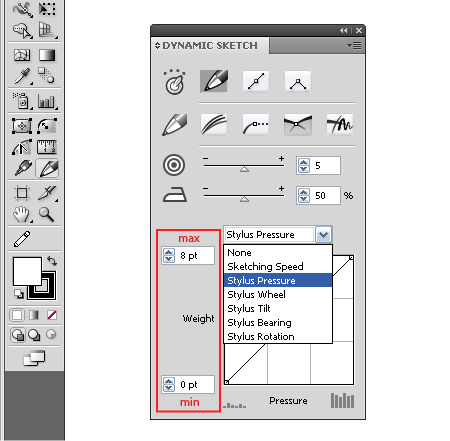
The Dynamic Sketch Tool panel allows us to set the variable line width dependence on several parameters. In my work I will be using the Graphic Tablet (eg. those by Wacom), therefore set the path width to be based on the graphics tablet pen pressure.
In this panel, you can also set the path width value at the minimum and maximum pressure on the stylus. In contrast to the Paint Brush Tool and the Blob Brush Tool dialog windows, the Dynamic Sketch panel stays available during the work. This allows us to change the settings of the tool fast. Besides, the created path is dynamic, allowing us to change its properties after the creation which we will see at the process of work.
Step 4
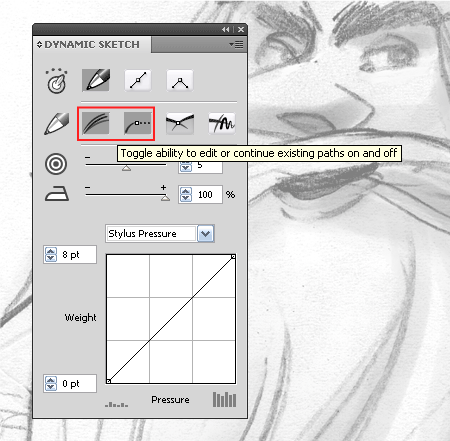
Proceed to enable the following option in the panel by clicking on the buttons; "Toggle repeat sketch traces” and "Toggle ability to edit or continue existing paths”. These functions allow us to re-profile sketch traces and to continue the created path.
You can read this vector tutorial on Asturegraphics Blog
Follow us if you want to be the first to know about the latest Adobe Illustrator tutorials and articles. Vectorboom team works for you!
|