|
Today we begin a series of quick tips for beginners. They will be describing work with vector objects in Adobe Illustrator. The creation of any project can be divided into typical stages. The performance of each of them requires specific tools and techniques. You will get to know them in this series and will learn some of the nuances and tricks that will allow you to work easier and more efficiently. Well, the first step is the creation of the object's shape. In this quick tip we will be talking about working with the Pen Tool (P).
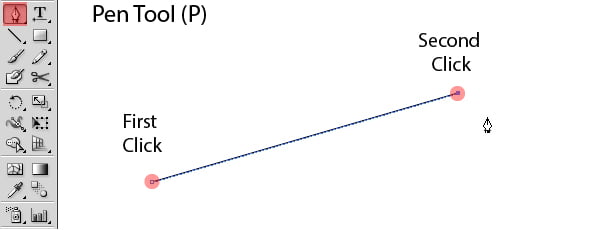
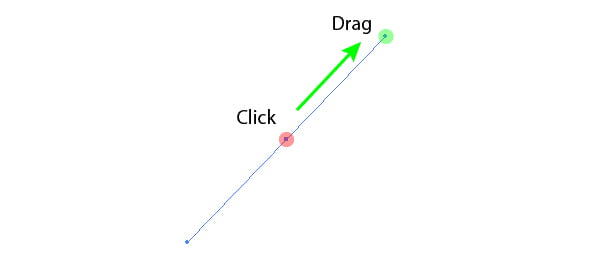
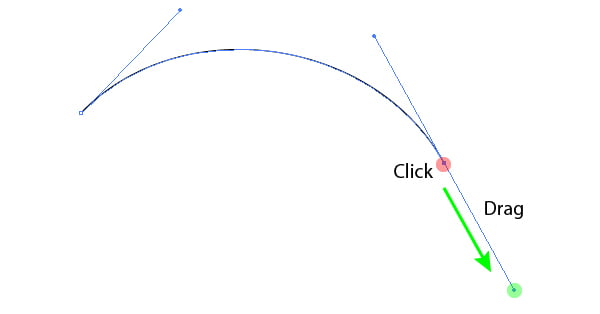
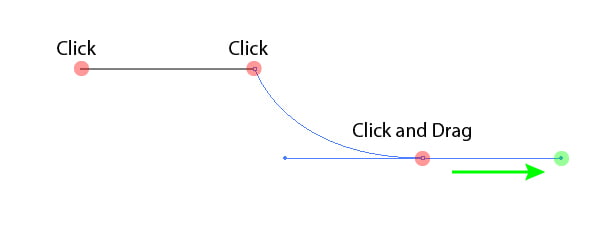
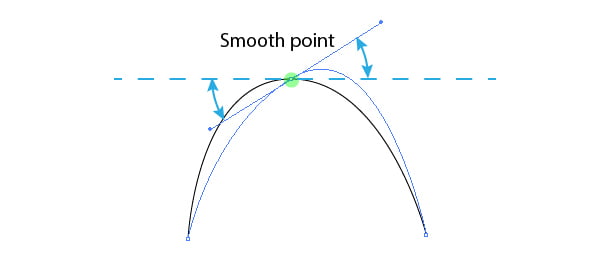
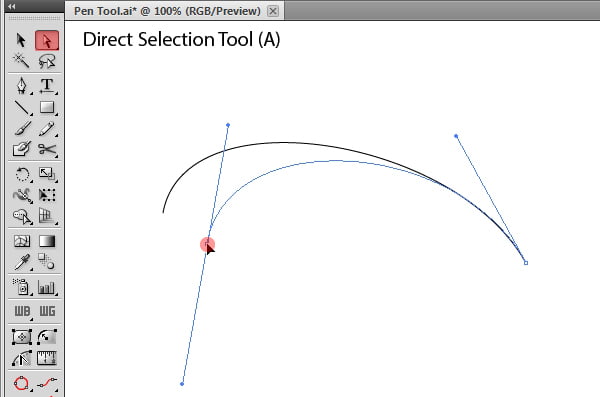
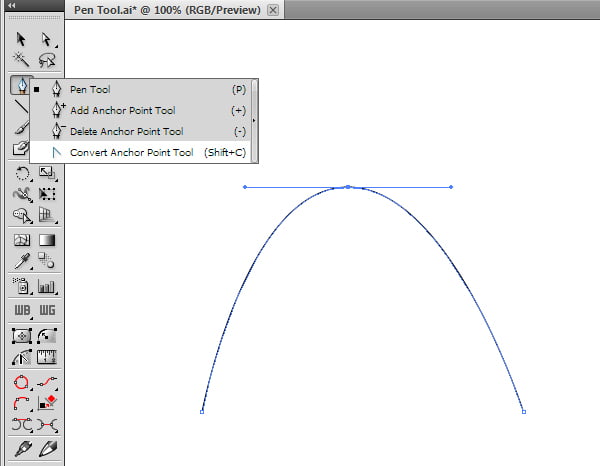
Pen Tool (P) is one of the most important tools for the creation of vector objects. However, many beginners and even experienced users feel uncomfortable while working with it. Everything you create in Adobe Illustrator is paths and only paths. Pen Tool (P) is designated for these purposes. Before we begin to familiarize ourselves with this tool, let's take a look at the artworks of Pen Tool Masters for inspiration. Acid Make-Out by Cristiano SiqueiraAdriana Lima by Marcus ViniciusKey terms and conceptsWith the help of the Pen Tool (P) you can create straight and curved segments, and also three types of anchor points: smooth point, corner point and points with retracted handles. Let's see how to do it. To create a Straight-line segment take the Pen Tool (P) and simply click at the beginning and the end of the segment that is being created. To create a Curved segment click at the place of the first point and, without releasing the mouse button, drag the cursor to the side, creating point's handle. Now click at the new location, and again pull the cursor to the side. You can combine linear segment with a curved one using the technique described above. A point that has two related handles is called a Smooth point. That means when changing the angle of inclination of the first handle, the second one will change the inclination angle as well. Direct Selection Tool (A) is designated to change the position of the point, the length and inclination angle of the handle. In order to break the connection between the handles of the point we will need the Convert Anchor Point Tool (Shift + C). It is located in the same group with the Pen Tool (P) on the Toolbar.
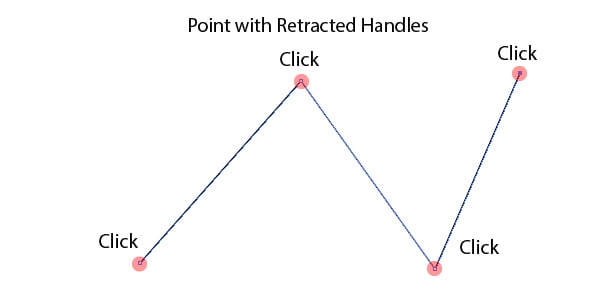
Change the inclination angle of one of the handles using this tool. As you can see, the handles are no longer connected and this point is a Corner point now. To get the point with retracted handles, we just need to do a single click using the Pen Tool (P). We have learned about the basic terms and concepts, now let's see how we can simplify work with this tool as much as possible.
You can read full version this vector tutorial on DesignModo
|