|
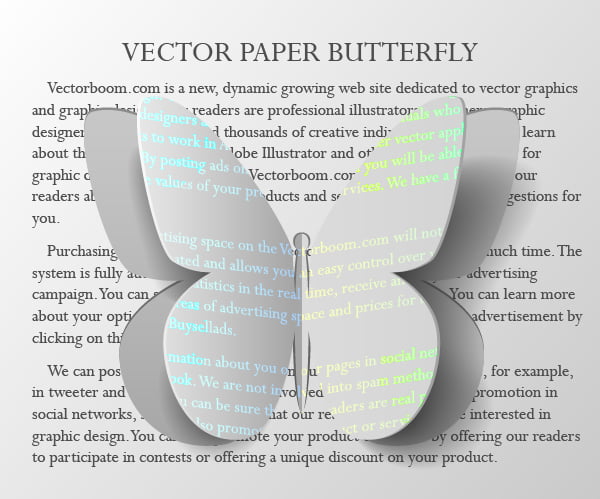
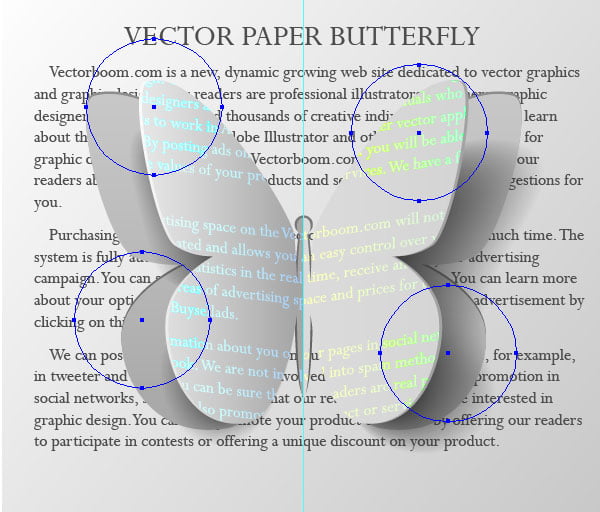
Final Image Preview
In this Illustrator tutorial we will create a vector paper butterfly and apply text effect to it. This vector tutorial designed especially for beginners, as it contains the detailed instructions and helpful tips. However, the advanced users will find some useful information in this tutorial as well. For example, you will learn how to control a vector shadow with the Pencil Tool (N).
Illustrator Tutorial Details
- Program: Adobe Illustrator CS3 - CS6;
- Difficulty: beginner;
- Estimated Completion Time: 2 hours;
Creation of Main Forms of Vector Paper Butterfly
Step 1
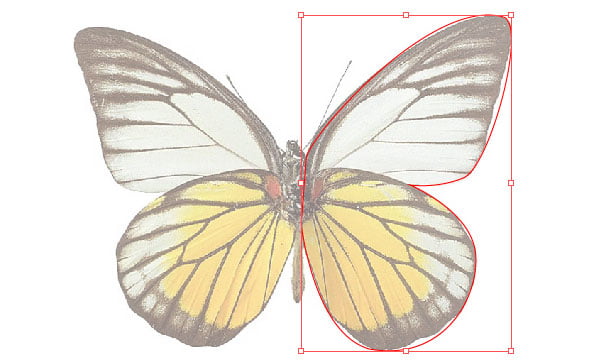
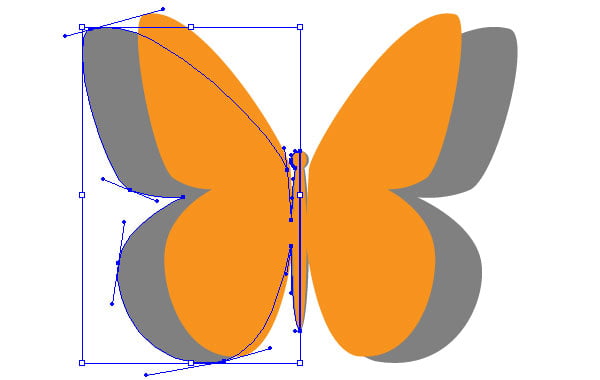
I think that the creation of a butterfly wing wouldn’t cause you any trouble. But if you are not sure, find an image of a butterfly and paste it to an open document (File > Place…). Reduce the image’s opacity in the Transparency panel and lock it in the Layers panel.
Take the Pen Tool (P) and create a shape of one of the butterfly’s wings.
You don’t need exactly to repeat all the details of the wing; it is enough to reproduce only the main proportions.
Step 2
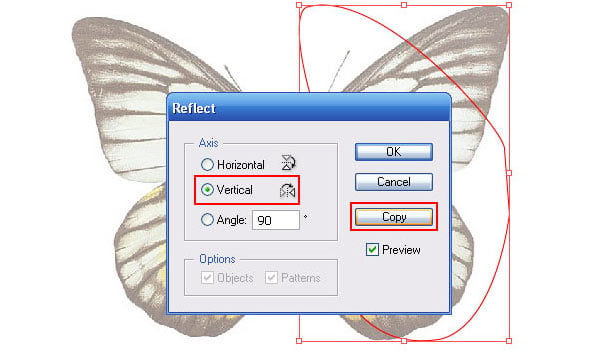
Select the wing, then go to the Object > Transform > Reflect…. Tick Vertical Axis, press the Copy button in the dialog box.
Move the second wing to the right and group both wings (Cmd / Ctrl + G). Create a form of a head and a body of our butterfly with the Ellipse Tool (L).
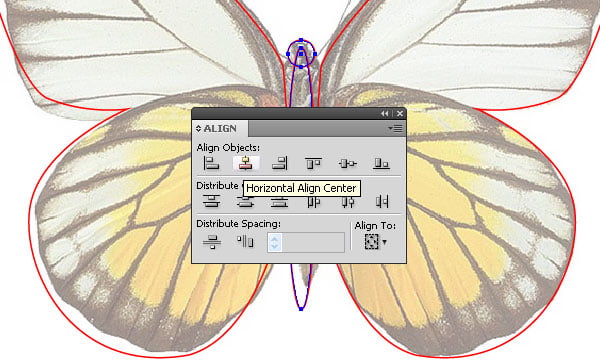
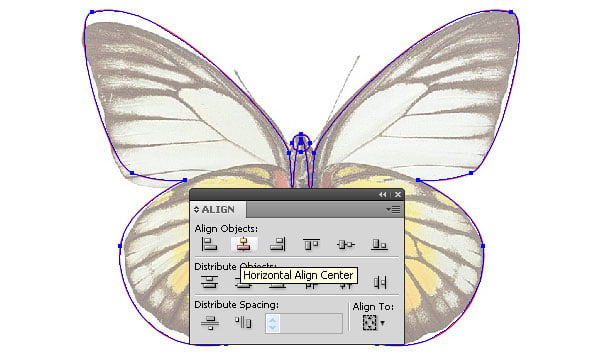
Select these forms and align them horizontally with the Align panel.
Group up these objects. Select the groups with the wings and the body and align them again horizontally.
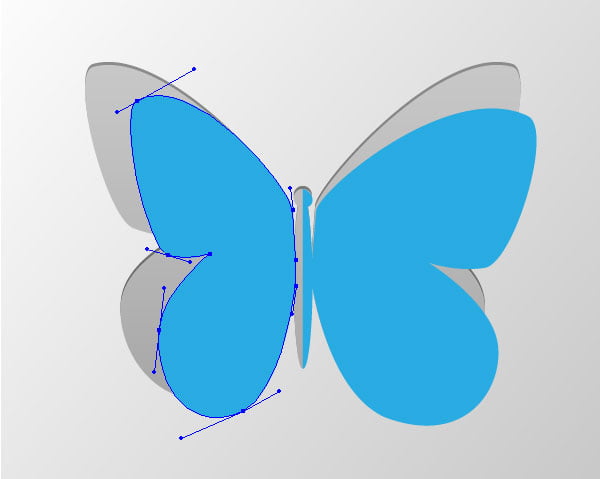
Step 3
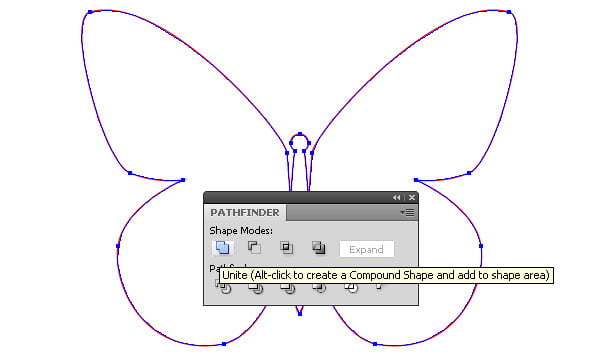
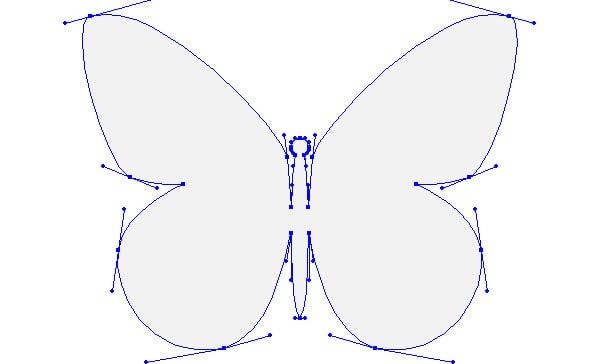
Select all the elements of our butterfly, click on the Unite in the Pathfinder panel.
Fill the received object with any color. Turn off the stroke.
Copy the butterfly and paste it to the front (Cmd / Ctrl + C; Cmd / Ctrl + F). Fill the copy with any other color for the convenience of our further work.
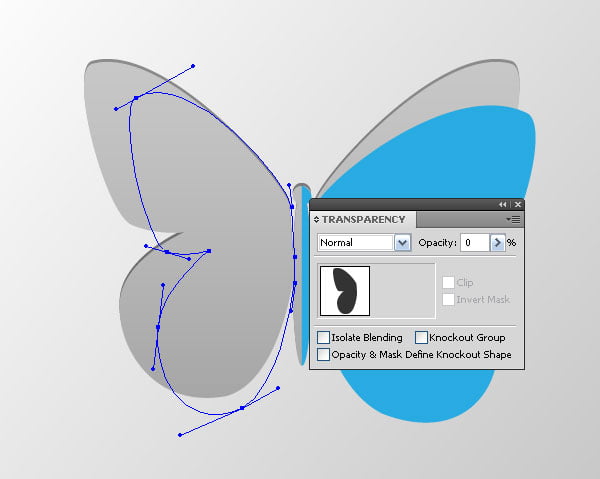
Step 4
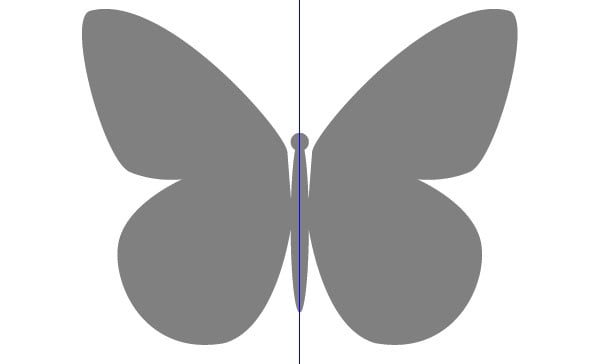
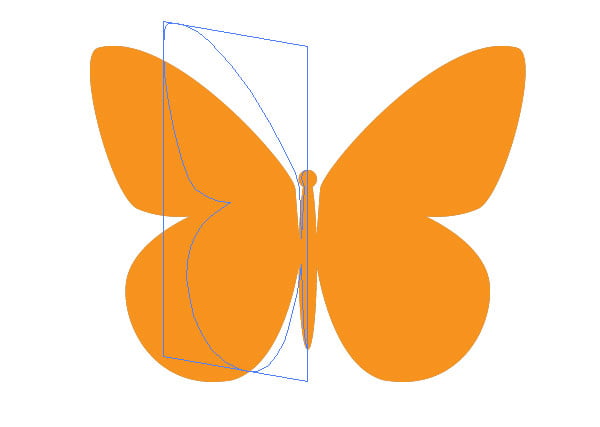
Create a horizontal guide. To do so, turn on the rules (Cmd / Ctrl + R) and drag the guide from the horizontal rule. It should go through the center of our butterfly. Turn on the Smart Guide mode (Cmd / Ctrl + U) and you will be able to find the center of the butterfly without any difficulty.
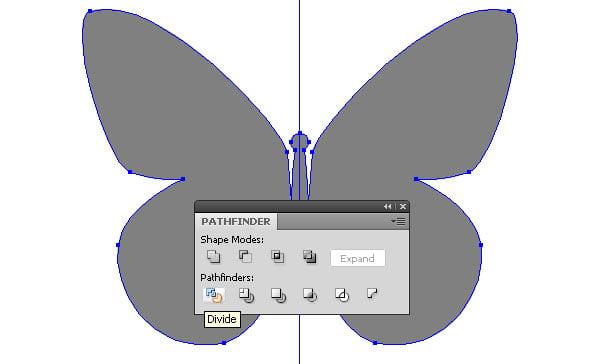
Select the guide and the upper shape of the butterfly and click on the Divide in the Pathfinder panel.
This action divides dark grey shape in half.
Step 5
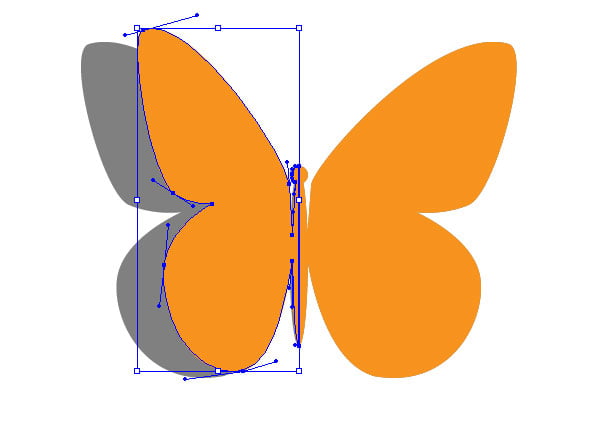
Copy and paste the resulting group to the front. Recolor the upper group for our clarity.
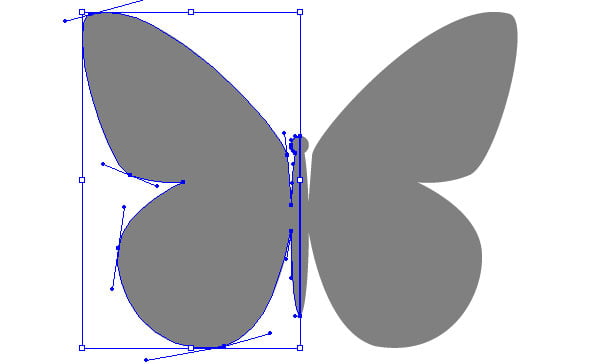
Ungroup the upper group (Shift + Cmd / Ctrl + G), then select the left half of the butterfly.
Take the Free Transform Tool (E), grab the center marker of the Bounding box, then while holding the Cmd / Ctrl move all the plane of the left half of our butterfly.
Step 6
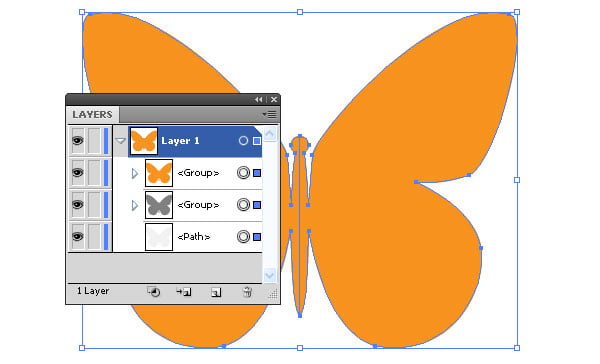
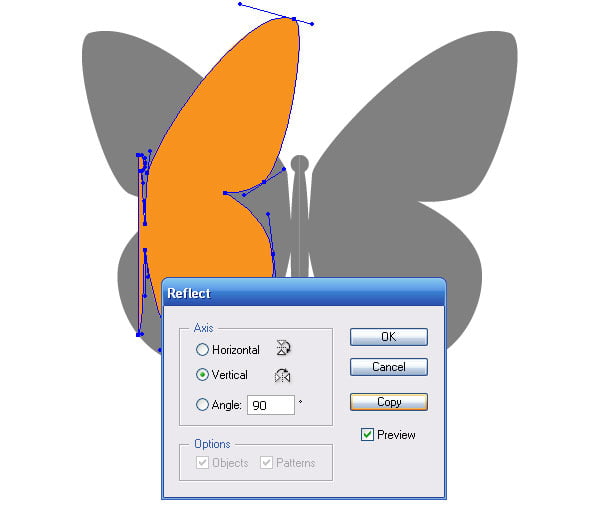
Delete the right orange half of the butterfly. Now select the left orange half and go to the Object > Transform > Reflect…. Tick Vertical Axis, and then press the Copy button in the dialog box.
While holding down Shift, move the resulting copy to the right so that both halves were touching each other in the center.
Step 7
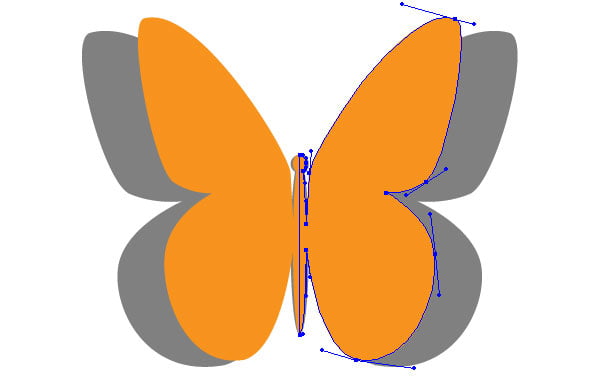
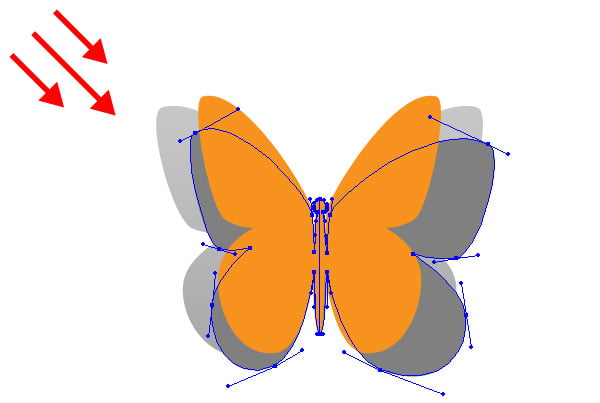
Ungroup the dark grey copy.
These copies will illustrate the shadow from the butterfly’s wings. Unlike the wings, the shadow won’t be symmetrical. So, it’s just time to indicate the source of light! In my case the light will be directed as it is indicated on the figure below.
Take the Free Transform Tool (E) and using the technique described in the step 5, change the shadow’s form.
Coloring of Vector Paper Butterfly
Step 8
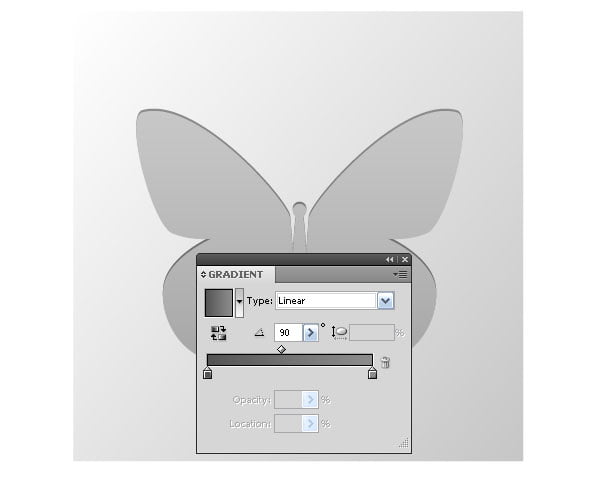
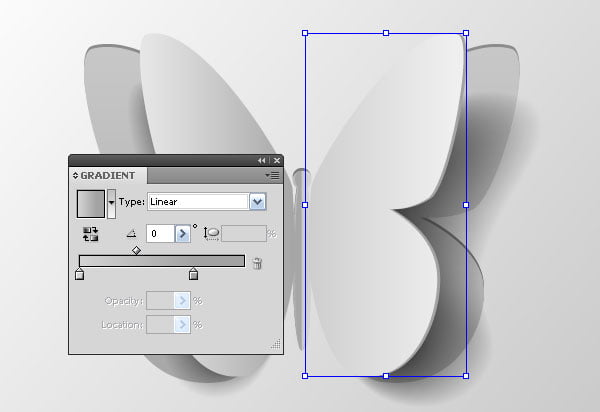
Let’s start coloring the created objects. First, create a background. Take the Rectangle Tool (M) and create a rectangle, which should be placed below all the existing objects. Fill the rectangle with the linear gradient which consists of two light-grey sliders in accordance with the light source.
We will color the objects from the bottom up, that’s why the visibility of the upper object is temporary off in the Layers panel. Fill the lower form of the butterfly with the linear gradient consisting of two shades of grey. The lighter shade should be on the top, because it is located closer to the light source.
Step 9
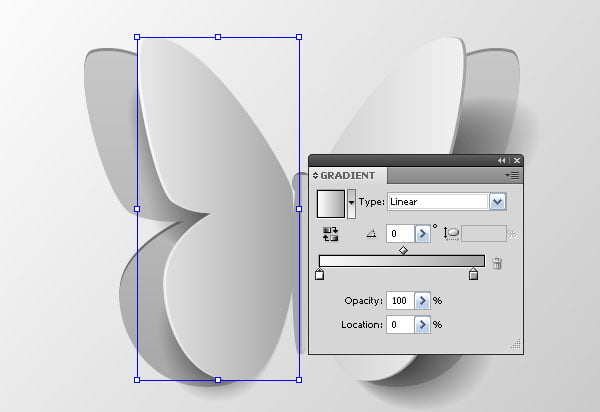
Copy this form and paste it back (Cmd / Ctrl + C; Cmd / Ctrl + B). Fill the copy with vertical linear gradient, which consists of darker shades of grey, and move it to a couple of pixels up.
Step 10
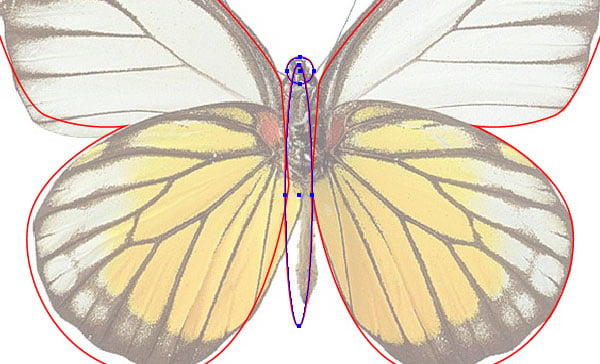
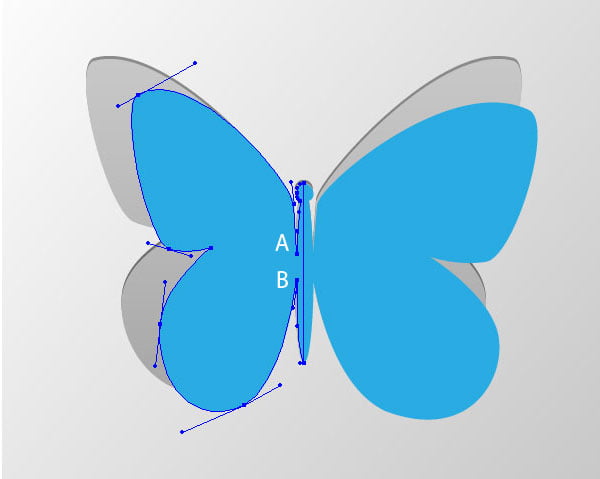
Now let’s work with the shade. We will create it with the help of the Blend Tool. This tool doesn’t like any complicated forms that’s why we will make our task a little easier. Take the Scissors Tool (C) and cut the left half in points A and B.
Delete the right part of the path and connect the points A and B with the Pen Tool (P).
Fill the form with dark-grey and set the 0% opacity in the Transparency panel.
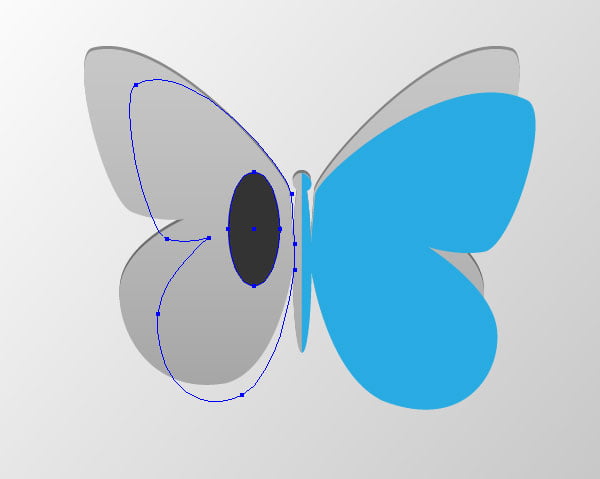
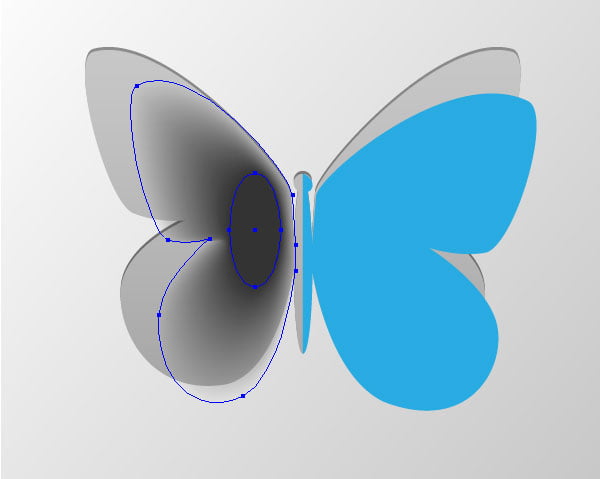
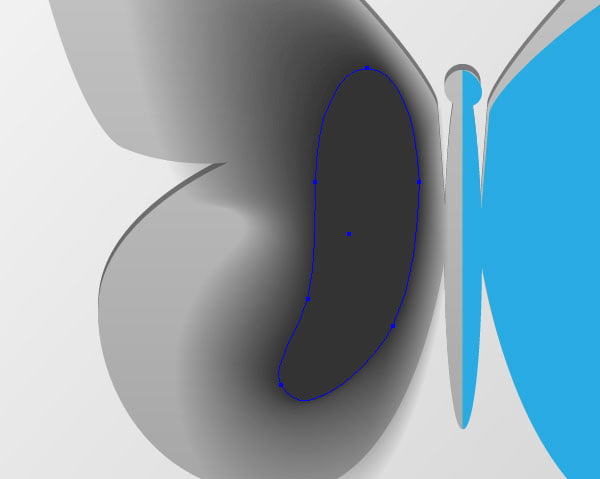
Step 11
Take the Ellipse Tool (L) and create an ellipse with the dark-grey or black fill. The ellipse should be in the borders of shade’s form.
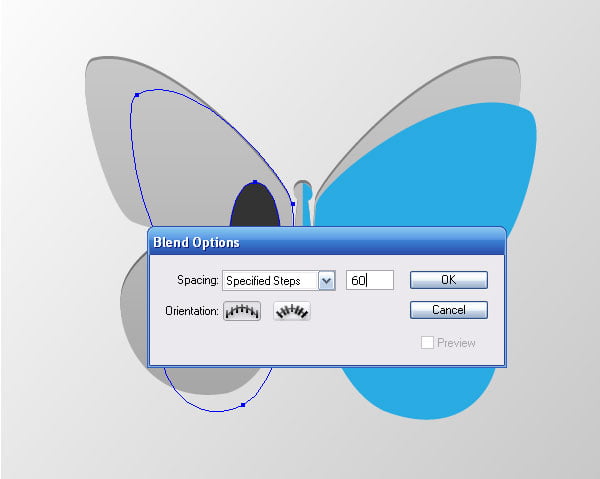
Select the ellipse and the form of a shade, then go to the Object > Blend > Blend Options… and set the number of the specified steps in the dialog box.
Now go to the Object > Bland > Make.
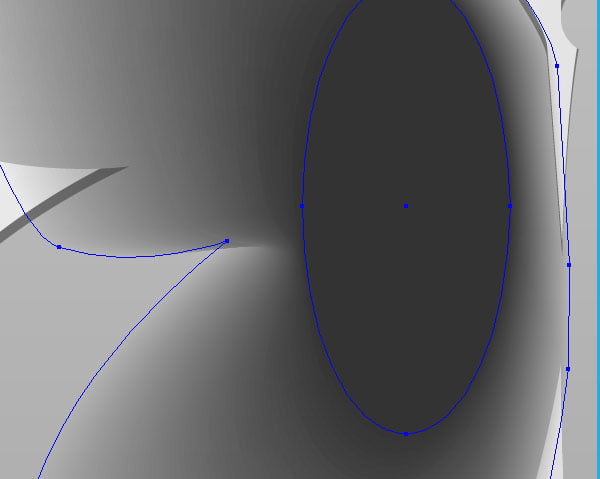
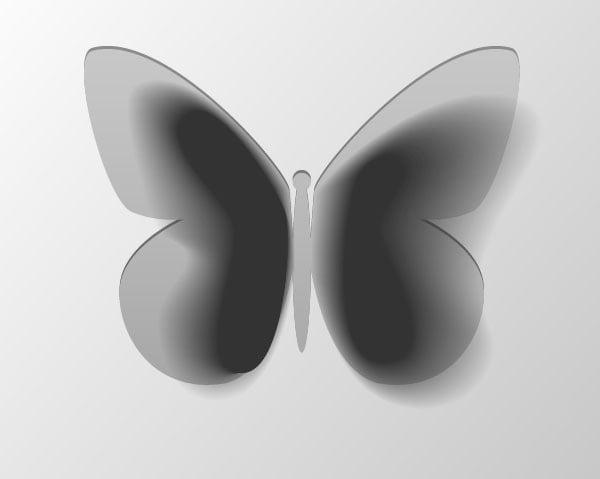
Step 12
There has been formed some artifacts near a sharp angle of our shade.
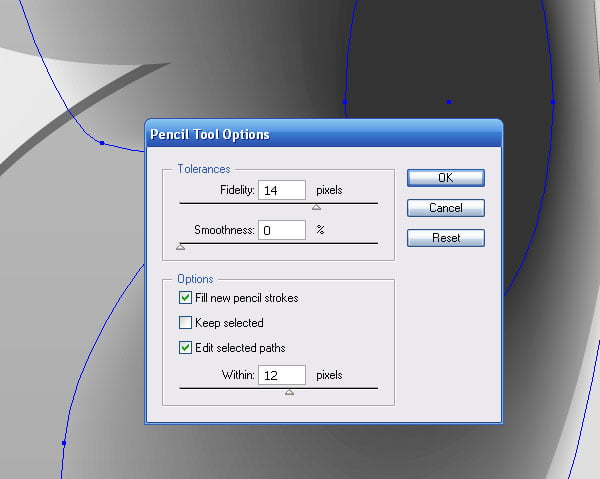
To correct this shortcoming, we need to change the form of the shade a little bit. To my point of view, it is easy and fast to do it with the Pencil Tool (N). To set this tool click twice on its icon on the Tool bar. Increase the value of the Fidelity in the opened dialog box.
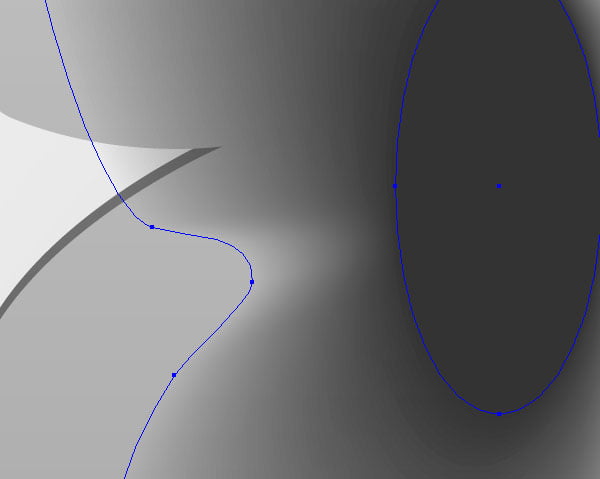
This allows us to create fewer points when we edit the path. Now let’s edit the angle’s shape; we will round it. Perfect!
With the Pencil Tool (N) you can change the density of the shade and redistribute it. We need to edit the upper part of the ellipse for it.
Using this technique, create a shade from the second butterfly’s wing.
Step 13
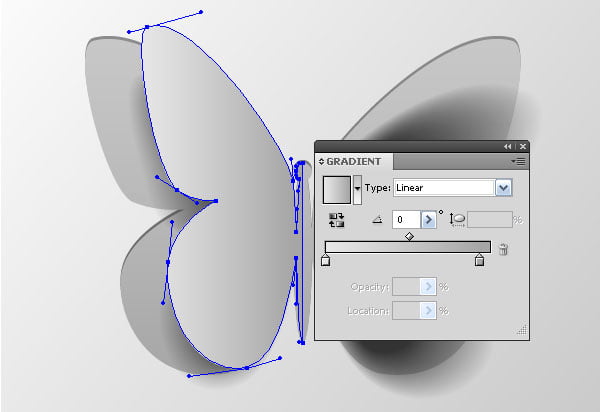
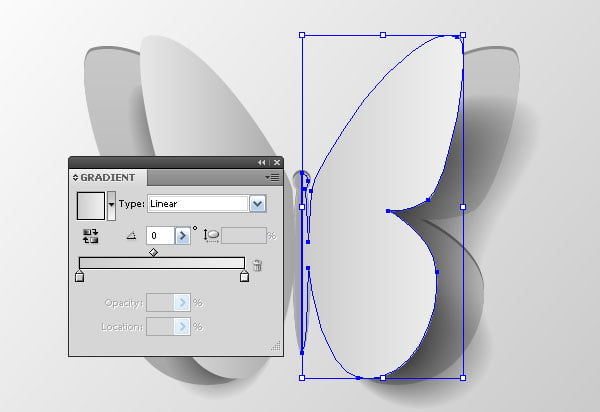
Fill the wings’ shape with linear gradient in accordance with the distribution of light on them.
Copy the form of the right wing and paste it back. Shift the copy a few pixels to the right and fill it with new linear gradient which will illustrate a shadow on the side of the paper wing.
Do the same actions with the left wing. In this case, the left slider of the linear gradient must be almost white demonstrating the highlight on the side of the wing.
Step 14
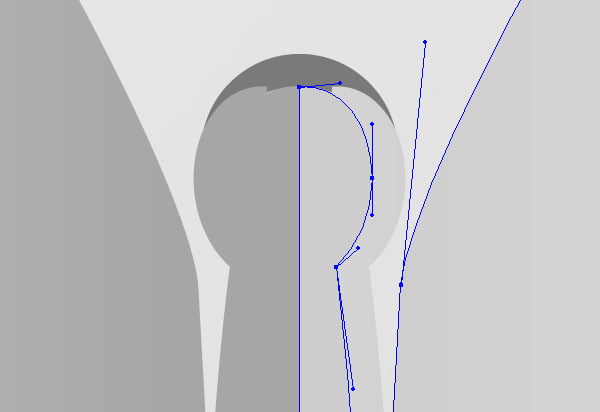
When we zoom in the head of our butterfly we will see a few more objects that lay below it.
We don’t need these objects because they create only unnecessary mess when our image is viewed in full size. Select the object which corresponds to the side of the right wing in the Layers panel, then take the Knife Tool and holding down the Opt / Alt cut the object as it is indicated on the figure below.
Now delete the left part of this form. Using this technique, delete the remaining parts of the objects which lay near the head and the body of the butterfly.
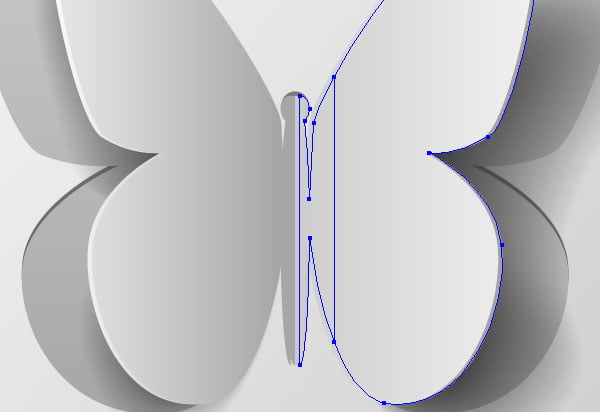
Now our vector paper butterfly is ready!
Application of the Text Effect to Vector Paper Butterfly
Step 15
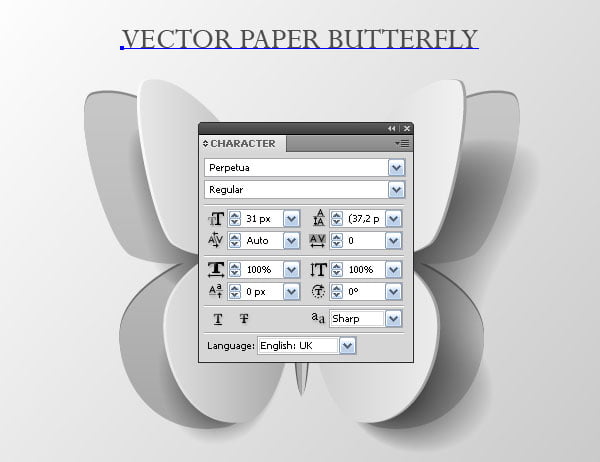
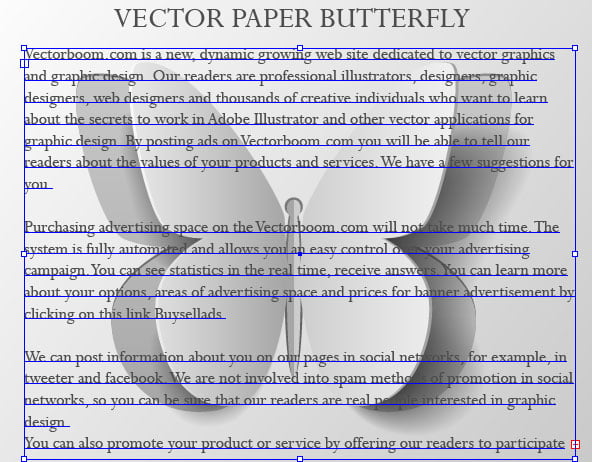
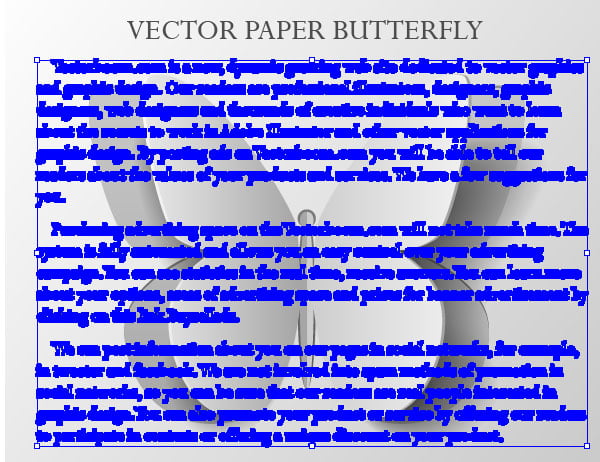
Now let’s work a little bit with the text. Take the Type Tool (T) and type the necessary inscription.
With the Type Tool (T) create a type area then copy and paste your text there. For these purposes I used the text from the article "Advertise on Vectorboom”.
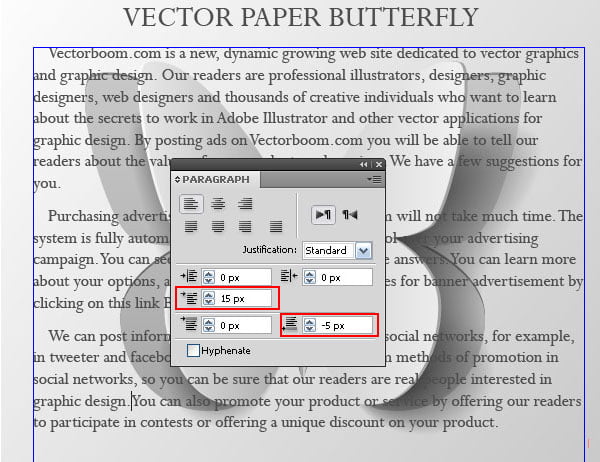
If needed, you can set the value of the First-line left indent and the Space after the paragraph in the Paragraph panel (Window > Type > Paragraph).
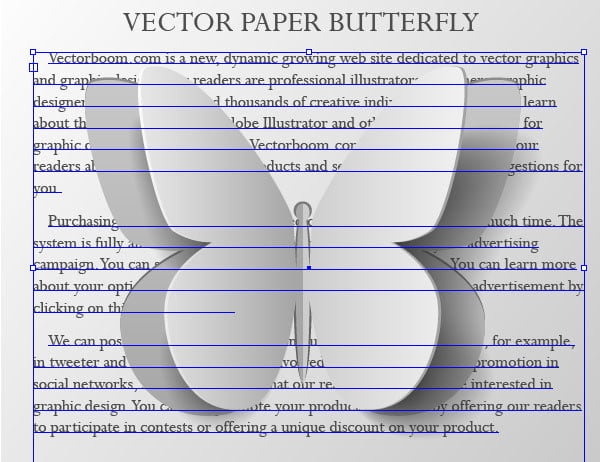
Place the type area underneath all the objects of the paper butterfly.
Step 16
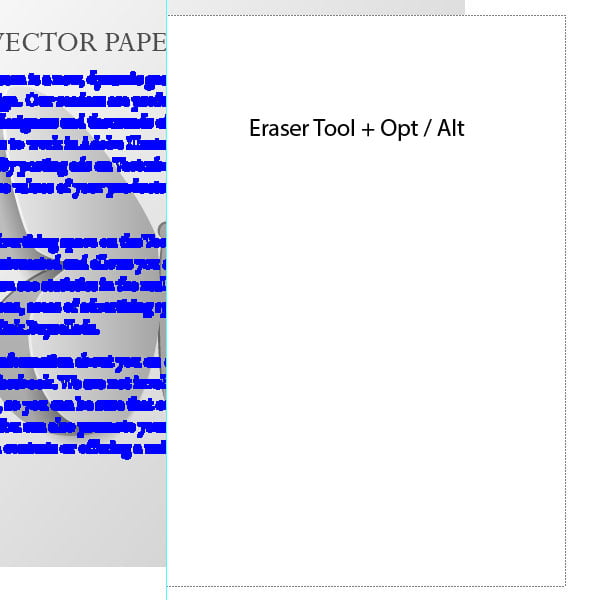
Copy the type area and paste it to the front, then placing the text above all the objects. Now go to the Type > Create Outline. Copy and paste the resulting group to the front.
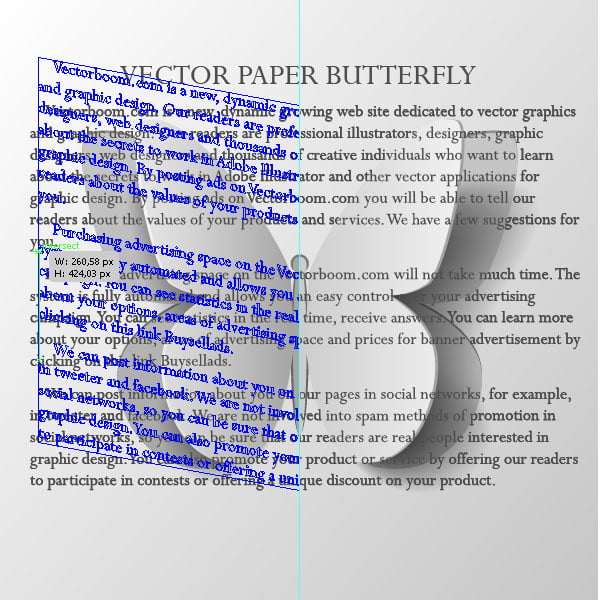
Create a vertical guide which goes through the center of the butterfly.
Select the upper group with the text; then take the Erase Tool (Shift + E) and holding down the Opt / Alt delete the right part of the upper group till the guide.
Now with the Eraser Tool erase the left part of the lower group till the guide as well.
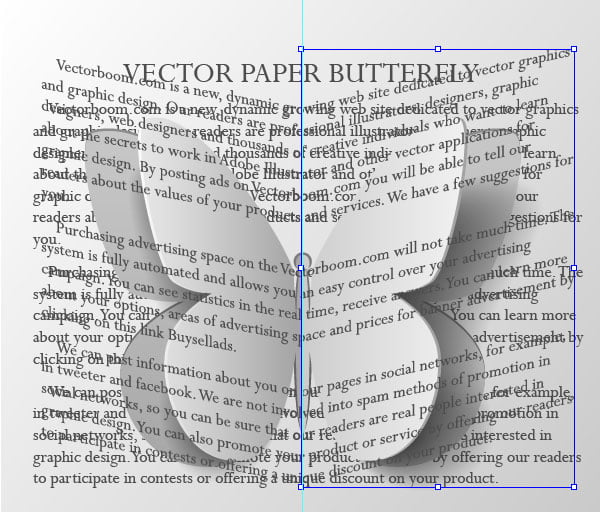
Step 17
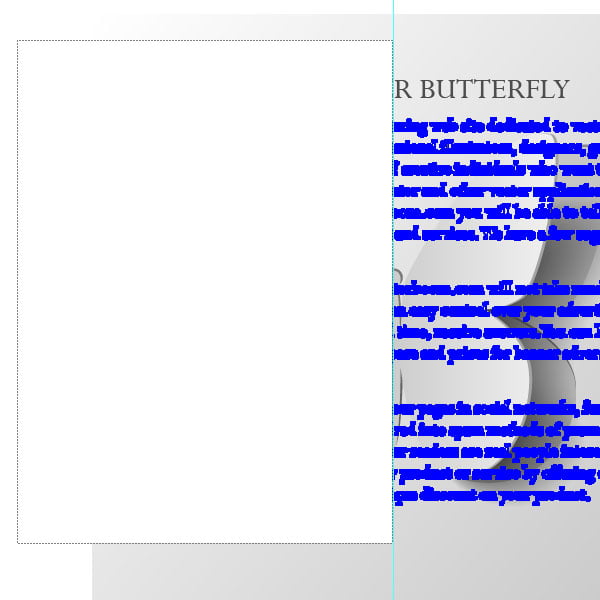
With the help of the Free Transform shift the plane with the left part of the text. Similarly, we deformed the wings of the butterfly in step 5.
Deform the right part of the text by analogy.
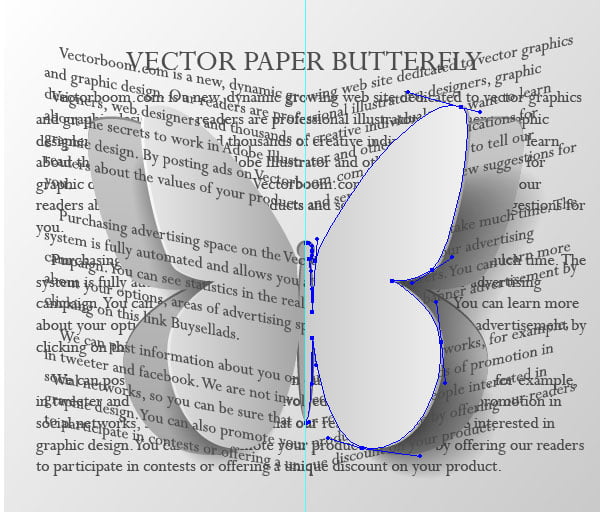
Step 18
Copy the form of the right wing and paste it to the front. Place this form on the top of all the objects.
Select the right half of the text and the upper form of the right wing; go to the Object > Clipping Mask > Make or use the Cmd / Ctrl + 7 shortcuts.
Do the same with the left half of the text.
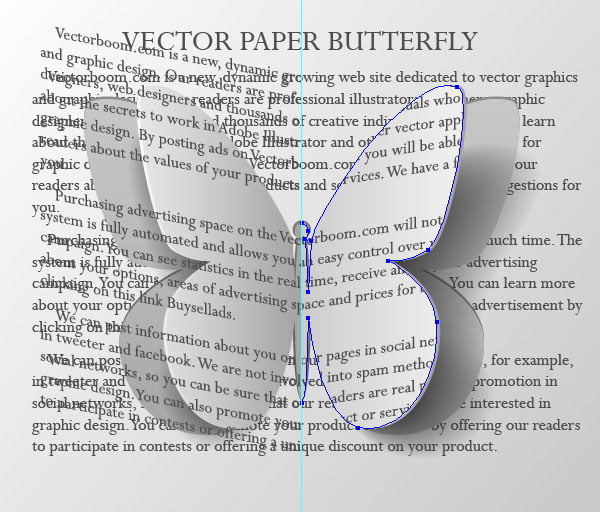
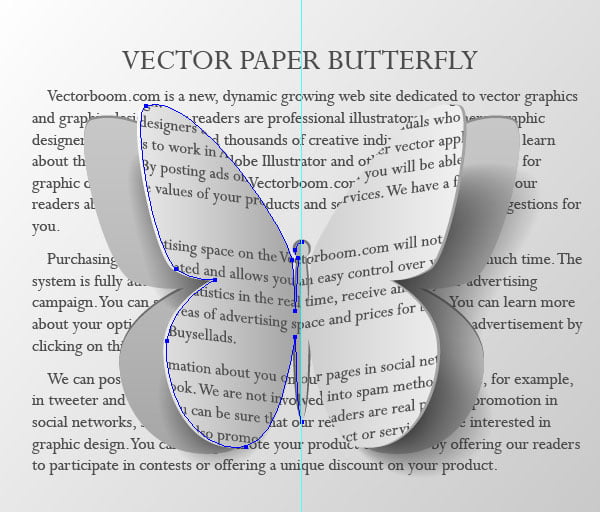
Step 19
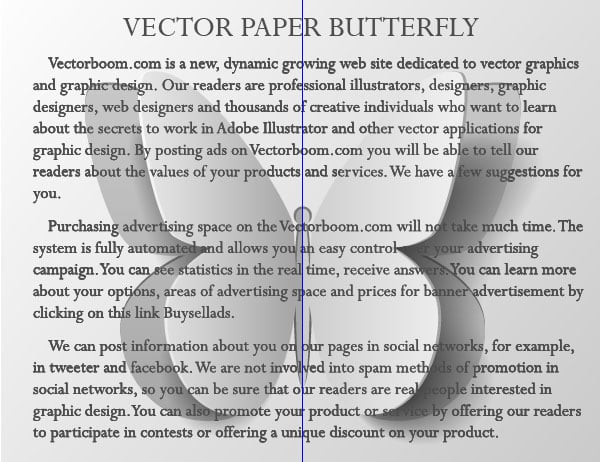
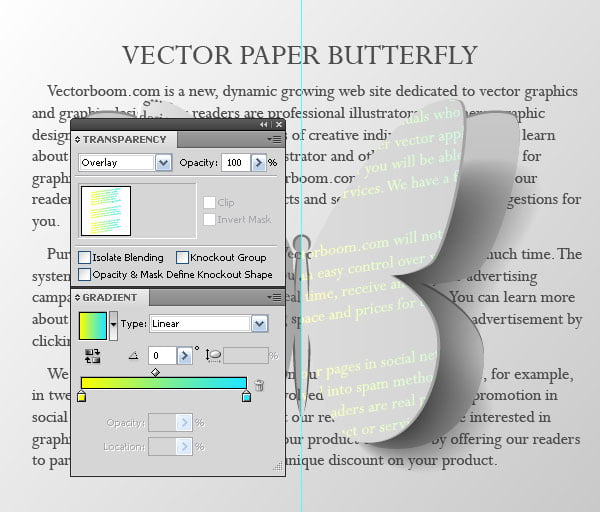
Fill the right part of the text with linear gradient from yellow to blue; set the Overlay blending mode for it.
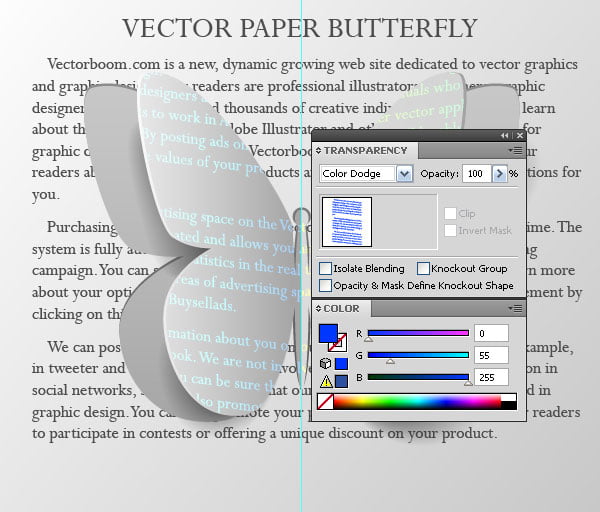
Fill the left part of the text with blue and set the Color Dodge blending mode for it.
Step 20
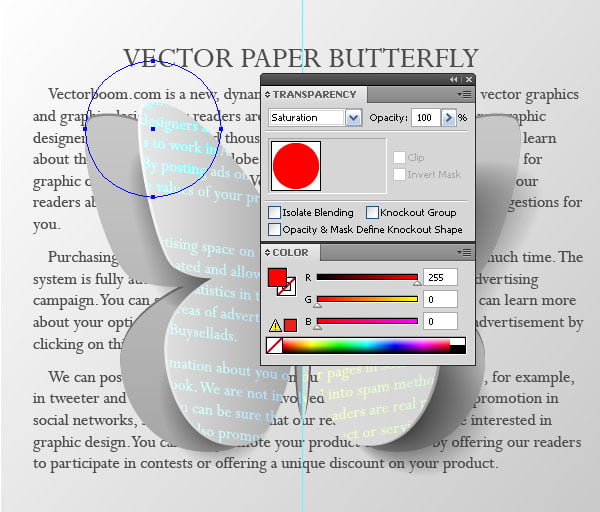
We can increase the glowing of the letters while creating a couple of circles with fill, consisting of any bright color and while applied the Saturation blending mode to it.
Follow us if you want to be the first to know about the latest Adobe Illustrator tutorials, Interviews and articles. Vectorboom team works for you!
|