|
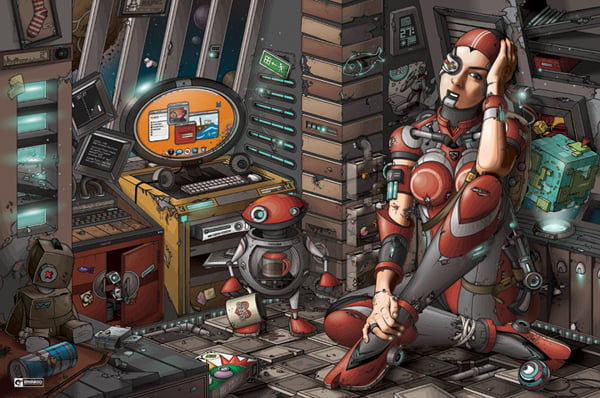
Final Image Preview
This is a step-by-step walkthrough of my artwork "Artificial Intelligence". This artwork took months tocreate and I almost went nutts creating it as it contains severe amount of detail. Please keep in mind that all my artwork is created the same way as this one. The following imagesare self-explanatory, I used Photoshop CS3, a mouse and my brain in order to create this artwork aswell as all my other art pieces. Please keep in mind this walkthrough assumes the reader has basicphotoshop skills, It does not however aim at teaching but rather expose how I create my art.
I roughly started off with basic lines to determine the overall character's look using the pen tool .The pen tool is hard to master, and when an artist gets hold of it, it is equivilant to a real pen. It requiresa lot of patience and preciseness, unlike brushes which can be sometimes random.I normally think as I go along and see what fits better. I keep deleting a lot and change plans a lot.
Up to this point, I keep deleting, resizeing and do a lot of tweaking, then finalize the outlines.
In this step I started coloring using the pen tool as well. As I go along, I keep experimenting as I don'thave a vivid idea of the character's final look. Each of these experiments above took days to createand as I have stated earlier, I think as I go along.
As of this point I went for a simplistic approach for the character's head.My coloring is simple and complicated at the same time. Every object/shape is consisted of a basecolor, in this case, the base color is red, then to shade/color an object ,I use light reds for lighting anddark reds for shadows. In (Figure 8A) i used circular shapes (depending on the object) with differentcolor levels and same goes to (Figure 8B). There are many additional steps such as scratches andreflections; however, they all evolve around the same concept.
I finished up the main character's overall coloring, then proceed with concepts for a sidekick character.
After creating the outlines for the secondary character, I color it. Again that took me a week to createand as it is with everything i create, detail is a must. I then started thinking of a setting and thesurrounding environment. I started off by roughly deciding the angle and design of the environmentas well as rough placement of objects, i.e. the computer.
Like every other object, I start off with outlines, base color then start adding lighting and shadowing.It is best to finish an object before moving to the next; However, as I create more objects I sometimestweak and change colors. As you might have noticed my environemnts are not clean, I like to scratch,break and shatter objects in order to provide detail, otherwise everything remains normal and dull.
Once again, every object I create is my own creation since I tend to use my imagination and createwhat I hope to be a unique creation. The rest of the artwork was created just like the steps above.Outline, color, shade and more outlines. In otherwords, make the Pen tool your best friend.
Best wishes… Ahmed Al-Refaie (OwaikeO)
More lessons from this author: How to Create a Vector Scribble Art
Follow us if you want to be the first to know about the latest Adobe Illustrator tutorials and articles. Vectorboom team works for you!
|