|
Final Image Preview
In this tutorial you will learn how to create vector greeting card with a blurred background. Today you will learn how to create a background consisting of vector objects. Have fun learning our new Adobe Illustrator tutorial and Happy Holidays!
Step 1
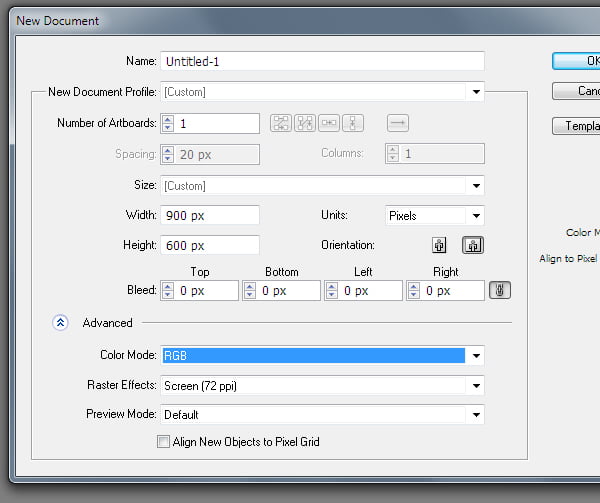
Run Adobe Illustrator and create a new document (File > New) with the artboard of the necessary size and in RGB color mode.
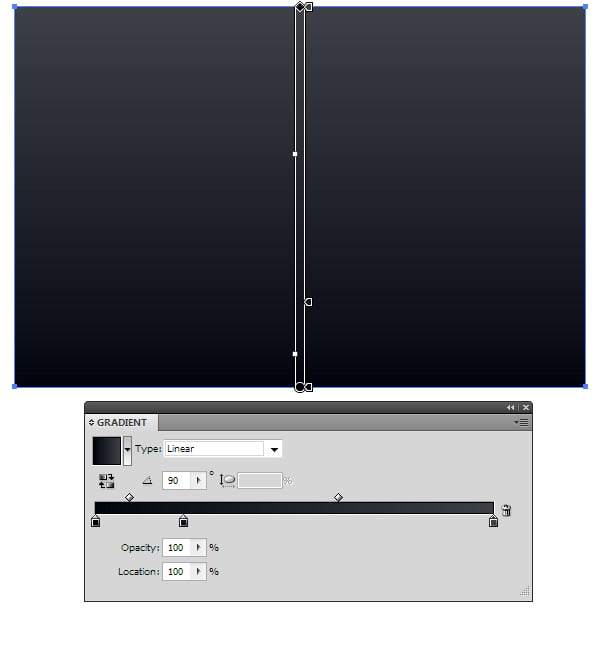
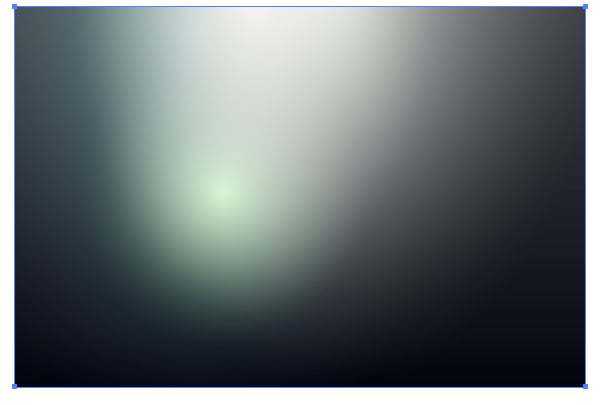
Create a rectangle with the size that matches the size of the artboard, using the Rectangle Tool (M), then fill it with a vertical linear gradient, which contains three shades of dark gray color (R = 0, G = 2, B = 12; R = 16, G = 18, B = 28; R = 62, G = 64, B = 71).
Step 2
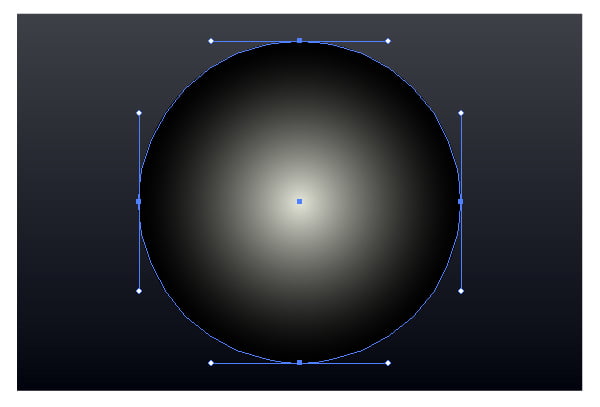
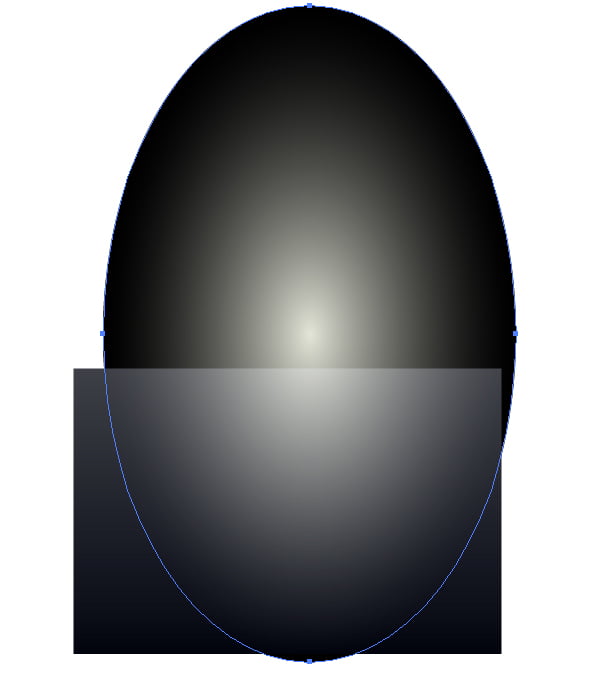
Our background will have complex lighting that can be created using relatively simple techniques. Let's see how it's done. Draw a circle using the Ellipse Tool (L) and fill it with a radial gradient from light yellow (R = 227, G = 229, B = 216) to black (R = 0, G = 0, B = 0).
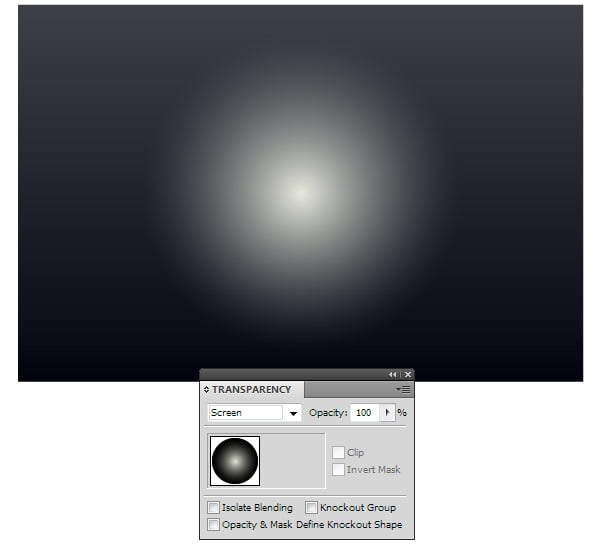
Apply to circle the Screen blending mode in the Transparency panel. As you can see the black edges of the circle became transparent.
Using the Selection Tool (V), deform the circle into an ellipse shape and place the shape in order to illuminate the scene on the top.
Step 3
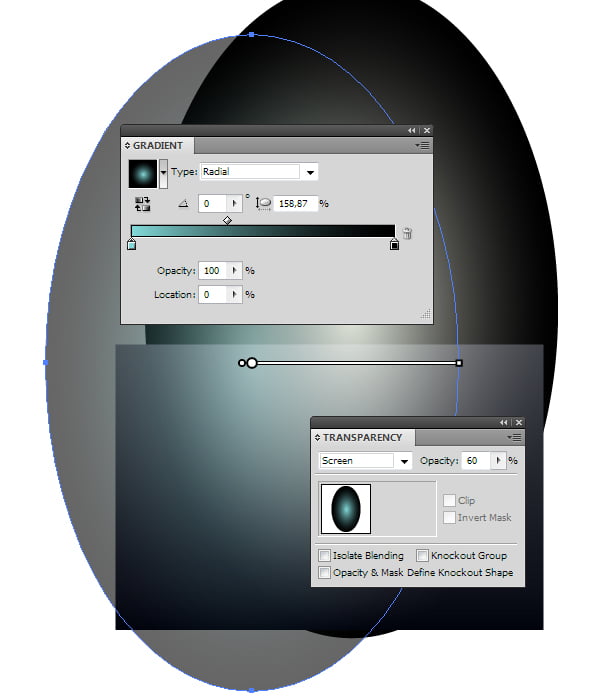
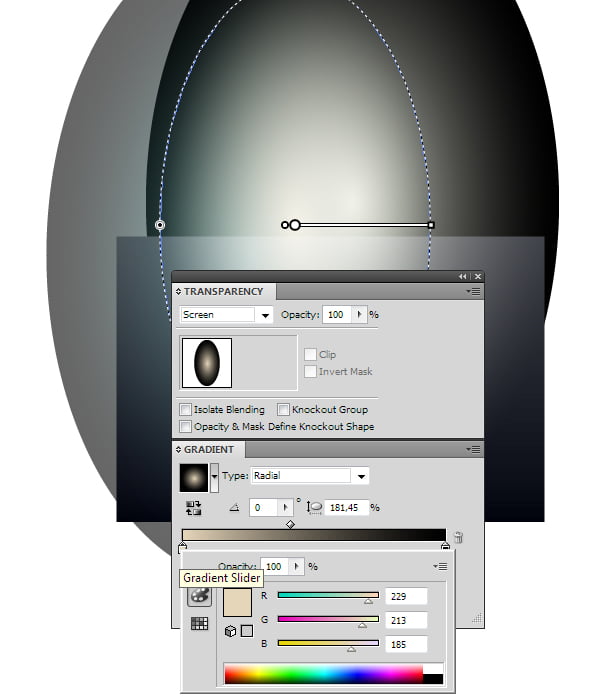
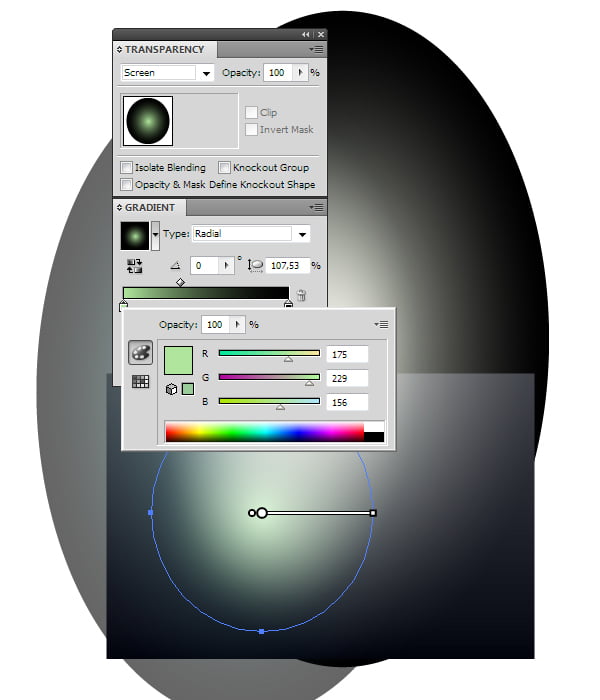
Create a new light spot. At this time, the ellipse is filled with a radial gradient from green (R = 130, G = 217, B = 217) to black (R = 0, G = 0, B = 0). As in the previous step, apply the Screen blending mode and reduce the intensity of the color by reducing the opacity in the Transparency panel.
Using the described technique, create two more light spots.
Step 4
Copy the bottom rectangle and paste it in front (Cmd/Ctrl + C; Cmd/Ctrl + F), then place it above all the created objects. Select all the created objects (Cmd/Ctrl + A), then go to Object > Clipping Mask > Make or use Cmd/ Ctrl + 7 shortcuts. Thus, we have hidden the parts of ellipses that go beyond the background.
Step 5
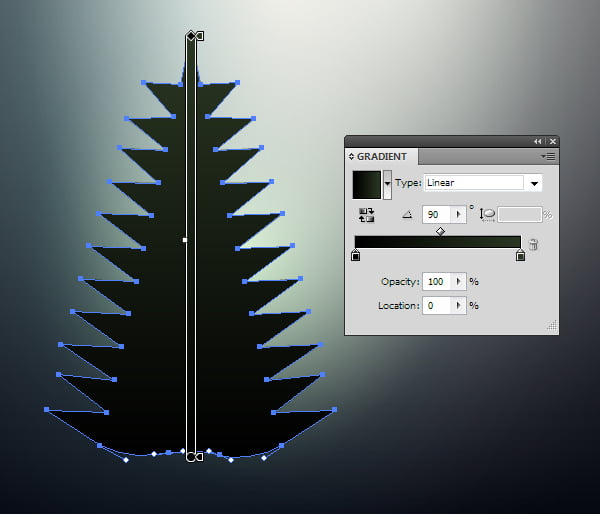
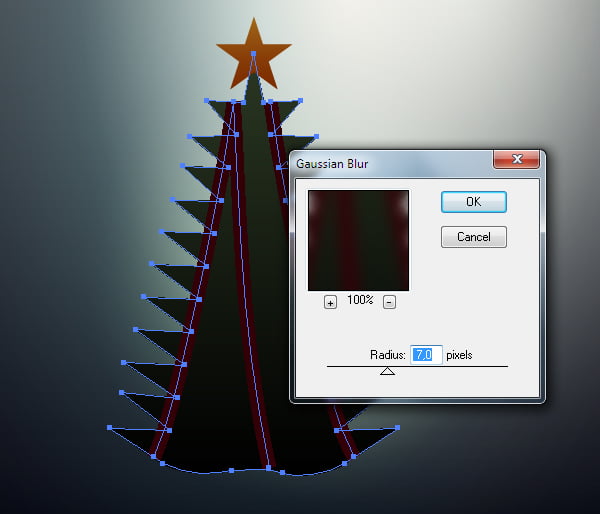
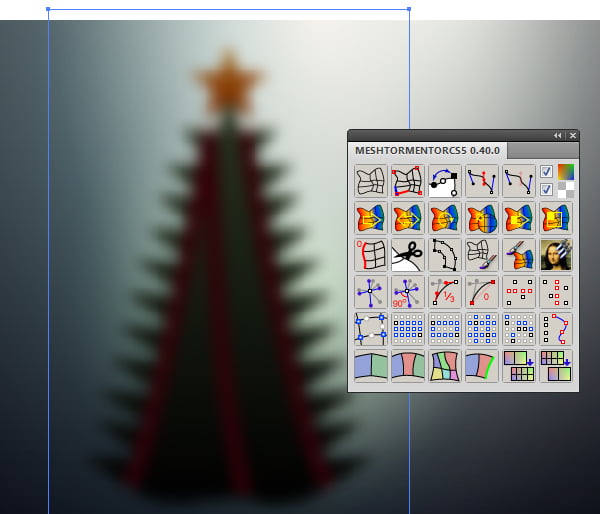
Using the Pen Tool (P) create an outline of the Christmad tree, which mainly consists of straightline segments. Christmas tree shape in your case may be less accurate than on the picture below, because in the future it will be blurred.
This object should be filled with the vertical linear gradient from dark green (R = 43, G = 56, B = 35) to black (R = 0, G = 0, B = 0).
Step 6
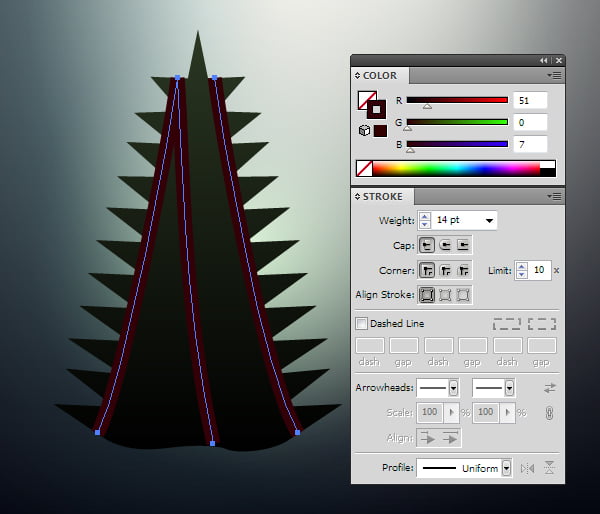
Create three more of the curved paths with the dark red stroke and without a fill. Pick the thickness of the paths in the Stroke panel. These are lights on the tree.
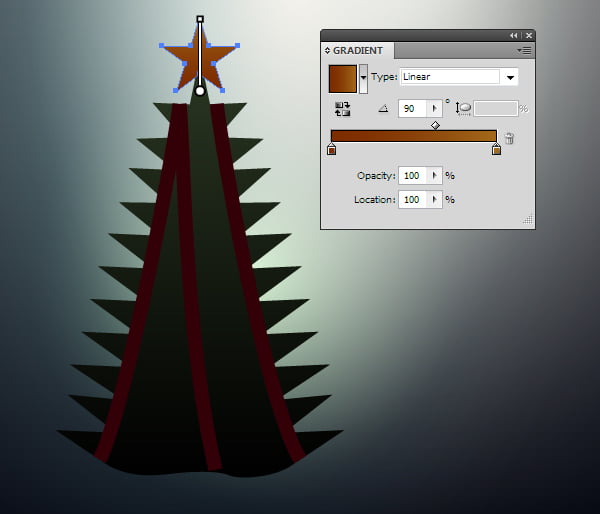
Draw a five-pointed star with the help of the Star Tool and fill it with a linear gradient from dark brown (R = 125, G = 44, B = 0) to brown (R = 163, G = 106, B = 26)
Step 7
Select the shape of the Christmas tree and lights, then go to Effect > Blur > Gaussian Blur … and set the blur radius equal to 7px.
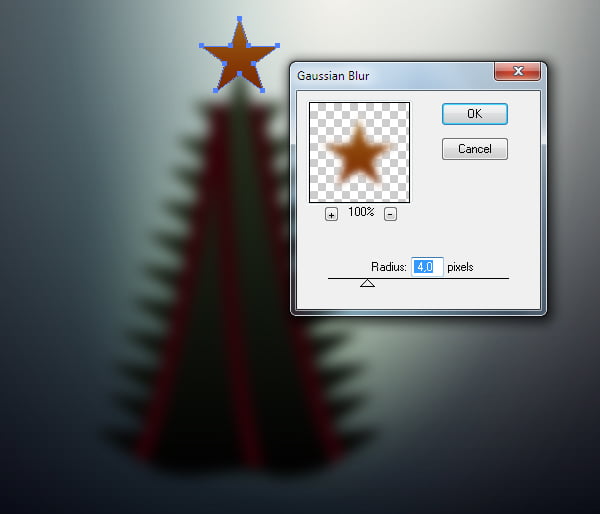
Select the star and go to Effect > Blur > Gaussian Blur …, this time set the radius equal to 4px.
Step 8
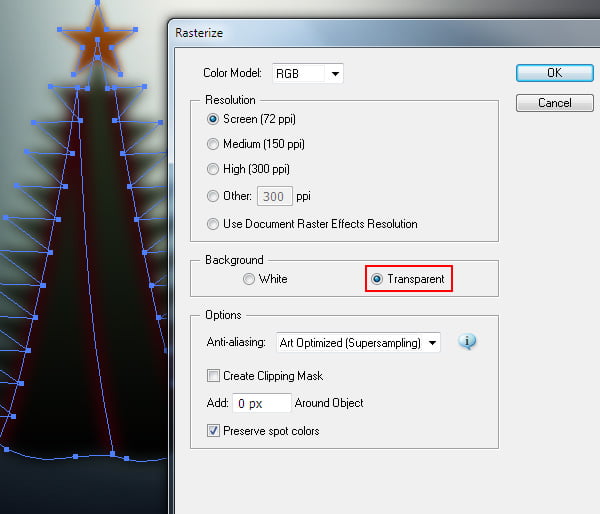
In my practice, often there are cases when the client requires files that do not contain raster effects such as Gaussian Blur. So now let's look at the technique that will transform our blurred tree into a vector object. Select the star, lights and Christmas tree, then go to Object > Rasterize …, select Transparent background in the dialog box.
Step 9
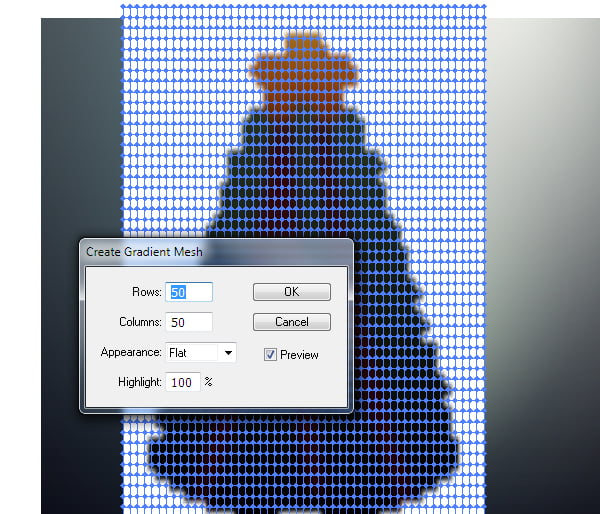
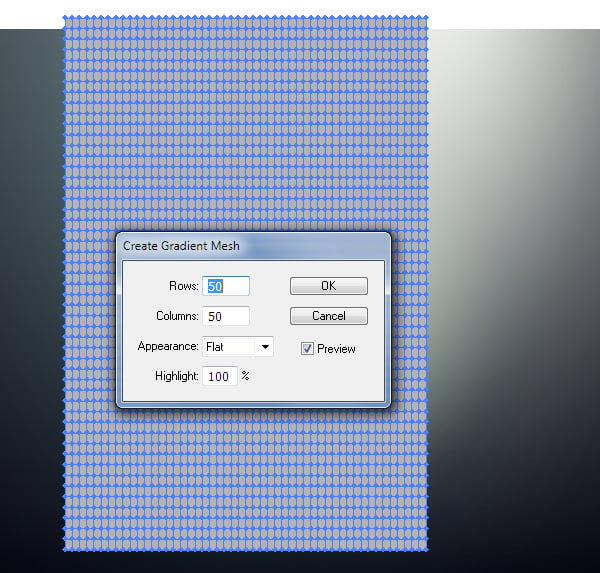
We can convert an obtained raster image into a gradient mesh using the standard feature of the application. But, unfortunately, transparent pixels of the image will be converted into white mesh points of the gradient mesh. Besides that we can create a gradient mesh which cannot contain more than 50 rows and columns which, in my opinion, is insufficient for the gradient mesh to correspond to the raster image. To confirm my words, select the bitmap image and go to Object > Create Gradient Mesh…
To avoid these problems, we need to use the free Illustrator plug-in, which is called the Mesh Tormentor. After installing the plugin to your computer go to Window > Mesh Tormentor to open its panel.
Step 10
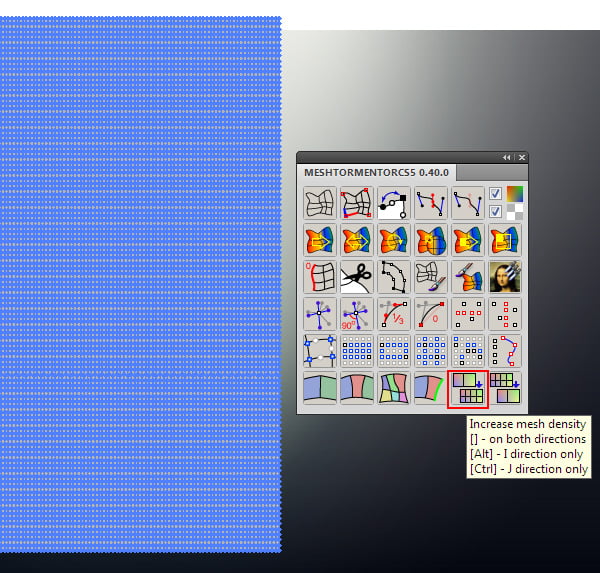
Take the Rectangle Tool (M) and create a rectangle filled with a random solid color with no stroke, the size of which exactly corresponds to the size of the bitmap tree.
Keeping the rectangle selected, go to Object > Create Gradient Mesh … and set the maximum possible number of rows and columns (50x50).
We can double the number of rows and columns by clicking Increase mesh density in the Mesh Tormentor panel.
Now select the options "Affect the colors and the opacity of nodes” in the plugin panel.
Step 11
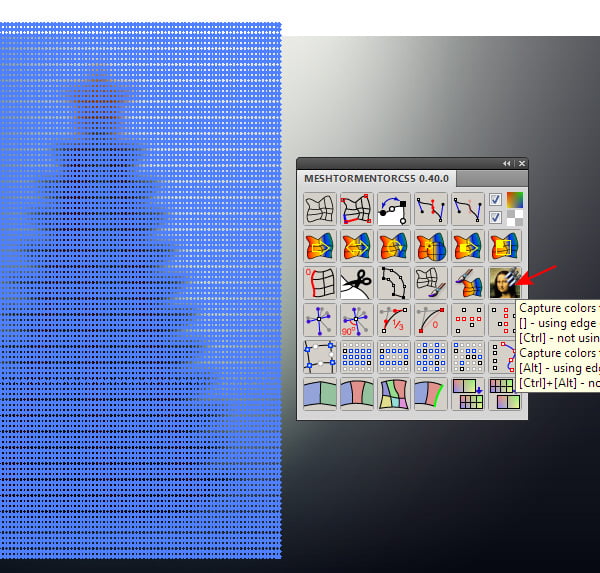
Select the bitmap image and gradient mesh, and then click on the Capture colors button.
As you can see, colors of the raster image were transferred to the mesh points considering the transparency of the pixels.
Now the raster image can be removed.
Step 12
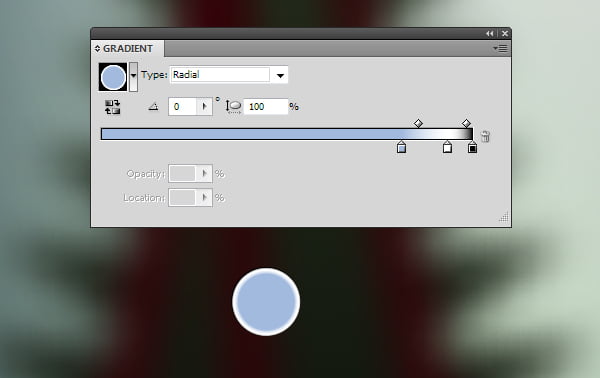
Now let's draw the Bokeh effect, which is created by light bulbs on the tree. Draw a circle using the Ellipse Tool (L). Fill it with a radial gradient consisting of blue, white and black colors.
Set for this object the screen blending mode in the Transparency panel.
Duplicate the created circle multiple times and distribute new objects on the surface of the tree. Change the opacity of the circles in random order.
Step 13
Place a few vector snowflakes in the foreground of the composition with different levels of opacity. You can read how to create the snowflakes in my tutorial How to create Christmas background.
Now we have to add a congratulatory inscription. Tutorial is over, happy holidays to all!
|