|
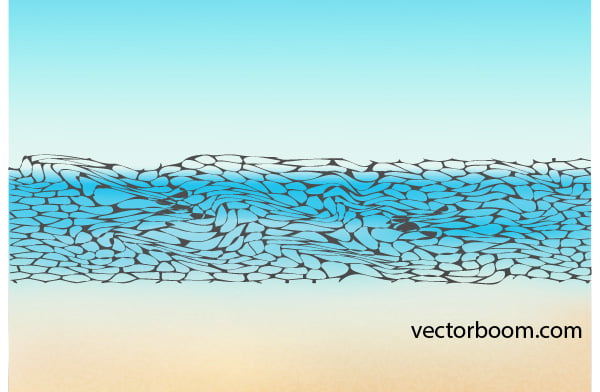
Final image
In this tutorial we will learn how to create a summer background by using gradient meshes, vector textures, and Opacity masks, which will allow us to create some depth in the composition. Have fun learning our new Adobe Illustrator tutorial!
Step 1
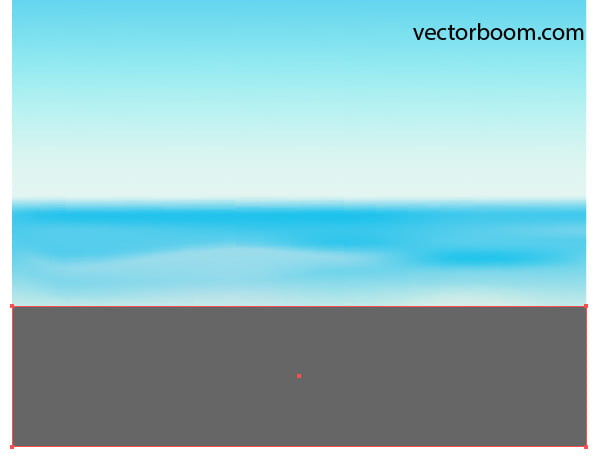
Take the Rectangle Tool (M) and create a rectangle, which we fill with vertical gradient.
The color should reproduce the basic colors of our summer landscape. We can divide it into a couple of color zones. The foreground is some sand on the beach and the border of the sea with the sand. The medium shot is the coastal part of the sea, which is usually not very deep. The distant shot of our composition is the distant part of the sea and the sky.
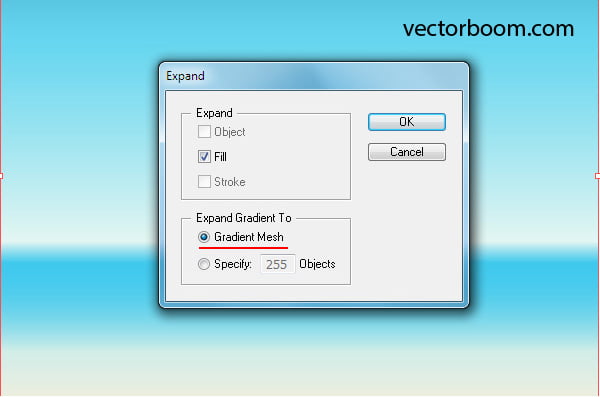
Step 2
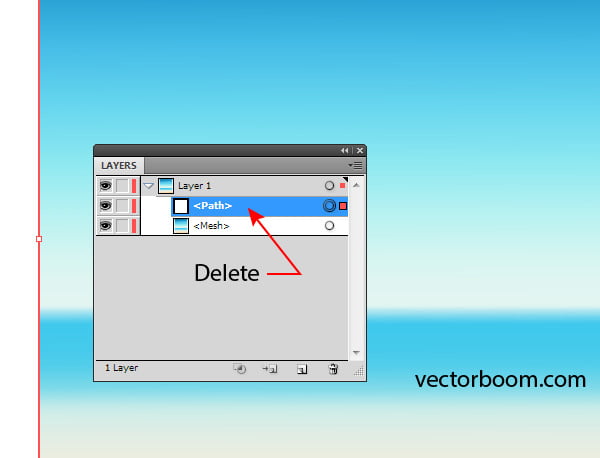
In order to manage the background colors more flexibly, let's convert the linear gradient into the gradient mesh. Select the rectangle, then go to the Object > Expand…, and in the opened dialog box select the Gradient Mesh option.
Go to the Object > Clipping path > Release, ungroup the objects (Shift + Command / Ctrl + G), then delete the upper rectangle with no fill and stroke.
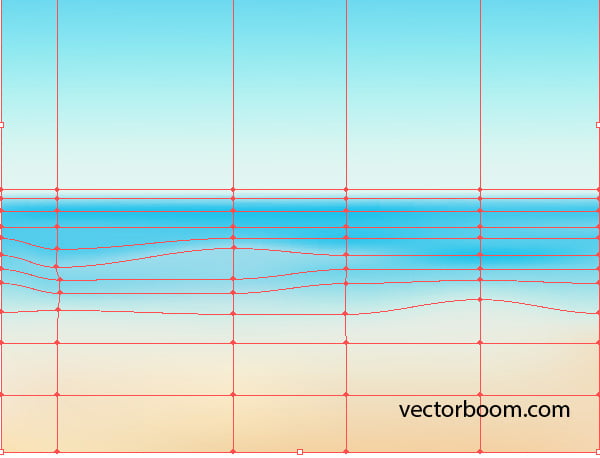
Step 3
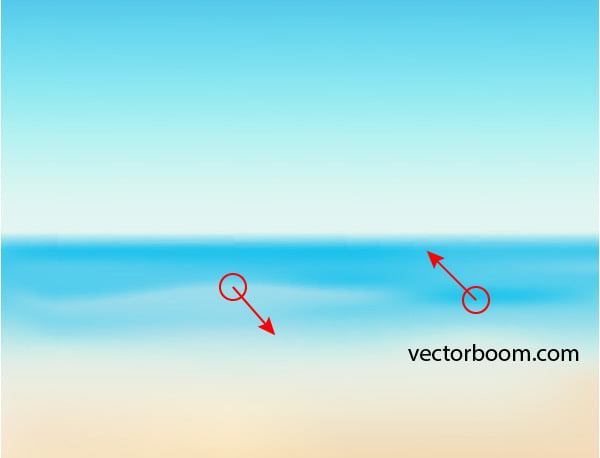
Add some vertical and horizontal mesh lines with the Mesh Tool (U), then bend a few of them on the medium shot ground of the sea by driving mesh points handles.
In this way we reproduce the wavy sea surface in shallow water, which of course, won't be a uniform color. For mesh point painting of the wavy surface you can choose colors with the Eyedropper Tool (I) from other parts of gradient mesh. This method allows you to achieve the desired result faster, than selecting colors from the Color panel.
Step 4
Now let’s create textures on the foreground and the medium shot. Create a rectangle with grey fill; the width of the rectangle should be the same as the background, and the height of the rectangle should cover sandy part of the landscape.
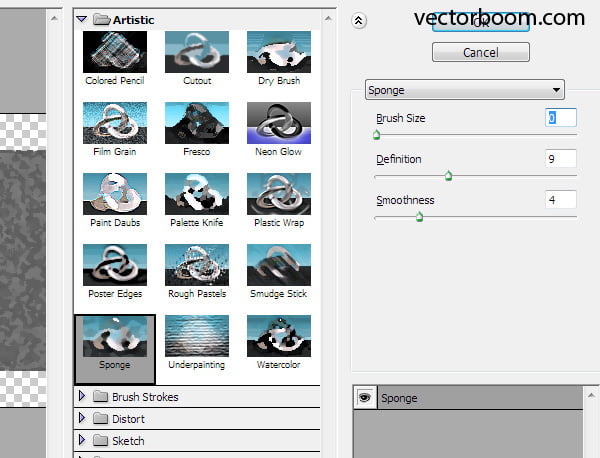
Keep the grey rectangle selected, go to the Effect > Artistic > Sponge…, and then select the effect parameters in the opened dialog box.
If you’re not happy with the applied effect, you always can get the access to its parameters in the Appearance panel.
Step 5
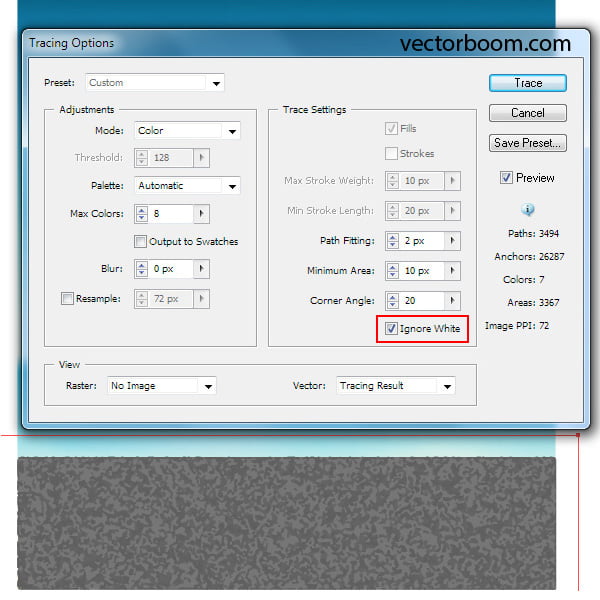
Convert the bitmap texture into the vector one. To do so, go to the Object > Expand Appearance, and then to the Object > Live Trace > Tracing Options…. Choose the Color mode, select the number of colors and tick Ignore White in the dialog box, then click on the Trace button.
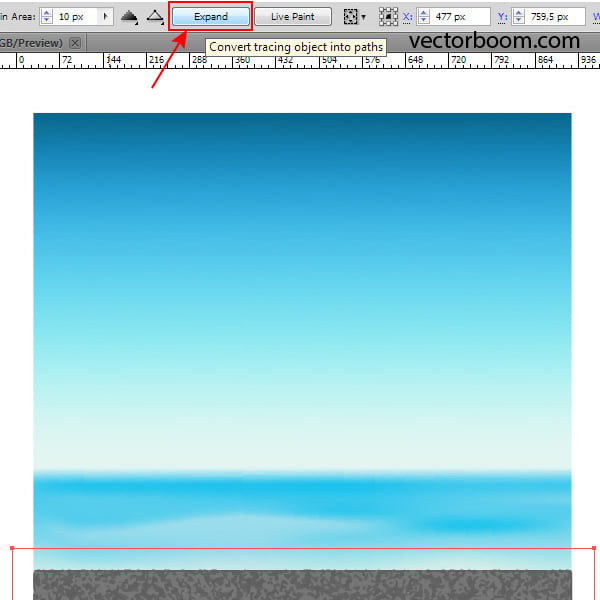
Now click on the Expand button in the Control panel.
If you use Adobe Illustrator CS6-CC, then you need to use the Image Trace panel (Window > Image Trace) for tracing the bitmap texture.
It is not difficult to notice that vector texture, created in Illustrator CC, turned out to be much rougher than the one created in Illustrator CS5 with the same tracing options. This is one of the reasons why I continue to work in Illustrator CS5.
Step 6
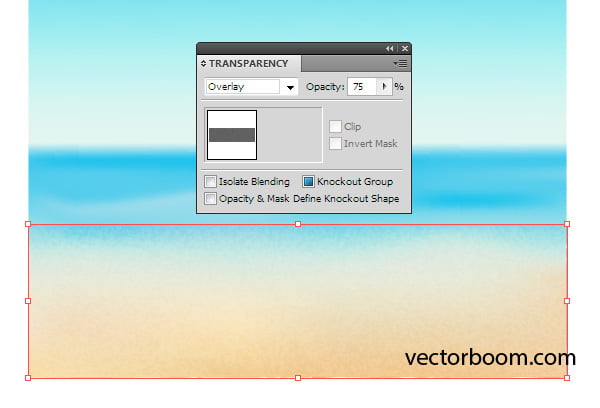
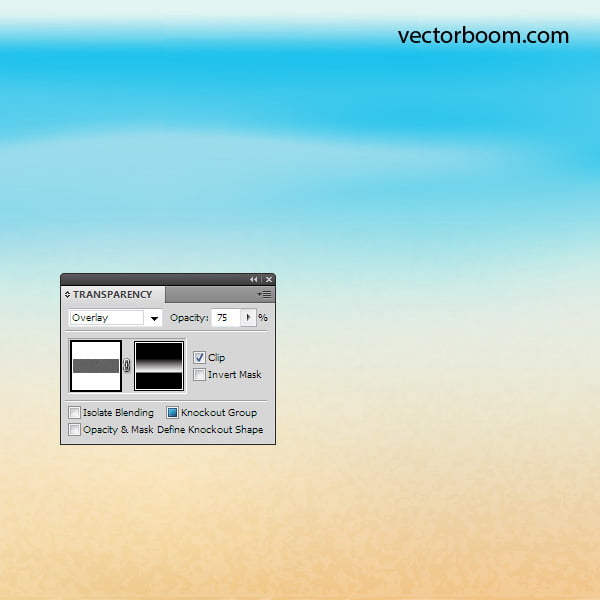
Set the overlay blending mode in the Transparency panel for the resulting vector texture of sand. The texture intensity can be adjusted by changing the opacity.
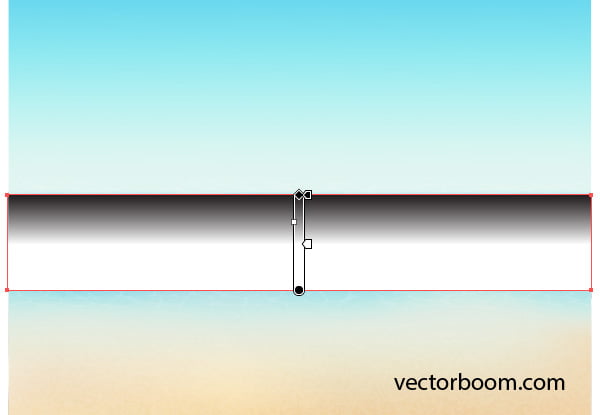
The texture should be shown clearly on the foreground of the composition and gradually disappear while moving into its depth. To create this effect, we apply the Opacity Mask. Create a rectangle filled with vertical linear gradient from white to black.
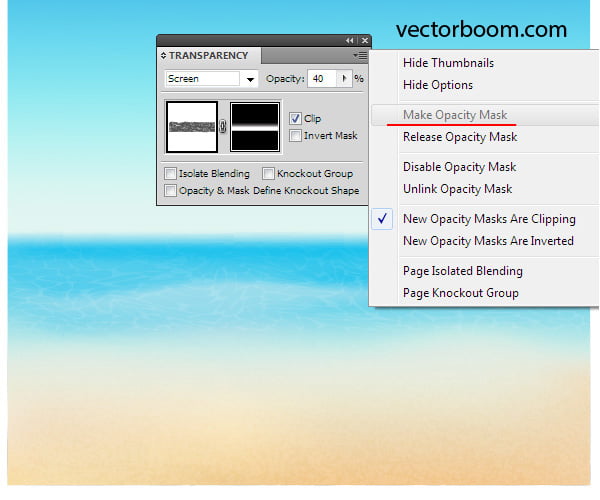
Select the vector texture and the upper rectangle, and then select the Make Opacity Mask in the fly-out menu of the Transparency panel.
Step 7
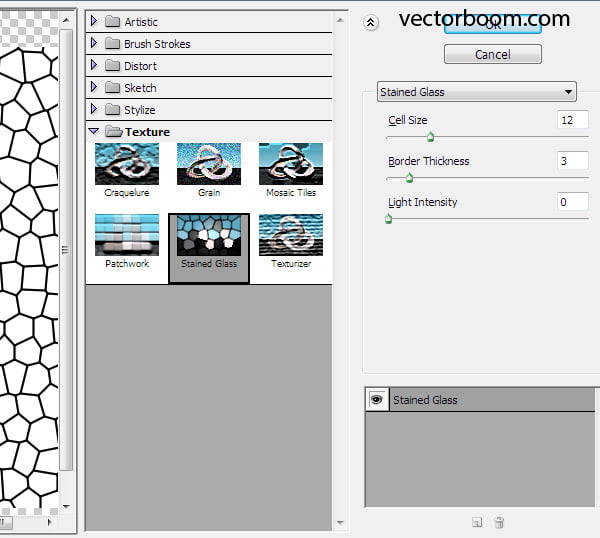
And now we'll create the texture of foam on the waves. Draw a rectangle with white fill. Keep it selected, go to the Effect > Texture > Stained Glass…
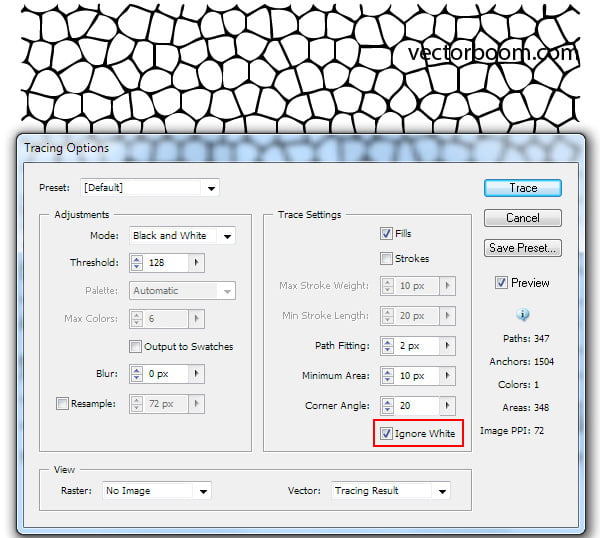
Convert the raster texture into vector in the same manner as we've done it with the sand texture. Go to the Object > Expand Appearance, and then to the Object > Live Trace > Tracing Options…. This time select Black and White mode in the dialog box.
Now click on the Expand in the Control panel.
Step 8
Reduce the height of the resulting texture and apply to it the shear with the help of Free Transform Tool or Shear Tool.
Place the foam texture above the sea zone and fill it with dark-grey (until this moment it was black). The parts of texture that exceed beyond the background borders, I simply deleted with the help of the Eraser Tool, though you don't have to do it. I'm trying to reduce the file's size while creating it. Now take the Warp Tool and create a wavy surface, as it is indicated on the figure below.
Step 9
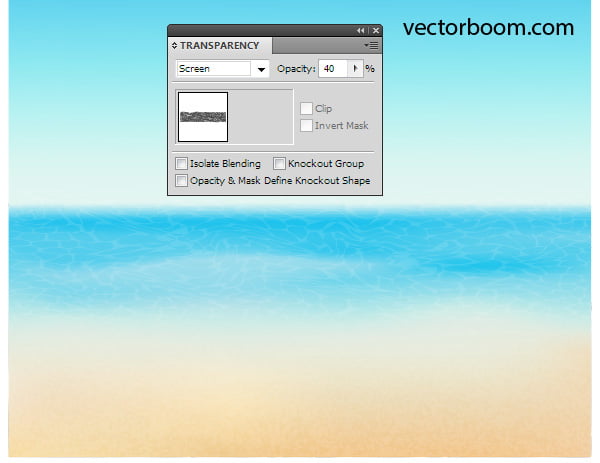
Apply the Screen blending mode to the texture of the foam and, if necessary, reduce opacity in the Transparency panel.
As in the case with sand, the foam texture should appear to the viewer in the nearest section and gradually disappear while approaching the horizon. As you already know, we can get this effect by using the Opacity Mask.
Step 10
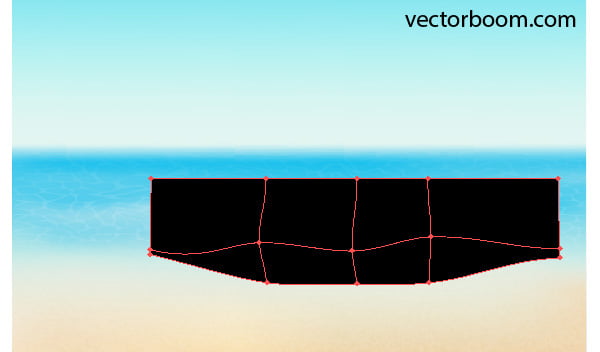
Let's create a wave lapping on the shore of the beach. With the help of the Pen Tool (P) create a figure with the black fill like it is shown of the figure below.
Create a couple of mesh lines with the help of Mesh Tool (U).
Lighten the lower part of the wave by coloring three lower mesh points into white and light-grey.
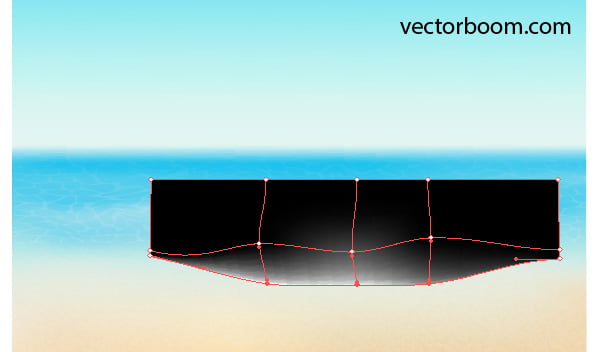
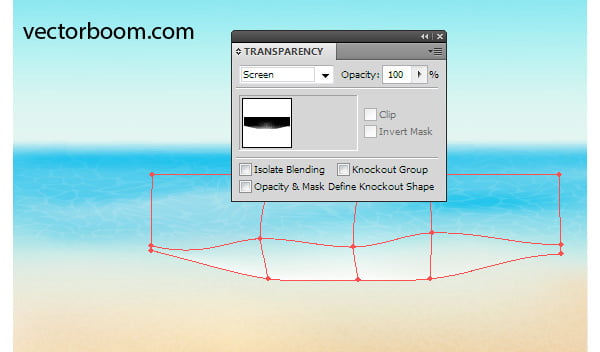
Step 11
Apply the Screen blending mode to the wave. As expected, the black areas of the gradient mesh became transparent.
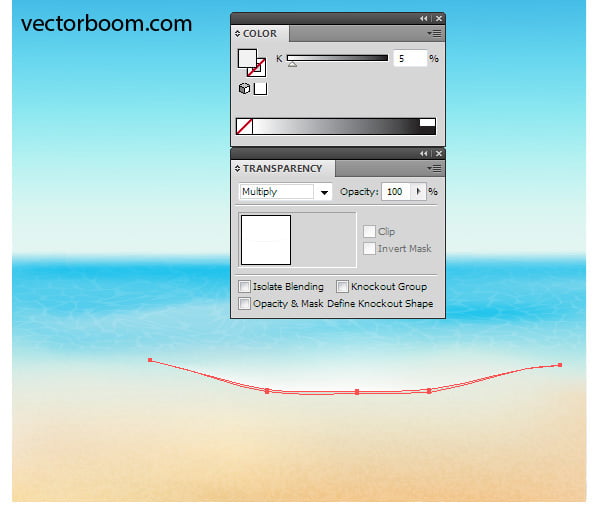
Create with the Pen Tool (P) a shape of shadow and fill it with light-grey, then apply the Multiply blending mode to it.
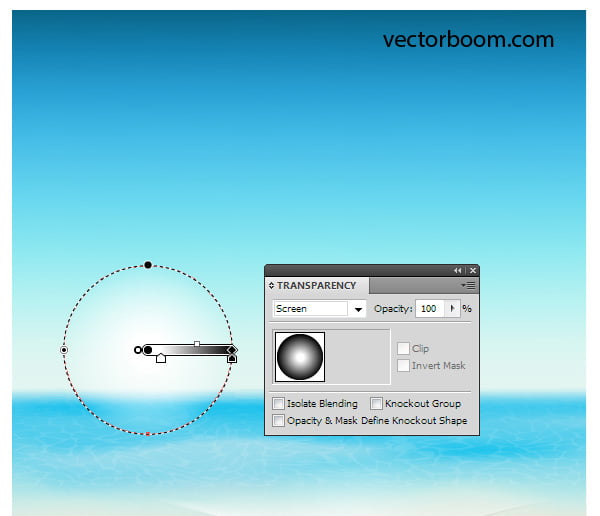
Step 12
There is nothing as easy as the creation of a bright summer sun. Create a circle with the help of the Ellipse Tool (L) and fill it with radial gradient from white to black. Apply the Screen blending mode to the circle.
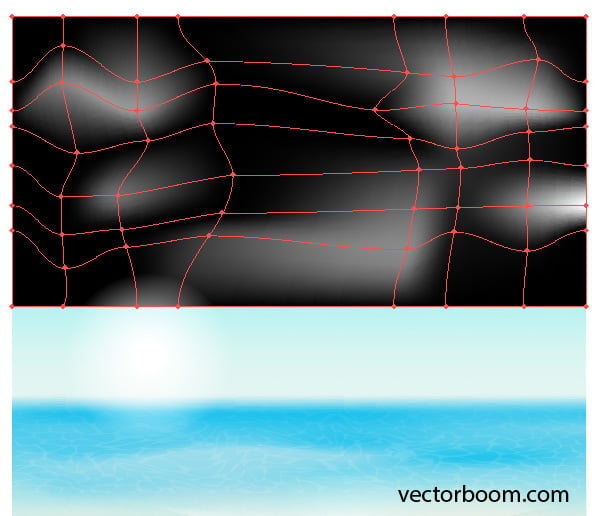
Step 13
Let's work of the clouds creation. Draw a rectangle with black fill, and then transform it into gradient mesh with the help of the Mesh Tool (U). Deform mesh lines with the Direct Selection Tool (A). Now color a couple of mesh points into different shades of grey.
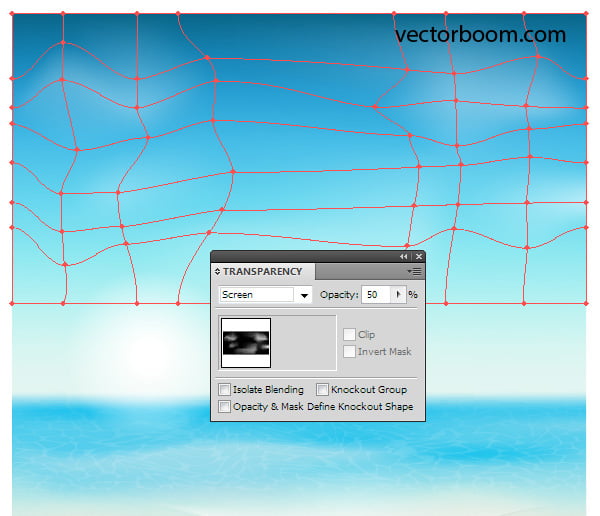
Apply the Screen blending mode to the clouds and reduce the opacity, if you want to reduce the intensity of their color.
You can create some more clouds by using the same technique.
Overlaying, gradient meshes will create more detailed vector clouds.
I wish you all to have a good rest this summer!
| 


 Keep up such kind of pretty job …