|
Final Image Preview
Today we will take a look at one of the ways of creating glass objects in Adobe Illustrator on the example of the cloud icon. After studying this tutorial, you will easily be able to create a set of glass icons of any shape.
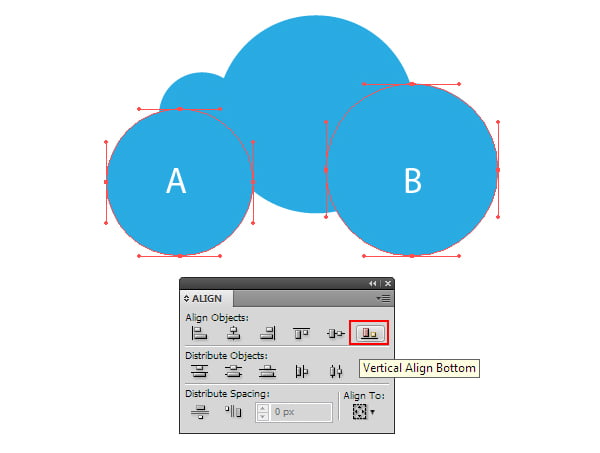
Step 1
With the help of the Ellipse Tool (L) create four circles and place them as shown in the picture below.
Select the ellipses A and B, then align them along the bottom edge with the help of the Align panel.
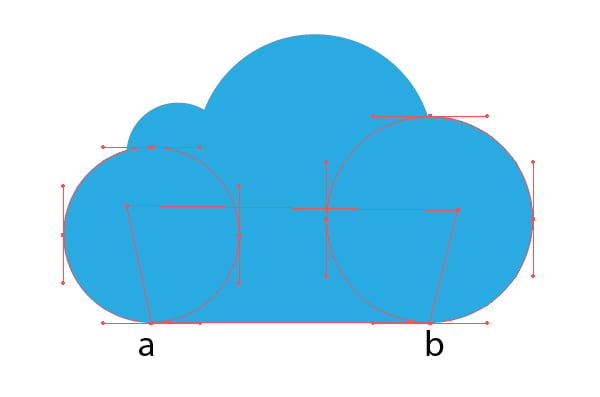
Step 2
Using the Pen Tool (P) create a new shape, which consists of straight line segments. Points of the lower segment must pass through the points a and b of the lower circles.
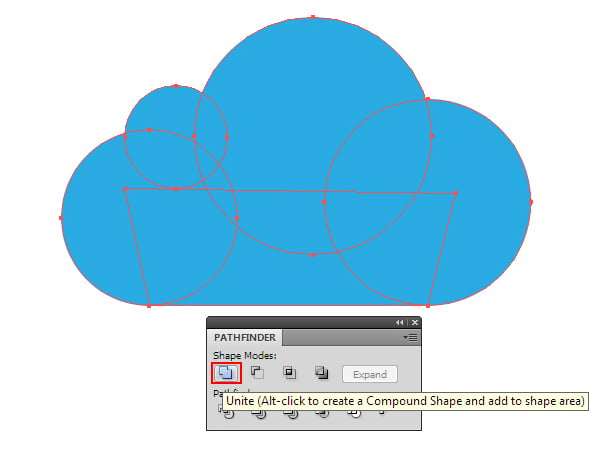
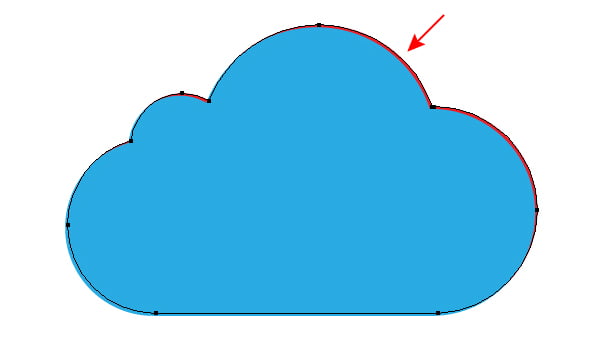
Select all the created objects, and then click on the Unite button in the Pathfinder panel.
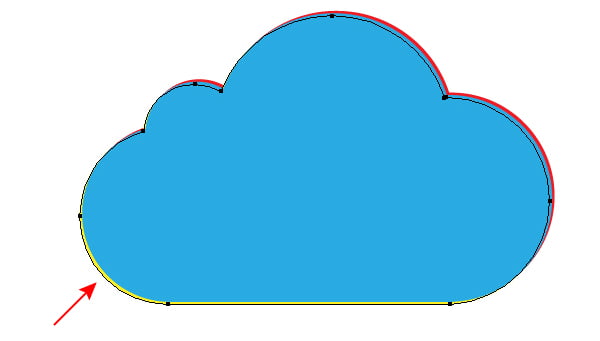
Step 3
Copy the resulting shape of a cloud, and then paste it back (Cmd / Ctrl + C; Cmd / Ctrl + B). Move the bottom object 2px to the right and upward, using the arrow keys. For illustrative purposes, color this object in a different color.
Copy and paste the shape of a cloud and paste it back again. This time, move the new shape 2px to the left and downward.
Step 4
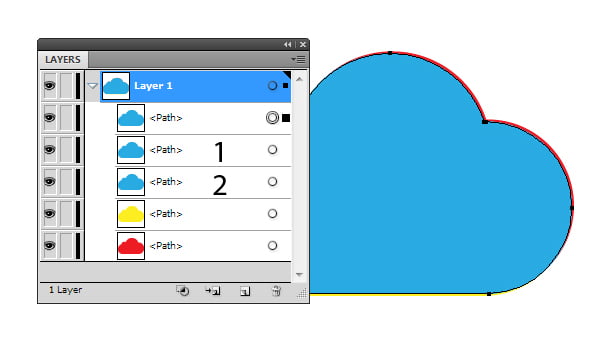
Duplicate the shape of a cloud two more times.
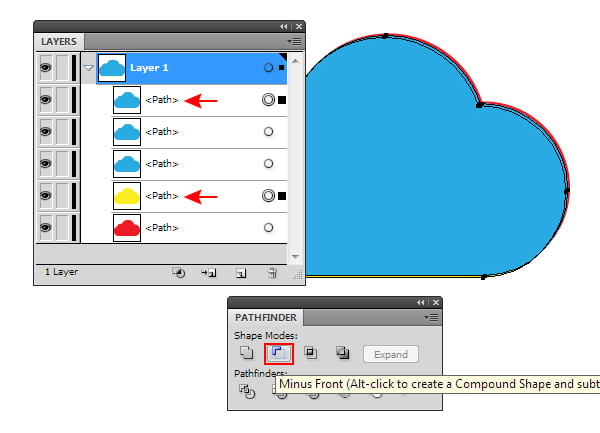
Select one of the blue shapes and a yellow shape form in the Layers panel, then click on the Minus Front button in the Pathfinder panel.
Select the blue and red shape, then press the Minus Front button.
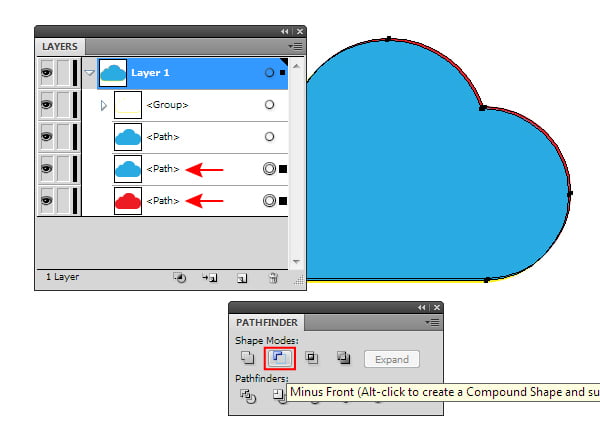
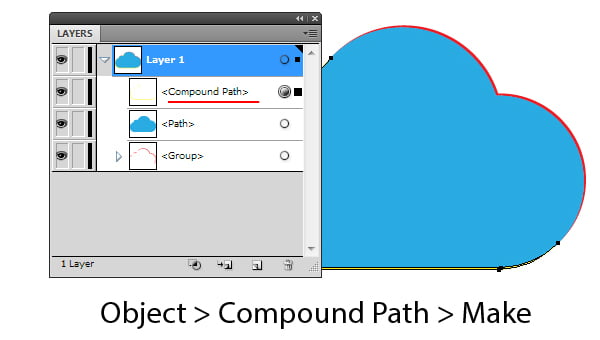
Select the group with yellow objects, then go to Object > Compound Path > Make (Cmd / Ctrl + 8)
Later these shapes should be filled with radial gradient, so it will be more convenient if they will be represented by a single object.
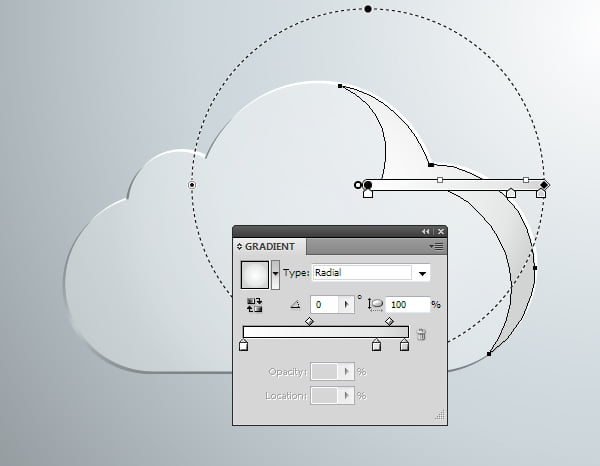
Step 5
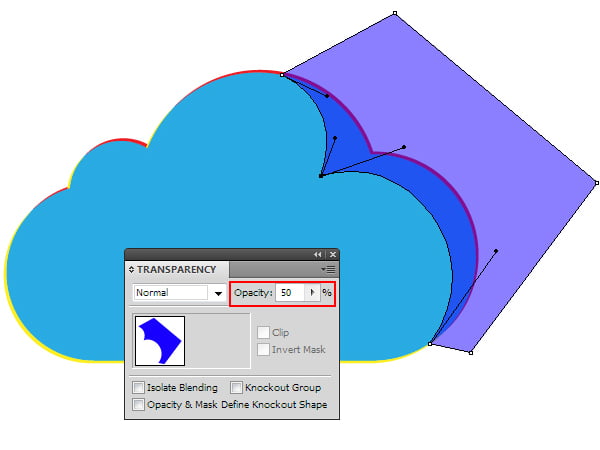
Using the Pen Tool (P) create a shape shown in the picture below. Usually I reduce opacity of the object in the process of creation, in order to properly estimate its relationship with already existing objects.
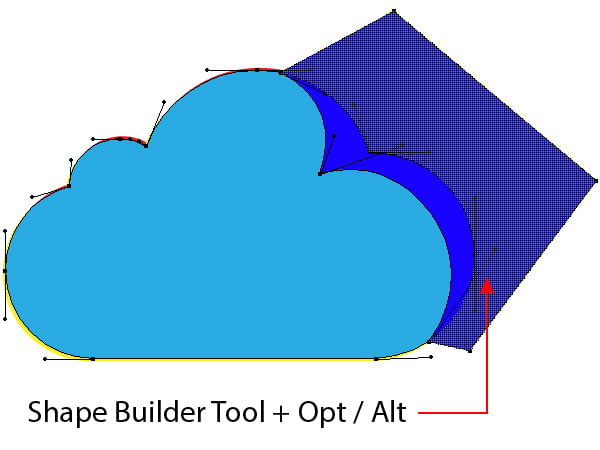
Restore the opacity to 100%. Select the blue shape of a cloud, and a new shape, then take the Shape Builder Tool and hold the Opt / Alt key, and click on the part of the upper shape that goes beyond the cloud.
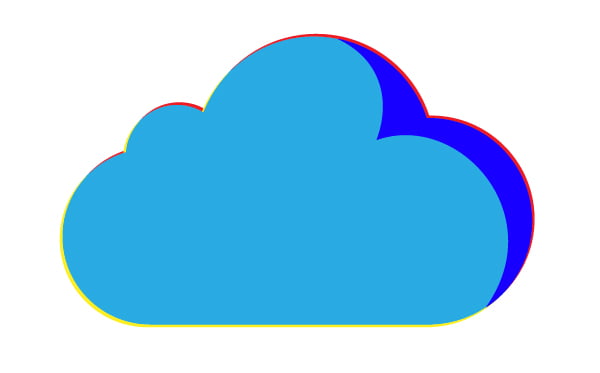
This action will remove the excess part of the shape.
Step 6
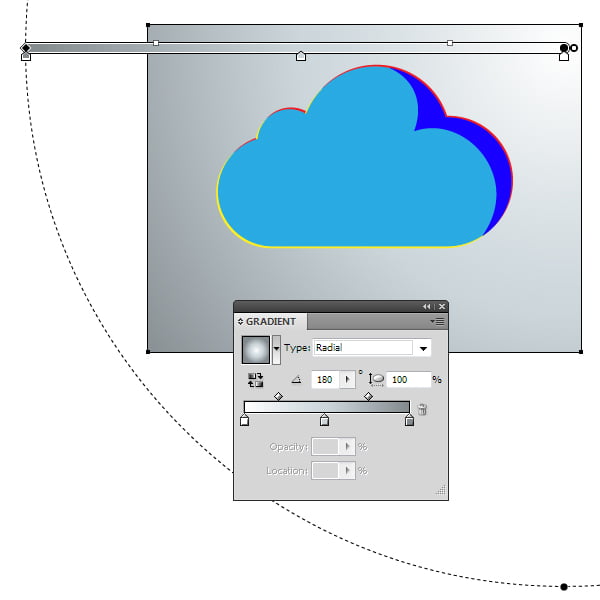
Basic shapes of the glass icon are ready. Now we can proceed to coloring. Let's start with the creation of the background. Take the Rectangle Tool (M) and create a rectangle that must be located below all of the existing objects. Fill the rectangle with a radial gradient that contains a white and two grey sliders.
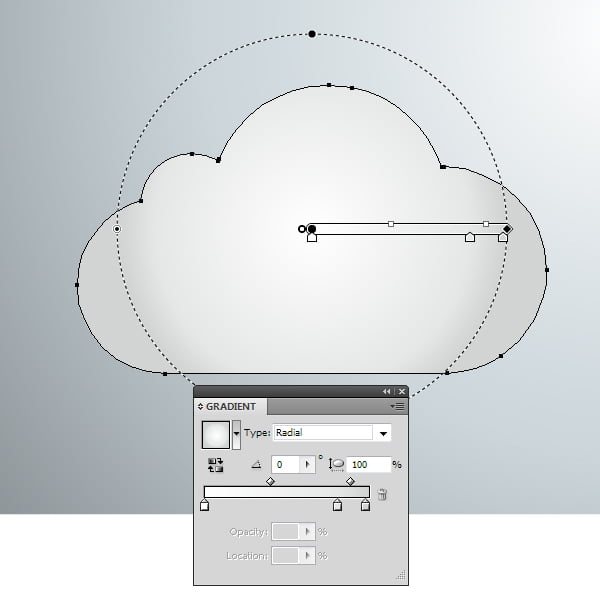
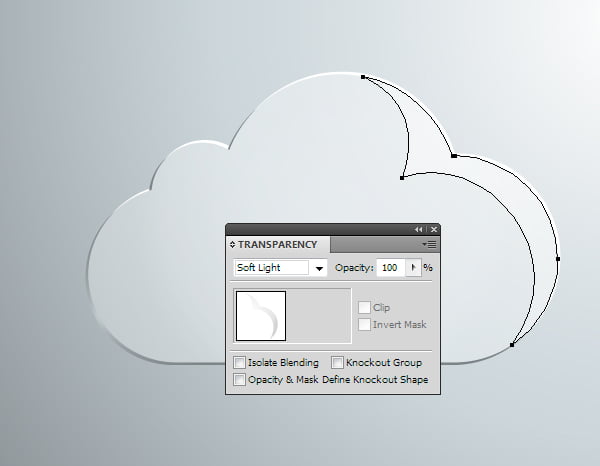
Select the shape of the cloud, and fill it with a radial gradient, which consists of white and two shades of grey color.
Set the Soft Light blending mode for this shape in the Transparency panel.
Step 7
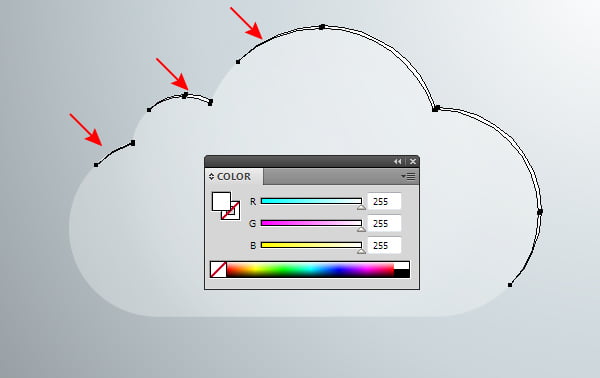
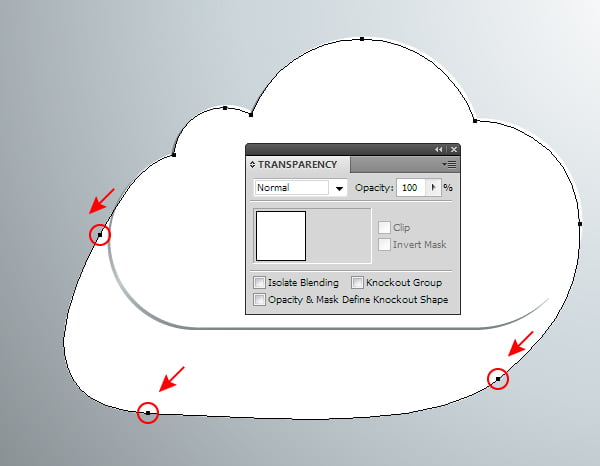
Select the shapes shown in the following picture and fill them with white color.
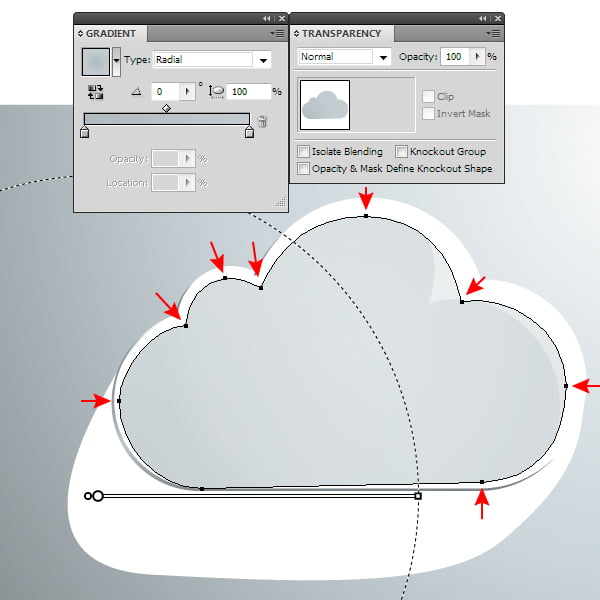
Fill the compound path with radial gradient from grey to dark gray color.
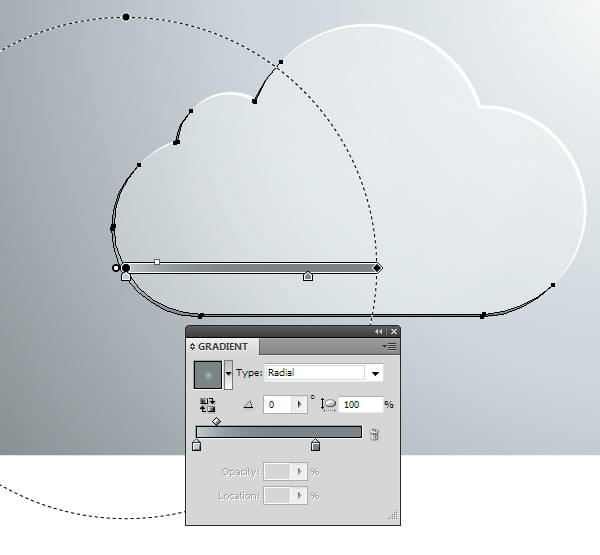
Fill the shape of the glare on the cloud with radial gradient, which consists of one white and two light grey sliders.
Set the Soft Light blending mode for this object.
Step 8
Copy the shape of the cloud, and paste it back. Set the Normal blending mode for the object and fill it with white color. With the help of the Direct Selection Tool (A) change the shape of the white object by moving its lower points.
Copy the shape of the cloud and paste it back one more time. Set the Normal blending mode for the new copy and fill with a gradient fill which consists of two shades of grey color. Now move the points of this shape a little bit inside of the basic shape of the cloud. Lock the upper objects in the Layers panel to ensure that nothing prevented from moving the points.
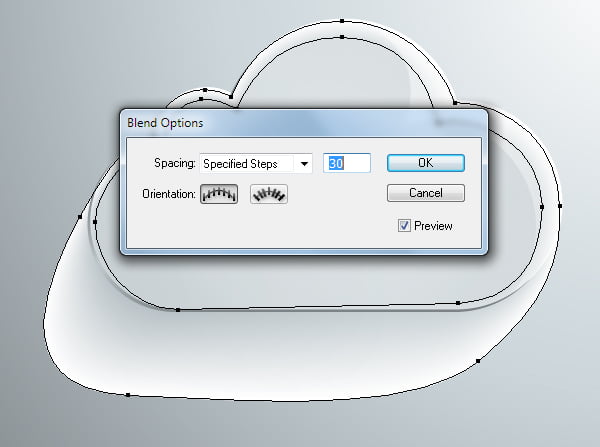
Step 9
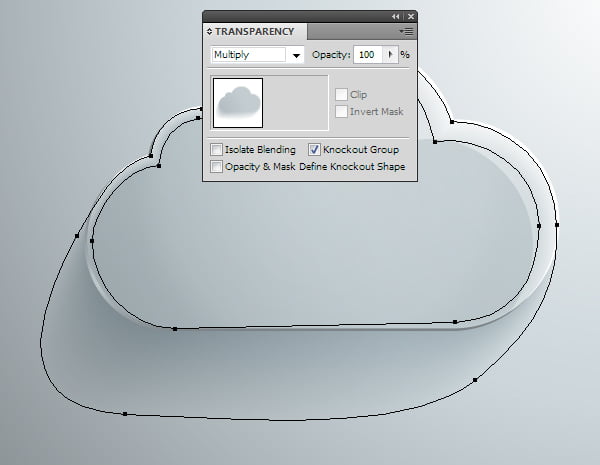
Select both objects created in the previous step, then go to Object > Blend > Make. To set the necessary amount of steps of the blend object, go to Object > Blend > Blend Options … or double click on the Blend Tool (W) icon in the Tools panel.
To avoid artifacts in the blend objects, shapes included inside blend objects must have the same amount of points. Read more about this in the article "How to Avoid Problems while Creating Blend Objects”. Select the blend object in the Layers panel, then set the Multiply blending mode.
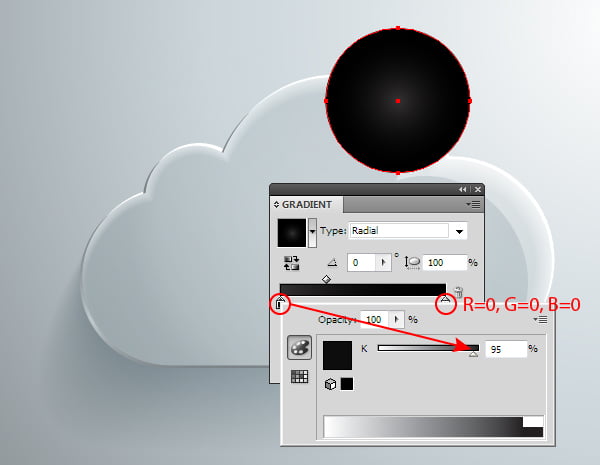
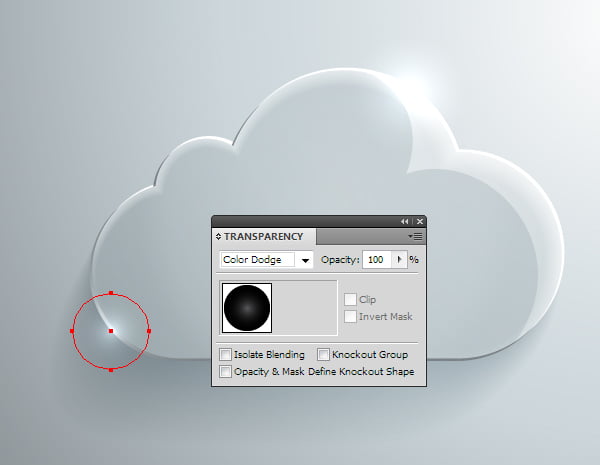
Step 10
Create glares on the edges of the glass icon. Using the Ellipse Tool (L) draw a circle filled with a radial gradient from dark gray to black color (R = 0, G = 0, B = 0)
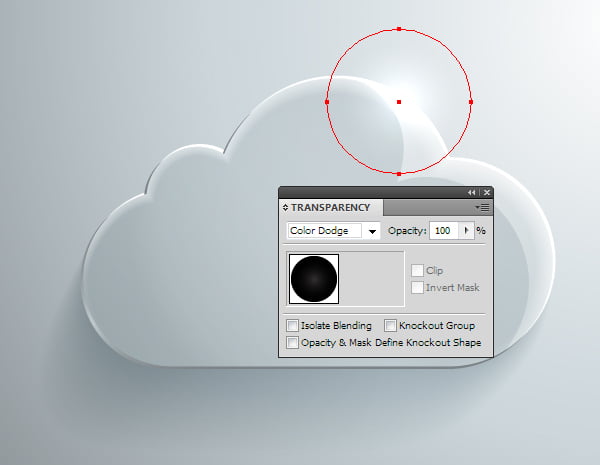
Set the Color Dodge blending mode for the circle.
Place a similar circle on the other side of the glass cloud.
Now you can place any icon on the surface of the cloud.
|