Today I want to demonstrate some creation processes of vector character
with Graphic Tablet. I will comment on the steps of these
processes. I hope you will
not only find inspiration in this
article but also learn many important technical details.
First Process
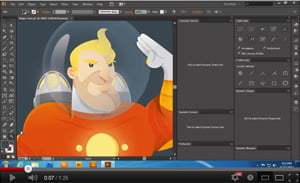
Creation of a sketch in Photoshop
You can surely create a sketch with the help of a pencil and paper and then place it into Adobe Illustrator for further work. You can create a sketch on a separate layer directly in Adobe Illustrator. However, I think that the creation of a sketch with the help of Graphic Tablet in Photoshop is the most effective. This technique is more like a drawing on a paper and gives all the advantages of digital inking.
Inking in Adobe Illustrator
To create the outline, the illustrators use Paintbrush Tool (B) and Blob Brush Tool (Shift + B) with the thickness of the path which depends on the pressure. Paintbrush Tool (B) creates a path, which has the properties of the applied brush. This makes it easy to edit the created line (move, delete its point). This property is especially important for the beginners who don’t have a sufficient firm hand yet. Blob Brush Tool (Shift + B) creates a closed path, which allows to start coloring with no preliminary processing (Expand Appearance, Unite from Pathfinder panel) and also allows you to edit the outline with the help of Eraser Tool (Shift + E). This tool is suitable for you if you already have some experience in working with Graphic Tablet.
Scathing in Photoshop and Inking with the help Paintbrush Tool in Adobe Illustrator
Inking with the help Blob Brush Tool in Adobe Illustrator
The outline can be created also with the help of Pen Tool (P). However this method takes a lot of time and is already outdated.
Coloring in Adobe Illustrator
The most popular but the longest coloring method is the coloring with the help Pencil Tool (N). The advantage of this method is that it makes no demands to the properties of the outline. For example, the outline may be open. Some illustrators like this method because in the process of painting they do some more thinking about the details of the picture.
A reasonably quick way to color an illustration is the usage of Live Paint Bucket (K). The outline of the coloring illustration for such a method must be closed and represent one object. If Paintbrush Tool (B) was used for creation of the outline, select all its elements and go to Object> Expand Appearance, then click on the Unite button from Pathfinder panel.
I think that another quick and an interesting way of coloring the illustration is the method of using the command Release Compound Path. The outline of the images must be closed and represent one object. This technique is shown in the video below and since it is demonstrated very fast I will describe it here.
Copy the outline and paste it back (Cmd / Ctrl + C, Cmd / Ctrl + B). Keep the selection of the copy and fill the outline with another color and go Object> Compound Path> Release Compound Path. As a result of these actions we’ve got a group of objects that are inside the outline. Now we can fill them with any color. Light and shade of the images are created in the sub-layer below the outline (it is necessary to lock it in the Layers panel) with the help of Paintbrush Tool or Blob Brush Tool.
First Process
Inking in Photoshop
Many professionals prefer to create an outline in Photoshop, because this graphics editor’s brushes have more settings than Adobe Illustrator’s. But in Photoshop it is not possible to adjust the parameters of the smoothing of the path, which is possible in Adobe Illustrator. So, if your hand is not firm enough, use Adobe Illustrator for these purposes.
Live Tracing in Adobe Illustrator
To create the objects inside the outline in the Tracing Options dialog box Ignore White option should NOT be selected.
Coloring in Adobe Illustrator
Now you can fill in the objects with different colors using solid and gradient fill.
The video materials from the following sources were used in this article
Awesome collection of little preview videos/tutorials.
Keep it up, and be sure to announce when Drawscribe and Vectorscribe come out for Windows CS6.
Thank you!
Thank you, Andy!
We plan to start testing SubScribe and Phantasm CS for Windows/CS6 this week, with VectorScribe and DrawScribe following a week or two thereafter.